

One of the reviewers at Pro Tool Reviews bought a rental home with a large tiled area. The tile occupied both the living and dining areas. Trouble was, the former owners used two different tiles, and the job was definitely sub-par. Fortuitously, The Home Depot had just started carrying the new Pergo Outlast laminate flooring (actually it’s called Outlast+). As the press release came across my desk, I wondered if this might be a good solution to change the look of that home. Pergo laminate flooring might just do the trick.
While tile floors are durable, they also result in several negative characteristics. First, they make a home sound very harsh when talking or even watching TV. Second, tile is hard on your feet, so walking on tile is no fun when it covers half your home. For bathrooms and kitchens we say, rock on, but for a living and dining room, wood or engineered wood is much better.
Pergo’s Particular Style of Laminate Flooring
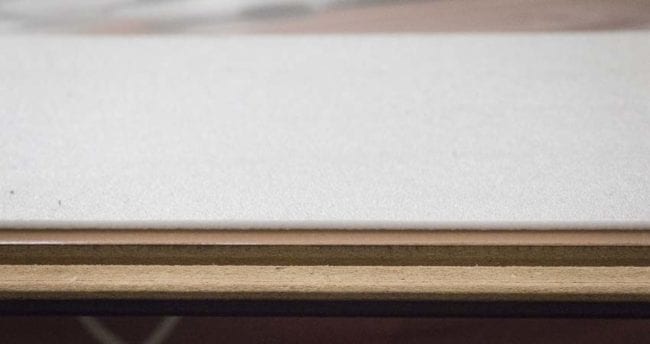
Pergo Outlast+ laminate flooring bonds several layers of material together under extreme heat and pressure. Pergo has been doing this for over 35 years, so they know what they’re doing. The underlayment comes pre-attached to the bottom of each interlocking plank. This thin foam material gives you some cushion when you walk. It also evens out minor floor imperfections, and provides a little bit of barrier below the flooring to protect from moisture.
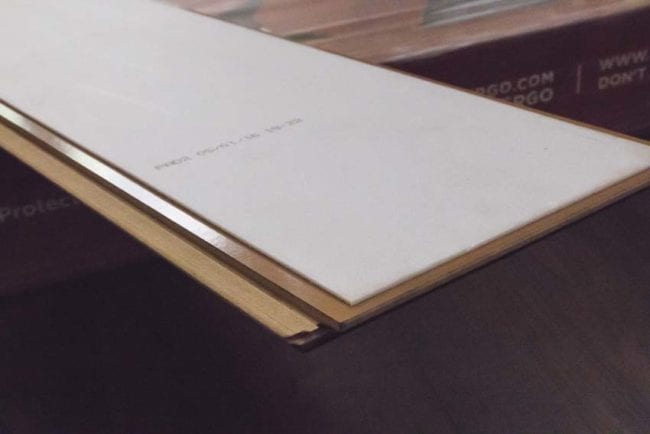
Above that exists a “balancing” layer. This layer provides stability and keeps each board from easily bowing or collapsing when you walk on it. It’s a sort of stiffener. Next comes the water-resistant HDF (high density fiber) core board, which terminates at click-joints that provide snap-together installation. The fiber board core is dense enough to resist dents from drops, so your floor looks the same 15 years later as it did the day it was installed. The design layer produces both the look and feel of the plank. Pergo Outlast laminate flooring gives you very lifelike patterns and colors from the type of wood represented. Finally, a water-resistant transparent overlay gives you the texture of real wood along with a ScratchGuard Advanced and PermaMax wear layer. This keep the surface of the Pergo laminate flooring scuff and scratch-free for the expected life of the product.
Pergo Outlast Features
The Pergo Outlast+ is a product you can take home in the back of your SUV or pickup. It comes boxed in ~16 sq. ft. bundles and transports easily. Almost 550 square feet will fit on a single pallet.
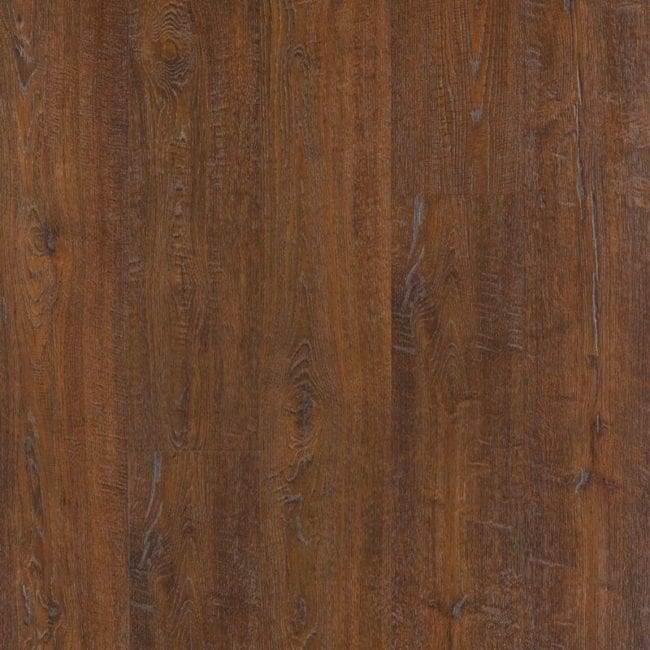
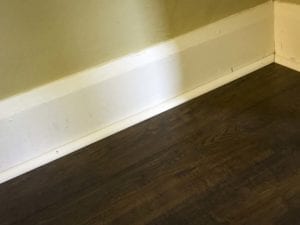
We went with Pergo Outlast Auburn Scraped Oak flooring. The color comes across as a nice dark brown with a slight reddish tint. Each board varies in detail, and lots of nice knots and cracks break up both the color and texture. Once down, you don’t really see a repetition in the pattern. You’ll want to go to your nearest Home Depot to see each of the colors up close before making a decision. My local store even had free samples available, and Pergo offers samples for $5 (out the door) on their website.
Pergo Outlast is designed as an incredibly durable laminate floor. It comes with something Pergo calls SurfaceDefense wear protection and SpillProtect24 technology. It claims it can protect the flooring from household spills for up to 24 hours. The idea is that the Uniclic joint and the materials used can actually hold water out of the seams for that period of time.
[amazon_link asins=’B00KXZGLIC,B07QPG46B3,B00KQ1AER2,B07DFLKVVF,B00KWFRK2Y,B00KWJ7NOK’ template=’ProductCarousel’ store=’protoorev-20′ marketplace=’US’ link_id=’c43a0255-606b-47f6-82f4-7fc34ba39255′]
Pergo Outlast+ Laminate Flooring Finishes
There are 7 different Pergo laminate flooring finishes available in the Outlast+ line:
- Antique Cherry
- Auburn Scraped Oak
- Java Scraped Oak
- Marigold Oak
- Molasses Maple
- Vintage Pewter Oak
- Vintage Tobacco Oak
Each has its own attractive look, but you can easily compare them in-store and see which you like for your room. A quick visual sampling of the options follows:

Each board measures 10 mm thick, 6-1/8 inches wide, and 47-1/4 inches long. You get just over 16 sq. ft. of laminate flooring per case. The flooring has an AC 4 rating (AC 5 is the highest), which designates it as suitable for commercial and general traffic. It’s good enough to be used in an office, boutique, or cafe. For the home, the durable should hold up under expected traffic…unless you park your car in your living room!
When Pergo designed the Outlast+ line they took into account how many people today view remodeling tasks—they want it simple. To make things easier, Pergo Outlast boards include the underlayment already attached. All you really need to do, is open up the box and install it.
Installing Pergo Outlast+ Laminate Flooring
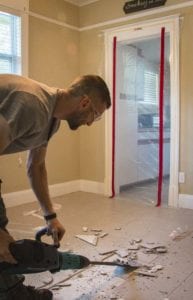 First off, this is a floating floor system designed for placement over a flat surface—either wood or concrete. We had a house full of tile—and that meant some serious demo. To facilitate this, we enlisted a few friends AND a Makita rotary hammer with floor scraper attachment. There’s simply no way to remove tile without some serious dust and debris. To keep the dust out of the adjoining rooms, we opted to use the ZipWall ZipDoor kit. We reviewed this system back in 2013, and it remains one of the simplest solutions for controlling dust from one room to another. ZipWall has since added new commercial products, and the line has expanded significantly over the last few years.
Enter the Makita Floor Scraper
After securing the area, we went to town with the 27-lb Makita SDS-Max HM1214C demo hammer (visit their website for more info). This new demo hammer has Makita AVT technology which reduces vibration dramatically. We inserted the 6″ SDS-Max floor scraper which we first saw at the 2016 World of Concrete trade show. It features a flexible blade and gives you more ergonomic way to remove tile, linoleum, and adhesives like thinset.
[amazon_link asins=’B00SCXURNC,B01G48WU2C,B01MTLEEU6,B07DC3NNN6,B01F4I8QMQ’ template=’ProductCarousel’ store=’protoorev-20′ marketplace=’US’ link_id=’c57967f7-32e1-470b-b979-057cc9650044′]
It literally blew the tile off the floor. I’d hate to do it every day, but I have to admit that we all had a lot of fun running this tool. Even my army vet buddy (who’s fired 50 cal machine guns) thought it was cool.
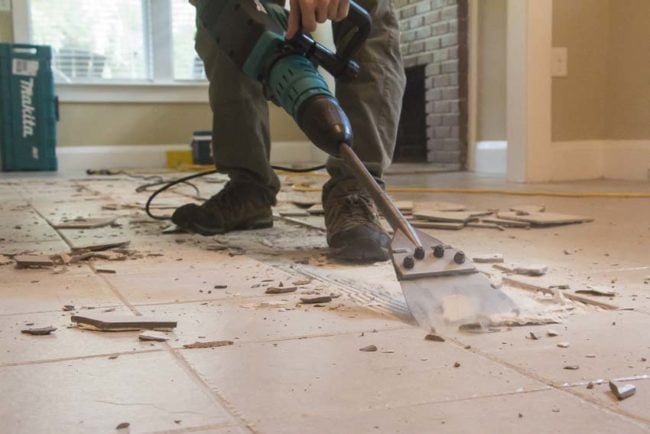
Even though this tile was laid on a heart-pine wood floor, the Makita floor scraper made quick work of it without gouging the wood. It’s a great system that not only popped off all that tile, it also let us go back and remove 97% or more of the thinset that was left behind. When we finished, the floor had a smooth surface all ready for prep.
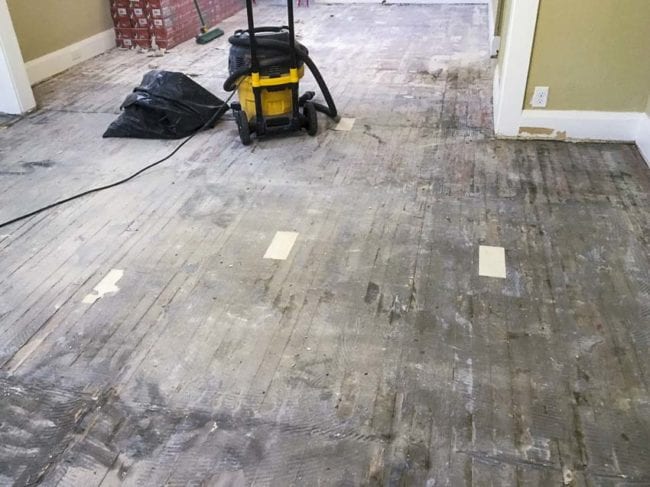
Laying a Moisture Barrier
The next step involved laying down some material to use as a moisture barrier. In Florida, with an old bungalow home, you don’t want to lay down laminate flooring without some way to block moisture and humidity from encroaching via your crawl space. For this we used some tar paper, which laid down easily with a Milwaukee staple and nail gun. We opted for this over a traditional product which would have compounded the cushion of the Pergo Outlast+ built-in underlayment. Tar paper doesn’t allow any more flex—it just provides a barrier.
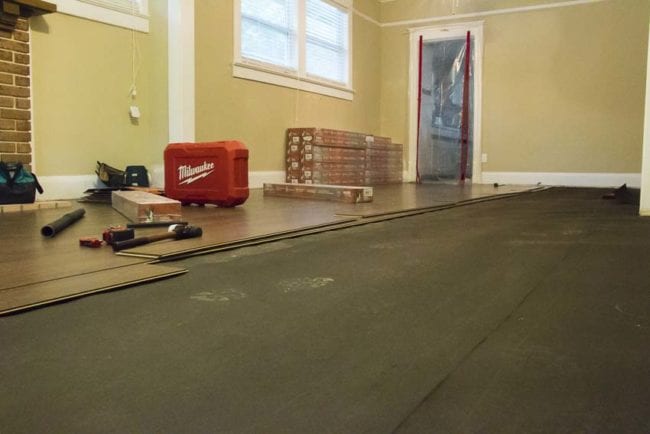
Laying Pergo Laminate Flooring
Yes, that was a lot of prep, but once completed, the Pergo Outlast laminate flooring laid down easily. The steps to installing this flooring is simple. There are basically 7 steps:
- Inspect each plank and measure/plan your initial line.
- Start in a corner if possible, and remove the tongue on the short and long edges of the first row boards. Lay a nice straight line across the room. On both the ends and the wall-sides you need a 3/8-inch gap. That gap will be filled with 100% silicone. Use 3/8-inch compressible PE foam backer rod to avoid buying stock in silicone.
- Pro Tip: If your home has a fireplace like ours did, you can backfill planks as needed using a tapping block and mallet. For uneven walls you’ll want to scribe the wall onto the end plank. On a straight wall you’ll just remove the tongue.
- You assemble the first row with the tongue side toward wall. Each plank follows the next by inserting the end tongue into the end groove and rotating downward. All joints should be tightly closed.
- On your second and subsequent rows, the first piece needs to be at least 8-inches long, so it holds. In general, you’ll start the next row with the piece you trimmed from the previous row. Make sure there’s at least a foot between joints on adjacent rows of Pergo Outlast laminate flooring.
- On the second, and subsequent rows, insert the tongue of the new plank at a slight angle into the groove of the first plank. Leave 1/2-inch gap along the long side—you’ll get to that after the board is down. Rotate the board down until the short edge joints lock.
- After the short ends are together, raise the outside long edge of the plank up just an inch. Hold it up as you tap it into place with a mallet and push block (never mallet the laminate flooring directly).
- Rotate the Pergo laminate plank downward until the long joint locks. Repeat until you’re done.
Helpful Installation Tips
Unless your room is perfectly square with no doors (unlikely) you’ll need to deal with a few things. First, be sure to undercut the trim on all doorways. You need room for expansion all around the room. The rule of thumb is that, if the wood isn’t going to be covered by quarter round, something needs to be undercut.
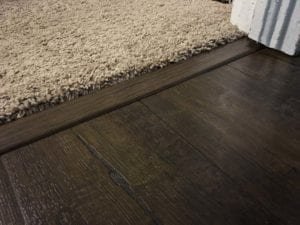
You also want to leave the appropriate gap around fireplaces and for your transitions. If you don’t leave the correct 1-1/8 to 1-3/8 inch gaps, you’ll have to go back and rip your Pergo laminate flooring to make the required room for the 4-in-1 trim molding. Pergo Outlast 4-in-1 molding kits come in matching colors and handle transitions between laminate, carpet, tile, and more. It’s a great solution to really dress up the installation.
Don’t forget to apply 100% silicone all around the room. That PE backer rod fills in the expansion gap so you don’t have to fill all that space with silicone, but this step is important if you want to keep out moisture.
Final Thoughts
I really like the look of the Auburn Scraped Oak Pergo Outlast laminate flooring. It presents a dramatic improvement over the tile floors, and it has a natural look. It feels good to walk on, has improved the acoustics of the space significantly, and has the durability to last a very long time. To sweeten the deal further, this laminate flooring costs just $2.79 per sq. ft. or $44.97/case. You can do 500 sq. ft. for just over $1,500 (including some overage)—and shipping is free from The Home Depot.
