
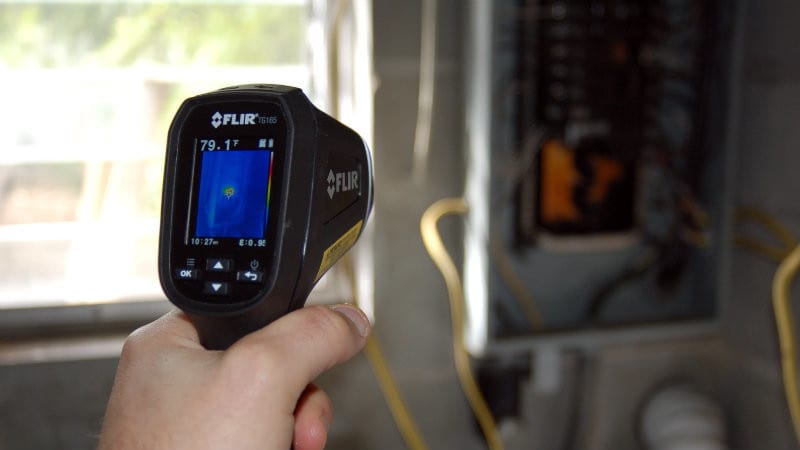
The first home I ever owned was a condo in Central Florida. It worked for a while, but when it was time to sell, we had to have an inspection. A friend of mine was in the home inspection business, so he let me hang around while he went through the unit. What really got my attention was a relatively new device: an infrared thermometer. By simply pointing it at the air conditioning duct, he could tell if the AC was operating correctly. Quick and easy. There are a host of jobs that can be done with an IR thermometer, but the tool that’s coming to change the game again in IR Thermometer applications is the FLIR TG165 Imaging IR Thermometer.
Take everything you already love about the IR thermometer. Now turn it into a visual picture. This is a huge benefit. It’s the same kind of reckoning as taking a data table of numbers and converting it into a visual graph: it puts things into a better perspective. Up until recently, there’s been a major hurdle in being able to enjoy that kind of result. Thermal imaging units traditionally are very expensive. For the contractor that doesn’t absolutely need thermal imaging, it has been a luxury most choose to forgo. That’s where the FLIR TG165 starts to turn heads. It retails at just under $500. By also making it easy to use and durable, FLIR is giving almost everyone the option to enjoy the benefits of basic thermal imaging.
FLIR TG165 Imaging IR Thermometer Specs

- Power Source: Integrated Lithium-Ion battery
- Run Time: 8 hours continuous
- Memory: 8 GB Micro SD Card (included)
- Temperature Range: -13 to 716 degrees Fahrenheit (-25 to 380 C)
- Accuracy: +/- 1.5% or +/- 1.5 C
- Distance to Spot Ratio: 24:1
- Screen Size: 2 inches
- Thermal Image Resolution: 80 x 60 pixels
- Display Resolution: 176 x 220 pixels
- Certifications: CE/CB/FCC/FDA
- Drop Test Rating: 2 meters (6.5 feet)
- Warranty: 2 years (product), 10 years (thermal imaging detector)
- Price: $499.99
FLIR TG165 Imaging IR Thermometer Features
Thermal imaging cameras are expensive for a good reason. They’re complicated instruments that have a ton of science built in to them. It takes waves that are outside the normal visible spectrum and translates them into something we can see. The FLIR TG165 utilizes the same science, but this tool isn’t targeted towards the user that needs the high end of the spectrum. This is for the guys that see the value in basic thermal imaging but don’t think they could afford it. For that reason, I’m going to highlight the features that matter to those users.
Cameras of any kind can chew up batteries. The FLIR TG165 uses an integrated lithium-ion battery that will get about 8 hours of continuous use on a single charge. Designers worked at building a unit that is jobsite tough. It’s been built to survive drops up to 6.5 feet. The screen is 2 inches diagonally and features both a thermal image and displayed temperature to the nearest tenth of a degree. We’ll take a closer look at the effectiveness of that screen in just a moment. Images can be saved to the 8 GB micro SD card that is included in Bitmap (.bmp) format and transferred to computer, tablet, or other compatible device.

Users that are already familiar with IR thermometers will find some common features. To get the temperature reading, the FLIR TG165 uses dual diverging lasers. These two lasers frame the area that the temperature reading is coming from. To get a more precise measurement, simply move closer to until the the lasers are outlining only the area you want a temperature for. The crosshairs on the screen will also help. The Distance to Spot Ration (D:S) is 24:1. This means that when you are 24 inches away from what you are pointing at, it’s measuring a 1 inch area. This is twice the distance of other popular models and is intentionally designed to keep you further away from potential burn hazards.
Build Quality
When we decided that we wanted to spend some time talking about thermal imaging in general, my first concern was the shear cost of these units. Knowing the kind of technology required to bring an image to life that’s normally outside the visible spectrum had me worried that tapping it too hard or knocking the unit over would result in all kinds of recalibrations or damage to the inside parts.
Really, I should have known better from FLIR, but I let my worry get the best of me. FLIR (Forward Looking Infrared) is one of the most popular thermal imaging companies in the world. They also make systems for the Department of Defense, such as the Apache helicopter’s system. FLIR knows how to make their gear stand up to tough conditions.
Even at the $500 price point and not attached to an attack helicopter, the FLIR TG165 has several durability features. First, almost the entire outer housing is surrounded in a rubber overmold. The perimeter of the screen and front lens area appear to have some additional protection by thickening and extending that overmold. The glass covering the lens, lasers, and thermometer are set back several millimeters to help prevent hitting it directly in a fall or accidental bump. The screen is probably the most vulnerable part because of its size. Still, you’d have to be unlucky to make this fall directly on the screen. The way that it is balanced would tend to have it drop towards the top as opposed to the front or back.

The FLIR TG165 is drop tested to 2 meters (6.5 feet). They also provide a lanyard appropriate for wearing around your wrist. This is slightly nit-picky, but I’d actually like to see them get rid of the plastic snap on this. With much outdoor use in Florida, that plastic snap could get brittle in a hurry, and I’d just as soon not have the snap at all. I didn’t find any reference to IP ratings on dust and water, but those kind of jobsite conditions aren’t what this unit was designed for. Overall, the TG165 is a surprisingly durable unit when it comes to drops and bumps.
Using the FLIR TG165
Once you get past the hurdles of cost and durability, many people are still concerned that thermal imaging units are too complicated to effectively use on their jobsites. This isn’t true with the FLIR TG165. For the type of applications that I’m going to show you, the camera is ready to go right out of the box. There are some adjustments that can be made. These are all easy to get to and reverse if you do something that throws off your results somehow.
There are four buttons on the screen, plus the trigger on the front. The return button on the right doubles as the power button. Once the unit is on, it will immediately give you a thermal image and temperature in Fahrenheit. I did need to set the date and time in my unit, which took about 2 minutes to figure out without consulting the manual.
Speaking of the manual, you’ll notice its conspicuous absence from the contents. There is a quick start guide in a multitude of languages, but no physical, full manual. FLIR offers a series of free training videos that you can watch via their website. Really though, if you’re even mildly tech savvy, you’ll figure out most everything you need to know in the first few minutes. Additional specifics can be learned by watching the videos or simply doing a quick Google search.
Helpful Settings
To get into the settings, press the “OK” button on the left. The first icon is your micro SD card where you can either view the images or format (delete everything) the card.
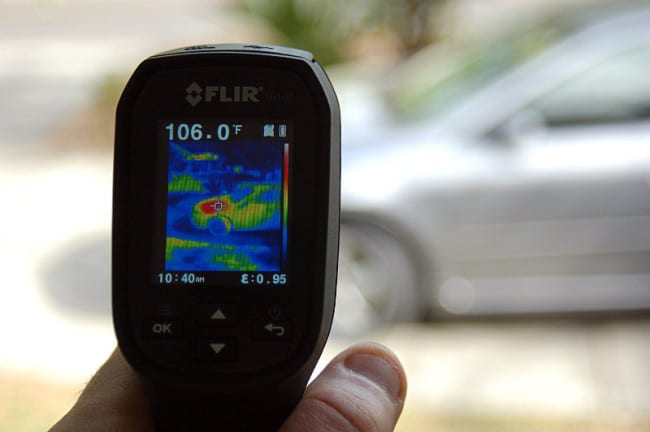
Next is your color palette. Cycle through 3 options by pressing the “OK” button. I prefer the wider range color that is preset when the unit comes. The second offers the classic thermal imaging color spectrum of blue/purple/red/yellow/white. Grayscale is the third option and gives you that ghost hunter kind of feel to your images. Ideally, you want to use the color scheme that is going to A) help you understand the temperature differences that you’re looking at, and B) help your clients/employees understand the significance of what they are looking at. It’s an easy setting to change, so you may take a picture in more than one color setting if it helps.

Next is the sensitivity. As you get more tuned in with what thermal imaging is capable of, you’ll find reasons to adjust this in different applications. For this basic idea of adding the thermal picture to the IR reading, the 0.95 preset is good. Changing this setting will affect the accuracy of the temperature reading, so be sure to fully research this before you mess around too much.
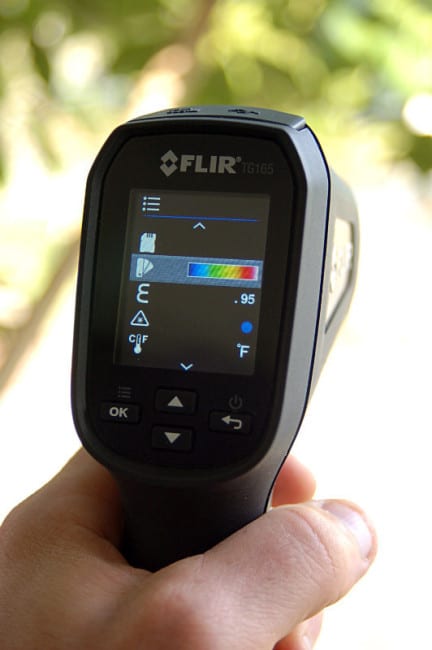
The next icon is your framing lasers. I leave this one on. When you press and hold the trigger, the dual diverging lasers will frame the area you are getting a reading from. With this setting off, you won’t have the benefit of the 24:1 laser frame.
Next is your C/F mode for selecting Celsius of Fahrenheit readings. Seeing that I’m in the US, it’s set on Fahrenheit. Again, setting changes are so easy that you can switch to meet the needs of foreign travel or colleagues. It would also be relatively simple to take pictures in both settings so that can be set side by side in a mixed group.
Next are your targeting crosshairs. This is another setting that I leave on. It helps to gauge where your constant temperature reading is coming from when the lasers aren’t on. Since those are only on when the trigger is pressed, it’s nice to keep those crosshairs up to eliminate guess work.
Auto shut off setting are up after that. My unit was preset to 2 minutes. I left that one alone. Even though I plan to be the only one using this, if someone else borrows it down the road, they may not be as vigilant about shutting the TG165 off when it isn’t in use. Fortunately, there’s an 8 hour constant run time. If it doesn’t get shut off, you’re likely okay for today. Forgetting to charge it overnight will be inconvenient for you though.
The last two settings are the date/time and software information. Date and time are relatively easy to set. I haven’t had to think about updating software for the unit yet, so I can’t really comment to the usefulness of that information.
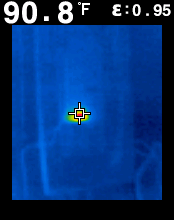
Tell Me How Well it Works Already!
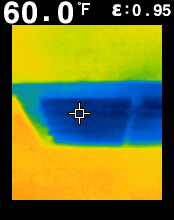
Yeah, good point. With the unit on, you can see both the thermal image and temperature. I was concerned about the small 2 inch screen and relatively low resolution compared to much more expensive units. The TG165 is effective at showing the temperature differences we need to see. Whether we are looking at heating/cooling leakage for home efficiency, surface temperature on industrial machinery or vehicle motors, or even just cheating at a game of hide and seek, the unit does offer a clear enough picture. It also offers easy to see color variance as temperatures change.
To take a picture, you just press the trigger. Holding it down will allow you to use the lasers to frame exactly where you want the temperature taken. Simply release the trigger to view the image. You’ve got about 4 seconds to decide if you want to keep the image or not. Personally, I’d like more time than that. I’d prefer to have to select whether I’m keeping or not before it goes back to the live image. So, be sure look quickly and press the let button if you’re keeping it, right button if you’re not. Otherwise, the TG165 will remove the image and move on.
Accessing the pictures for use is simple. Plug the included USB cable into your computer. My Windows 7 computer automatically did everything that it needed to and read the card from the unit just like any other SD card I’ve used for pictures. I could immediately move, copy, delete, or save the pictures from the unit. Since they are in bitmap format, they are readily usable for presentations, email, or other documents. You can also view the images from the FLIR TG165 using the SD card access in the settings. This is helpful if you need to review or show the pictures to someone right away.
Conclusions and Parting Thoughts
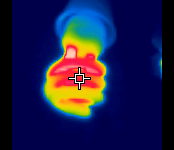
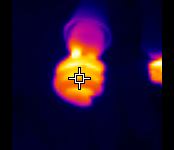
Thermal imaging is cool (see what I did there?). It’s fascinating to see and play with, particularly after the sun goes down when you realize you can “see” in the dark! It’s also incredibly useful in helping clients and employees, even supervisors, understand the heat picture of what is going on. You can help a homeowner understand where the temperature leaks are around the house. Regular pictures of machinery can help employees better understand if it is running as it’s usual efficiency. Electricians can instantly tell which breaker is overheating. The list is longer than I care to type out.
There are some limitations here though. The TG165 isn’t a $6000 or military issue unit. It’s got lower resolution and accuracy specs. Keep in mind that it is an infrared thermometer that offers a thermal image. You need to think of it as being appropriate where you’d normally use an IR thermometer. It doesn’t offer all of the color control or precision that a full fledged thermal imaging camera does. It does, however, off a powerful visual aid to go along with the IR temperature readings. As a thermal imaging camera, the TG165 would rate pretty low for the professional. In fact, I wouldn’t recommended it for the pro at all in that scenario. As an IR thermometer that has imaging capability, it rates very high within the intended scope of its function.
The combination of IR thermometer and thermal imaging at a $500 price point in the FLIR TG165 is simply brilliant. We learned long ago in middle school math that a visual image tells a much more comprehensive story than raw data alone. Once professionals get their hands on the TG165, they’re going to wonder how they did their jobs for so long without it.
