
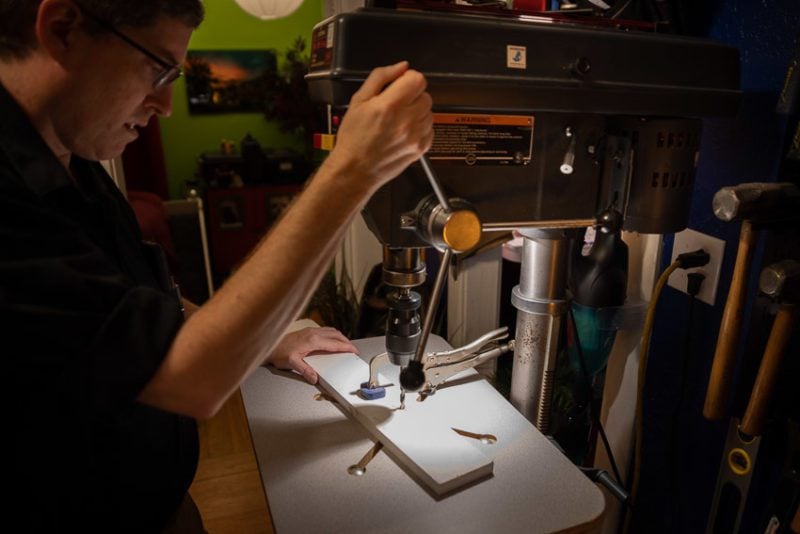
I love my drill press. It is my favorite tool. Actually, I have two. I bought a bench model in college and picked up a big floor model not long after I graduated. Drill presses are quiet. They are precise. Most of all, they are extremely versatile. If you use the best drill bits, you can drill a hole in almost anything, as long as it fits. With the right accessory, a drill press also becomes a sander. It can even drill square holes in wood with a mortising attachment. I’ve used these tools for decades, and I think I can teach you how to use a press like a Pro.
Table of Contents
What is a Drill Press?
If you already know what a drill press is, feel free to move further down to the next sections for lots of how-to tips and tricks. To put it simply, a drill press is a drill mounted on a column. The drill moves up and down while the work remains stationary. The big advantage is that the drill press aligns the bit perfectly perpendicular to the material. No more crooked holes! To the inexperienced, that might not seem like such a big deal, but when you start actually trying to build something, you soon realize how important it is.
If you try and make something nicer than a planter box, having your holes exactly perpendicular dramatically steps up the quality of your project. It makes parts fit together easier and more securely. Drill presses also allow repeatable holes at a constant depth. This is much more difficult when drilling by hand.
How does a Drill Press Work?
All drill presses have the same basic parts. They consist of a head and motor mounted on a column. The column has a table that can be adjusted up and down. Most of them can be tilted as well for angled holes. On the head, you will find the on/off switch, the arbor (spindle) with the drill chuck. This is raised and lowered by rotating a group of three handles on the side. Usually, there are about three inches of travel up and down that the drill chuck can move. In other words, you can drill a hole three inches deep without adjusting the height of the table.
The material is placed on the table and either held in place by hand or clamped in place. You then raise the table up to the bit which is chucked into the drill chuck. The speed of the turning bit is usually controlled by a series of step belts in the head. Some high-end drill presses (like the Nova Voyager) use variable-speed motors. There are many speed charts available online to help you determine the speed you need for the material and size drill bit you are using.
When ready to drill, turn it on and slowly pull one of the handles forward and down to feed the bit into the material. The amount of pressure you use depends on the material you are drilling. Steel needs more pressure than wood for example. With a sharp bit, you should be getting shavings—not dust—coming out of the hole as you drill. When drilling metal, a sign that you’re using the correct amount of pressure is when shavings come out as one long spiral. Drilling metal is a process in itself. Look for an article on drilling metal, wood, and plastics coming soon.
What Type of Drill Press Should You Buy?
Benchtop
Drill presses come in several different form factors. You can get a drill guide that lets you attach your hand drill to guide rods. You can also get a drill press stand without a motor or chuck. Instead, you clamp your own hand drill into it. Both of these options are cheaper and will serve in a pinch, but in no way will they replace the real thing. Most beginners would be better served with a benchtop drill press. These smaller tools usually have all the features of the big floor models but are small enough to fit on a workbench.
Full Size/Floor Models
The floor models are the big boys. These powerhouses will drill holes in just about anything without the bit stalling. They will drill holes that can be very dangerous or impossible to drill by hand. Floor models have bigger motors and larger chucks for drilling larger holes. They have a much bigger throat clearance than bench models so they will drill to the center of larger material.
Drill presses are rated by the distance from the column to the center of the chuck (radius), multiplied by two (diameter). In other words, what is the diameter of the largest circle you can fit on the drill press? This is called the drill press swing. A typical benchtop might be rated at 8- or 12-inches. That means you have 4- or 6-inches between the column and the center of the drill bit. A floor model might be 16-inches so you would have 8-inches of clearance.
Radial Drill Presses
A radial drill press has a horizontal column in addition to a vertical column. This lets you drill to the center of much larger workpieces, as much as 34-inches for some small benchtop models. I have wanted one for years. They are rather expensive and take up a lot of space. Always bolt down these top-heavy tools so they don’t tip over. The advantage though is that the column almost never gets in your way, so you can put all sorts of things in a radial drill press you normally cannot, like an entire bicycle or your pickup truck tailgate.
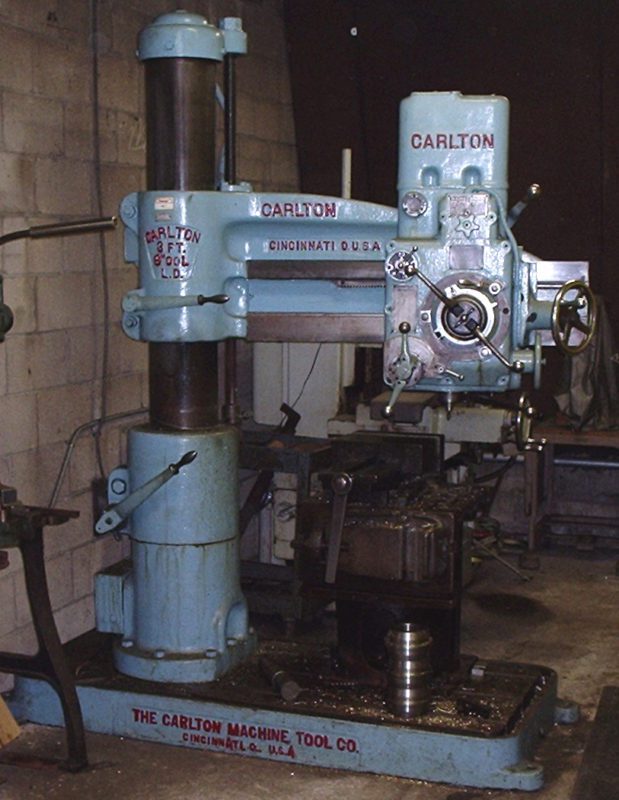
CC BY-SA 3.0, https://en.wikipedia.org/w/index.php?curid=23867036
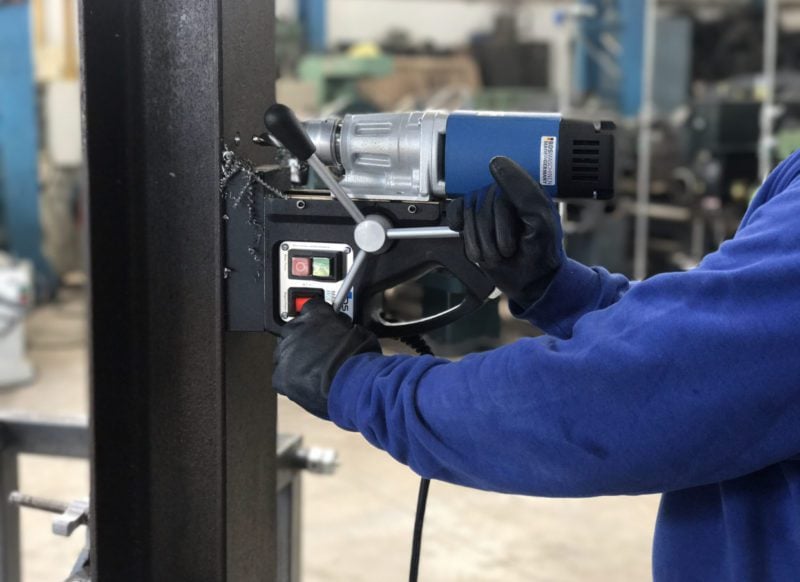
Magnetic Drill Press (Magnetic Drill or Mag Drill)
Among fabrication, shipwright, and erection/construction industries, you will find magnetic drill presses (mag drills). They do not have a central column or table. In their place is a powerful electromagnetic base. Take the magnetic drill press and place it on an I-beam, plate steel, or other structural steel. Then you turn on the magnet and the drill holds itself in place, even upside down. Just don’t stand under it in case the power goes out! This is why they should have a safety tether attached when possible.
By Rohan von Indien – Own work, CC BY-SA 4.0, https://commons.wikimedia.org/w/index.php?curid=77633781
A word of caution about magnetic drill presses. They will erase your credit cards! The first time I used one, the wallet in my back pocket got too close to the magnetic drill press while using it. It erased everything in my wallet. Lesson learned! If you absolutely need it, you can also pick up battery-powered models like the Milwaukee cordless mag drill.
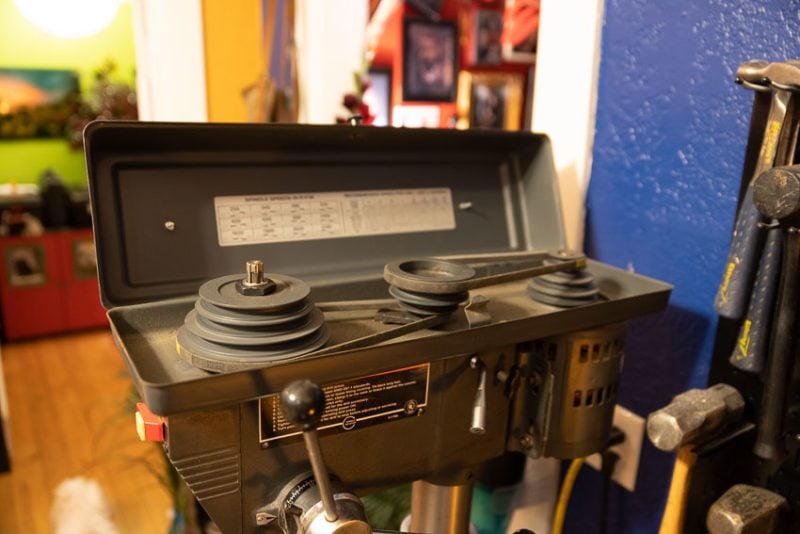
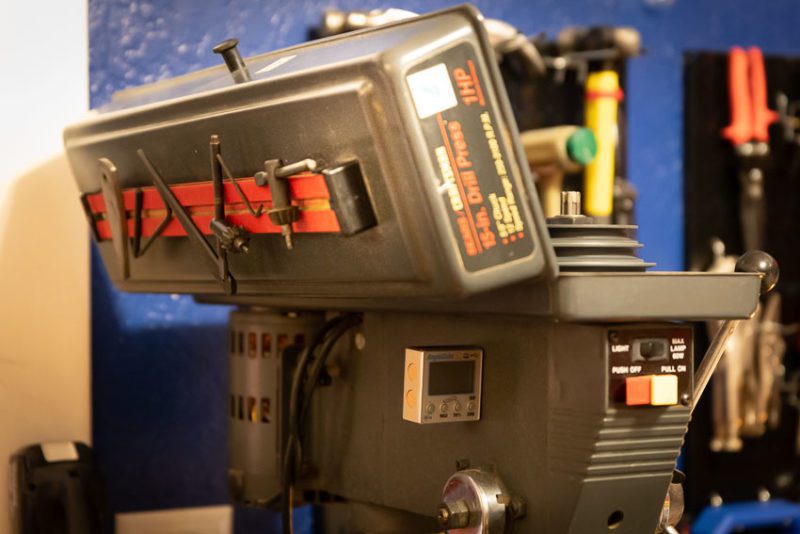
Changing the Drilling Speed
Changing the speed of most drill presses requires adjusting belts in the head. Open the top and you will see a series of two to three step-pulleys. Also within the top of the drill press compartment will be a chart showing each possible configuration of the belts on the step pulley. Each configuration results in a different speed of the drill press.
On the back and to one side of the drill press by the motor, will be a handle. Once you loosen this handle, it allows you to pull the motor forward. This produces slack in the belts so you can adjust them from one pulley to the other. If they are very tight and the motor is all the way forward, rotate the pulley/motor shaft while slipping the belt from one level to the other. Our lawyers wanted us to remind you to always unplug the drill press while you do this so you don’t lose a finger!
After you have gotten the belts in the correct position, push the motor back in as far away from the front of the drill as possible. This creates tension on the belts. While pushing back, retighten the handle on the side. Close the lid to prevent a worn belt from becoming a projectile if it should snap.
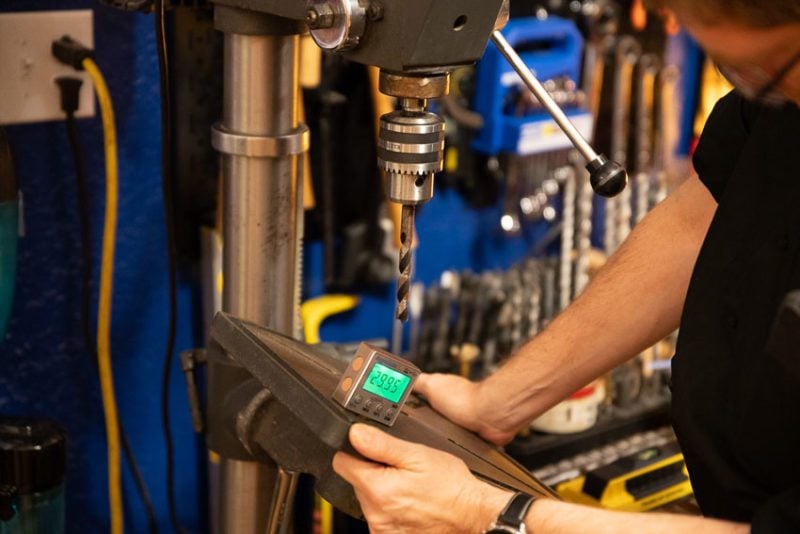
Tilting the Table
Most drill presses have a table that will tilt. A tilting table is for drilling holes at an angle. There is usually a large bolt under the table you loosen to tilt it. I use the iGaging Angle Gauge Cube to set my angle, but you can also do it with a sliding T-bevel and a protractor. The gauge cube also helps you reset the table back to 90 degrees to the bit.
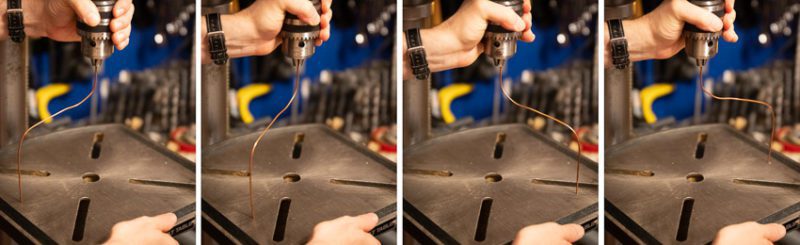
For years I used the “coat hanger method” to reset the table since you can’t trust the built-in scales. Get a stiff wire, like from a coat hanger, and cut/bend it to the shape in the photos below. Chuck one end in the drill press and the other place just floating above the table. Rotate the chuck and when you are at 180 degrees, the amount of space between the wire and the coat hanger will be the same on the left and the right side of the table.
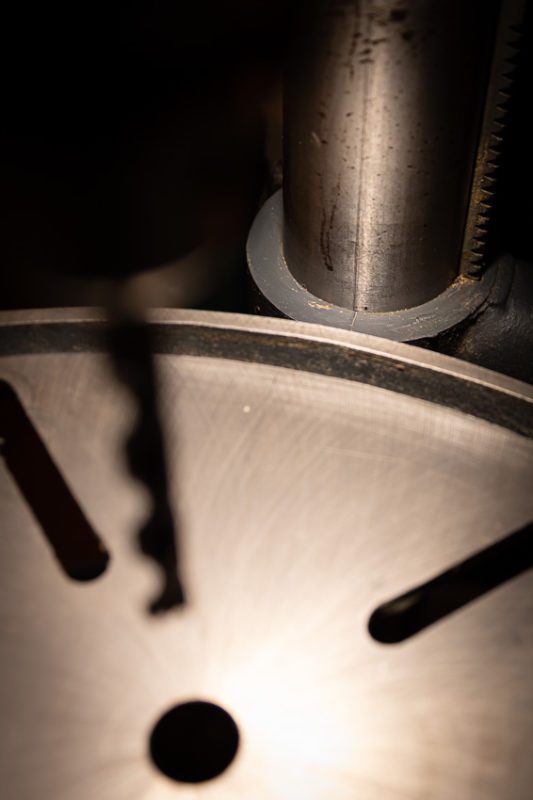
Ironically, often the most expensive drill presses do not have a tilting table. Found in machine shops, these are for drilling in metal. A metal drill press lacks a hole in the middle to prevent you from damaging the table if you drill too deep. If you ever get a good deal on a metal drill press, buy it. They last forever and work just fine in wood or plastics. Just make sure you can physically move it as it may weigh 250 pounds or more.
How to Use a Drill Press Safely – Follow These Tips
Of course, you should always wear safety glasses when using a drill press. Beyond that, one advantage to these tools is that there are bits that you should never try and drill by hand. An example would be drilling with circle cutters. You would be insane to try this with a hand drill. That’s not a challenge or dare, by the way. After you get out of the emergency room with a broken arm, you won’t do it again.
Things you need to watch out for when using a drill press are long hair and necklaces. Since your head is close to the spinning drill chuck, loose hair is much more likely to get sucked into the machine than a hand drill. A drill press will not stop running when your hair gets pulled in. Many people have literally been scalped using the tool with loose hair.
The other thing that injures people is when the bit grabs the material and either sends it flying or grabs it and starts spinning it like a finger smashing, wrist-breaking machine. It will keep going until you hit the power switch or the material eventually goes flying across the room. This is why it is important to either clamp your material down, or make sure it’s big enough that you can hold on to it. Because of its design, there are many ways to clamp objects to the top. There are, however, ways we can work to improve the capabilities of your drill press.
Upgrading Your Drill Press
Quick Release Clamp
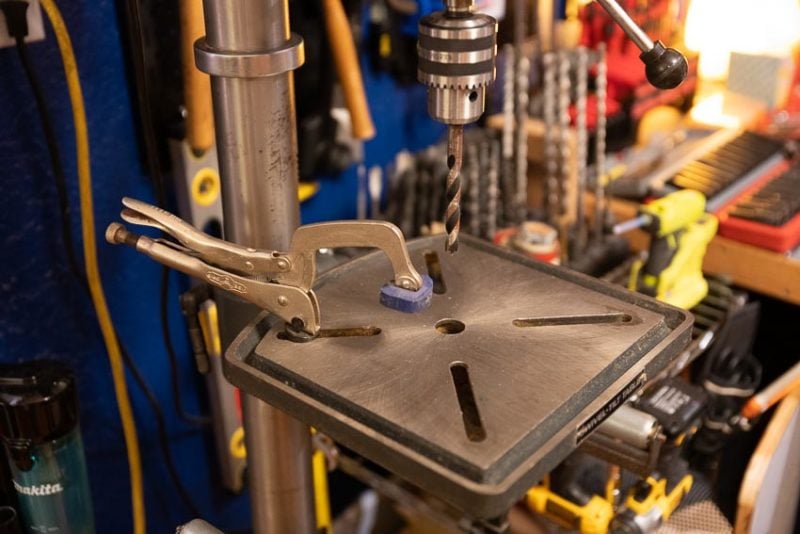
The first thing I would do when getting a drill press is add a quick-release clamp. I leave mine attached to the table almost all the time. It makes it really easy and fast to clamp something down. I would also get a drill press vice for smaller pieces. These can be bolted to the table but usually, you can just hold on to the vice while drilling. Better still, use the quick-release clamp to hold the vice for you.
Magnetic Bar
So I never lose my chuck key or taper drift (the tool for removing the chuck), I mounted a magnetic bar (like the kind used for holding kitchen knives) on top of my drill press. This has been a fantastic upgrade because I can just reach up and grab my chuck key off the magnet. It doesn’t even fall off when I open the lid of my drill press to change the speed.
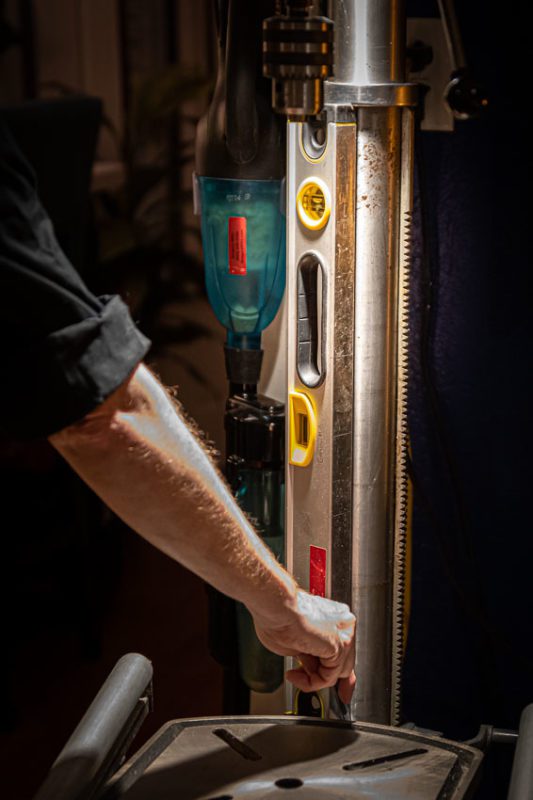
Scribe a Line on the Column
A free upgrade I did was to scribe a line on the column with a matching reference line on the table. When these two lines are lined up, my drill press table is directly under the chuck so the clearance hole is going to line up. This way I will not accidentally drill a hole in my table. This means when I have a board clamped down, I can move the column up and down without having to unclamp to board to see if I am going to hit my table. As long as the lines meet up, I will never accidentally drill into my table, even if I can’t see the clearance hole.
Drill Bit Organization
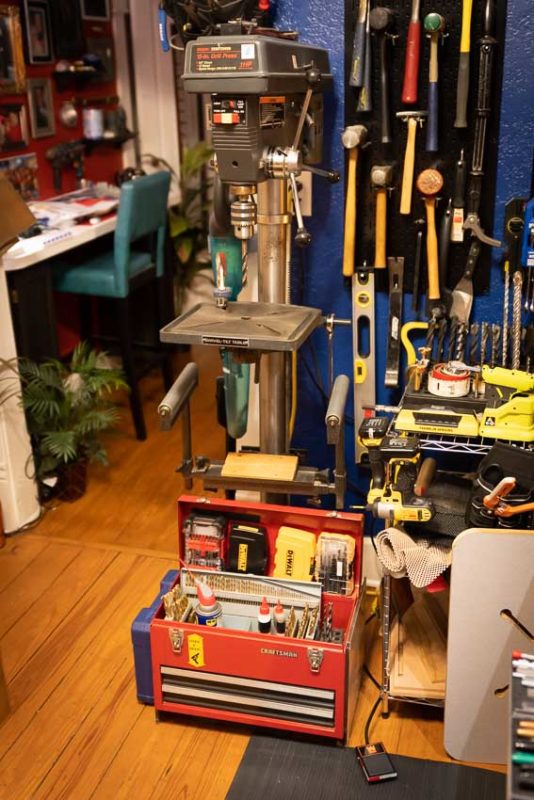
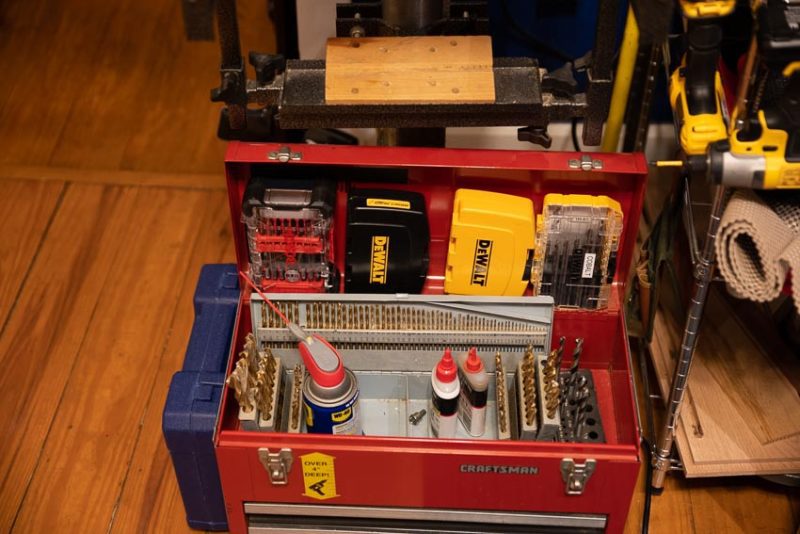
Drill presses are top-heavy. The more weight you can add to the base, the more stable they are going to be. For my benchtop drill press, I simply placed a 20-pound barbell weight flat on the base. You can often get these used for cheap at yard sales, sporting goods stores, or flea markets. For my floor model, I put a steel toolbox on the base and put most of my drill bits in it. This gives me both extra weight and drill bit organization for my various drill bit indexes.
Supporting the Material
Years ago I added extension arms that attach to the column and supports longer work. This has been practically useless. I would have been better off buying separate freestanding workpiece supports.
Perhaps the single biggest upgrade you can do for your drill press is to make or buy a drill press table. The adjustable table on a drill press is rather small. Adding a larger one, with more work area is a huge help. After I made mine, I never needed the extension arms I had previously bought. It also makes it easier to add a fence, stop blocks, and other jigs to the table. These allow for drilling repeatable holes without measuring.
Replacing the Chuck
What You Need to Replace the Chuck
At some point, your drill press chuck is either going to wear out or you are going to get tired of using the chuck key to manually tighten the chuck when you put bits in it. Mine recently wore out after close to thirty years, so I got my money’s worth out of it.
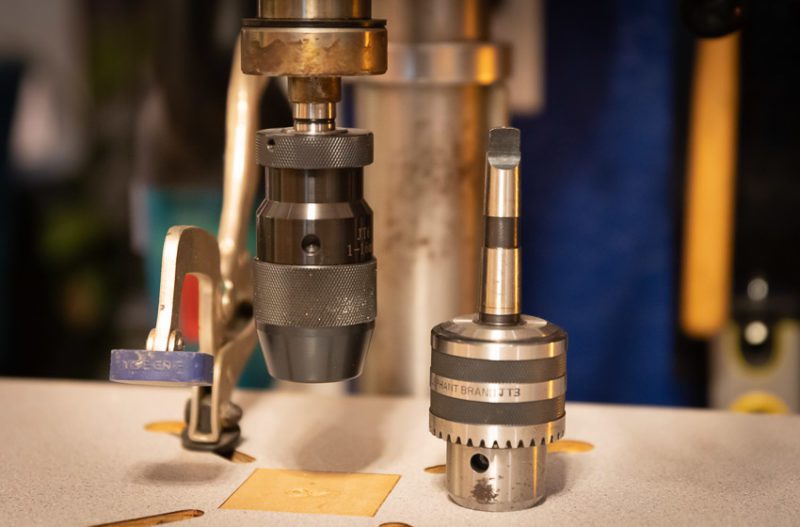
To replace the chuck on a floor model, you will need the tapered drift tool that came with your drill press. Most people lose these. Keep it somewhere safe. You can always buy replacements on Amazon for less than $10. You will also need a new chuck. This chuck is the one I choose for my drill press. It has a number two Morse Taper on the end that goes into the drill column. The number two Morse Taper (2MT) is probably the most common size taper.
How to Replace the Chuck
Once you have a new chuck, lower the quill (the drill press head) all the way down. You should see a slot on each side of the quill. Insert the small end of the taper drift tool until it stops. It will now be resting on the back of the chuck. You may need someone to hold the handles in place so the quill stays all the way down while you do the next step. Take a wooden or plastic mallet and strike the thick end of the tapered drift tool. Use a wood block and a hammer if you don’t have a mallet. After a few strikes, the chuck should fall out—just be ready to catch it!


A new chuck is half the price of a benchtop model or more, so it would not be worth the upgrade. Also, the chuck in many benchtops is not designed to be replaced.
Accessories
If you search online for drill press accessories, you will find hundreds, in addition to many types of drill bits. Some of the accessories will turn the drill press into a drum sander for sanding curves, especially inside curves. With a sanding flap wheel, you can hold the material and take it to the sander, which is sometimes safer or easier depending on the material size you are sanding. V-Blocks let you safely drill and saw into round material like dowels. You can even turn your drill press into a wood lathe.
Concluding How to Use a Drill Press
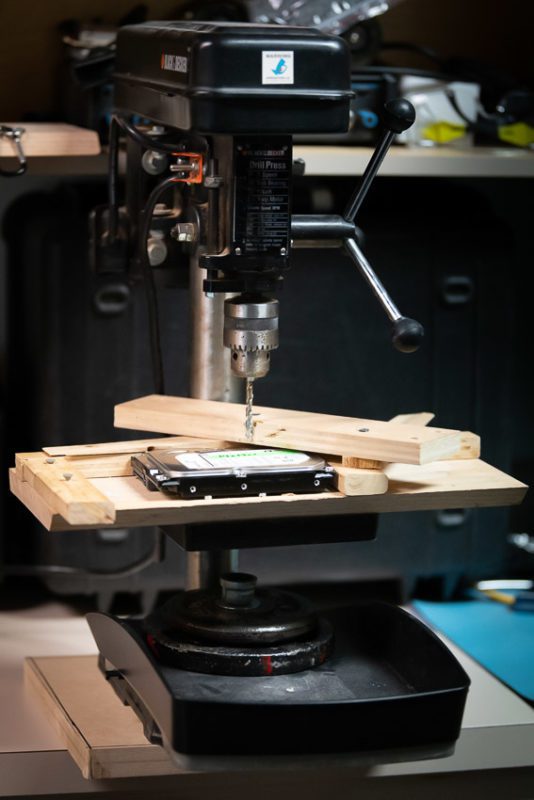
A drill press is an essential tool for any shop. They will last for many decades provided you put a coat of paste wax on the cast-iron tabletop every 6 months to prevent rust. The more you use a drill press, the more you will want to buy a bigger floor model. I find smaller drill presses useful, however, and keep a benchtop model in my office at work for “erasing” hard drives by drilling holes in them. This can be done in an office environment because drill presses are so quiet. In your shop, you will be able to find many uses for a drill press, no matter what size you choose.
