

Electricians often encounter extremely difficult tasks in their day-to-day work. One great example occurred with a 2-story 1920 Colonial-style home. It offered a variety of situations that required workarounds or less-than-routine solutions to some very difficult wiring problems. Rewiring electrical for a two-story house should involve an experienced, licensed electrician. You want the work guaranteed and building codes adhered to.
Rewiring Electrical for a Two-Story House
Part one of this series on rewiring electrical for a two-story house begins with an obvious issue. Namely, how do you rewire lights and deal with wiring ceiling fans on the first floor of a two-story home? This article won’t be comprehensive enough for you to do the entire job on your own. We want to encourage electricians and Pro tradesmen. Who knows, we may even give them some new ideas.
Lastly, we hope to give homeowners a better appreciation for the difficulty of rewiring an older home. Doing the job right results in a large amount of debris and a LOT of patching holes. Expect that when you get into it and you won’t experience surprises later.
Access is Everything
When you think about it, there are two simple ways to gain access to electrical wiring, fixtures, and boxes: the crawl space and/or the attic. But what about a two-story house? How do you get to the ceiling circuits on the first floor? There’s no attic access, and the crawlspace provides little help.
For many of us, that would be a show-stopper.
In the case of this home, we had access to both an attic and a crawl space but, as we just indicated, that doesn’t solve the conundrum of a first-floor ceiling. When dealing with ceiling fans, lighting fixtures, or a bathroom fan or light, however, there is a light at the end of the tunnel…
There’s a pun in there somewhere, but I’m just going to skip it.
And the attic and the crawl space? They do help, just not in the direct way you might think.
Mapping Out a Solution to the Problem
Again, we’re talking about wiring up ceiling fixtures on the first floor of a 2-story home. For that, we’ve got to have a plan. This involves collecting some information regarding the structure of the home and understanding your options. Start by answering the following questions:
What is your wall construction?
This may sound like a basic question, but knowing your wall construction will help you know for certain what your options are for running wire along exterior walls as opposed to constantly gunning for interior walls. Are you dealing with 2x4s? Block construction? Brick? How much room do you have within your walls? Is there any insulation you’ll need to worry about? These questions need to be answered.
Which way are the ceiling joists running?
Knowing the answer to this question will guide you in how the wiring needs to be run within the ceiling in order to get to a wall. In addition to ceiling joist orientation, you also want to look at where your windows fall. This comes into play later as you begin to lay out a specific plan for running wiring.
Do you want to upgrade ceiling fans to a dual gang/dual pole switch or separate dimmer for the light?
Knowing your goals for upgrades ahead of time will save you the mistake of running 12/2 when you should be running 12/3 wire. You can also plan to run 12/3 for 3-way switches and anywhere you might need two separate breakers for a particular area. Also, if you’re interested in installing a ceiling fan in your house, now is the time. Choose a ceiling fan and then follow the steps below.
Getting Into Rewiring Electrical for a Two-story House
Actually mapping out a plan is one thing, implementing it is another. The principle behind wiring a first-floor ceiling fan follows these basic steps:
- Cut breaker/fuse box and remove the fan or fan/light combo
While an obvious step, you want to pull off the light and get it out of your way. You also want to get ready to rewire your switches and outlets in the local area by pulling them out of the wall as well. This may take some doing, particularly if the outlets, switches, and or fans/lights are old like this house. Plaster can be nearly cemented to those old metal electrical boxes and older fans and lights are very non-standard in their mounting methods and will require some rethinking of how you’ll replace them with updated boxes. - Verify the direction of the ceiling joists
Verify the direction of the ceiling joists so you know which way to run your wiring
While you can usually tell which direction the ceiling joists are running by the roofline, it’s good to verify. Older homes have a way of “violating the rules” when it comes to construction best practices. - Plan your holes and cut them
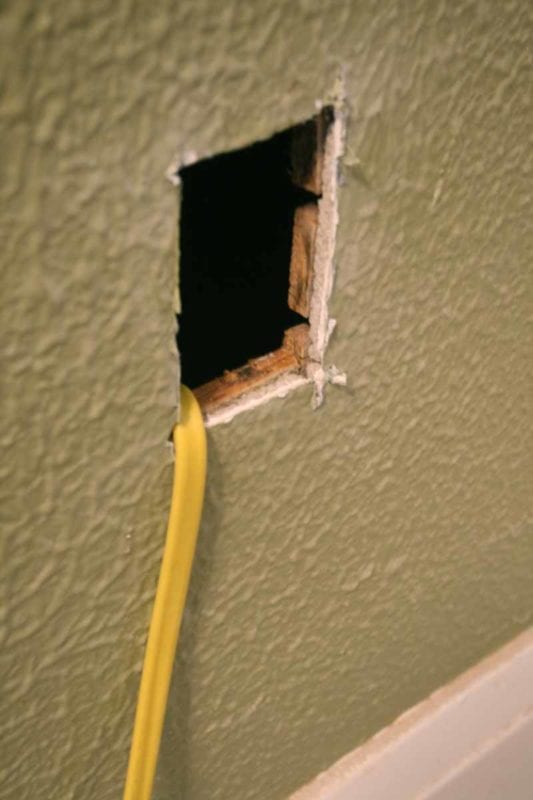
We typically line up our holes so that we have an outlet that’s in line with the ceiling fan or light in the direction of the joists. This also means, however, that you need to look out for windows that throw that plan, well… out the window. If you come across a window (and you can’t run the cable in the other direction to the opposite wall), the next thing to do is figure out which way you want to drill through the joists near the ceiling fan/light opening in order to get into the adjacent free-and-clear stud wall cavity that can travel down to the floor.
Some More Explanation on Step 3
Regarding this step three, the big picture here is that you are intending to run the new wire from the ceiling fan/light opening to the nearest “clear” wall. You then cut out a box right at the corner on both the ceiling and the top of the wall. Here you can use a drill and a flex bit to drill an opening through the top plate of the wall, gaining access to the ceiling space where you can then make the turn to your ceiling fixture. Here is an illustration of what we’re talking about:
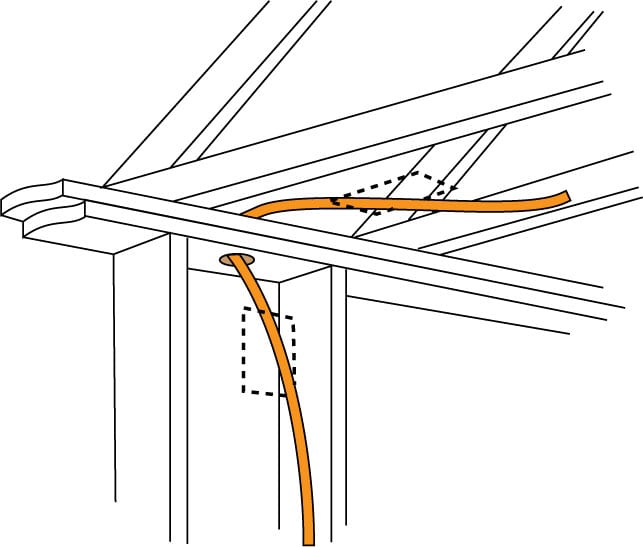
We show the wires coming out of the holes here, but that’s for illustration to show you how you can pull them through the hole and gain some leverage. The idea is that you are using the cut holes to gain access and thread the new 12/2 or 12/3 all the way from the crawl space (as was our case) to the ceiling fixture via the wall and ceiling cavity.
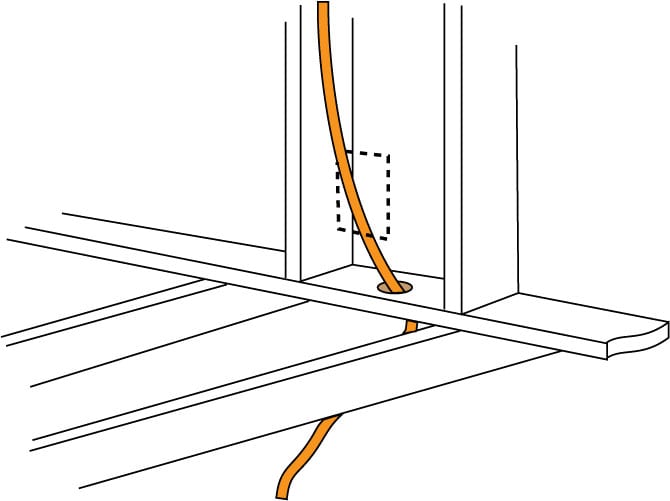
Here is what it will look like going to the floor and on through to the panel, another receptacle, or junction box:
Glow Rods to the Rescue

By drilling holes like this you can use glow rods (we used a Klein Tools 15 ft. Glow Rod set) to easily locate and pull the cable through each portion of the run. We also used Jet Line or poly line, which has a high pull strength and allowed us to reliably go back and forth through the same hole when pulling up (or down) 12/2. When we were going a long distance, we pulled out the Klein Tools 240′ High Strength Stainless Steel Fish Tape which gave us incredible rigidity where it counted and also allowed us a tremendous amount of pull strength when encountering less-than-smooth in-wall terrain.

Editor’s Note: When using Jet Line or poly line, you can really tug on most versions. Many have 200+ pounds of tensile strength. If something is particularly tough, work it up and down and then wrap the Jet Line around a pair of Klein linemans pliers and give it a fairly strong tug to bring it through. In most cases, this will put it over the edge without snapping the line. In most cases, if that fails, working as a two-man team and giving it a pull-push motion from above or below usually does the trick.
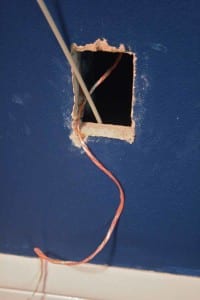
Once you’ve learned the secret of jumping corners with the box-cutting method, you simply need to patch the drywall holes using standard techniques. Some walls and ceilings are plaster, which takes a bit of finagling to get it to blend properly, but for the most part, this will be the simplest, though perhaps dirtiest, part of the job.
Things to Watch Out for in any House Electrical Rewiring Job
There are many unknowns when working on older homes, and we’ve encountered a bunch of scenarios that can make a job particularly difficult if you haven’t run into them before. Watch out for these:
Plaster Walls
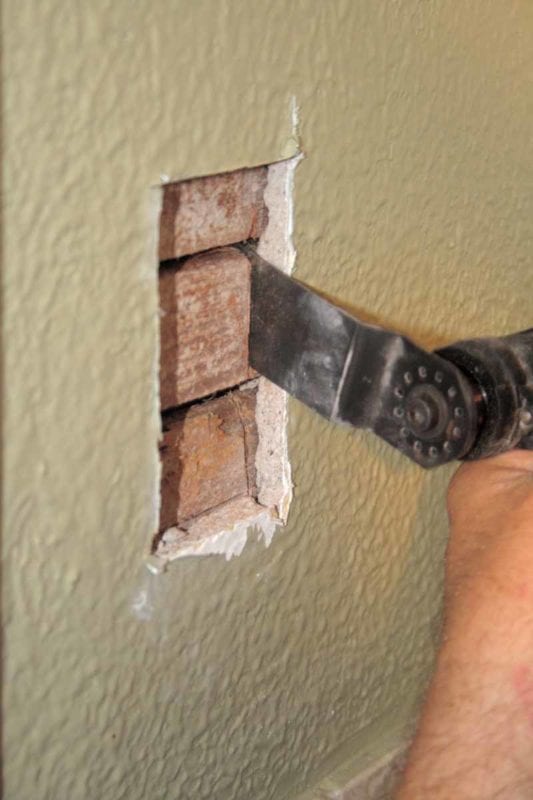
Dealing with plaster walls when rewiring electrical for a two-story house is difficult for several reasons. First, plaster is a bear and crumbles easily. A small hole you intended to cut out for your electrical box can quickly turn into a nightmare patch job if you aren’t careful. You also can’t effectively use a stud finder on plaster and lathe walls, so your best bet is banging on it with your palm and listening for the pitch change. We recommend using a multi-tool. These seem to do really well. If you cut horizontally before you cut vertically, you can ensure you don’t accidentally hit a stud. Multi-tools yield a nice clean hole for the electrical box. Keep in mind, however, that plaster EATS multi-tool blades. We often cut and clear the plaster from the rectangular hole using a razor knife.
Drywall Over Plaster
While having drywall over plaster certainly aids in less crumbling during cutting and drilling, it also makes ‘old work’ boxes useless until you cut off the extra bit on the tabs, rendering them thin enough to be used with the extra depth afforded by the lathe and plaster. Cut the tab and you should be able to use old work boxes perfectly, even with the extra wall thickness.
Exterior Walls
We’ve found that with exterior walls over crawl spaces, it’s often easier to drill up from the bottom. For this, we recommend something durable, like Lenox’s new Bi-Metal Utility Bits.
Sometimes, however, you need to use a flex bit. You need to drill on a nearly-vertical angle to reach 18″-20″ below the centerline of the receptacle box hole. Drilling with too much of an angle can damage the interior wall or even punch out through the exterior wall. When in an attic drilling down into an external wall us a shallow angle. Using shorter drill bits helps when drilling through the header on the sloped sides of the roof. If the pitch on the roof isn’t steep enough, you may have to cut a hole in the wall just below the ceiling in order to feed the wire into the attic from below.
Replacing Old Ceiling Boxes When Rewiring Electrical for a House
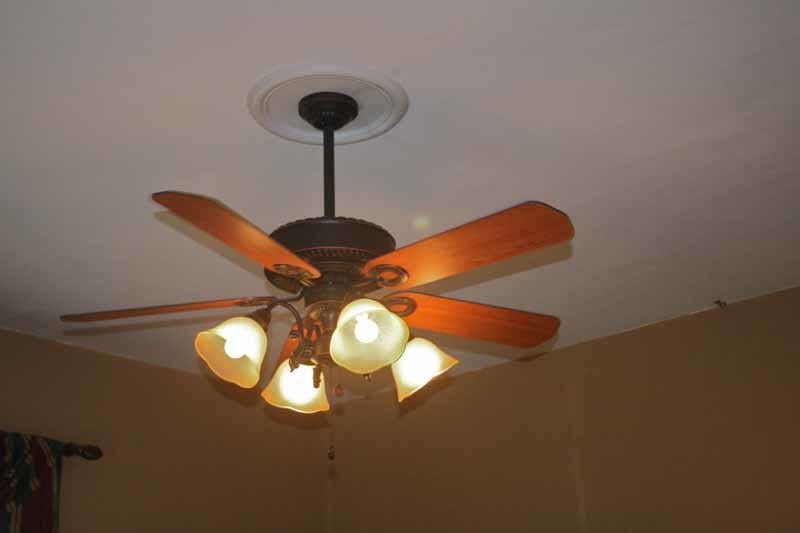
One trick when replacing older ceiling fans and light fixture boxes involves widening the hole. This gives you unfettered access to the joists for more support. As this can leave a larger hole in your ceiling, just cover it up with ceiling medallion.
Stapling
In order to meet code in most jurisdictions, the new wire must be stapled on interior stud walls. This means you will need additional access holes to accomplish this. For this reason, it’s good to minimize your access points whenever possible. Staple underneath the house in the crawl space or up above in the attic. Good planning on the front end saves lots of time and hassle in the long run.
Rewiring Electrical for a Two-Story House Conclusion
With some elbow grease and a lot of work, rewiring electrical for a two-story house may not be that colossal task you imagined. It may also be the best thing you ever do to update that newly purchased home. In either case, you should have a lot of appreciation for the electricians and journeymen who make a job like this possible.
