We don’t often cover too many automotive tools and problems. However, oxygen sensors keep creeping back into my project list. Knowing how to change oxygen sensors in your vehicle can save you a lot of money and hassle.
With all the computer gadgetry on cars today, many car problems can seem daunting. Don’t you just hate it when the check engine light comes on in your car? Often it’s for something as relatively simple as an oxygen sensor that’s gone bad. This holds especially true if your automobile has around 100,000 miles on it or more. The normally expected life span of an oxygen sensor sits somewhere around 60 to 90 thousand miles.
The good news? Changing oxygen sensors doesn’t present many opportunities to mess up your vehicle. Consequently, you can definitely try and tackle this job yourself to save a few bucks.
What is an Oxygen Sensor?
Every new car, and most cars produced after 1980, have at least one oxygen sensor, if not more. These sensors feed data to the car’s engine control computer and are a vital part of the emissions system. The idea behind these sensors is to make the engine run as efficiently as possible and to produce as little pollution as possible.
All gasoline engines burn fuel and oxygen. This mixture of fuel and air is critical and is referred to as the fuel-air ratio. This ratio can vary with many different variables such as the quality of fuel, composition of the fuel, elevation, and temperature to name a few.
If the air is out of balance, there can be leftover fuel after combustion. We call this a “rich” mixture. You don’t want this because the unburned fuel causes excess pollution at the tailpipe. Frankly, it wastes fuel.
If you have too much air in the mix, you call it a “lean” mixture. A lean mix produces more nitrogen-oxide pollution. This can contribute to poor engine performance and even engine damage in some extreme cases. To sum it up—oxygen sensors play a key role in figuring out the exact air-fuel ratio your car needs at any given time.
Changing Oxygen Sensors
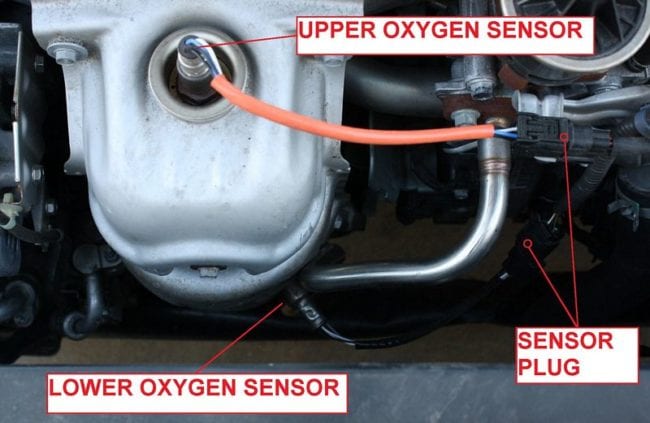
The oxygen sensors are positioned in the exhaust pipes. Most modern cars have one before and after each catalytic converter. Catalytic converters are a topic for another discussion. Just know that they function as a necessary part of the emission and pollution control system.
Located directly in the flow of the exhaust, oxygen sensors detect how rich or lean the engine is running. They then convey this data back to the car’s engine control computer. It then makes any necessary adjustments.
As you drive, the engine computer continually makes changes to optimize the performance and economy of the engine. Many outside factors also affect how the engine runs. This includes elevation, air/engine temperature, barometric pressure, and even the stress on the engine.
We all hate it when the engine light comes on. Many times, when you go to a service technician, he tells you it’s the oxygen sensor. Pay attention to this diagnosis when you get it. When the oxygen sensor fails to work properly, the engine control computer defaults to a mode that doesn’t take into account all the variables. It can’t since it’s not getting the needed data. This can lead to poor fuel economy, bad performance, and extra pollution from your car or truck.
Diagnosing the Problem Using an OBD2 Scanner
Now all this is to say that if you have even the slightest ability to turn a wrench, you probably are able to change the oxygen sensors yourself. The first place to start is diagnosing why the check engine light came on in the first place. This is pretty easy if you have your own engine code reader. We like the Innova CarScan Pro OBD2 scanner.
Many national discount auto part retailers also offer basic diagnostic services for free. They do this because they will be happy to tell you why your engine light is on so that they can sell you some parts. And of course, there are your regular mechanics and service technicians and can run diagnostics on your car. Now if you have your car at a mechanic in the first place, it is our guess you would rather not get your hands greasy. No matter how you find out, once you know, you can make your purchase.
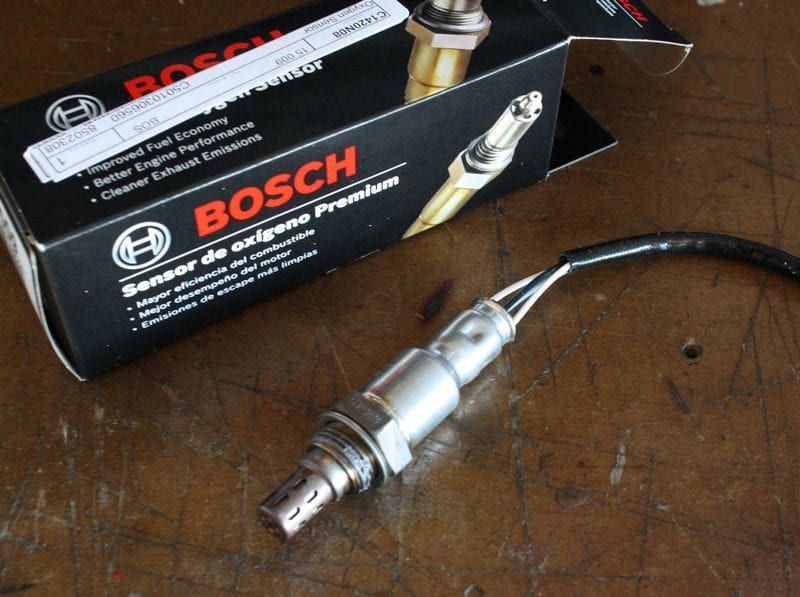
We suggest not going with bargain-level products. They don’t tend to last. Unfortunately, I’ve had to learn this the hard way! I now only buy Bosch or OEM (Original Equipment Manufacturer) oxygen sensors.
Swapping Out the Oxygen Sensor
Now that we have the science lesson behind us for this article, we can get to what we set out to do. Let’s swap out an oxygen sensor. Our guinea pig car is a late model Honda Civic. According to my OBD2 code scanner, we were getting a diagnostic code that related to the secondary oxygen sensor.
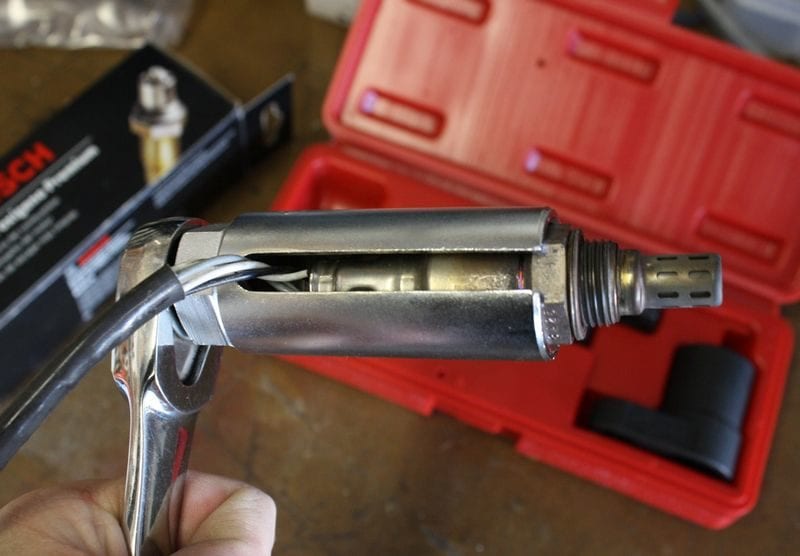
After stopping at a local parts store we picked up a Bosch replacement unit that came with the factory-style plug. Since oxygen sensors have some wires coming out the end, you cannot use a conventional socket or box end wrench. The wires are in the way. For this job, we picked up a nifty little kit from the parts store that has three different oxygen sensor sockets for just a little over $20. This kit should work with just about any oxygen sensor out there since most all oxygen sensors have a 7/8″ (22 mm) hex drive.
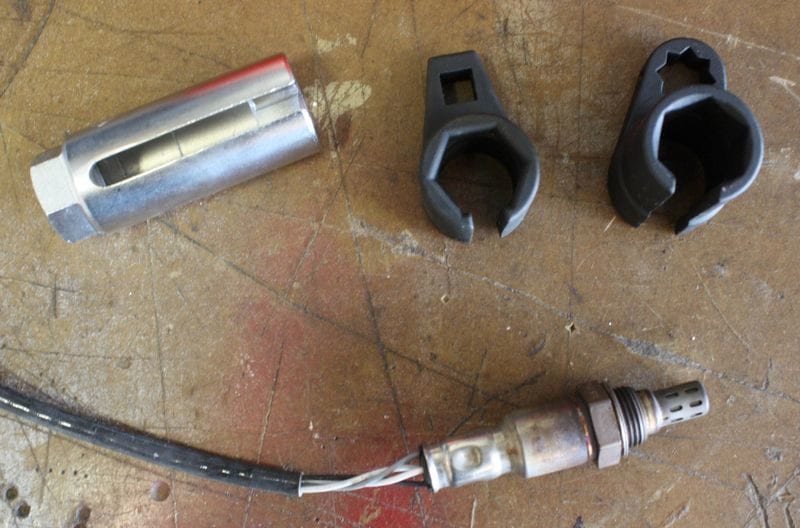
The reason for three different sockets is because when they assemble cars in the factory, they are not always thinking about future accessibility when you have to do maintenance. Sorry to say, it sometimes takes some crazy angles and adapters to get at things when it comes time to change them.
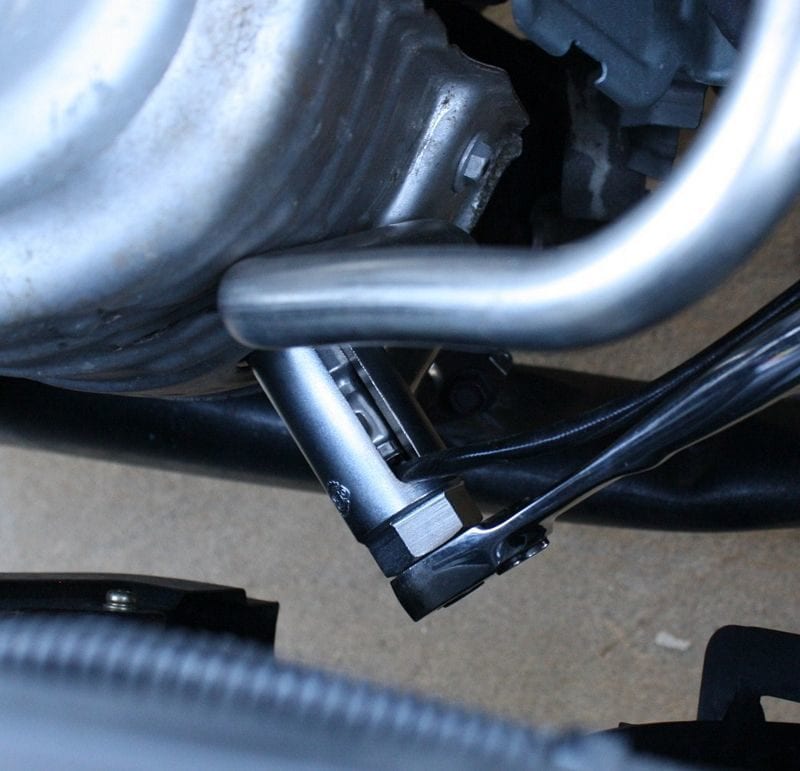
In the case of the Honda Civic, the secondary oxygen sensor was in a fairly open and easy to access area in the front of the engine. Since this was the case, we used the socket style socket tool that fits over the sensor with a space for the wire to pass through. Before we loosened the sensor we unplugged it from the wire harness.
Working with Oxygen Sensor Sockets
Sometimes unplugging the sensor can actually be the hardest part of the job. Use patience and caution so as not to damage the plug or wires when pulling the two halves of the plugs apart. Using a 3/8″ drive ratchet we were easily able to loosen the old sensor.
The install is exactly the opposite of the removal, simply tighten in the new sensor with the appropriate socket adapter and plug it back into the wire harness. After we were all done, we used the AutoScanner to clear the saved codes from the engine computer, and then we started the car. After a few laps around the neighborhood, the check engine light did not come back on and the car had a clean bill of health again.