
Knowing how to use a whetstone to sharpen a knife helps you get close and intimate to the work. It also often results in a better sharpening—and, frankly, it just feels more satisfying!
You can sharpen your knives in any number of ways. There are electric sharpeners, filing systems, and belt systems. Many manufacturers even offer a sharpening service. Use that, however, and you have to mail your knives back to the plant and wait a few weeks for them to return. You could just learn how to do it yourself with a whetstone.
Editor’s Note: Check out our best knife sharpeners article to get our top picks.
Table of Contents
- The Case for Using a Whetstone
- Step 1 – Saturate the Whetstone
- Step 2 – Position the Whetstone So It Doesn’t Slide
- Step 3 – Position the Knife on the Stone
- Step 4 – Draw the Knife Back and Forth Across the Whetstone
- Step 5 – Flip and Repeat
- Step 6 – Finish With a Fine Whetstone and Strop (If Available)
- Wrapping It Up
- Using Power Tools to Sharpen a Knife
The Case for Using a Whetstone
We like using whetstones for several reasons. For one, they give you a very personal feel when sharpening your knives. Most whetstone kits make it very easy to pull out the stone, line up your blades, and get to work. You don’t need a lot of fancy accessories; the setup is immediate, and there’s no power required (except for your arm muscles).
Whetstones generally have two sides: coarse and fine grit. The coarse side works to pre-sharpen by grinding off the rough edge and any burrs. The fine-grit side finishes off the work by making large burrs even smaller and working that dull blade into a super-sharp edge.
Following, we have some simple step-by-step instructions for how to use a whetstone to sharpen your folding pocket knives, kitchen knives, axes, scissors, or other sharp tools.
Step 1 – Saturate the Whetstone
There’s not necessarily a consensus among knife sharpeners about whether or not to wet your whetstone. (If you want to have some fun—say “whetstone” to a knife enthusiast the way Stewey Griffen says “cool whip”.)
Some folks won’t use water and just go at it dry. Others like to use water or mineral oil. This reduces any heat caused by friction. We prefer to keep things lubed up. You could also simply follow the manufacturer’s recommendations.
To use a whetstone, submerge it in water for at least 5-10 minutes. A longer time period just ensures saturation. Some people we know soak their whetstone for a minimum of 24 hours. That may be overkill.
Step 2 – Position the Whetstone So It Doesn’t Slide
After saturating the whetstone, place it atop a mat or towel. You need something to keep the stone from sliding around while also trapping wayward water. Some manufacturers make stands or integrated holders. Those work great as well.
If your whetstone has a coarse and fine side, begin with the coarse side. The same goes if you have multiple whetstones. Work from coarse to fine. That lets you progressively sharpen your knives by removing burrs and getting them progressively more honed.
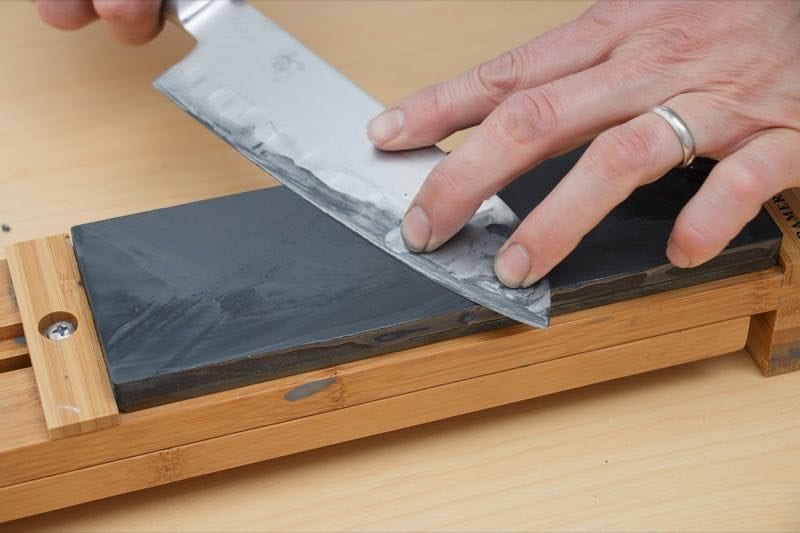
Step 3 – Position the Knife on the Stone
Using a whetstone to sharpen knives takes a little practice. Most people, however, catch on quickly. Always hold the knife with the handle in your dominant hand. It makes for a safer whetstone sharpening experience. Position the knife across the whetstone at a 45-60 degree angle with the tip off the edge of the stone. The tip can either be towards you or away from you, depending on your preferred grip.
Find the angle (pitch) of the actual knife blade edge. We see a lot of 15–20 degree angles for kitchen knives. Pocket knives can have angles up to 25 degrees or more. You want to start with the blade of the knife angled diagonally across the whetstone.
Remember, you’re sharpening a knife, not grating cheese!
Step 4 – Draw the Knife Back and Forth Across the Whetstone
With the fingers of your non-dominant hand on the rear of the blade, pull or “draw” the blade towards you across the length of the stone. Maintain both the angle of the knife across the stone as well as the angle of the blade. This lets the whetstone work across the entirety of the knife blade, from tip to belly.

Work the knife up and down the whetstone in both directions. Repeat this several times—particularly if you’re working on a dull blade. Each stroke should allow the entirety of the knife blade to move across the whetstone. You don’t want to work on “sections” of the blade but rather the entire blade at once.
During sharpening, continue to apply water from time to time. As you work, particles from the stone will release. These small particles get trapped in the liquid and form an abrasive paste. Keep everything at a pretty runny consistency.
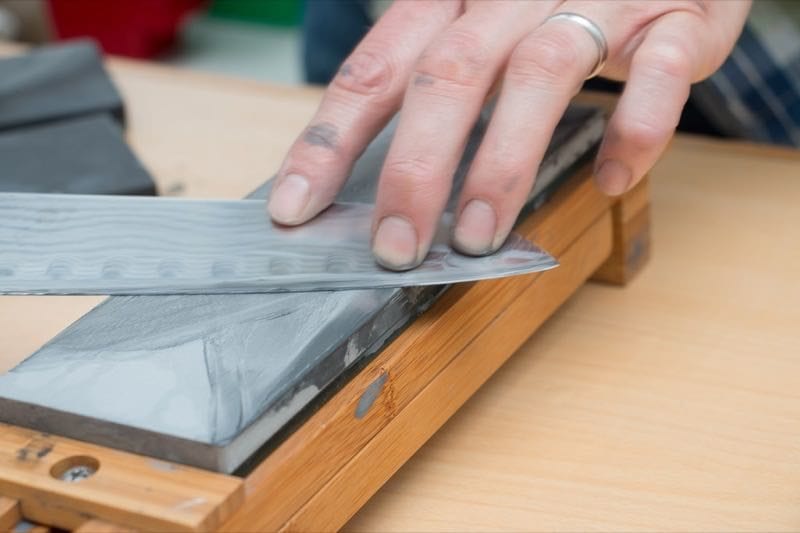
Step 5 – Flip and Repeat
When the first side has sharpened up, flip the knife over and repeat the process with the other side of the blade. Again, maintain the handle in your dominant hand—you aren’t switching hands. Keep that angle and continue working the knife across the whetstone as you did before.
It helps to count how many passes you make so that you keep things as even as possible. You don’t want to take off more material on one side of the blade than the other.
Step 6 – Finish With a Fine Whetstone and Strop (If Available)
After finishing the coarse grind, flip the whetstone over (or change it out) to continue sharpening using the fine grit material. Repeat the exact same process on this side of the whetstone. Remember to always keep the blade angled consistently. Some systems let you sharpen your knife using three whetstones. Either way, work your way down through the finest whetstone provided.
After that, if you have a leather strop, it’s time to get that finishing touch.
Stropping gets rid of those invisible-to-the-eye inconsistencies of the edge. It’s what gives you a true razor-sharp edge to your blade. To strop a blade, use the same angle you sharpened the blade with and then pull it along the piece of leather toward you. Just a dozen passes should do it—though more is better!
Wrapping It Up
Overall, knowing how to use a whetstone to sharpen your knives doesn’t take a degree in rocket science. However, it does take some practice to get it right. Maintaining the angle while moving the knife across the whetstone makes up the biggest learning curve of this blade-sharpening method. Once you dial in a technique, you can start adjusting your angle for specific applications and steel blends that you have.
If you’re an old hand at sharpening knives and have any tips and tricks for how to use a whetstone, feel free to add them in the comments section below.
Using Power Tools to Sharpen a Knife
If you don’t want to deal with a whetstone, check out the following power tools that sharpen knives more quickly at the expense of potentially removing more material from the blade.

This article has helped me in the learning curve by hand aspect… I’ve got pocket knives, not kitchen knives…so this huge whetstone will take practice…but this has indeed helped… Thanks again…
Glad we could help, Hannah! It definitely takes some time, but once you get the right technique and build some muscle memory, it gets easier.