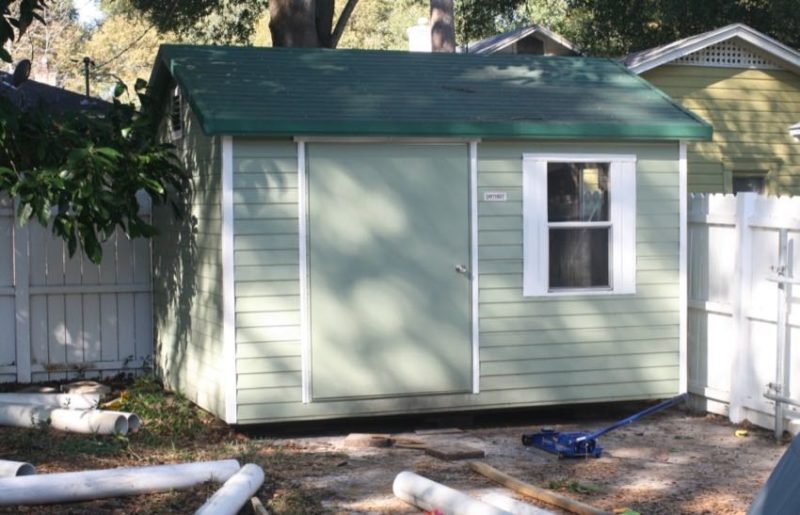
Most people would have no idea how to go about moving a large storage or garden shed. It seems like an insurmountable task or something that could result in a lot of damage if not done correctly. Some people use 4×4 pickups and tow chains – ouch that could cause some serious damage to your shed – not to mention your poor yard! Others recommend using galvanized pipe to roll the shed. That’s overkill. The truth is, Moving a shed with PVC pipe can be very effective, and schedule 40 works just fine. Plus, it’s in ready supply for most folks.
We moved a 12 x 10 shed about 50 feet across uneven terrain from one end of our yard to another, even steering around a tree that was in our way. It was quick, easy, and didn’t tear anything up in the process.
Table of contents
Tools Needed
Here’s how we Moved a shed with PVC pipe (a picture is worth a thousand words, so don’t expect us to write everything out). This how-to project is best communicated through photos—and we took a bunch. We’ll outline each necessary step to get you on your way. The first thing you want to do is make sure you have the necessary tools and parts to get the job done:
- Floor jack (two will make it even easier)
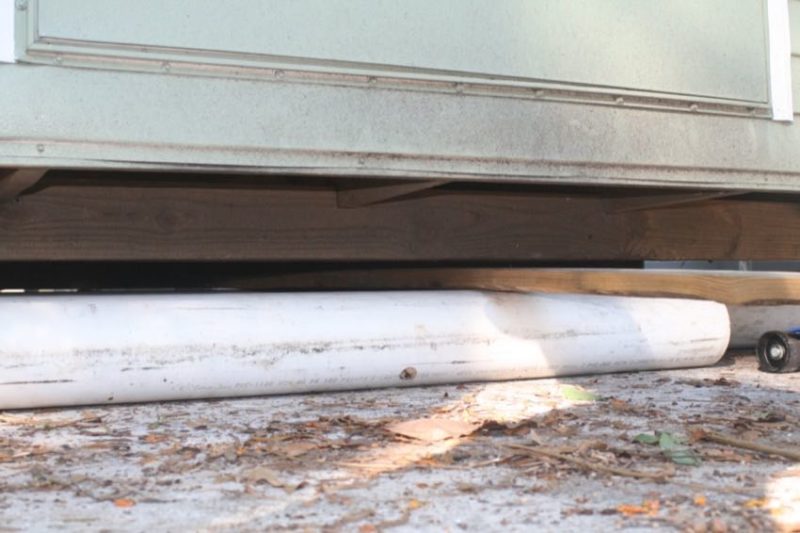
- 8 pieces (or more) of 6″ PVC pipe (can be 6-8 feet lengths)
- Concrete or block to use as pads
- pressure-treated or cedar shims
- Two 2 x 4 x 12s
- 4-foot level
- 3-4 buddies
Moving a Shed with PVC Pipe in 6 Easy Steps
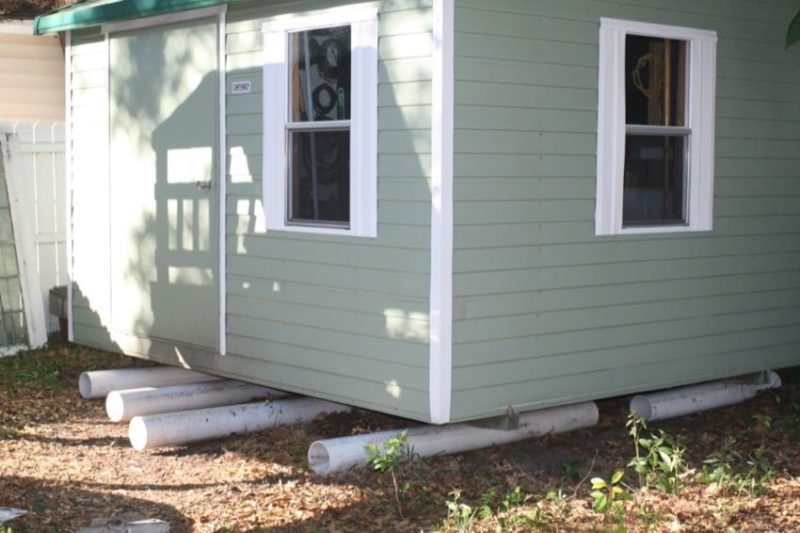
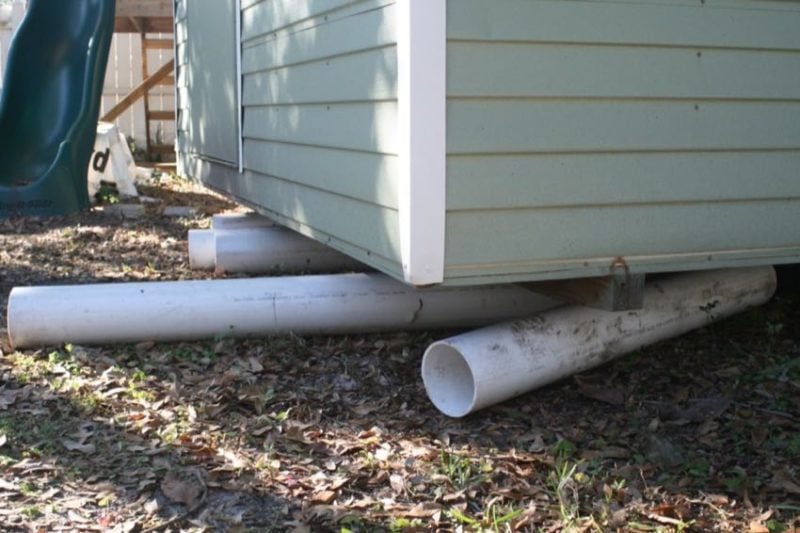
Jacking Up the Shed and Inserting the PVC Pipes
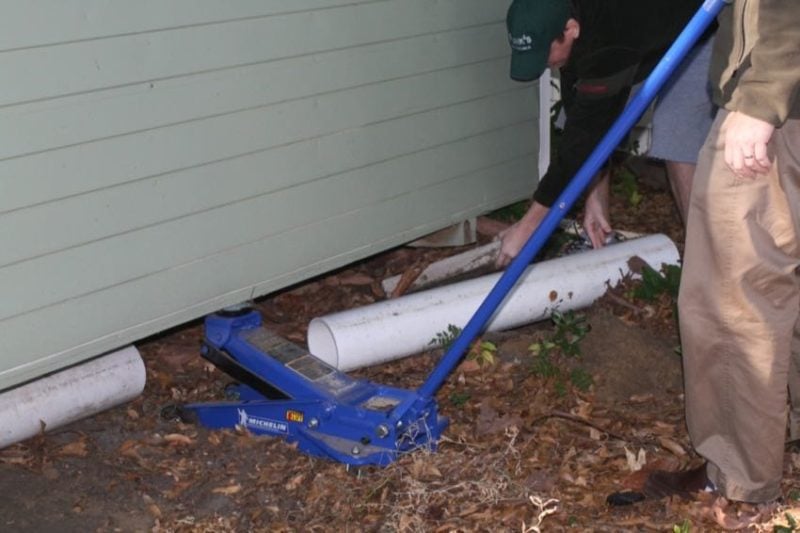
The first thing you’ll need to do (after you empty the shed and plan your “route”) is jack up the shed and insert the PVC pipes underneath the entire structure. For purposes of this article, we assume you know how to use a floor jack safely:
To lift the shed, use a floor jack. You don’t have to use a high-tech NASCAR-style jack as we did, any old 2-ton jack will work just as well. Bottle jacks may come in handy during this project, however, they require additional clearance that the floor jacks do not.
Take a Look Under the Hood
The only thing potentially tricky about this first step is understanding how the joists run underneath the floor of the shed. Our shed had floor joists that ran parallel to the PVC pipe and they all sat upon a couple large 4×4 posts. It was those posts that we kept on top of the PVC piping. If your shed is aligned in the opposite manner, simply insert your own 2x4s above the PVC and across the support 4×4 posts so you can get rolling in the proper direction. We actually ended up doing this near the end as we had to switch gears and push the shed back into place.
Ready to Roll!
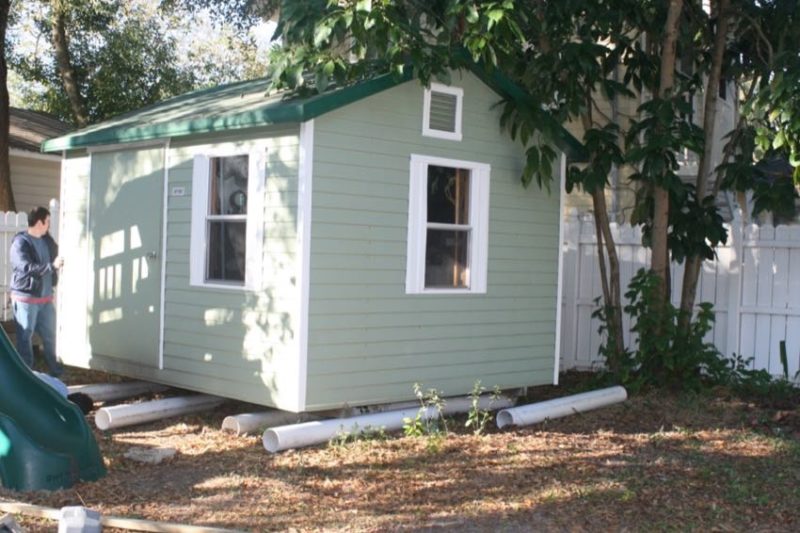
Once the 6″ PVC pipes are underneath the shed you are ready to roll. Keep in mind that the idea is to slightly cantilever the shed across the PVC pipe, rolling it gently across as you go, When the shed rolls off the rear pipes you simply bring them to the front and continue rolling. If you’re like us, however, you may have to adjust to get around some obstacles.
As luck would have it, we needed to “steer” around a tree that was in our way. To do this we simply pushed the shed at the corner to twist it around – it slid easily on top of the smooth plastic PVC.
Keep the Pipes Aligned
After we got it twisted, we realigned the PVC as we went to again get it rolling in the correct direction. Once we cleared the obstacle, we re-aligned it and pushed it straight across.
At no time did the PVC pipes ever show any sign of strain or collapsing. Those who recommend 3- or 4-inch galvanized piping apparently like to spend money, or possibly have some lying around. If you only have 4″ PVC piping lying around (for 6″ you may have to borrow some from your friendly neighborhood construction worker) you can use it, just expect to have to push a little harder and use more piping.
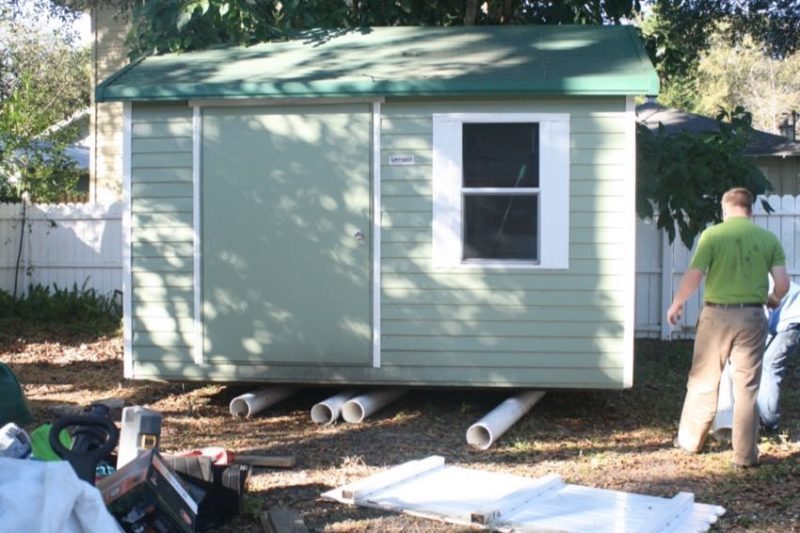
Final Shed Positioning
Once we had the shed all the way across the yard we needed to push it back into place. To do this we couldn’t just turn the PVC pipe 90 degrees, we had to give them something to roll on as well. Since we had those two 4×4 supports, we needed to insert a couple of 2x4s across the PVC pipes (which we had now turned 90º to roll the shed back into place). This is where you will again require the use of a good floor jack.
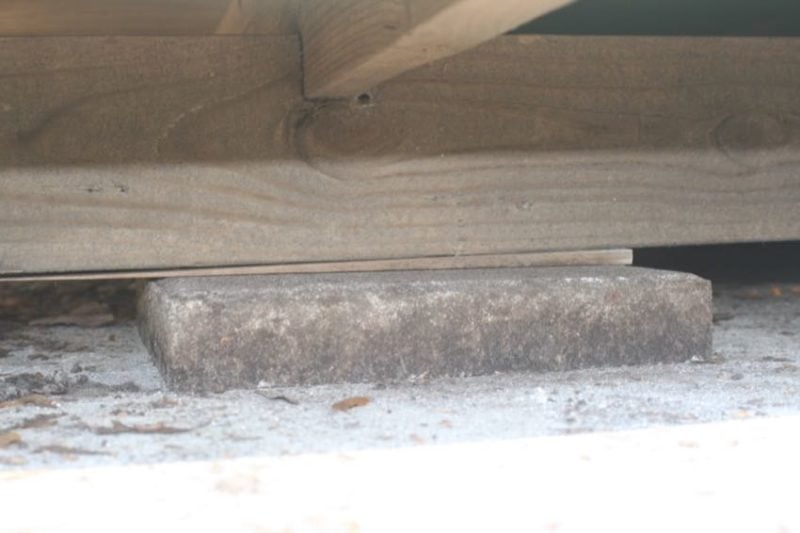
Leveling It Out
Once the shed is in place, use a level to determine how you need to support it. Shim any uneven areas with pressure-treated lumber or cedar shims.
The Final Location
Here is a shot of the shed in its final location, shimmed and supported. This took us about an hour to complete once we had disengaged the hurricane straps from the bottom of the shed and got it ready to begin. The hardest part might be securing the PVC – and a few friends to help provide enough muscle to move the shed. This is something a novice could undertake and it’s a safe, easy, and convenient way to relocate any shed that has an integrated floor.