
Find the measuring & marking tools you want, for the price you need
When you have an idea in your head, drawn on plans/blueprints, or you are just winging it, you need to transfer that to your materials. You can get a lot done with just a tape measure, pencil, and square. To want to be accurate, fast, and efficient, woodworkers demand more than the basics. In this ultimate guide to woodworking measuring tools and marking tools, we talk about what you need. We also talk about the tools you want. And…we might mention those tools you can lust after.
Table of Contents
I put the list below in order of importance—in my opinion at least. I’m starting with the most important tools you must have and work down to luxury or specialty tools. I have been woodworking for over 30 years. It has taken me decades to refine my collection of measuring and marking tools to the items below.
Be sure to also check out our article on measuring and marking tips and tricks.
Spending Your Money Wisely
Prices on woodworking measuring tools and marking tools can vary wildly for what looks to be the same tool. Some manufacturers like Woodpeckers can demand top dollar for their tools. This is because of their tool’s quality, materials, workmanship. Most importantly, they charge more for their accuracy. Other companies like iGaging give you almost as good a tool. The accuracy is the same level as Woodpeckers but for 1/4 to 1/2 the price. There are also plenty of companies that offer good, accurate tools for any budget. Examples of these would be Irwin, Empire, Milwaukee, DeWalt, and Stanley.
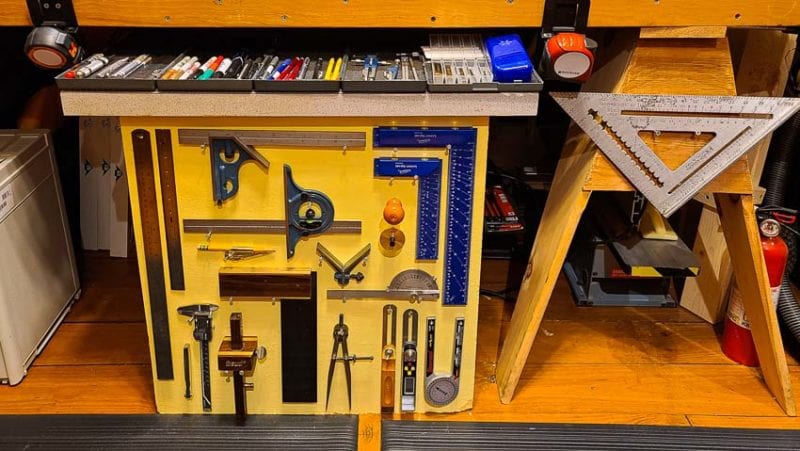
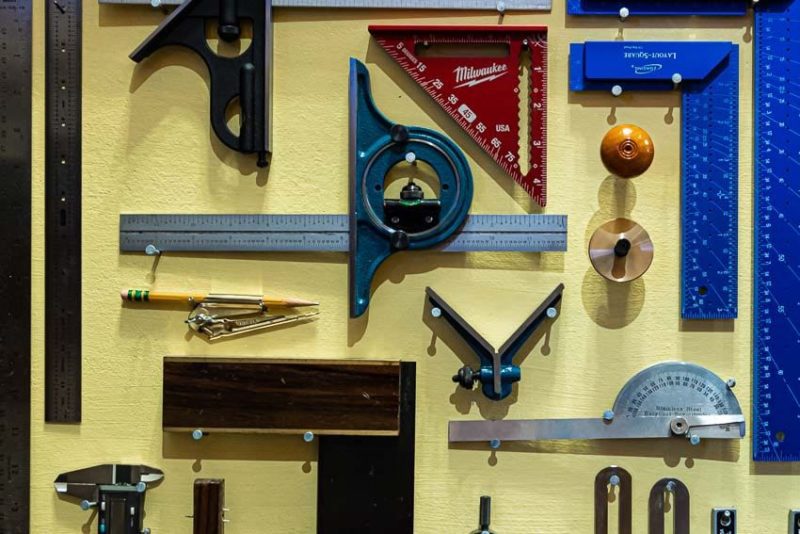
Must-Have Woodworking Marking and Measuring Tools
The following woodworking marking tools and measuring tools represent the foundational tools every woodworker needs to have in their possession. Miss out on any of these and you cost yourself time—possibly even money.
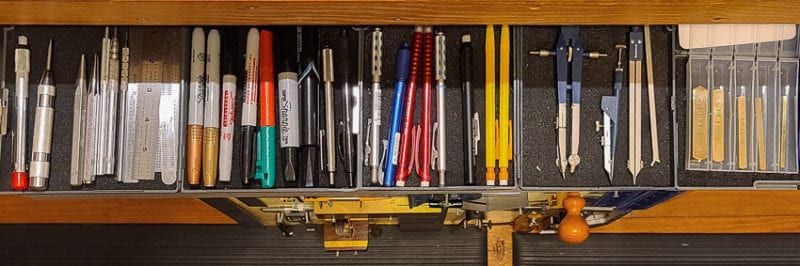
0.5-0.9mm Mechanical Pencil or Wooden Pencil – Good | Better | Best – Mechanical pencils are great because they always create a sharp, crisp line. The lead in 0.7mm mechanical pencils is thin enough to give you useful lines. At the same time, it is not so thin it keeps breaking. 0.9mm lead works well on rough lumber because the added thickness prevents the lead from breaking. 0.5mm mechanical pencils only work on very smooth wood or paper without breaking.
Scratch Awl – Good | Better | Best – An awl is a woodworker’s best friend due to its many useful functions such as starting screws, accurately starting a hole for drilling, and scribing lines.
Tape Measure – Good | Better | Best – This one is kind of obvious. Most woodworkers prefer tape measures but some prefer folding rules to do the majority of their measuring. Many of the best tape measures come in metric, imperial (fractions), or a combination of both on the same tool. A story pole tape measure has a blank area you can write on with a pencil. You can mark various parts of your project right on the tape. This facilitates better repeatability when laying out multiple parts of the same size. Check out our article on tape measure tips and tricks.
12″ Combination Square – Good | Better | Best – The combination square is one of the most useful woodworking measuring tools ever made. It is a tri-square measuring both 90 and 45 degrees. It is also a depth gauge and a router bit height gauge and marks lines down the length of a board. The 4 piece sets include a center finding attachment for round stock and a protractor head. If you can only afford one, get the 12″ combination square. The 6″ model is the one I reach for most often. Therefore I keep it in my shop apron so I have it on me at all times while working.
Sliding T-Bevel – Good | Better | Best – Most often used in combination with a protractor, a sliding T-bevel lets you mark angles. It is also known as a bevel gauge. The sliding T-bevel is excellent for transferring those angles to other tools like the blade of your table saw. Digital models don’t require a protractor.
Protractor – Good | Better | Best – Protractors find and draw angles. It is also a perfect companion to set the angle on a sliding T-bevel.
Straight Edge – Good | Better | Best – Straight edges are used for drawing lines, checking the flatness of a board or hand plane. Straight edges are almost a necessity to adjust the depth of cut on your jointer.
Nice to Have Woodworking Marking and Measuring Tools
Adding in these tools brings you to a place where you have more options, flexibility, and capabilities in your project work. You’ll see variations on our “mandatory” woodworking measuring tools and marking tools as well as some new tools to increase your ability to make much more precise measurements.
Ultra Fine Point Marker – Good | Better | Best – Markers, also known as Sharpies, has many uses from writing labels on paint cans and boxes, to drawing on tile, glass, metal, or rough lumber. The ultra-fine point is about the thickness of a ballpoint pen line and is used when accuracy counts. Fine point markers are thicker than ultra-fine point markers. Fine point markers are most useful for making permanent notes on your project or labeling objects around the shop.
Marking Knife – Good | Better | Best – When accuracy counts, a pencil line is too thick. Use a thin knife blade to scribe a line for ultimate precision. A marking knife is a knife designed for scribing lines. Due to its flat design, it can more precisely mark against a ruler or square.
Center Punch – Good | Better | Best – A center punch creates a dimple in metal. They can also be used with wood or plastics. Center punches accurately start a drill bit hole without it wandering away from the center. Prick punches are sharper versions of center punches. They have greater accuracy but too many hits in harder metals will dull the point more than a center punch. Automatic center punches have a spring-loaded mechanism so you do not need to use a hammer with it; simply push it down by hand until the mechanism fires.
Combination Metric and Imperial Tape Measure – Good | Better | Best – This one is kind of obvious. Most woodworkers prefer tape measures but some prefer folding rules to do the majority of their measuring. They are available in metric, imperial (fractions), or a combination of both on the same tape measure. A story pole tape measure has a blank area you can draw on in pencil so you can mark various parts of your project right on the tape. This facilitates better repeatability when laying out multiple parts of the same size.
Hook Rule – Good | Better | Best – Hook rulers are like regular rulers only they have a hook on one end that you hook on the edge of a board when measuring. This guarantees that zero inches or millimeters start at the edge of the board. They increase both accuracy and speed when measuring from the board edge.
Tri-Square – Good | Better | Best – A tri-square is the go-to 90-degree reference tool in the shop. Good ones boast plus or minus 0.001″ per inch of blade length or better. Layout squares are tri-squares with a series of small holes in them designed to be used with a mechanical pencil. The pencil allows you to scribe a line down the length of a board by inserting the tip of the mechanical pencil in one of the holes and sliding the square down the board.
Speed Square – Good | Better | Best – Though most often used in carpentry, the speed square won’t go out of square when roughly treated like other types. The primary use of a speed square in the shop is as a saw guide to make straight cuts in wood. I use a 12″ model as a guide when assembling my projects to hold everything square while installing the fasteners. Check out our how to use a speed square article for even more tips on using these handy tools.
6” Combination Square – Good | Better | Best – The combination square is one of the most useful woodworking measuring tools ever made. It is a tri-square measuring both 90 and 45 degrees. It is also a depth gauge and a router bit height gauge and marks lines down the length of a board. The 4 piece sets include a center finding attachment for round stock and a protractor head. If you can only afford one, get the 12″ combination square. The 6″ model is the one I reach for most often. Therefore I keep it in my shop apron so I have it on me at all times while working.
Compass – Good | Better | Best – This type of compass has nothing to do with finding north. It is instead used to draw circles of various sizes. Circle templates can also be used to draw circles but are limited to fixed sizes.
Dividers – Good | Better | Best – Dividers are like compasses that don’t have a pencil on one leg. They are used to layout spaces of equal size such as when laying out dovetails.
Marking Gauge – Good | Better | Best – A marking gauge scribes a line down the length of a board with its small spike. The better ones have a circular wheel for cutting into the wood instead of a spike. Mortise gauges are marking gauges with two spikes or wheels to lay out both sides of a mortise or a tenon at once.
Luxury or Specialty Woodworking Marking and Measuring Tools
After you do enough projects you find that adding a new tool here or there allows you some conveniences you lacked over the years. After a time, you can seek to add the following woodworking measuring tools and marking tools to enhance your arsenal and give you additional functionality, options, flexibility, and precision in your work.
Carbide Scribe – Good | Better | Best – Most woodworkers have to use metal for a project A carbide scribe is like a marking knife for metal. It scribes a precise line in all but the hardest metals.
Story Pole Tape Measure – Good | Best – A story pole tape measure has a blank area you can draw on in pencil so you can mark various parts of your project right on the tape. This facilitates better repeatability when laying out multiple parts of the same size.
Four Piece Combination Square – Good | Better | Best – The combination square is one of the most useful woodworking measuring tools ever made. It is a tri-square measuring both 90 and 45 degrees. It is also a depth gauge and a router bit height gauge and marks lines down the length of a board. The 4 piece sets include a center finding attachment for round stock and a protractor head. If you can only afford one, get the 12″ combination square. The 6″ model is the one I reach for most often. Therefore I keep it in my shop apron so I have it on me at all times while working.
Fine Point Marker – Good – Markers, also known as Sharpies, have many uses from writing labels on paint cans and boxes, to drawing on tile, glass, metal, or rough lumber. The ultra-fine point is about the thickness of a ballpoint pen line. Use this when accuracy counts. Thicker than the ultra point marker, fine point markers are most useful for making permanent notes on your project or labeling objects around the shop.
Lumber Crayon – Good | Better | Best – When writing on the bark of trees or on rough lumber use a lumber crayon. They are available in various colors to contrast against what you are marking on. For finer marks, use a grease pencil also known as a China marker.
Mortise Gauge – Good | Better | Best – A marking gauge scribes a line down the length of a board with its small spike. The better ones have a circular wheel for cutting into the wood instead of a spike. Mortise gauges are marking gauges with two spikes or wheels. They are used for laying out both sides of a mortise or a tenon at once.
Center Finding Ruler – Good | Better | Best – Center finding rulers are rulers that start with zero in the middle. When measuring the center of a board, set the same measurement on both sides and the zero point will be in the middle.
Calipers – Good | Better | Best – For the ultimate accuracy when measuring in the shop, nothing beats a nice caliper. I prefer digital rather than ones with dial because they are easier to read without needing to put on my reading glasses. Good ones are accurate to 0.0005 or better. Use these to measure an object’s thickness. They are also used as depth gauges and can measure the inside dimension of a hole or pipe. If you can’t read the size of a drill bit, calipers will tell you the bit’s diameter.
Feeler Gauge – Good | Better | Best – Often thought of as a mechanics tool, feeler Gauges measure the thickness of a thin gap, such a between two boards. If your plunge router does not have a micro depth adjustment, use the feeler gauge to shim the stop on the router during setup to get a precise depth of cut.
Brass Bar Gauge Blocks – Good | Better | Best – A set of gauge blocks are extremely useful for setting small known dimensions of less than 1/2″. An example to be when you need to set your router bit or table saw blade to exactly 1/4″. Place the block beside the bit or blade and raise it until it is the same height as the block. A set of 1-2-3 blocks do the same thing but are exactly 1″ x 2″ x 3″. They are machined at 90-degree angles so they can also set the angle of a table saw blade to 90 degrees. Combine 1-2-3 blocks with gauge blocks when you need measurements such as 3-1/2″. Most gauge blocks and 1-2-3 blocks are accurate to 0.0001″.
Level – Good | Better | Best – Levels are mandatory for the cabinetmaker when hanging their cabinets. To be more efficient use a laser level. They project a line horizontal and/or vertical line around the room you are installing cabinets in. They are much more user-friendly than the water levels of the past. The only advantage of a water level is going around corners. You need a line of sight with a laser level but not a water level. Some small digital levels are used to set the angle of your saw blade. This only works if your table saw is level.
Chalk Line – Good | Better | Best – Just like in a carpenter, woodworkers use chalk lines for drawing lines over a long distances. A classic example is snapping a chalk layout line down the length of a long board or large slab before you rip cut it into two parts.
Laser Level – Good | Better | Best – Levels are mandatory for the cabinetmaker when hanging their cabinets. To be more efficient use a laser level. They project a line horizontal and/or vertical line around the room you are installing cabinets in. They are much more user-friendly than the water levels of the past.
Miter Saw Angle Gauge – Good | Better | Best – A miter saw angle gauge is specifically designed to help you transfer angles from your project or plans to the miter saw. A sliding T-bevel and protractor will do the same thing, but the miter saw angle gauge helps you with the math often involved with angled cuts.
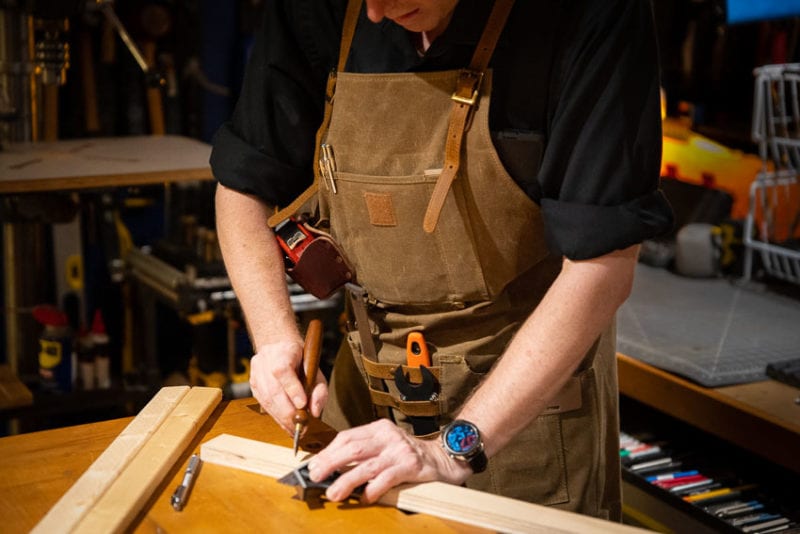
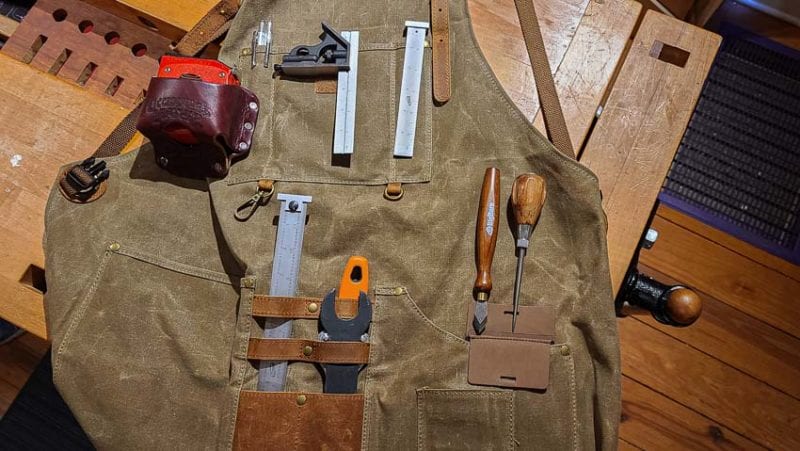
Shop Apron – Good | Better | Best – In my opinion, the best way to carry your most used woodworking measuring and marking tools is in a good apron. This way your tools are always on your person. Without a shop apron, I tend to lay my tools down all over the place. Then I can’t find them a few minutes later.
Conclusion
While you certainly do not need every tool on this list to be a woodworker, I have found a use for all of these tools. In my cabinet-making class, one of our projects was to build a toolbox. We got a letter grade off for every 1/64″ off the overall dimensions we were in the finished toolbox. That kind of accuracy is really difficult to achieve with just a tape measure. Instead, it takes a multitude of woodworking measuring and marking tools.
I helped build a pole barn once. All we needed was a tape measure, level, lumber crayon, and chalk line. In a typical pole barn, if you were off by 1/2″, no one would notice in most cases. If you are building a grand piano, accuracy is paramount and it takes many specialized measuring tools not found on this list. The type of work you do determines the importance of each tool on this list. In all instances, you can never go wrong with build the best quality tools you can afford.
Do you have a favorite measuring or marking tool? Tell us about it in the comment section below.
