

When I bought my 2015 Ford F-150 I quickly searched out the best aftermarket upgrades for my new work truck. In particular, upgrading the stereo in a Ford F-150 XLT work truck would get me Apple CarPlay. Unfortunately, at the time, the 4″ stock Sync 2 radio remained the one thing I couldn’t upgrade. No one made a replacement dash kit—something that changed in the last year. Now, no less than three manufacturers make aftermarket dash kits for the F-150. So, armed with this newfound information, I set about to decide exactly which car receiver I wanted to install. Having worked with the brand before, the obvious choice quickly led to installing the Pioneer AVIC-W8500NEX.
Upgrading the Stereo in a Ford F-150
When upgrading the stereo in a Ford F-150, start by selecting the in-dash receiver. While you can certainly go with any model of double-DIN car audio receiver, Pioneer has some features I like. First off, the AVIC-W8500NEX is their flagship in-dash navigation AV receiver. It has a 6.94˝ WVGA capacitive touchscreen display. This display is very similar to the one you find on your iPhone. Less expensive models (even from Pioneer) use a clear resistive screen that doesn’t have the same level of responsiveness.
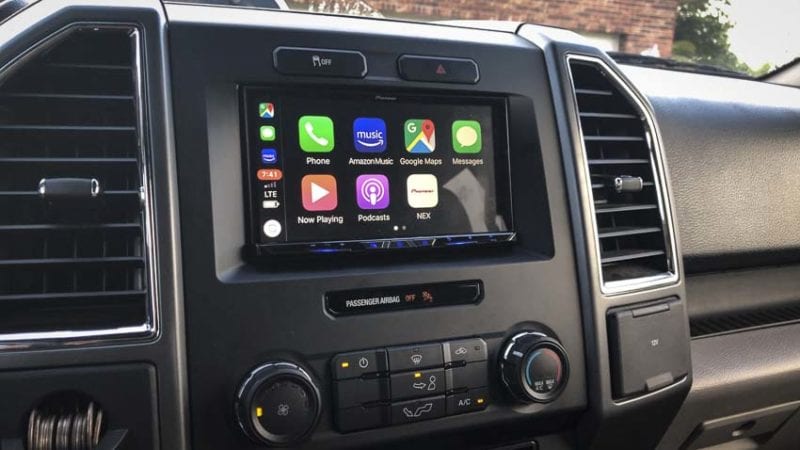
The Pioneer AVIC-W8500NEX includes both Apple CarPlay and Android Auto in wireless mode. Siri Eyes Free mode means that anyone with a compatible iPhone can activate Siri by touching the NEX touchscreen or using the steering wheel controls (requires the iDataLink Maestro module). It goes without saying that you get full Bluetooth audio including the latest Hands-Free Profile (HFP 1.6) support.
Navigation and Other Features
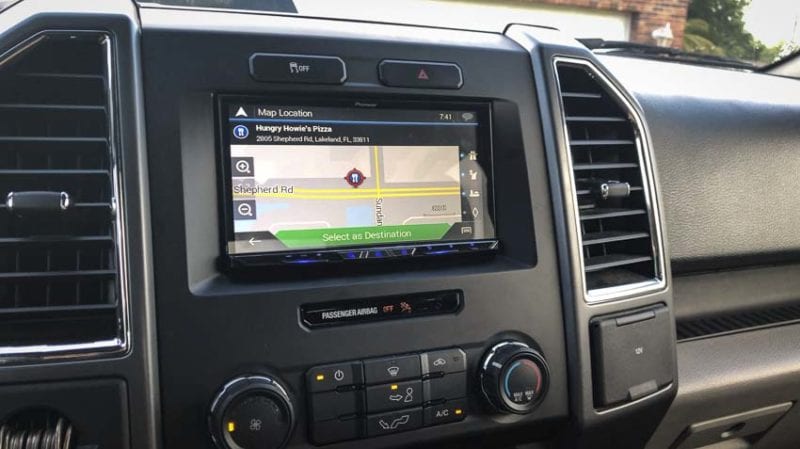
Since this model supports built-in navigation, you can get detailed turn-by-turn navigation with real-time traffic without CarPlay or Android Auto modes active.
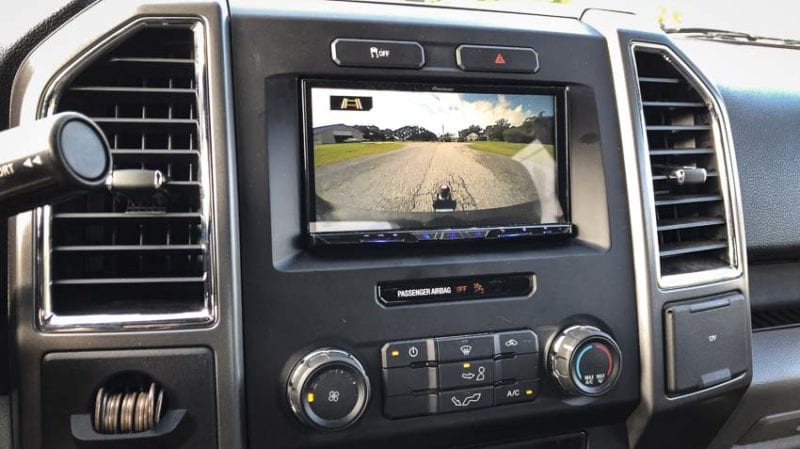
Other features I like include the fact that it integrates your existing backup camera (or you can add a front and back camera of your own). The system includes native Pandora support as well as HD Radio, which lets you enjoy digital quality audio without a subscription. Of course, if you want to pay for your music and talk radio, the Pioneer AVIC-W8500NEX supports SiriusXM as well.
If you really want to go full-tech, the Pioneer W8500 supports a feature called Dual Zone Entertainment. This allows rear seat passengers to listen to a different audio or video source from the front passengers. You could, for example, set up rear seat monitors and headphones so your kids could watch a movie while you enjoy a podcast from the front seat.
Upgrading the Audio in Your Work Truck
Really, when it comes to upgrading the audio in your work truck two schools of thought exist. The more DIY-minded will consider tackling this project themselves. Others will see the dealer as the logical choice for taking care of the myriad of installation issues associated with replacing the factory radio with an aftermarket upgrade. If you do it yourself, you really need to know how to upgrade the stereo in a Ford F-150 without missing any key steps. And there are a LOT of steps.
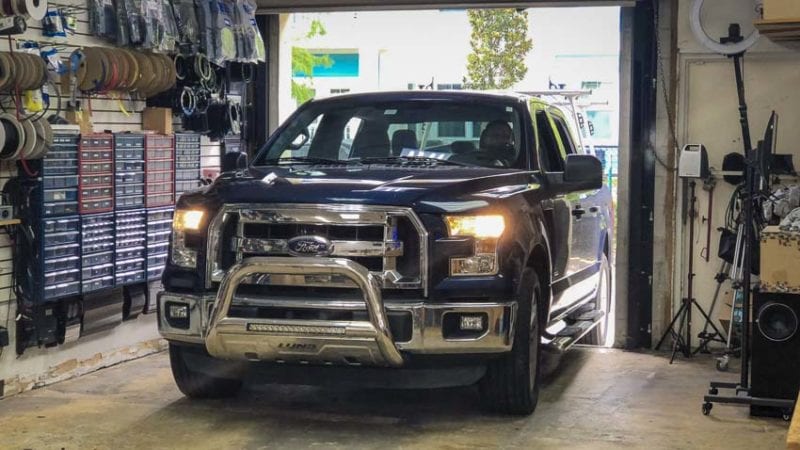
For our installation, we took a visit to Five Star Car Stereo in Clearwater. Dean and Fernando took good care of us (and even shot some video in the process). After rolling the truck into place, it didn’t take long to get the key components unpackaged and ready for prep—and there’s a lot of prep! The install included the following Pioneer Car Audio components:
- AVIC-W8500NEX AV receiver $704.99
- GM-DX871 Class D mono amplifier $198
- TS-A692C 6″ x 9″ 2-way speakers with dedicated tweeters (for the fronts) $109.95 (each)
- TS-A652F 6″ x 9″ 3-way coaxial speakers (for the rear doors) $74.98 (each)
- TS-D10LB 10″ shallow-mount pre-loaded subwoofer $119.00
- ND-BC8 universal rear-view camera $79.97
What doesn’t get mentioned here includes the tape, plastic, foam, and other custom parts an installer like Five Star Car Stereo uses to ensure proper fit and seals for all of the components and cabling.
Step One: Prepping the Components
You’d think the installation would consist of unboxing the receiver and speakers and slapping everything in place. You’d be wrong. We watched as our installers took great pains to properly dress the wiring and hone the plastic frames for each speaker so they fit properly.
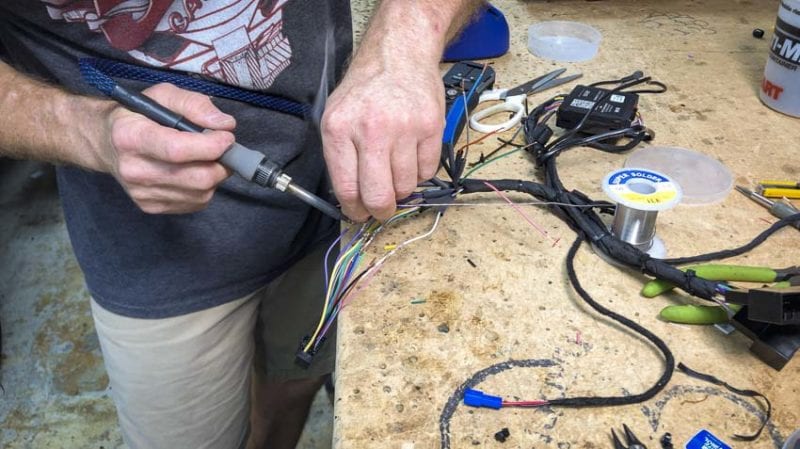
The wiring was particularly impressive. We watched the harnesses being dressed, but also the organization and care they used. Factory-quality tape grouped the cabling and made everything look professional. While cable harnesses can be ordered to link up any car audio receiver to any vehicle, custom installers take a more active approach. We watched as Dean cut and resoldered the harness so that it functioned exactly as he wanted.
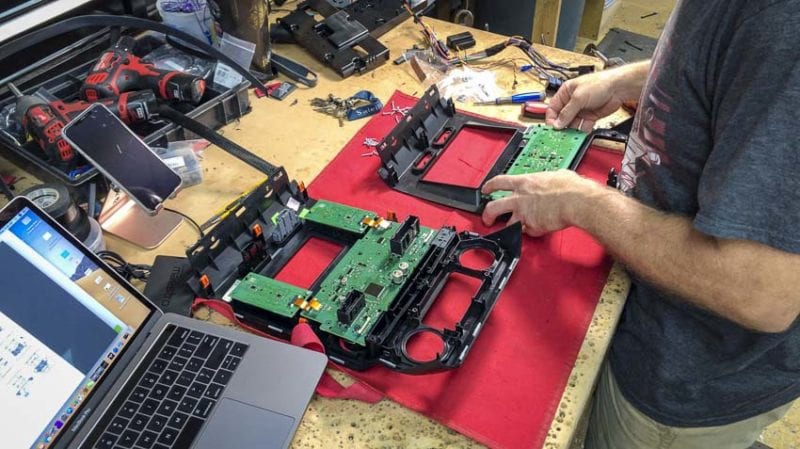
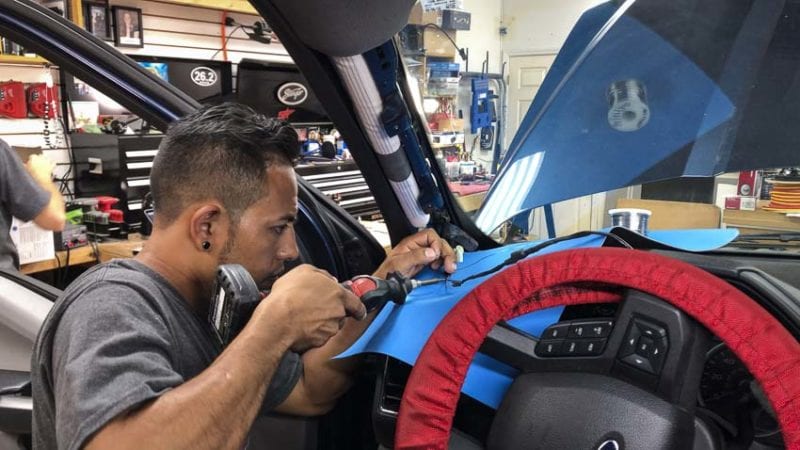
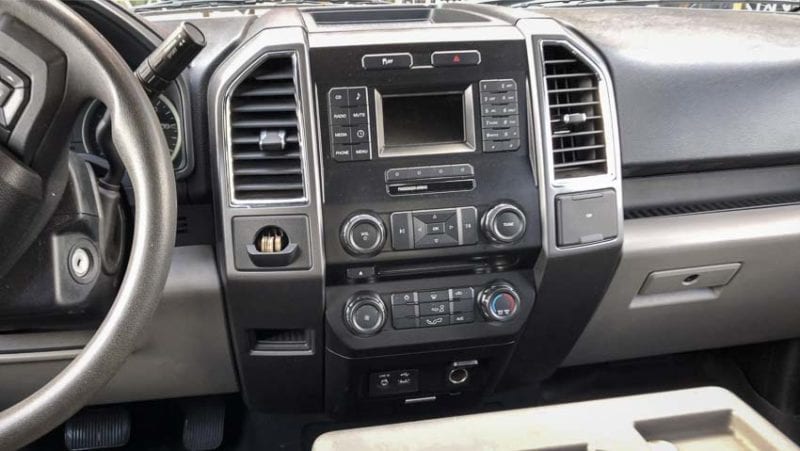
For the main stereo, Five Star removed the climate, hazard, and traction controls from the original dash shroud.
They then added those into the replacement dash kit and tested it to make sure everything worked properly. This all occurred prior to putting in the Pioneer AV receiver.
Replacing the Speakers
The door panels came off next, and they removed the OEM speakers, including the tweeters from the Ford F-150’s A-pillars. The replacement tweeters received custom back plates which were finessed into shape using a Wagner heat gun.
Before replacing the front door speakers, each had to be carefully matched to their plastic frames, with some trimming required for a perfect fit.

After perfecting the fit, they reinstalled the 6×9 front speakers and 6.5-inch 3-way rear speakers and replaced the door panels.
For the front pillar speakers, the wiring was modified to include a new passive crossover. Connectors were added to mate to the new Pioneer tweeters before placing them back into position and replacing the A-pillar. For the solder connections, we spied them using the Milwaukee M12 soldering iron.
Installing the Pioneer AVIC-W8500NEX
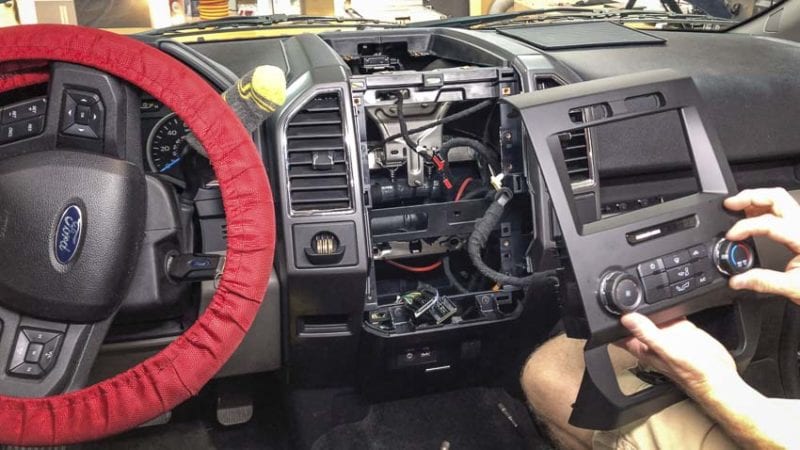
After swapping out the speakers, two things remained. The first involved finally installing the new Pioneer AVIC-W8500NEX AV receiver head unit. First came a dry-fit of the unit before completing the integration with the dash kit. This ensured all of the speakers worked properly.
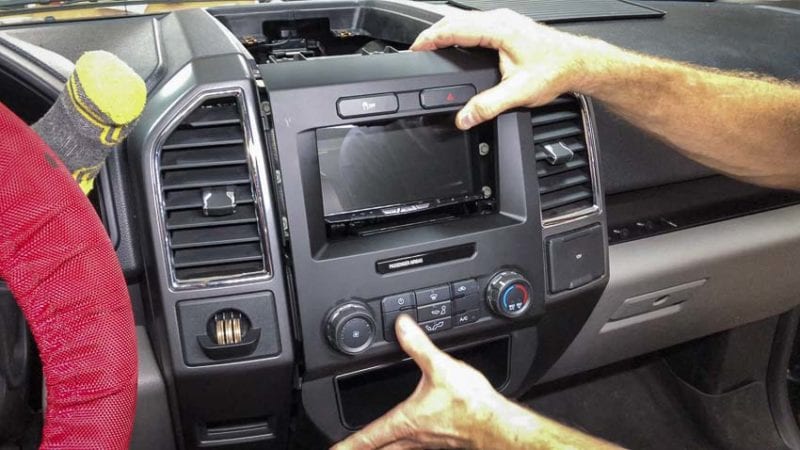
Once tested, they connected rear USB and HDMI cables (purchased separately) and installed the Pioneer W8500NEX into the dash. The plastic dash kit then went overtop, covering everything and finishing out the install. All that remained was to run the backup camera wiring and connect it to the system underneath the dash.
Installing a Pioneer Backup Camera
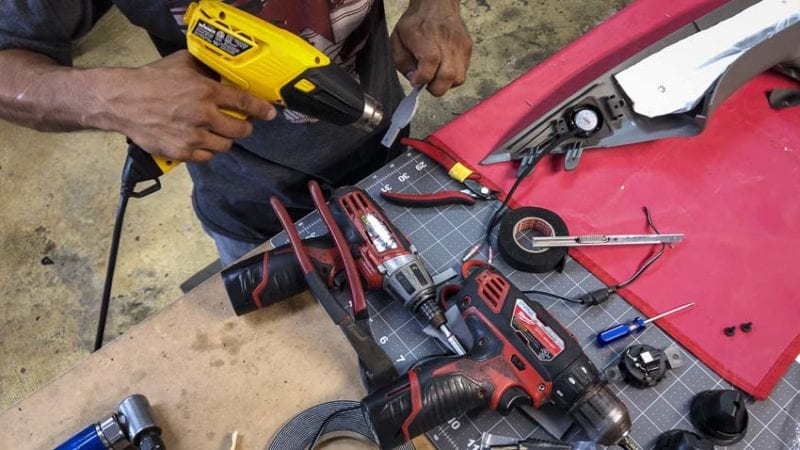
Since my 2015 Ford F-150 XLT slipped in under the cut-off date for mandatory backup cameras, we decided to add one. The Pioneer ND-BC8 fit the bill and integrated easily with the AVIC-W8500NEX. Since the Ford lacked a place to conveniently mount the camera, Five Star Car Stereo made a custom bracket for the license plate.
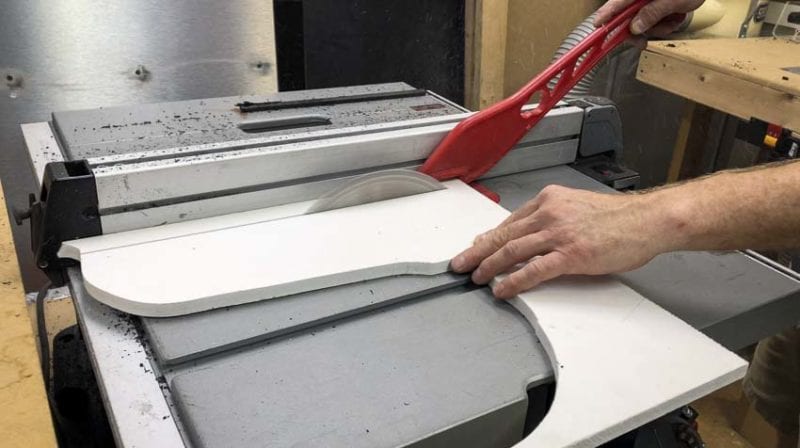
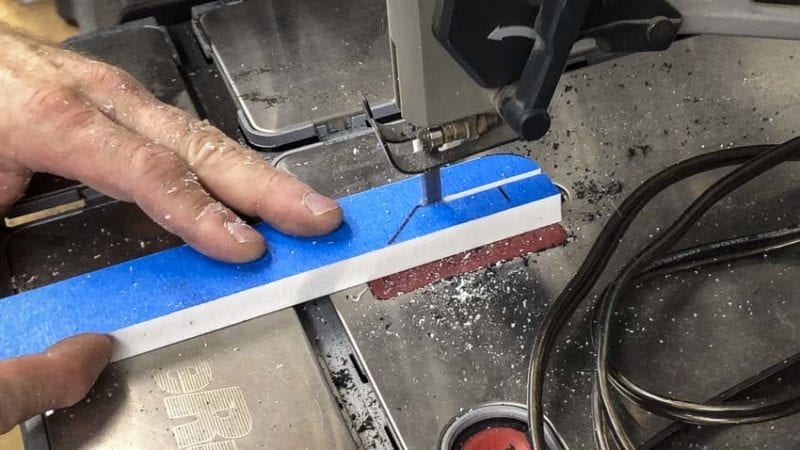
Using a Bosch table saw they ripped a length of plastic and used a Rockwell BladeRunner scroll saw to match the curve of a license plate cover. Finally, a Triton router rounded over the edges for a nice finished look. This custom plastic bracket looked great and gave us a secure place to mount the camera.

Next, they carefully ran the camera wiring alongside the chassis underneath the truck and into the cable trough. Continuing up to the front of the vehicle, it then connected into the AV harness for the Pioneer head unit.
Enjoying the System
The audio system sounded remarkably decent for an almost-OEM rig. I had added a Kicker subwoofer which gave me a lot more bass. Now, we upgraded all of the speakers to Pioneer. Combined with the flagship AVIC-W8500NEX AV receiver, I not only dramatically increased the sound quality of the system, I added features as well.
Before, I was able to use Ford Sync2 and Bluetooth to make and receive calls. Now, Apple CarPlay lets me do everything hands-free and use apps like Google Maps, Amazon Music, and Spotify without even having to take my phone out of my pocket. Everything connects automatically.
As far as upgrading the stereo in a Ford F-150, the best way might involve a custom installer. Whether to take on the aftermarket truck upgrade, replacing that old 4-inch system with a full-fledged AV powerhouse made for the most satisfying result I could have hoped for. You can also go crazy and spend thousands of dollars on higher-quality speakers, DSP processing and calibration, and bigger subs—but for now, I think this has everything I need.
