

We’ve written a lot of articles about drills. We have everything from how to use a drill to what to look for in a Pro level drill. This time we break down the components of this popular tool. This may even help you locate the parts of a drill if you want to make a repair. Plus, knowing the parts of a drill helps you get the most out of it. Hopefully, this article proves helpful for anyone from the DIYer or apprentice to anyone looking to better understand cordless drills.
With that said, if you’re looking for specific parts to fix your drill—that’s not us. However, we might get you in the vicinity to at least know what you’re looking for.
Starting with the Most Expensive Drill Part – the Motor
All those parts of a drill depend on the motor to drive things along smoothly. There are two main types: brushed and brushless motors. Brushless motors cost more to manufacture, but they give you longer life, greater power, and longer runtime. The reason they cost more has to do with how they operate. Without going into too much detail here, brushless moors always integrate electronics circuitry. So you don’t just have a motor—you have an electronics package working alongside it.
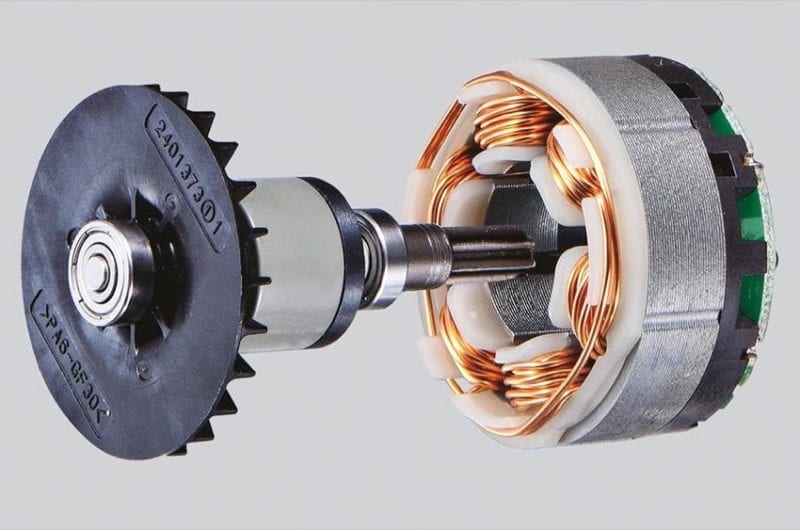
A brushless motor doesn’t inherently make it more powerful than a brushed motor—but you do get more control over the tool.
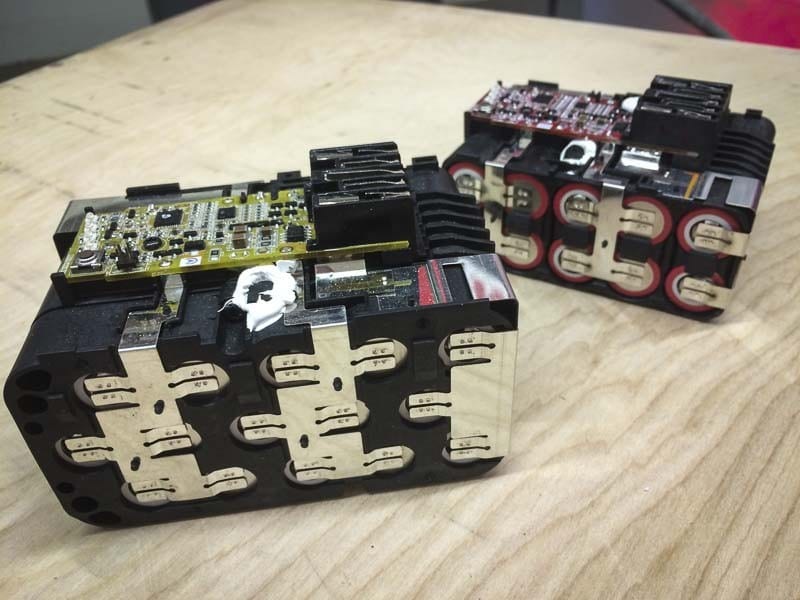
The Most Expensive Parts of a Drill Include the Power Source
Most drills you’ll come across will either be corded (AC) or cordless (DC). Corded drills give you as much runtime as you want while cordless models need to recharge.
Cordless models come in a lot of flavors. Here’s a quick breakdown:
- 4V or 8V – usually for light screwdriving in delicate materials
- 12V – light and compact, these can do as much as 80% of the work most Pros do
- 18V/20V/24V Max – these can be compact or heavy-duty and make up the majority of what Pros use. By the way, 18V vs 20V battery differences are a myth.
- 36V/40V/60V/80V – you won’t see a ton of these, but they’re designed to have more power than 18V or simply provide a solution for higher voltage platforms. You will, however, see are larger rotary hammers which function as big concrete drills.
Battery Chemistry
The cordless world has obsoleted both nickel-metal hydride (NiMH) and nickel-cadmium batteries (NiCad) in power tools. You may still see some NiCad on the shelf—but we never recommend buying these tools. Lithium-ion battery technology gives drills access to more power and longer runtimes. The packs feature higher power densities—so you get more power in less space. They also don’t have that annoying battery memory effect.
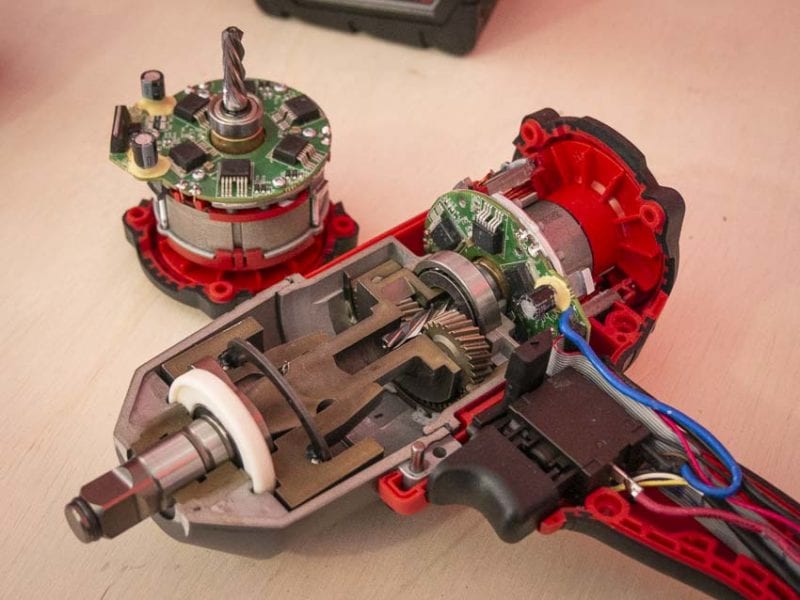
Drill Triggers Includes Complex Electronics Parts
4V/8V tools aside, most cordless drills feature a variable speed trigger. This simply means that, as you pull it, it gives you an increasing amount of speed and power. Combined with brushless motors, these triggers often feature several wire leads that work alongside a controller.
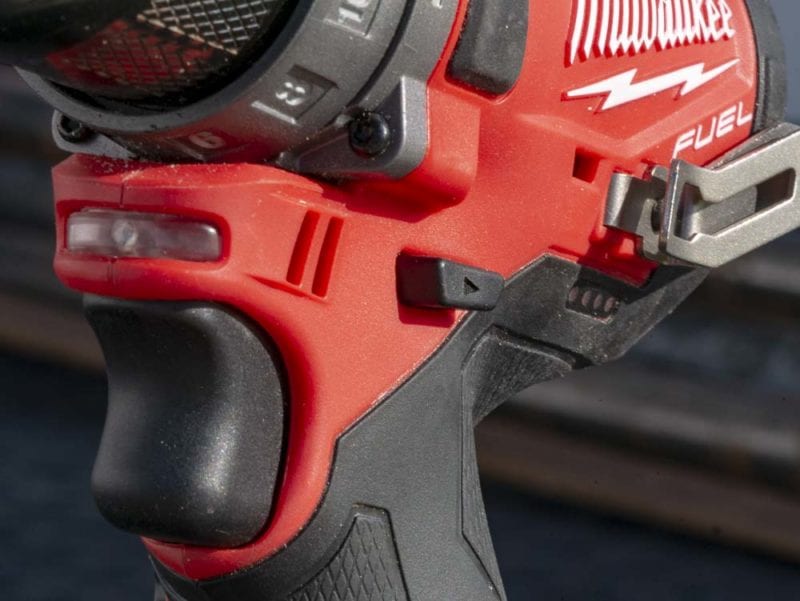
Drilling Direction or Rocker Switch
The rocker switch is what lets you switch the chuck from forward (clockwise rotation) to reverse (counterclockwise). Letting the switch sit in the middle between the two locks it out.
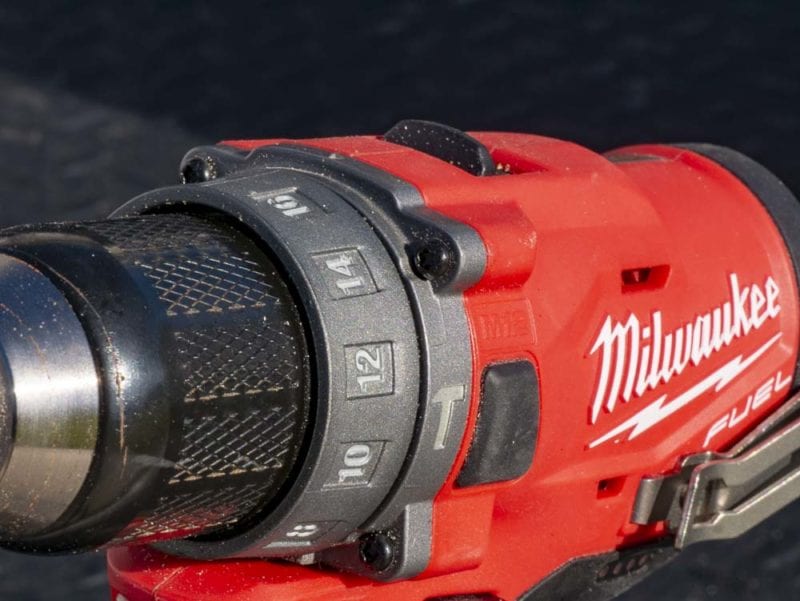
Gear Selection Switch
If your drill can switch gears, you’ll usually find the switch on the top. The relationship between speed and torque on these tools is inverse. At high speed, you have less torque. You get the most torque at low speed. Most of these tools come with a two-speed gearbox, but others have as. many as four.
Some drills even include completely electronic controls that typically sit above the battery. Others take that further with an option to connect to your smartphone or tablet via Bluetooth for tool customization. Check out Milwaukee One-Key technology and DeWalt Tool Connect for more information on that.
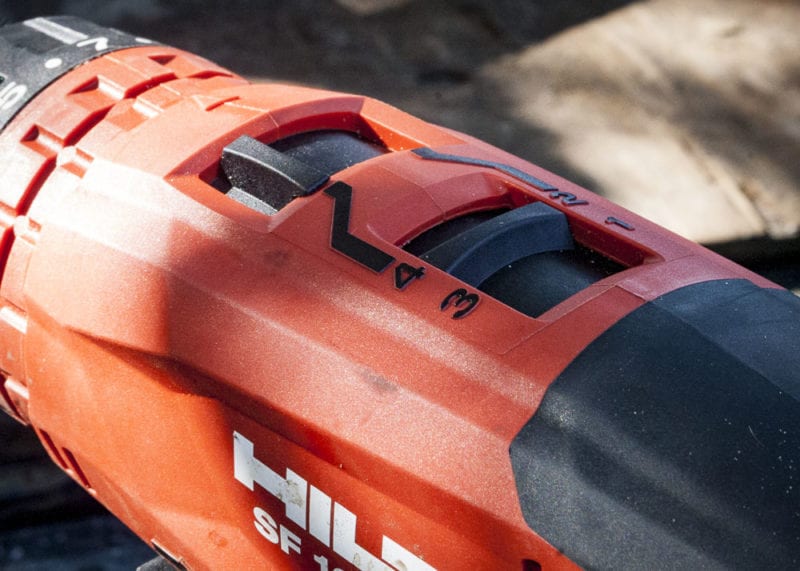
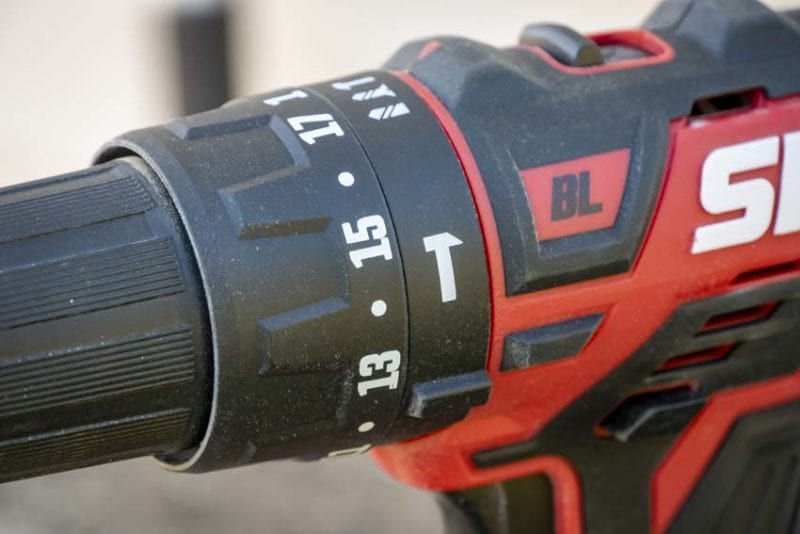
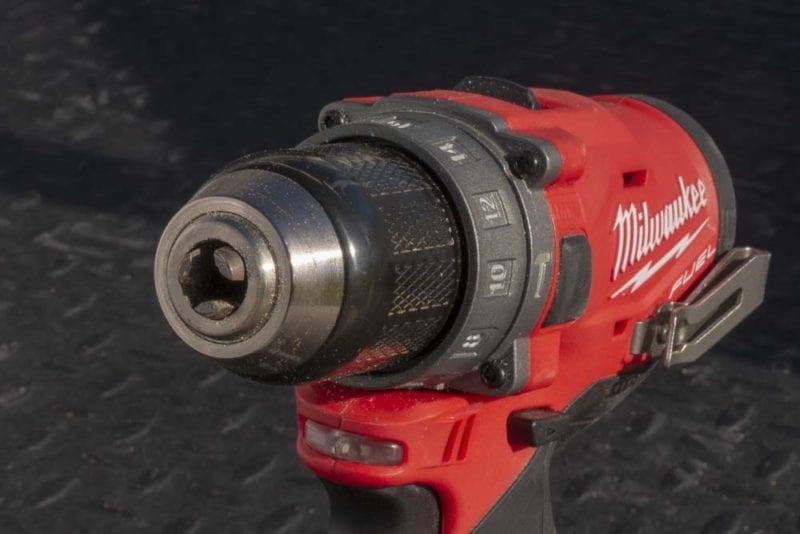
Mode/Clutch Collar
Check out the rotating collar just behind the chuck. This lets you select lower torque settings to activate a clutch. It lets you stop the bit from rotating too aggressively for smaller fasteners. The lower the number, the lower the torque. These numbers don’t represent actual torque values, however. They just mark positions relative to the whole.
Twisting the collar all the way counterclockwise, you’ll typically find a drill icon. This disengages the clutch, giving you access to all of the available torque.
If you have a hammer drill, you’ll see a hammer icon one click further than the drill but icon (in most cases). Some tools place that setting behind the clutch as a separate mechanism.
Cordless Drill Ratcheting andf Non-Ratcheting Chucks
While there are still some keyed chucks running around with larger mixing drills, most are keyless. Simply rotate the chuck at the front of the tool clockwise. This opens it up while turning it counterclockwise closes it. Inside, metal prongs (usually three) extend outward as they close. These grab your bit securely when you tighten down the chuck.
Better keyless chucks have a ratcheting action. When you close it all the way down on the bit, you’ll hear it give you a few clicks of extra tightening to really secure the bit in place. We can’t stress enough how important it is to know how to use a keyless drill chuck.
