
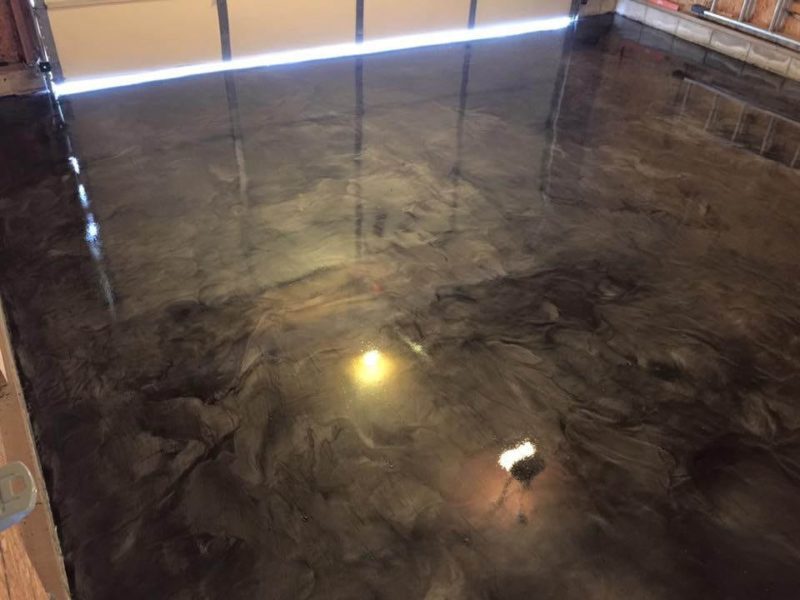
We’re always looking for better ways to serve our customers and grow our businesses. For this reason, it’s a good idea to consider ways you can expand the services and products you offer. A case in point: learning how to install epoxy flooring for garages and workspaces. These handsome floors don’t require a lot of training to install, and they are tough as nails. The durable, shiny epoxy flooring resists scratches, cracks, stains, and chips. The resin and hardener cure into a low porosity surface that’s also easy to clean.
A few years ago, we looked at how to go about painting and sealing garage floors. While there are definite similarities between epoxy paint and an epoxy overlay, we like the true epoxy overlay for its durability and finish. It might be a more expensive solution, but it won’t delaminate under hot tires. Plus, aggregate additives give an epoxy floor good traction without compromising its appearance. For these reasons, we think that adding epoxy flooring installations to your list of available services is a good idea.
Table of Contents
How to Install Epoxy Flooring
Prepare the Surface
Before you install epoxy flooring you need the surface prepared. Be sure to assess the concrete’s condition before quoting. Epoxy is thin, so any surface defect will show through. You’ll need to fix any cracking or spalling before you really get going. Next, pressure wash the floor and let it dry. Remove oil stains as much as you can, either with a bleach mixture or with a cleaner specifically designed for the task. Then, tape the boundaries of the epoxy with painter’s tape along the floor and walls.
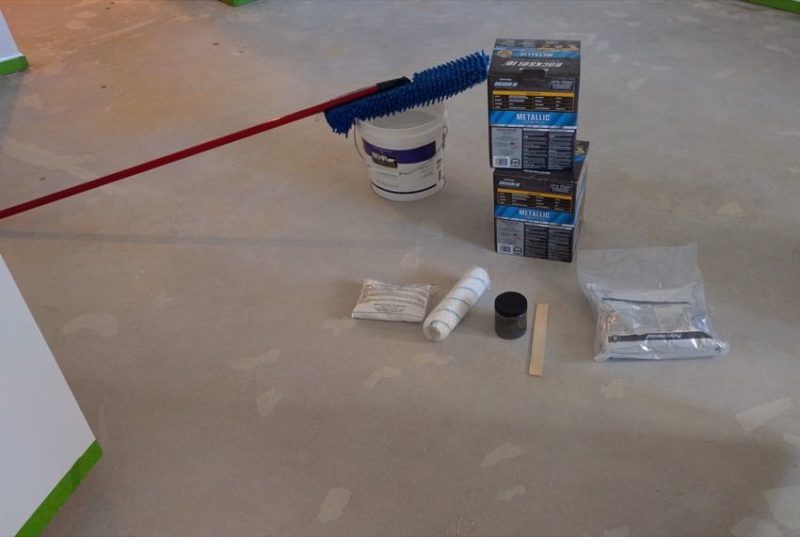
Acid Etch to Roughen the Surface
You’ll need to make the surface rough so the coating for the epoxy flooring strongly adheres. Prepare a solution of two parts muriatic acid (the same kind you use in swimming pools) to one part water and apply with a pump sprayer. Be sure to wear the appropriate safety gear and follow jobsite safety guidelines. The acid shouldn’t come in contact with metal. Consider neutralizing the acid with an ammonia solution. Then wash and let dry.
Apply the Primer Coat
Avoid bubbles in your epoxy floor by applying a primer coat with a roller. Let it dry.
Apply Your First Base Coat
Pour the mixed resin and hardener onto the floor and spread with a serrated or notched squeegee. Be sure to follow the manufacturer’s instructions for applying decorative flakes.
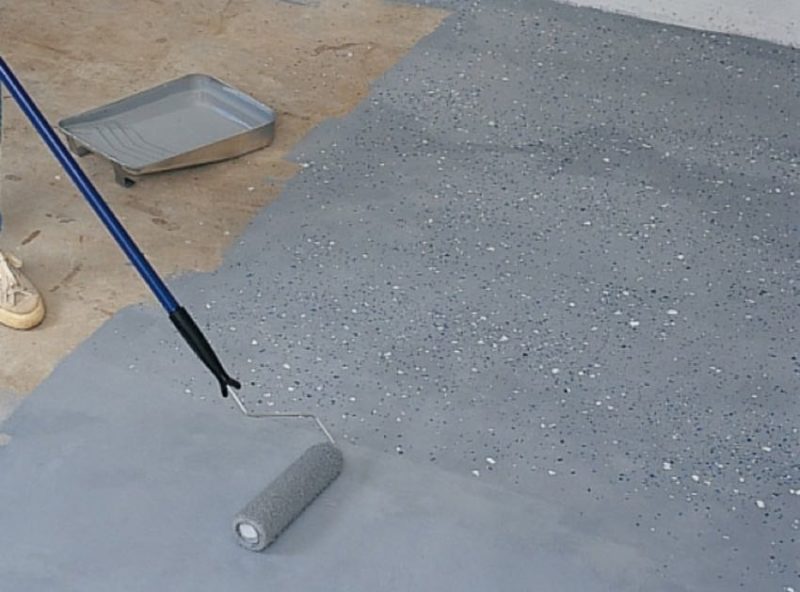
Roll Out the Base Coat
When you install epoxy flooring, a paint roller might be your best friend. Roll the base coat with a roller to ensure even coverage. The serrated or notched squeegee will leave a pretty even layer, but the roller will perfect it. Now, let the floor dry overnight.
If You Didn’t Prime, Get Ready To Buff
If you didn’t prime the floor then you’ll see bubbles when it dries. You’ll need to gently abrade the surface with a buffer and light grit to remove the bubbles. Then sweep and mop the floor and wait for it to dry.
Apply a Second Base Coat of Epoxy
Apply this coat just as you did the first coat. Use the squeegee and then the roller.
Let the Epoxy Flooring Cure
Read the manufacturer’s instructions, but be prepared to let the epoxy flooring cure for about four days after you install it.
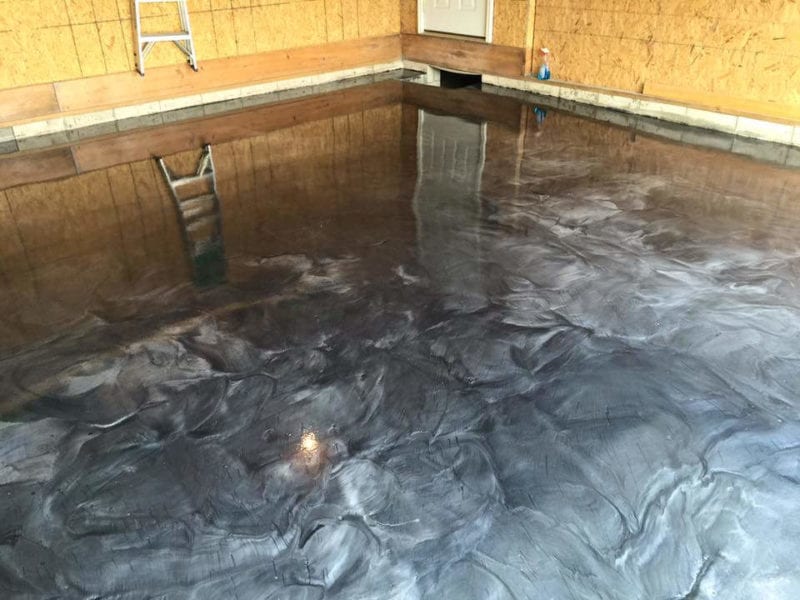
Apply the Top Coat (Sealer)
Use a roller to apply the top coat to seal. The surface should really pop.
When you install epoxy flooring, you add a great product and service to your arsenal. It sounds like a time-consuming process—and it can be—but the results are worth it!
