
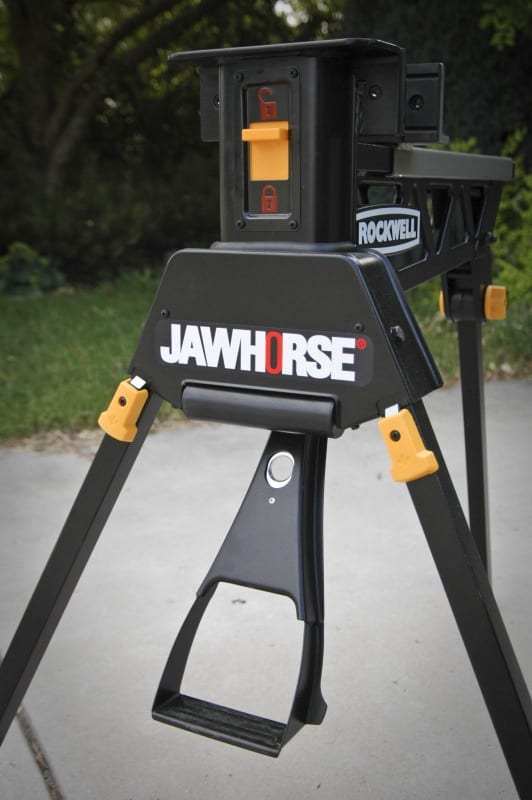
By now everyone has seen the infomercials for the Rockwell JawHorse and either has one or wonders if they need one. But in case you haven’t seen it, let me describe the JawHorse. It’s basically a vise mounted to a stair-stepper machine. You might also consider it half of an exercise bike with clamps for handlebars. Rockwell seems to have difficulty explaining it, generically referring to the JawHorse as a “hands-free portable work station”. That’s no help either. So is it the best sawhorse? If not, who makes the best sawhorse? That was the challenge.
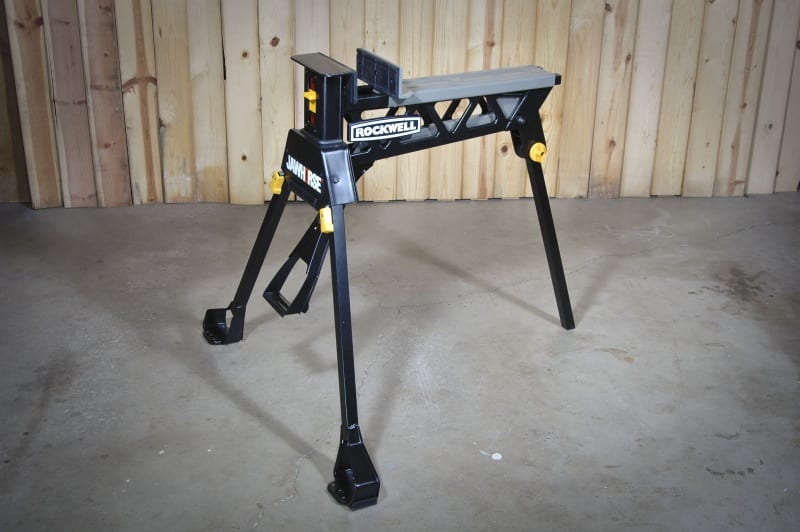
It’s difficult to describe if you haven’t seen one. The tool’s sturdy three-legged base sits long and low like a sawhorse. It has a strong foot-operated vise at one end. I suppose you could call the JawHorse and similar tools work-holding sawhorses.
Rockwell Jawhorse Key Features
The Rockwell Jawhorse was built to be a jack-of-all-trades. It will support heavy loads of up to 600 pounds. It can also tenaciously grip objects in its vise with up to 2,200 pounds of force. Its sturdy steel construction can really withstand rough duty tasks—both indoors and out. It’s this century’s answer to the venerable Black and Decker Workmate. That was more of a worktable with a light-duty clamping top, and quite dainty by comparison.
I’ve put all the Rockwell JawHorse models through their paces in the last several years—some longer than others. From both standard models to the super-sized Sheetmaster and even the bench-mounted BenchJaws, I’ve ridden ‘em hard and put ‘em away wet (more accurately, I left them out in the rain) with nary a complaint. And none of the horses are any closer to being put out to pasture despite their tough lives.
Rockwell JawHorse and JawHorse Sheetmaster
To find the best sawhorse you need to go back and look at earlier models. The original Jawhorse model RK9000 of infomercial fame and the newer RK9003 are nearly identical. The paint scheme differs as well as a few minor feature changes. This includes different locking latches on the legs and the addition of small screws to better secure the soft jaw faces. At their widest points (on the ground) these units measure 39 inches wide and 39-1/2 inches long. They weigh a little over 40 pounds. The clamping range is from 0 to 18 inches in standard configuration. With the jaw reversed, they go from 18-1/4 to 37 inches.
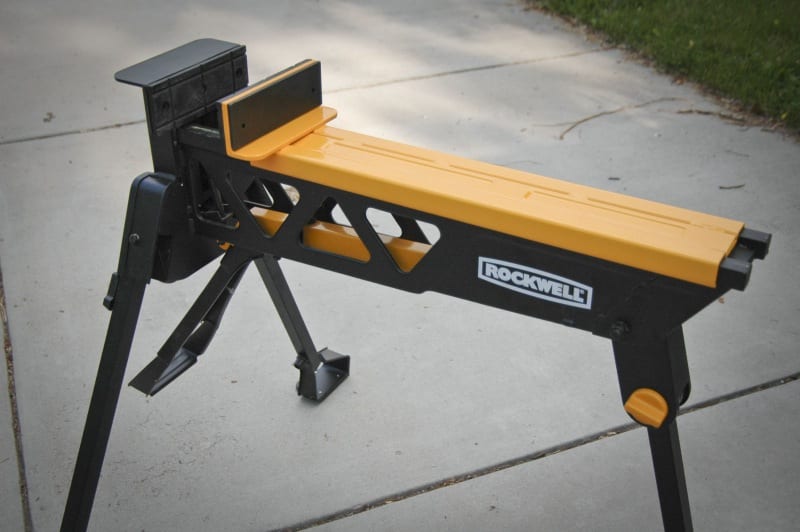
The Rockwell Jawhorse Sheetmaster is a plus-sized model designed to be able to hold sheet goods across their four-foot width. While largely the same as the original, upgrades include replacing the JawHorses’ single roller with two inline skate wheels. Rockwell also gave the rear leg a full-featured foot like that of the front legs. The unit measures 38-1/4 inches wide by 42-1/4 inches long and is said to weigh 53 pounds. The clamping range with the jaw set forward is from 0 to 24 inches and from 24-3/8 to 49-5/8 inches when reversed.
Rockwell BenchJaws Option
BenchJaws are a little different but a lot easier to define. It looks like a vise, and it mounts on the corner of a bench like a vise. Let’s just call it a vise. The only thing different is that it is tightened “by foot” like the Rockwell Jawhorse models instead of by hand. Its jaws have a clamping range of 0 to 8 inches with the jaw set forward and 8-1/4 to 16-7/8 inches with the jaw reversed.
The BenchJaws come with an L-shaped mounting bracket. This lets you mount it in two different positions at a 90-degree angle from each other. It functions similarly to the action of vises with swivel bases. To change its position or to remove it from the benchtop whenever you need more work space, the BenchJaws don’t require any tools. Its single locking knob can be removed quickly by hand.
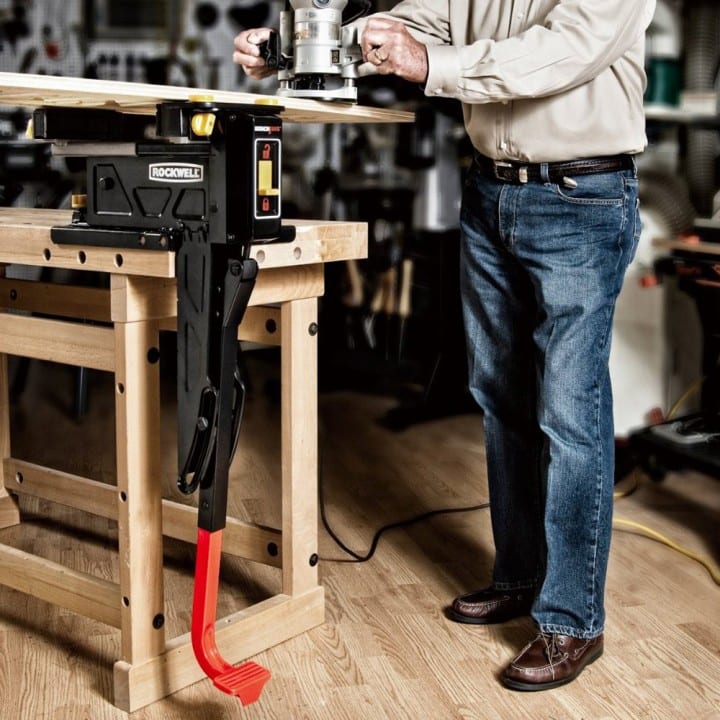
Using the Rockwell Jawhorse with a Bench
Because the mounting bracket sticks up above the benchtop even with the vise removed, I couldn’t install it on my main bench where large, flat materials often overhang the edge. But I found a perfect spot for it on a short, heavy-duty bench already fitted with a mechanic’s vise. Like the existing vise, the bulk of the Bench Jaws puts its working height at least 6 inches above the surface it’s mounted to.
With my 30-inch tall bench, I ran into an unexpected problem. The adjustable length foot pedal of the BenchJaws was too long—even at its shortest setting. To keep it from hitting the floor mid-stroke, I had to saw a few inches off the top of the pedal leg and drill a new mounting hole. This, of course, kept the leg from extending as far as it was designed to go. If I ever mount the vise on a taller bench, I just have to raise the leg higher to operate the foot pedal.
Sawhorse and JawHorse Accessories
A wide variety of add-ons are available for the Rockwell Jawhorse products. A few of them really expand the capabilities of the tools.
The log jaws are number one on my list. These tall, toothy jaws are just the thing for providing a firm bite into logs and poles. They’re also the best option for holding nearly all other construction lumber. You can apply enough force to the end of a 4-foot long 2x to slide the lumber up and out of the rubber padded jaws. That same board won’t even budge when held by the aggressive log jaws. Just keep those teeth away from siding and trim!
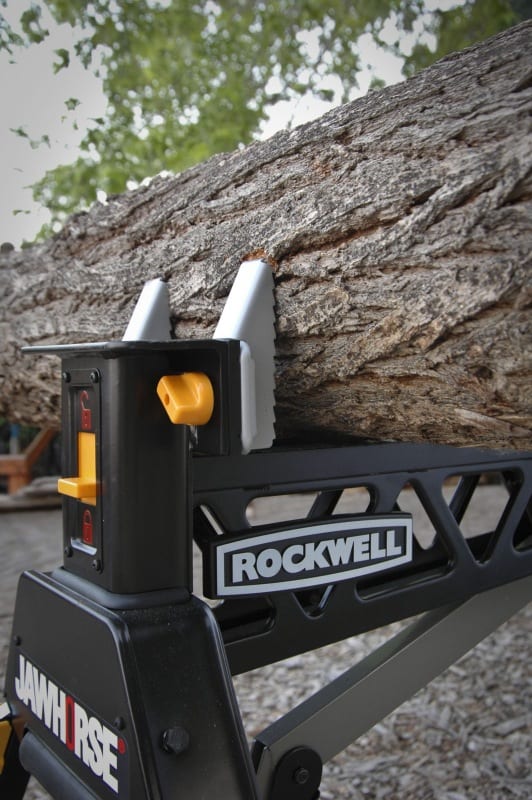
As a bonus, the Rockwell Jawhorse log jaws have padded inner jaws that flip out to hold a chain saw by its bar for sharpening and other maintenance chores. If you sharpen your own chains, having a quick and easy way to hold your saw steady is extremely handy.
Long Extension Jaws
The long extension jaws for the standard JawHorse are also worthy of consideration for working with sheet goods. These jaws, whether the folding or the older rigid kind increase the clamping range of the JawHorse to around 51 inches and allow it to tackle jobs for which the Sheetmaster was designed. It won’t be quite as stable, however, because a significant portion of the extra-wide load hangs beyond the rear support leg of a standard JawHorse. The greater length and mass of the upsized Sheetmaster make it sturdier for this application.
Rockwell Jawhorse Clamping Bracket
The extensions and the Rockwell Jawhorse Sheetmaster come with a clamping bracket. It’s devised to make temporary legs out of 2x material for providing extra support for long sheet goods. But since the makeshift leg has to be clamped to the JawHorse and/or to the sheet you are cutting to keep the leg from falling over, I find it much easier to supplement support whenever needed with a low-tech sawhorse.
Other JawHorse accessories include a welding jaw face and clamp setup, a saddlebag, and a plastic tray for holding tools.
Accessories for the BenchJaws are limited to an extension jaw that increases the tool’s reach to 24-3/8 inches and a pivoting jaw for holding tapered or irregularly shaped materials.
How the Best Sawhorse Should Work
All of the models have a clamping mechanism with four steel teeth. These lift up and engage slots in the bottom of the movable rear jaw when the foot pedal is depressed. There is a rod attached to the pedal arm. As the teeth engage, they push the jaw forward 15/16-inch with every full stroke of the pedal.
By using your leg and your body’s weight, not only can you apply a lot of force efficiently, but you can do it with both hands free to position your work while clamping. The owner’s manual cautions against using more than 220 pounds of force on the pedal. It’s difficult to meter the force delivered by your leg. I’ve had to jump on the pedal before to release the clamping force. Even so, I’ve never worried about bending or breaking the rugged steel components.
Advancing the Movable Jaw
There are two ways to advance the movable jaw. When it’s not locked in or being moved by the foot pedal, it can be slid forward and back freely by hand. If neither hand is free, you can also advance the jaw with repeated pedal strokes. Once the jaw is firmly against your material, sliding the locking latch down will hold the jaw’s position. To tighten even more you can press the foot pedal down again without having to move the latch. To release the clamping force, slide the latch up to the unlocked position and step on the pedal again.
As sawhorses, a pair of Rockwell Jawhorses will work to hold long items. That’s usually overkill since you only need to lock down one of them to immobilize most workpieces. Instead, it’s easier and much cheaper to substitute a wooden sawhorse of the same height. That serves as a handy partner for your Rockwell Jawhorse.
Using the BenchJaws
In using the BenchJaws, I can say that it beats other bench-mounted vises for jobs that need frequent repositioning. This is because the clamping pedal action is so fast to release and retighten. It has one major benefit over the freestanding JawHorses. Being attached to the solid mass of a bench makes it better suited for forceful work that can slide or tip the three-legged models.
These two attributes have made the BenchJaws my new vise of choice for drawknife, spokeshave, and scraper work when shaping legs and handles. In addition, the ability to mount the vise parallel to or perpendicular to a bench reduces the likelihood of running into a wall with long workpieces.
The optional pivoting jaws provide an excellent contoured grip on the rounded and tapered pieces of wood I often work with. I do have to say, the regular jaws never slipped during my work either. They might be all you need with this tool.
Rockwell JawHorse Best Uses
As the infomercial will attest to, there are countless uses for the Rockwell JawHorse, but some are better than others. Here’s a rundown of things the JawHorse can do faster and/or easier than other tools or devices, and some of them even let you replace a helper.
- Holding doors on edge for planing, mortising hinges, or working on the lockset. Place the long edge of the door on some scrap lumber on the floor and clamp the end of the door in one side of the padded jaws. For planing you will have to elevate the edge of the door above the top of the jaws.
- Holding a T-brace at the right height for supporting ceiling drywall, cabinets, or even temporary outfeed tables in the shop.
- Holding fence and other posts plumb and at the desired height when backfilling the post hole with gravel or concrete.
- Cutting firewood from a long log or limb. Clamp it in the center and cut one or two pieces from each side at a time to keep it balanced.
- Making a quick and sturdy miter saw stand or work table by screwing a 2x spline down the center of a scrap of sturdy plywood and securing it in the clamping jaws. You’ll get the best grip by using a 2×3 on edge for the spline as it provides the maximum surface area against the jaws without bottoming out against the frame.
- For the most stable use, or for setting up a JawHorse in one place in the shop, bolt the feet to a thick piece of plywood wide enough to stand on while you are working, or bolt it to your shop floor. This is the best way to keep the unit from sliding around, rocking, or tipping over during heavy use.
Rockwell Jawhorse Teardown Tips
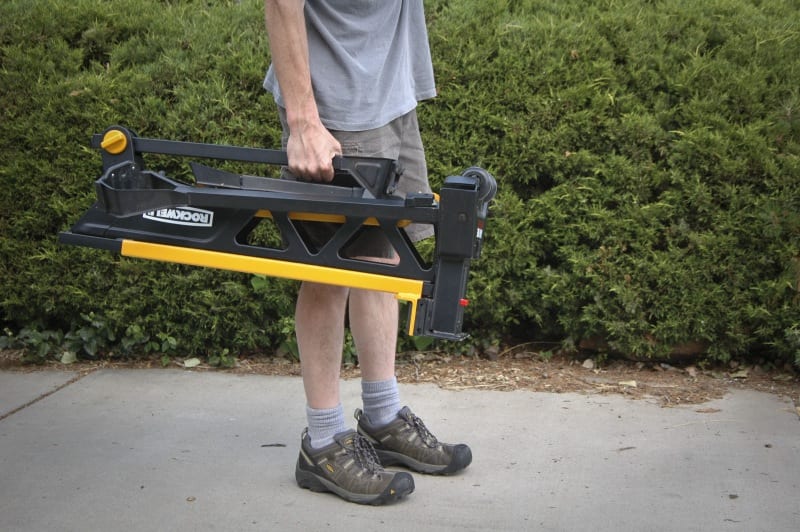
I tend to leave my JawHorses set up in my shop spaces and outdoors so they are easy to put into action when needed. The units do, however, fold down nicely for storage and transport. This works well for those who prefer not to live surrounded by tools. The teardown is as easy as 1,2,3. 1.) Release the front legs latches and fold them back. 2.) Release the foot pedal latch and fold it back. 3.) Loosen the rear leg knob, slide it down a few inches, fold it back, slide the leg into its mechanically locked position and tighten the leg knob.
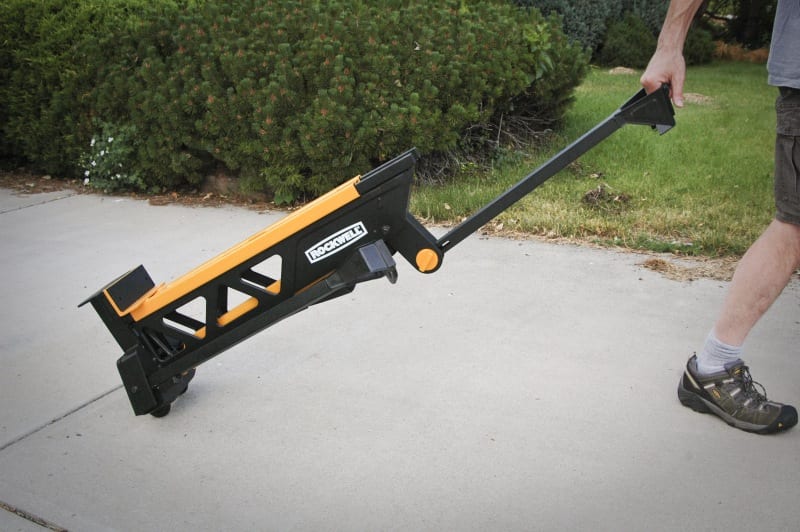
With the rear leg locked in place, it acts as a well-balanced handle for carrying the tool. The rear leg can also be locked in a forward position. This lets you use it as a handle to roll the units smoothly across the ground on their small wheels. To me, this has always seemed like more trouble than it’s worth.
With the tool folded up, it stands steadily on its front end and requires very little floor space.
Wish List
As capable and reliable as these tools are, I found something more to ask for. On the log jaws, there should be two mounting holes (or an elongated slot) on the rear jaw. You would let you attach and use it on the movable jaw in its wider reversed position. It would provide a better hold on chunky workpieces up to about 34 inches long. It would also allow their bulk to sit on the steel frame of the JawHorse instead of overhanging to the right and left perpendicular to the frame.
Holding a heavy load or applying a lot of force to a workpiece that is positioned inline with the JawHorse frame is more secure and less likely to tip than a side-cantilevered load in my experience. I modified one of my units to work this way years ago and it has proven very useful.
The Many Faces of the JawHorse
The Triton SuperJaws tool was a predecessor to the JawHorse. With the first model developed in 1991 and brought to the US in 2001, it stood alone in this unique market for many years before the Rockwell products came along. My first work-holding sawhorse was a Triton. It still sits out by the log pile, sun-faded and dusty but ready for any chore I throw at it.
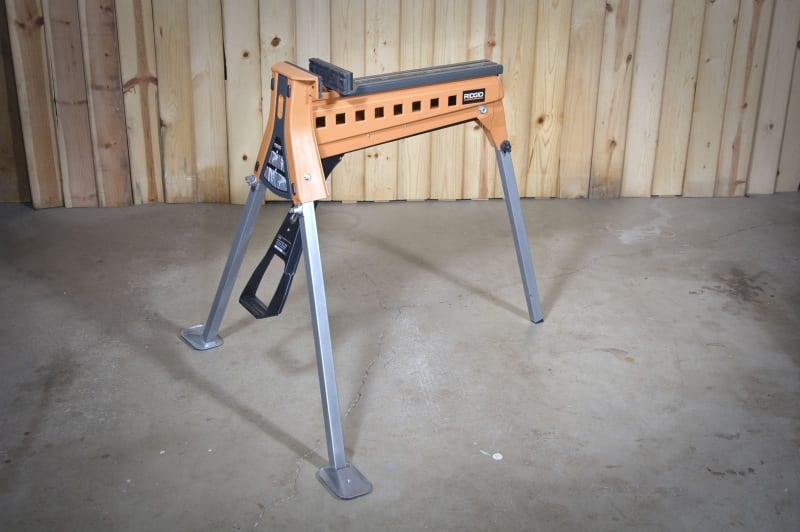
The second-generation SuperJaws SJA200 has also been sold as the Ridgid SuperClamp AC9955 at The Home Depot. Both models are being discontinued in the US, but they remain available in Canada and on the Internet. If you run across a deal on either version of this tool (or if it returns to the US market), I recommend it as a great tool with functionality and performance on par with the JawHorse.
It may get harder to find accessories as time goes by, however. Speaking of accessories, Triton has very nice log jaws for the SuperJaws and SuperClamp. You will, however, need to replace the flimsy attachment hardware with stronger grade 5 or grade 8 bolts and nuts to use them as intended.
The Bottom Line
I am very pleased with all three units. I can honestly say that I wouldn’t want to do without a JawHorse (or some other work-holding sawhorse) in my shop and woodlot. In the seven or so years that I have been using these tools, I have come to rely on them for all sorts of uses. They’ve certainly stood in for a helper countless times in my solo work.
If I had to pick just one, it would be the standard JawHorse fitted with the optional log jaws. With one of those, I’d be riding tall in the saddle because I’d be able to do at least 90% of what I rely on these tools for.
Specifications
Model: RK9000 JawHorse
- Clamping force: > 1 ton
- Max load: 600 lbs.
- Clamping range: 0-37 in.
- Clamp travel: 1 in. per step
- Clamp method: Foot pedal lever
- Construction: Solid steel
- Weight: 43 lbs.
- Price: $150
Model: RK9003 JawHorse (2nd Gen)
- Clamping force: > 1 ton
- Max load: 600 lbs.
- Clamping range: 0-37 in.
- Clamp travel: 1 in. per step
- Clamp method: Foot pedal lever
- Construction: Solid steel
- Weight: 47.5 lbs.
- Price: $148
Model: RK9002 JawHorse Sheetmaster
- Clamping force: > 1 ton
- Max load: 600 lbs.
- Clamping range: 0-49 in.
- Clamp method: Foot pedal lever
- Construction: Solid steel
- Wheels: Urethane
- Weight: 53 lbs.
- Price: $200
Accessories
- RK9101 JawHorse Log Jaws $37
- RK9100 JawHorse Welding Station $70
- RK9206 JawHorse Folding Plywood Jaw $58
- RK9102 JawHorse Saddle Bag $20
- RK9205 JawHorse Tool Tray $20
Model: RK9006 BenchJaws
- Clamping force: 2200 lbs.
- Max load: 220 lbs.
- Clamping range: 0-16 in.
- Clamp travel: 3/8 in. per step
- Foot pedal lever
- Construction: Solid steel
- Weight: 22 lbs.
- Price: $130
Accessories
- RW9207 BenchJaws Extension Jaw $38
- RW9208 BenchJaws Pivoting Jaws $36
