
We know the scenario all too well: the exterior door is fine, but the lower parts of the jamb are rotted and falling apart. Once the rot is discovered, the wood is often too far gone, and sometimes the easiest solution is to put in a new pre-hung door. With an EverMark replacement EverJamb, there is now a reasonable solution to repairing the jamb without replacing the door.
The Case for the Ever Jamb
The trouble with exterior door jambs is that most of the time, they are made of wood, even when you have a fiberglass or steel entry door. Not that wood is rotten, but wood is prone to rot. So now, a few years go by, and one day you look down at what was an expensive door unit, and you can put your finger through the paint and through the wood at the base of the jamb. You are not alone, my friend, as this plague will eventually hit nearly every exterior entry door with a wood jamb.
So the next obvious question is, what do you do? Of course, the easiest solution is to just replace the entire door with a new pre-hung door, and of course, the chances are that even if you get an awesome door, that new door jamb will still be made of wood. Another solution is to get some filler, chip out the rotted material, and paste it full of the putty, hoping that no one will notice the cob-job of a fix. Or you can replace just the door jamb.
Testing Out the EverMark Ever Jam
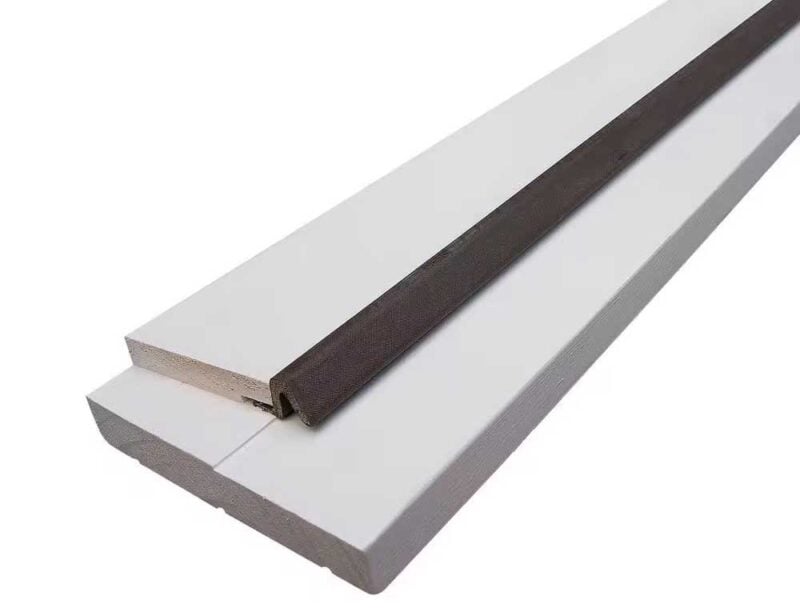
For this project, we decided to replace just the door jamb with a product made by EverMark called the EverJamb. The EverJamb is designed as a replacement jamb for both left- and right-handed, in-and-out-swing exterior doors. The jamb comes complete with weather stripping, detailed installation instructions, and is pre-primed. What makes the Patented EverJamb different then all the other wood replacement door jamb is that the bottom portion of the jamb is made of PVC. PVC will not rot or wick water, but in most other aspects, it works like wood. Exterior grade adhesives bond the wood and dowels, pins, and the PVC work together to give the jamb excellent structural integrity and longevity.
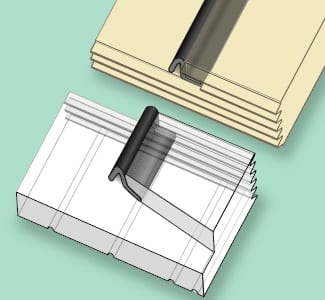
The reason that the PVC portion at the base of the EverJamb is critical is that most wood door jamb failure is shown to be caused by the wood wicking moisture from the bottom. This is the main reason that normally only the bottom portion of the door jambs rot away. With the PVC block in place, this “moisture sucking” is stopped and the integrity of the wood is maintained. Now, I am sure you are asking, since PVC is so great, why not make the whole blasted jamb out of PVC? That is a good question, and the reason is that PVC is not a structural material.
Installing the New Jamb
A heavy exterior door can not be hung off the PVC because the screws would pull out of it, also PVC in various temperature conditions can change properties. For example, in extreme cold, it can be brittle. I can just see it now: it is zero degrees outside, and you’re angry at your dog for the mess on the floor, so you send the dog outside to finish his business, and you slam the door after him. Suddenly, there is a crack like splitting wood, and the door literally falls out of the jamb and slams on the floor.
What happened was that the PVC got brittle from the cold, and the shock of the slamming door caused it to shatter. Trust me, you want your jambs made out of wood, just make sure you keep them painted up and you will not have anything to worry about, especially if you have an EverMark EverJamb.
The installation of the EverJamb was pretty straightforward. A good basic knowledge of some common power tools is a bonus in this project. What we did first was remove the door off the hinges and take the trim down from around the door jamb. Next, we disassembled the old door jamb the best we could. The EverMark EverJamb is designed for up to a 36″ door and can be cut down to function with other smaller-sized door openings.
Follow the Instructions
The particular door we were working with happened to be a 36″ right-handed out swing. Using the removed sections of the jamb, we compared them to the new jamb sections and proceeded to trim the new jambs to match the existing. The bottoms of the jambs were already cut at the proper angle to match up the existing aluminum threshold, which must be reused since it does not come with the kit. Also, using the existing jam as a pattern, we marked the hinge locations and the strike plate locations. Using a router, we carefully mortised the hinges.
Following the directions, we assembled the jamb, placed it in the doorway, and used some shims to plumb up the hinge side of the door. Using some 3″ wood screws we secured the jamb into the opening and then hung the door in the jamb using new hinges. After checking the alignment of the top and the strike side of the jamb, we used some shims and 3″ wood screws to finish securing the rest of the jamb in place. We drilled the holes and mounted the strike plates once we verified the strike latch and deadbolt locations.
Trimming out the door was done using the existing trim that we had carefully removed earlier. Of course, new trim could have been utilized too. After trimming out the door, we caulked the edges of the jamb to the threshold and the trim inside and outside to make sure we sealed out the possibility of water intrusion from the outside. Our final step was to paint all the pre-primed surfaces with two good coats of exterior latex paint.
Conclusion
While this is not necessarily an easy task, any well-equipped homeowner or handyman should be able to tackle this kind of repair. This is a fantastic solution for the budget-minded customer since we only paid about $40 for the EverJamb kit, which equals hundreds of dollars in savings versus a new pre-hung door. We give this product high marks for value because of the potential cost savings and quality.
