
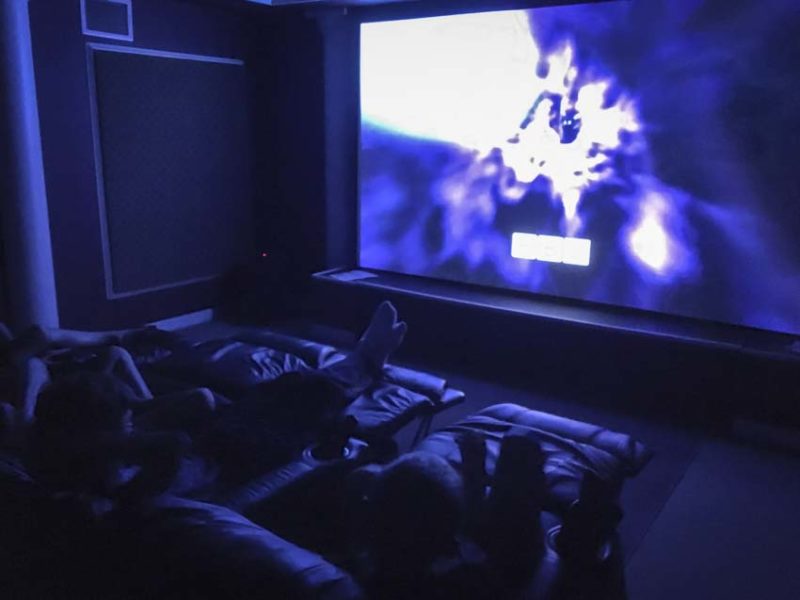
Anyone who knows me knows that I’m a home theater buff. It’s in my blood, but I also used to review home theater speakers, receivers, and other A/V products for a living. In the past, I built home theaters for myself and others with only minimal tools. Now that I own and operate Pro Tool Reviews, I have access to the tools that make building a home theater a much simpler proposition. This article will give you a checklist on how to build a home theater with hidden speakers. If you’re going to do it, I think you should do it right—and that means putting your speakers behind the projector screen.
Table of Contents
- Shopping List (Updated/Recommended Components)
- Step 1 – The Room Matters
- Step 2 – Plan the Layout
- Step 3 – Build the Plan (Framing and Insulating)
- Step 4 – Pre-wire Your Gear
- Step 5 – Install Your Speakers
- Step 6 – Install Drywall
- Step 7 – Paint & Carpet
- Step 8 – Hang Your Screen, Trim, and Decorate
- Step 9 – Install Your Seating
- Step 10 – Calibrate and Enjoy!
Shopping List (Updated/Recommended Components)
- Epson Home Cinema 5050UB projector – $2400
- Klipsch R-5502 II In-Wall Speakers – $190 ea.
- SVS SB-1000 Pro Sealed Subwoofer – $599 each
- Denon AVR-X3800H 9.2 Ch Receiver – $1300
- Playstation 5 (PS5) – $499
- Amazon Fire TV Stick 4K Max – $40
- Elite Screens Aeon AUHD perforated 135″ projector screen – $979
- GearIT 14/2 Speaker Wire (100 Feet) – $30
- Rock Wool batting – ~$1/sq. ft.
- Sofabaton X1 universal remote control – $190
Step 1 – The Room Matters
Before you can do anything, you need to consider the room. If I teach you how to build a home theater, and you think you can do it in a 9 x 9 room with 8-foot ceilings, I haven’t done you much good. It’s not that you can’t enjoy a good movie in a small room, but I would never suggest spending excessive money where it’s not needed.
If your room is closed off from the rest of the house—excellent. If not, then set the “boundaries” for the home theater space. A dedicated room always works best, but you can certainly design a home theater around a shared space. Having a dedicated room with a door allows you to pressurize the room with a subwoofer (like one or two SVS SB-1000 Pro Sealed Subwoofers) and get better overall sound by not having to deal with objects and architectural features not related to the home theater. Building a home theater with hidden speakers also entails leaving some room behind the screen which eats into your space.
Step 2 – Plan the Layout
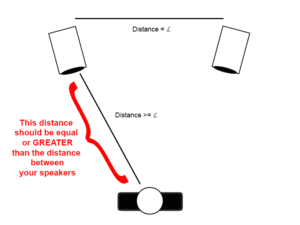
Once you know your room and your space, begin planning your layout. This includes deciding how to run your speaker wire, HDMI, lighting, and network cables to ensure everything you need gets placed correctly. For tips on setting your speaker positions, check out an article I wrote over at AV Gadgets titled Speaker Placement Guidelines and Tips.
We recommend planning for some in-ceiling speakers if you have 9-foot or higher ceilings. That will let you conform to the newest Dolby Atmos surround format. You also want to run a couple of HDMI cables from your AV rack to your projector—if only as a backup. HDMI is notoriously unreliable over the long haul. Always use high-quality cables that are spec’d for the highest speed and maximum resolution available (currently “high speed” with 4K and HDR support). Formats will change and grow, and you don’t want to put in all this time and energy and get stuck in the past a few scant years from now.
This happened to a lot of people who put in the original HDMI cables that don’t support 4K resolution. Don’t let that happen to you. The good news is that HDMI will cover just about everything, so there’s really no need to run component video, Toslink optical, or even analog audio cables from your AV equipment to your projector.
Don’t Forget the Gear!
Of course, planning the layout also means planning your gear. Opinions vary widely on how much you’ll spend and which brands you go with. We opted for an Epson Pro Cinema 4040 projector and RBH Sound SI-760/R In-wall speakers. As those are difficult to procure, we also recommend Klipsch R-5502 II In-Wall Speakers. For the “brain”, we chose the Denon AVR-X3800H 9.2 Ch Receiver. It has enough amps to drive our 7.2 system with room to expand into Dolby Atmos down the road (we may, however, find that we don’t really need Atmos). For Blu-ray, we replaced an older Oppo player with a Playstation 5 (PS5). We also have an Xbox One and an Amazon Fire TV Stick 4K Max for streaming media.
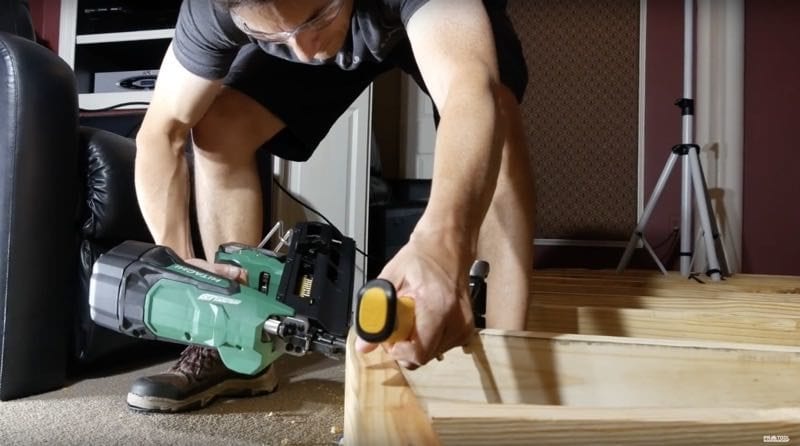
Step 3 – Build the Plan (Framing and Insulating)
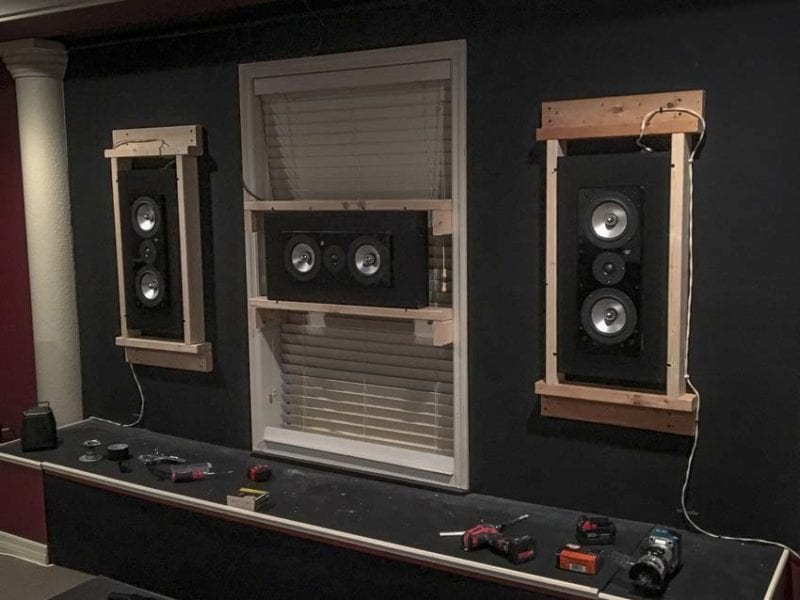
Once you decide on a 5.1 or 7.1 system, you can frame in your design or install your speakers in the wall. Since we built our home theater in an existing dedicated upper room, we actually built a separate structure to hang our speakers. This allowed us to mount them behind an Elite Screens Aeon AUHD perforated 135″ projector screen. This is, in my opinion, where speakers belong, by the way—behind the screen. This is how movie theaters do it, and it provides the best listening experience with the biggest possible viewing area. Consider our room—we have a full 7.2 system with two rows of seating out of a 16 x 20 space.
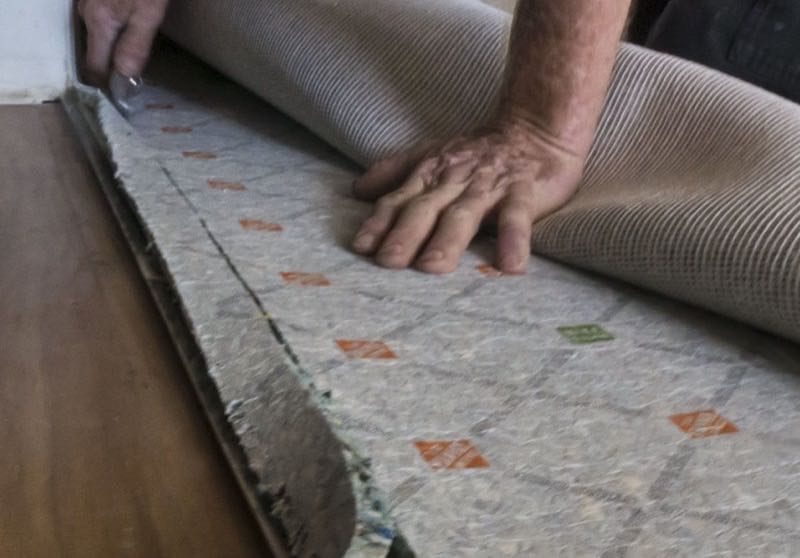
If you’re dealing with an actual framed-out room, this is where you can insulate. While typical home construction insulates only exterior walls, we recommend insulating any interior walls (and floors, if applicable) with Rock Wool batting, Owens Corning 703 (more expensive), or similar. This will provide some noise isolation from the rest of the house. This works in both directions—keeping your home theater noise levels from the rest of the house (and sleeping children!) while also giving you a lower noise floor. That means you get a wider dynamic range—just like a real movie theater.
Step 4 – Pre-wire Your Gear
This is my favorite part when I build a home theater with hidden speakers. I love wiring things together. It’s immensely satisfying knowing that everything is where it needs to be. Get at least 14-gauge speaker wire for your mains and surrounds, and be sure you don’t forget to plan for a remote control system. Since Logitech Harmony is now defunct, we recommend the Sofabaton X1 universal remote control.
If you want to run anything with IR, place a receiver at the front of the room. If you’re using a control system, then just make sure you’ve accounted for everything that needs to be connected to your home’s network.
Here’s a quick checklist:
- Projector gets HDMI from your AV receiver
- AV receiver receives HDMI from AppleTV, Kindle FireTV, Blu-ray, PS4/XBox One, etc
- Run at least one dedicated power line with 20A breaker for your AV equipment (check your AV equipment’s potential power draw to know exactly what you need). Subwoofers with amps may require another circuit depending on your equipment
- Speaker cable (12 ga) from AV receiver to mains, center, surrounds, surround backs, and overhead Atmos speakers
- Line level cable to your subwoofer(s) – We always recommend using two subs for best results
- Ethernet for your AV receiver, cable box, gaming systems, and other equipment
- RG6 cable (Solid copper 3GHz) for DISH Network Hopper or other service providers
Step 5 – Install Your Speakers
If your room can handle it, your plan could include a 7.2.2 system. That means you’d have left, center, right, surrounds, surround backs, two subwoofers, and two Dolby Atmos ceiling speakers. If you have a smaller room, however, a 5.1 setup is still fantastic.
Next, you want to install and wire up your speakers. For some, this will mean mounting speakers to walls or placing them at the front of the room. If that’s the case, you’ll be waiting until after the drywall is installed and the room is painted. For a true build-out, however, this means installing in-wall and in-ceiling speakers. Again, the best installation method will have your left, center, and right speakers mounted behind a perforated screen.
Why Build a Home Theater with Hidden Speakers?
Many loudspeaker manufacturers make some great self-standing products. In-wall speakers, however, can go behind a perforated projector screen. When you do this, those speakers allow for a larger screen, project the sound directly from the action, and give you a more theater-like experience. It also has the added result of making your room look more like a well-planned theater as opposed to a standard room into which you happened to put some speakers.
Step 6 – Install Drywall
Drywall doesn’t excite us, but I truly respect those skilled at the trade. If that’s not you, feel free to hire this out—you’ll thank me later. This step really seals up the walls, so make certain everything gets installed and runs properly before finalizing the drywall. After this, you can move on to a very fun step.
Step 7 – Paint & Carpet
Woohoo! This is where you get to truly design the look and feel of the room. Hopefully, you already settled on colors and materials before you started, but if not, this is your last chance to change it up. Paint the ceiling flat black if it’s a dedicated home theater room, and make sure to paint the walls a dark, flat color as well. The goal of any theater room is to ensure the least amount of light reflection. You want the projector screen to be your only source of light—not every other surface of your room reflecting light back to the seats.
Step 8 – Hang Your Screen, Trim, and Decorate
Columns, baseboard trim, and everything else come next. This is where you add those finishing touches to the room itself—while it’s still relatively empty. The big deal, however, is your screen. We went with an Elite Screens Aeon AUHD 135″ perforated screen. The Elite Screens Aeon AcousticPro UHD uses an acoustically transparent (AT) Ultra-Hi Def fixed frame projection screen. The screen material lets sound pass through the material without changing it. This makes for a key attribute when you build a home theater with hidden speakers. The tightly woven material passes sound without sacrificing picture quality—even when using a 4K projector.
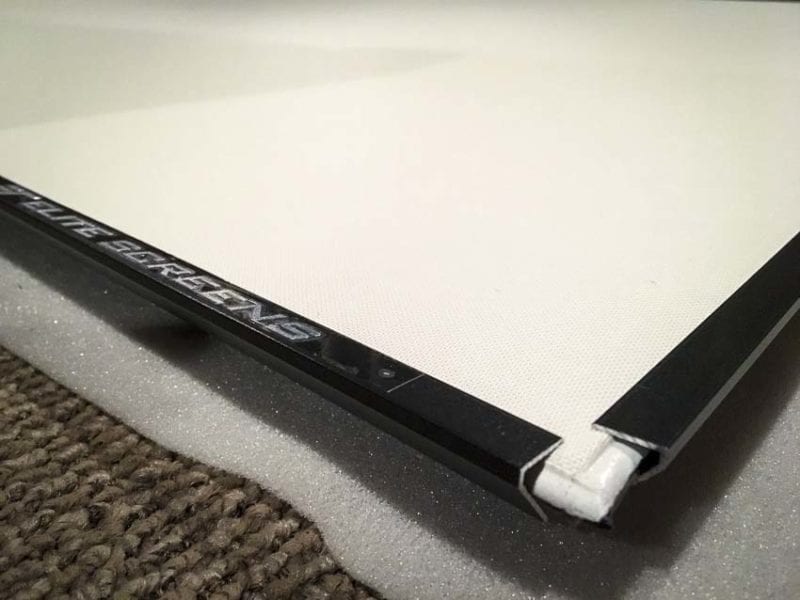
Hanging this screen allowed us to use our custom-mounted in-wall speakers and achieve true “behind-the-screen” movie theater sound. We like this particular screen because it’s rather affordable but also delivers a larger screen size with a very small bezel (the area around the screen). Our 135″ (diagonal) screen pretty much completely filled our available space. Had we used a screen with a traditional border, we would have had to decrease our screen size down to a 120″ model.
Step 9 – Install Your Seating
Seating is important. You need to go with chairs that recline but have a low backrest. If the seat extends up above your head when reclined, your ears are getting indirect sound from the rear speakers. That’s not optimal. You also want to elevate the second row of seats by 9 inches to allow for clearance over the front seats. If you don’t, you’ll end up with the second row of friends craning their necks to see the projector screen!
Step 10 – Calibrate and Enjoy!
The final step after installing everything involves calibration. I love this step as it includes a combination of using an SPL meter and setting all of your speakers to the same level. It also includes using real-world movie scenes to understand how well your system performs. Meters work well, but you want to make sure movies sound “right” and you “feel” the bass in your gut.

Hopefully, this helped you get your head around both the process and requirements of how to build a home theater with hidden speakers. In our opinion, hiding the speakers behind a screen makes the most sense and results in the best possible experience.
