
Changing Wheel Bearings Is Messy But Not Too Difficult Easy To Do On Your Own
As I pulled my boat out of the garage and began to head down the road, it was immediately obvious something wasn’t right. The presence of a rhythmic thudding but no flat tire meant I had a bearing issue. My day on the water might have been shot, but it’s a great opportunity to show you how to change wheel bearings.
How To Change Wheel Bearings: Preparation
You’re going to need a handful of tools to get started on your project. Like most things, good preparation is a key to efficient use of time. Start by gathering these items:
- Long nose pliers
- Rubber mallet (or hammer)
- Punch (and/or slotted screwdriver)
- Plenty of shop towels and grease-removing handsoap
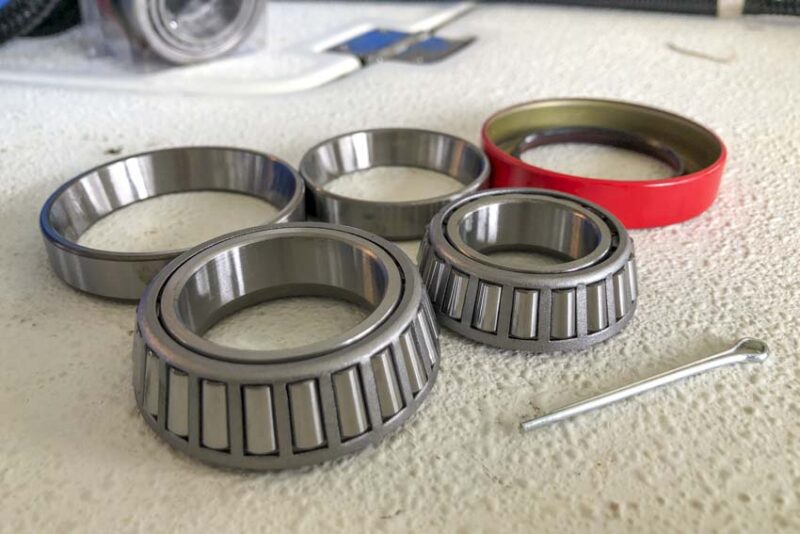
- Replacement wheel bearing kit
If you know which wheel bearing kit you need, great. If not, it’s not too difficult to find when you remove the old bearings. Keep in mind that the front and rear bearings on a trailer are commonly different sizes.
It’s possible you may just need one part and not have to repack the entire bearing system. I’m a bit more OCD, and the bearing kits for my trailer are only $25 for each wheel, so I go ahead and replace the entire thing.
How To Change Wheel Bearings: Removal
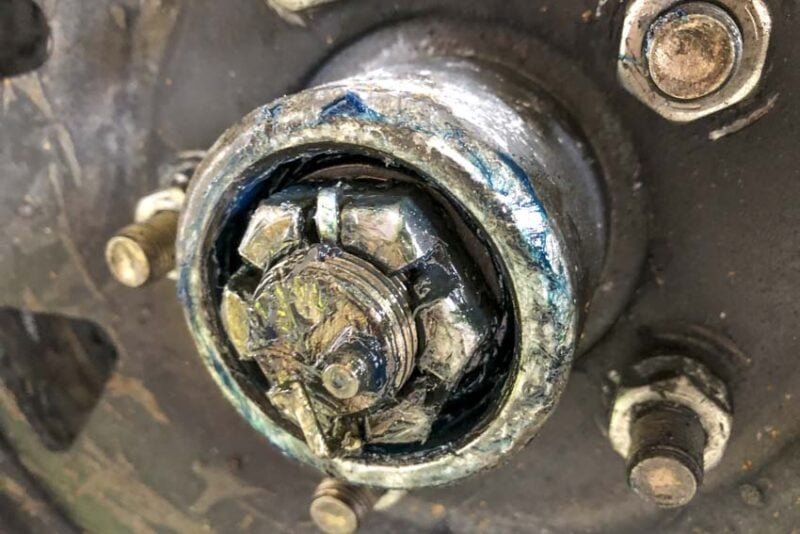
Step 1: Remove the Hub Nut
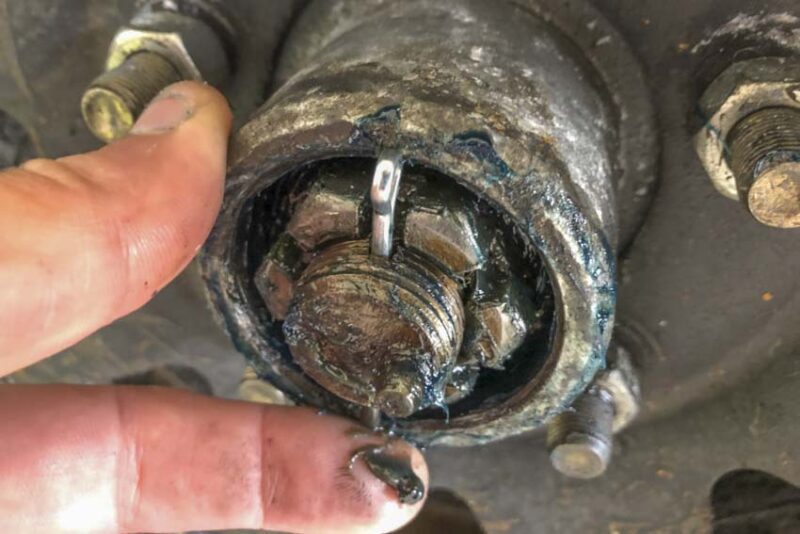
If there’s a cap or Bearing Buddies on your wheel, use your rubber mallet and tap around the sides until you can pull it off.
A pin holds the nut in place. Use your long nose pliers to bend it straight and then pull it out.
The nut should be somewhat loose and you can often remove it by hand. If it’s tight, use a pair of adjustable jaw pliers or a socket to get it moving.
Once the nut and washer(s) are off, remove the wheel. Unlike when you change the tire, the entire hub assembly is still attached to the wheel. If it’s easier for you, feel free to remove the wheel first and then remove the hub assembly.
Step 2: Pop Out the Seal
On the rear side of the hub, there’s a seal to hold the grease in. It’s just a friction fit, so place your slotted screwdriver tip on the underside of the seal housing and tap the handle with your mallet to push it out.
Step 3: Remove the Old Wheel Bearings
Most bearings come out easily—after all, they’re designed to move. Just pull the out by hand.
Step 4: Remove the Old Inner Cups (optional in some cases)
The inner cups (AKA races) are the metal rings the bearings spin against and they can fit pretty tight. First, carefully run your finger on the insides and feel for burrs, scratches, and other damage. If they’re in good shape, you can skip to the next step. If they’re not, they need to come out to avoid damaging your new bearings.
Like other parts, the inner cups just use a friction fit. Get the tip of your punch or slotted screwdriver on the inside edge and use your mallet to tap around until they come free.
Step 5: Clean Off Everything You Can
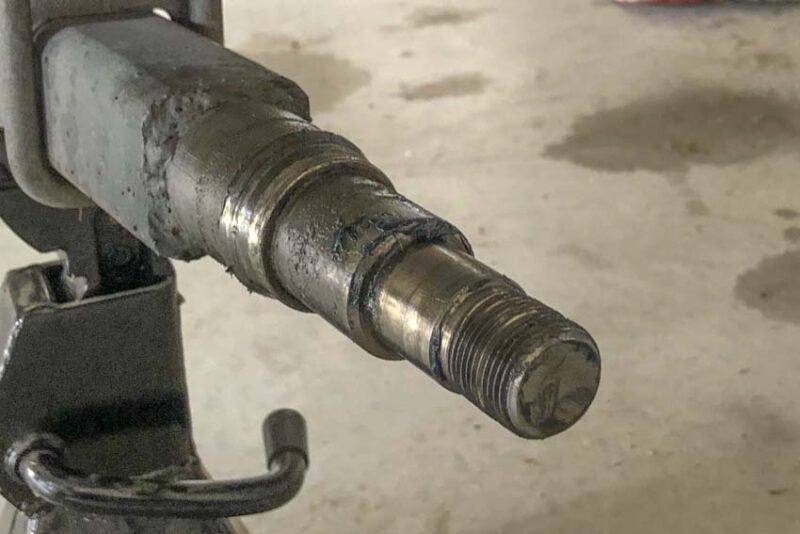
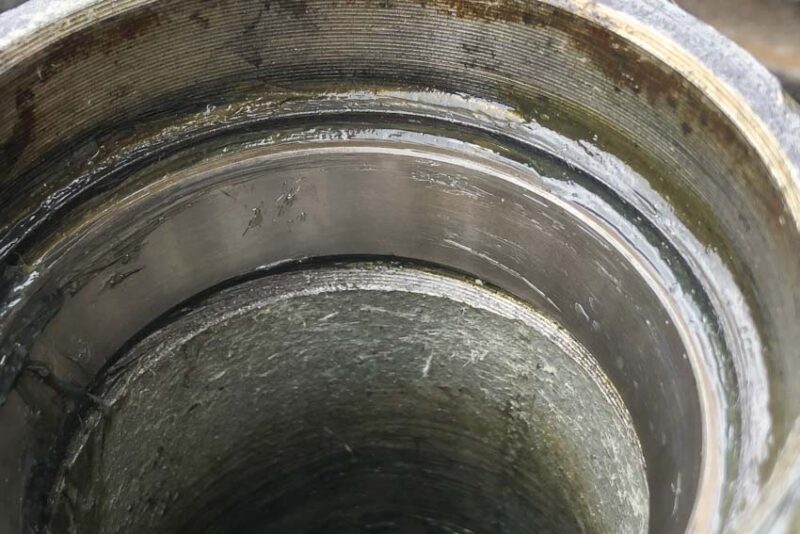
Before you start installing the new bearings, it’s important to clean off everything. It doesn’t have to be spit-shined, but you want all the dirt and debris out of there. Start wiping down the axle spindle.
Then move to the inside of the hub. If either or both bearings came apart, there will be rollers and metal pieces running around. Clean out all of it along with as much of the old grease as you can.
If you don’t know your bearing size, now is the time to get it. One way is to measure the inside and outside diameters of the old ones. A more accurate way is to look for the identifying markings on the bearing sides.
For example, mine are L68149 and L644649 (remember, each side has two different sizes). The seal also has markings. Mine is 1719DL. You can use those to find the correct kit or individual pieces you need.
How To Change Wheel Bearings: Installation
Step 1: Insert New Inner Cups
Start by applying some new grease to the inside of the hubs and then insert the new inner cups. The larger one goes on the inner side of the hub and the smaller one goes on the outside. With the wheel sitting down, set the cup in so that it opens towards you to accept the new bearing.
Use your punch and mallet to gently tap it in place. Be careful, though! You don’t want to scratch or ding where the bearing rollers will be. You should be able to see where the hub design stops them.
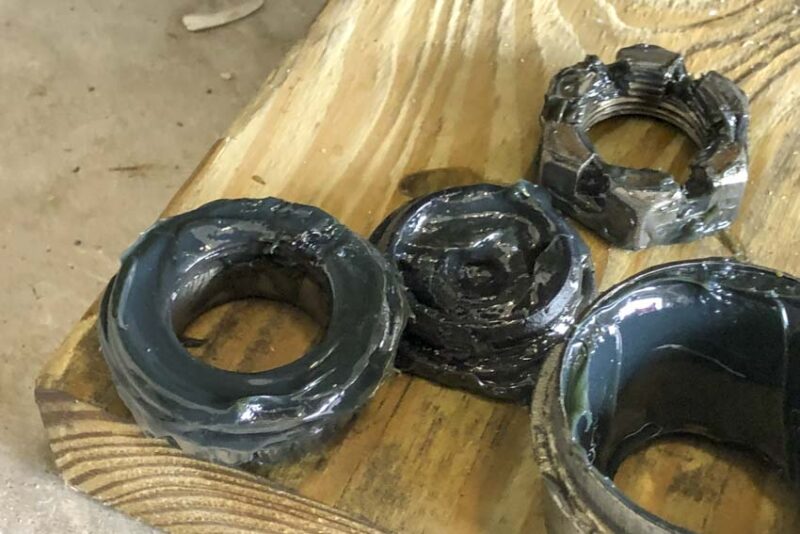
Step 2: Grease Your Bearings and Insert Them
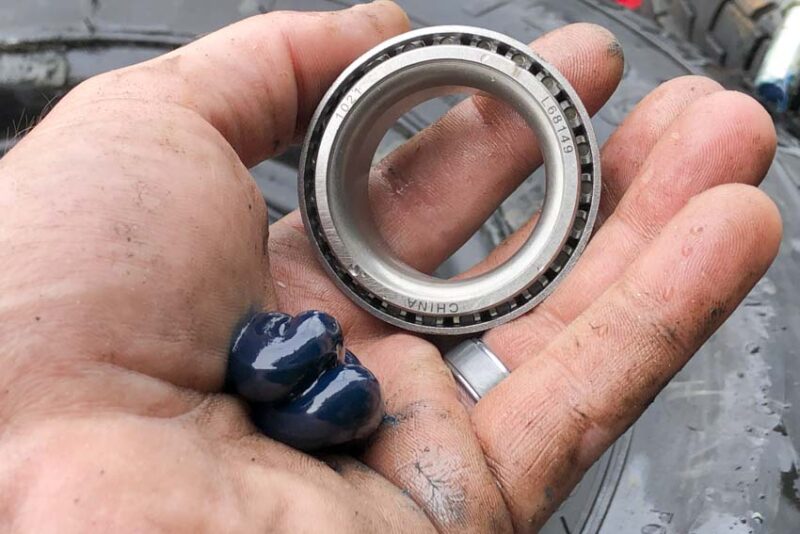
Before you set your bearings in, you need to pre-load them with grease. The easiest way is to put some grease in your hand and tap the edge into it until you see it start to come through the other side. As each section fills, move to the next until you’ve filled all the way around.
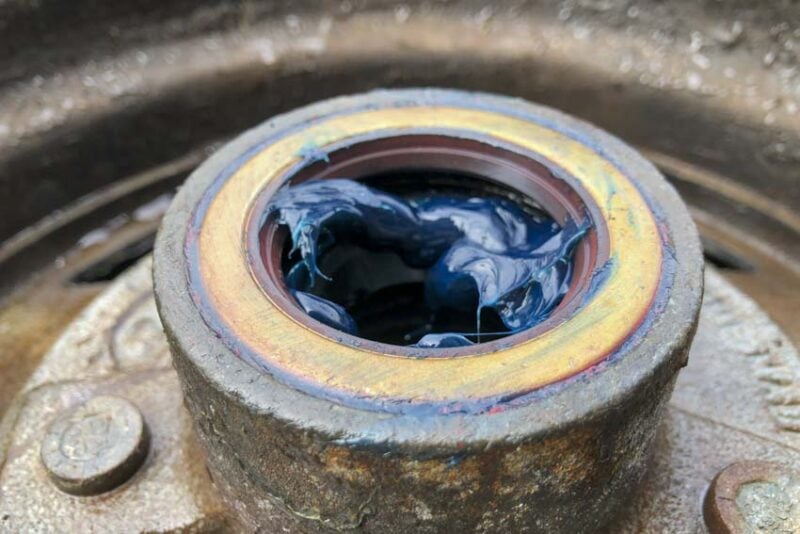
Step 3: Install the Rear Seal
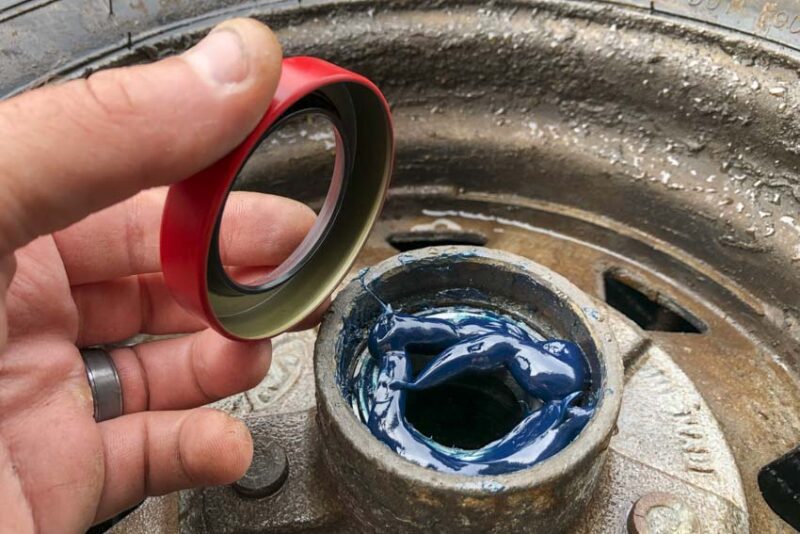
It’s critical that you do not install the rear seal until the bearing is in place—it won’t fit through the opening in the seal.
Again, the seal is a friction fit, so use your mallet to tap it in place so that it’s flush with the rear of the hub. Be gentle, though. You can damage the seal housing easily.
Step 4: Install the Castle Nut
Now that your bearing assembly is installed, apply some grease to the spindle by hand, set the wheel back on the spindle, and tighten the nut back down. Don’t forget the washer! Give the wheel a spin and tighten the nut a little more. You should feel some resistance to the wheel spinning.
Once that’s done, back the nut off slightly, make sure the holes for the spindle and nut line up, insert the pin, and bend it over with your long nose pliers. Your wheel should spin freely without any side-to-side wobble.
Step 5: Install Bearing Buddies (optional, but highly recommended)

We highly recommend installing Bearing Buddies. They use a spring to actively push grease into the hub and drastically reduce bearing issues. It’s another friction fit piece, so they’re easy to install.
Measure the inside diameter of your hub to determine which size you need.
Prices vary based on the size, but this valuable bit of insurance is just $35 per pair for my trailer.
Step 6: Grease it Up!
Finally, grease those hubs up! If you installed Bearing Buddies or something similar, there’s a zert to fill with and you’ll know it’s full when grease starts to push out. Wipe that off, clean up your mess, and get on with your day.
If you didn’t do your best to pack the cavity full of grease. When you’re finished, make sure you put the dust cap on.
Regardless, make sure you check your grease levels often. A quick check before each trip can save you a lot of hassle and a ruined fishing trip.
Need a video to see it happen? I found this one to be a big help the first time I changed my trailer wheel bearings.
amzn_assoc_placement = "adunit0"; amzn_assoc_search_bar = "true"; amzn_assoc_tracking_id = "protoorev-20"; amzn_assoc_search_bar_position = "bottom"; amzn_assoc_ad_mode = "search"; amzn_assoc_ad_type = "smart"; amzn_assoc_marketplace = "amazon"; amzn_assoc_region = "US"; amzn_assoc_title = "Shop Related Products"; amzn_assoc_default_search_phrase = "trailer wheel bearings"; amzn_assoc_default_category = "All"; amzn_assoc_linkid = "8c43707075dfc577edf134e94d446ba7";
