
For those of you considering entering the trades as a career, first of all, congratulations! You’re looking at the potential of high income, the ability to one day run your business, and enjoy the tangible results of a hard day’s work. As a plumber, I’m hoping you’ll follow my path. To help you understand what the job of a plumber is like, let me walk you through how to do a plumbing rough-in.
Table of contents
- Arrive Early When Doing a Plumbing Rough-in
- Failing to Plan is Planning to Fail
- The Bathroom Takes Priority
- Drains and Vents
- Gluing PVC Connections for Plumbing Rough-in Drains
- Running Water Lines and More Hole Drilling
- Adding a Recirculation Line
- Tackling the Tie-ins for the Plumbing Rough-in
- Not So Fast, My Friend
- Groundworks
- Completing the Plumbing Rough-in Job
Arrive Early When Doing a Plumbing Rough-in
Typically my apprentice and I get to the site bright and early in the morning. The first thing we do is curse the cold weather, as nobody likes being cold. Hey, we’re in Canada, not Central Florida like Clint DeBoer and Kenny Koehler. The first thing you do on any new job is check for power. If you have it, you’ll roll out the extension cords you need to cover your area. If not, you’ll pull our the generator and get her cranked up.
Pro Tip: If you have to use a generator, be sure you have enough fuel for the day. Breaks to run out for gas or other items you don’t have on-site take time – and time is money.
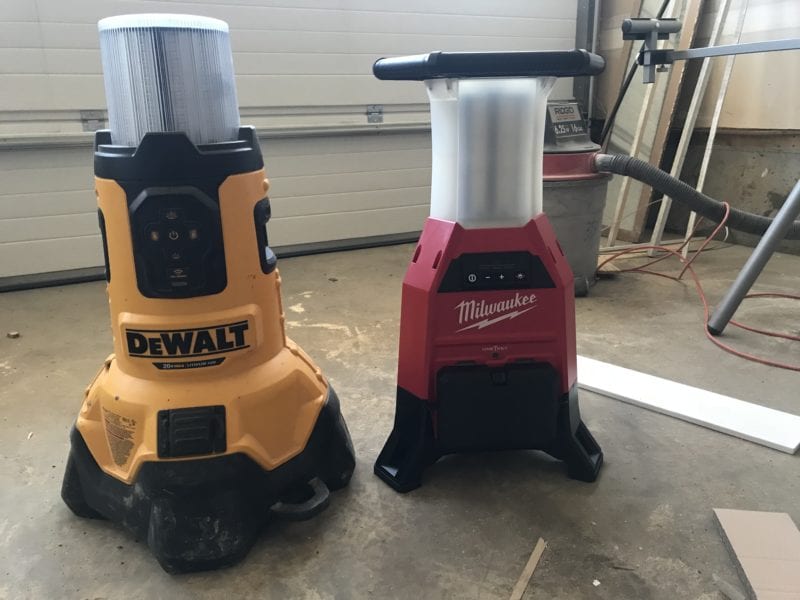
In the last year however, I have decided to make the move to cordless for all my tools in order to leave the generator in the van to collect dust, to cut down on the amount of time a job takes me, and to never have another corded tool unplug itself when I get to the top of a ladder because it got caught on something on the way up. Cordless tools are more expensive thanks to the batteries, but I haven’t had to use my generator in over a year now.
Failing to Plan is Planning to Fail
The first and sometimes the more annoying part is the planning stage. This is where you take your blueprints, walk around the house and mark where you want your drainage and venting to run.
Pro Tip: Visually marking each hole helps ensure you don’t miss any when you go back on your final walk-through.
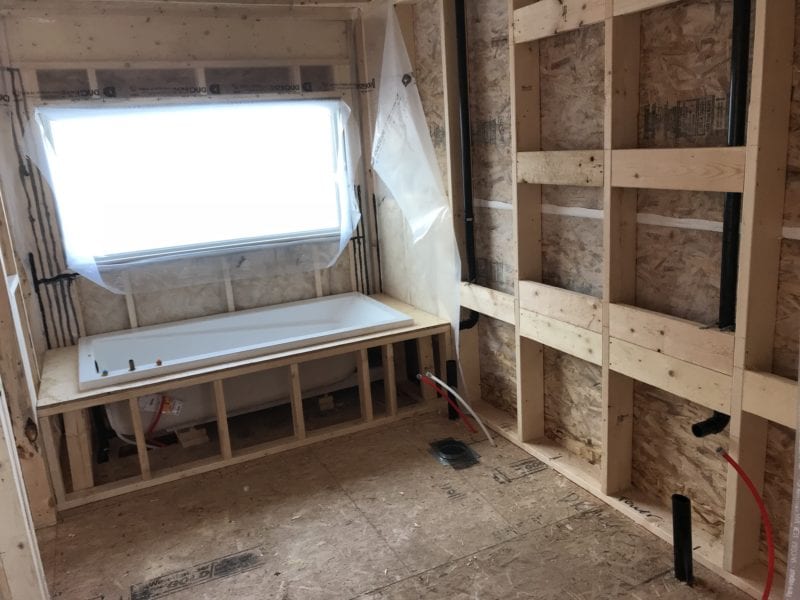
The Bathroom Takes Priority
Setting the tubs comes next. At first, you’ll need to physically set and level each tub and mark where the drain to the waste portion goes. Once you do this enough times, you’ll get to know your measurements by heart and be able to place cut the hole needed without placing the tub first. The best tool for creating the hole is a high-torque drill, like a Hole Hawg or Stud & Joist Drill.
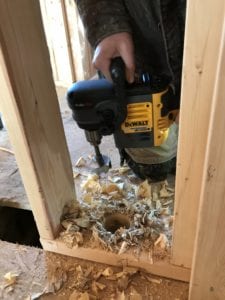
Watch Out for Floor Joists!
Pro Tip: Before you drill that hole, check to make sure you’re not directly over a joist. Your boss won’t be happy about a back charge bill for a new joist to be put in.
If you happen to be over a floor joist on the tub drain, all you need to do is to offset your waste and overflow beside the joist. However, if there is a joist on the center of a shower drain, then it’s time to call back the framers to do their job properly! But not before you check the rest of the house for framing issues.
Once you cut the holes, you can bring the tub back, re-level it, and set it with at least 2″ screws.
I’m sure every plumber has their own system but what I like to do is once the tub/shower is in place is to mark and drill out the water closet holes (toilet holes for y’all in the US). Believe me when I say that if you come across a joist under the toilet, there will be a few choice words exiting your mouth that may or may not be directed towards the individuals that framed the house.
Pro Tip: It’s important to know what kind of toilet is being installed for the plumbing rough-in. Then you can check the manufacturer’s shop drawings to make sure you drill your hole in the proper location.
Measuring for Toilets
If the finishes have not been chosen, I will usually measure 13-inches off the back wall. Then, if the fixture is directly off the tub, I’ll measure 15-inches off that. With that being said, there are times that the home builder you are working with will spec a specific measurement. You then have to verify and then duplicate this. Typically a 4-1/2″ hole saw does the trick when drilling out for a toilet drain.
Drains and Vents
Now it’s time to drill out the holes for drainage and venting. If you weren’t already using a Hole Hawg style drill, you will really want one at this stage. Usually what I do upstairs is pop all my vents up into the ceiling. Once all that has been done, I get up into the attic to connect the appropriate vents and then terminate them to outside air through the use of a roof increaser.
One very important thing in the plumbing trades are the following words: drainage MUST grade. For everything up to 3” pipe, the grade must be set to ¼” per foot and 4″ pipe must be set to 1/8“ per foot.
Pro Tip: Be considerate and realize when other tradesmen will be installing around your work. For example, in a ceiling, HVAC needs to pound tin up through the same areas, so stay either high or low in the joist spaces. Leaving them space is not only considerate, it makes you look like even more of a Pro.
Gluing PVC Connections for Plumbing Rough-in Drains
When gluing drain fittings together in a new build, there is no such thing as too much glue. With your application brush, coat the pipe as well as the hub of your fitting with a generous serving of glue, then when it comes time to put your fitting on and grade it, push on and rotate left then right before setting your grade. The reason we do this is to ensure that there are no bare spots inside the glue joint. Then once the fitting is in place, wipe off the excess glue.
Running Water Lines and More Hole Drilling
Now that we’re done with the drainage and venting into the basement, what next? If you have an apprentice, you will probably let him or her focus on running water lines to the upstairs for the fixtures. In new builds, the only type of PEX (cross-linked polyethylene) my company uses is PEX A (specifically Uponor) and the connections are made via expansion PEX.
Be sure to check out our article on What is PEX tubing for more information on the three flavors of PEX piping.
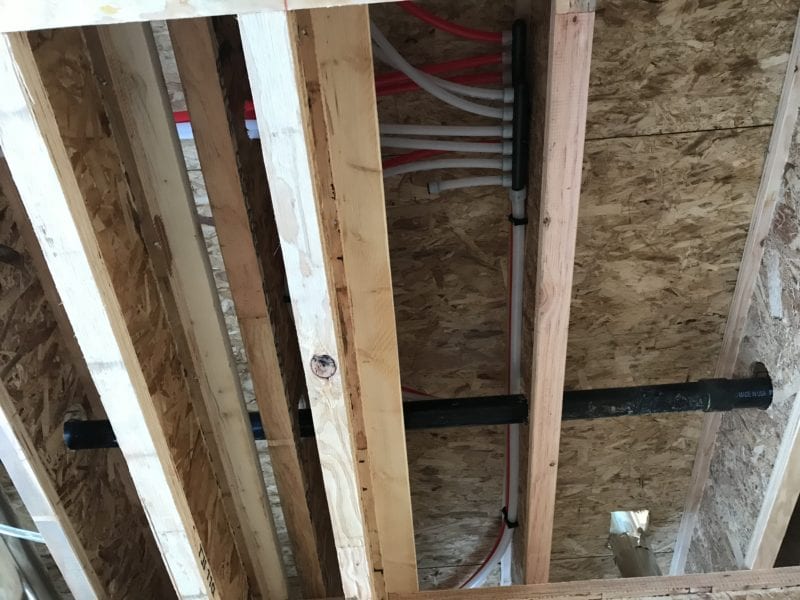
In my opinion, the best way to run water lines for a residential plumbing rough-in routes 3/4-inch pipe as close to where you have a bathroom group or other fixture that requires them. This includes a fridge line, washing machine, or kitchen sink.
Then, put up a header and reduce the 3/4-inch water line to 1/2-inch for each individual fixture. The goal? Keep those 1/2-inch lines as short and straight as possible for your plumbing rough-in. This cuts down on wasted water. It is imperative that you do not accidentally kink any of the waterlines. However, with PEX A, you can simply use a heat gun or a torch to take out a kink.
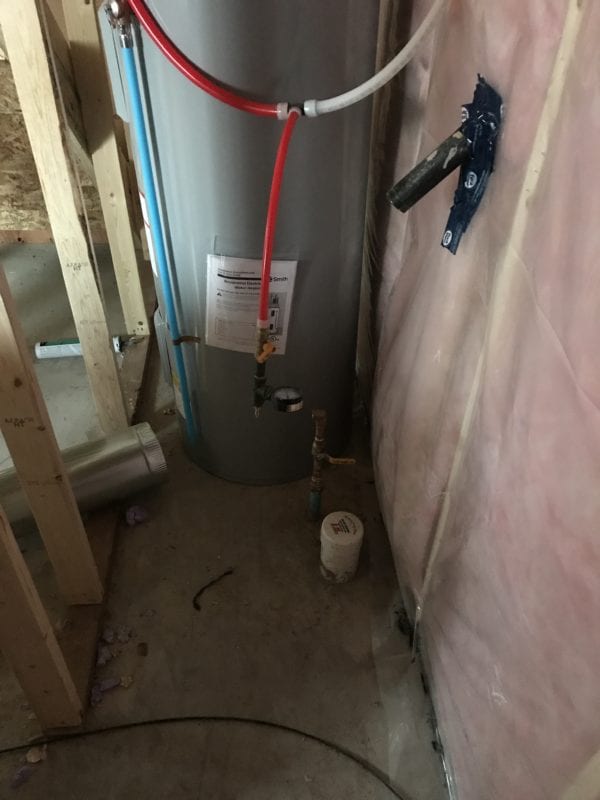
Adding a Recirculation Line
You can run a recirculation line to the furthest header away from the hot water tank. This connects to a pump installed on the hot water tank. It keeps the hot water circulating through the house. This lets you enjoy near-instant hot water when you open the tap. With new heating codes in Canada, the entire hot line requires insulation throughout the house. Because of this, recirculation lines dropped in popularity in new home builds.
While your apprentice is working on the plumbing rough-in lines (or after you complete them), go outside to drill in the hose bibs. You also need to drill out the holes for the sump pump, hot water tank, and any other piece of equipment requiring external venting (as laid out on the blueprints). In Northern Canada, we must use frost-free hose bibs and install them so they slope upwards. This ensures the line doesn’t freeze during the winter months.
If you had an apprentice to run the water lines, now is the time to inspect them.
Tackling the Tie-ins for the Plumbing Rough-in
Once you get into the basement, it’s time to start with tie-ins. This usually consists of several key tasks:
- Tying any half baths together
- Running the emergency floor drain for an upstairs laundry into the mechanical room and stubbing it down to ensure it doesn’t get covered over
- Preparing the vent for your rough-in double plumbing (a fancy way of saying your basement bathroom vent)
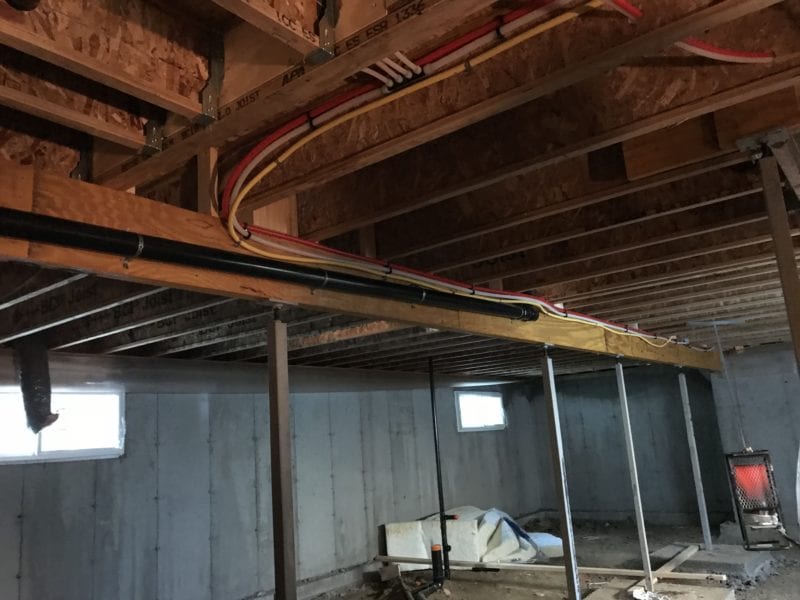
- Dropping your main 3-inch stack along with a possibility of another one depending on how you ran any upstairs drainage
3-inch Vent Stacks
Regarding those 3-inch vent stacks—the easiest and neatest way to drop these stacks is to tie them in together if local codes allow it. To do this, run to a structural beam. Next, drop onto the top of it and run the tie in horizontally at minimum grade. Tie in anything you run across along the way, such as another stack or a kitchen sink. When using this method, make your horizontal connections using a wye fitting with a 45° or fitting 45° elbow.
Pro Tip: For my plumbing rough-ins, I also usually put a 3-inch fitting clean-out at the furthest wye fitting on the horizontal branch. It’s not required by code, but it is good plumbing practice. It helps if something clogs the horizontal piping system. Rather than feeding your drain-cleaning tool from one of the above floors, all you have to do is carefully unscrew the cleanout and run your snake a few feet.
Kitchen Specifics
The tie-in type you use for kitchen sinks depends on the sink placement. Does the sink live in an island that you can completely walk around? If so, then you can simply angle the drain up with a 45° fitting and stud it through the floor roughly eight inches. You don’t have to do anything else here since you’ll use an air admittance valve (aka cheater vent).
If the sink is installed in an island attached to a wall, an island vent must be used. Yes, I know how much we love plumbing in these puppies but they are a necessary evil!
Finally, if installing the sink on an outside wall (where pipes might freeze), rough-in the sink with a flat vent. But what’s a flat vent?
A flat vent is a horizontal portion of a dry vent connecting a soil or waste pipe. Essentially flat vents primarily live on outside walls where there is a worry of freezing drainage. The vent runs into the cabinet, connected to the drainage pipe, and runs down through the floor.
Tying Up Loose Ends
During a plumbing rough-in, tie-ins also involve running the water lines in the basement. Do this, and you’re almost home-free! Just run your 3/4″ PEX to the mechanical room, adding headers along the way. This takes care of any main floor or basement fixtures you have roughed in. Finally, terminate the hot and cold lines around where the hot water tank is going.
Not So Fast, My Friend
Once you rough-in the house to the basement, take a look around and admire your work. Ensure you’ve tied everything in properly according to code. Head upstairs with your apprentice and start plugging and connecting water lines where appropriate. Apply protection plates wherever drainage runs through a stud or through the bottom of a wall. These protection plates ensure that the drywallers can’t accidentally drive a screw into your drainage.
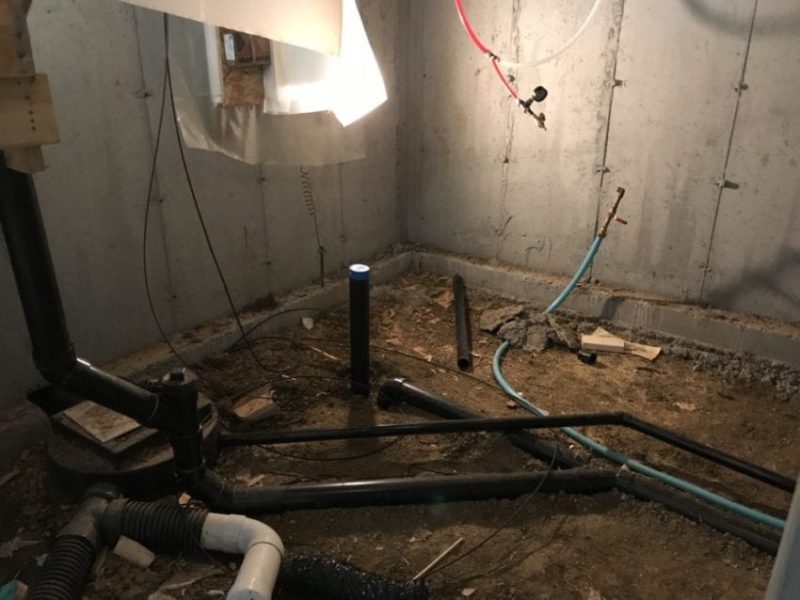
Groundworks
After completing the inside the house, start the groundworks. It’s tempting to let your apprentice tackle digging out the sewer line. If you want to get home in time for kickoff, you’ll want to help him. Once you hit the bottom of the main building sewer, look to see how much space you need for grade. Compare this to how deep your sewer sits coming into the house.
This is a simple math problem. Take a tape measure and determine the distance from the base of the sewer to your furthest stack. Next, figure out what size drainage you will be running to it. This helps establish the grade you’ll need to use. Using these two numbers, you can calculate the rise of the pipe using the formula:
Rise (or drop) = Run x Grade
Once you figure out how much space your drainage will need to come up, you can make a decision on whether or not you need to roll the sewer up or not.
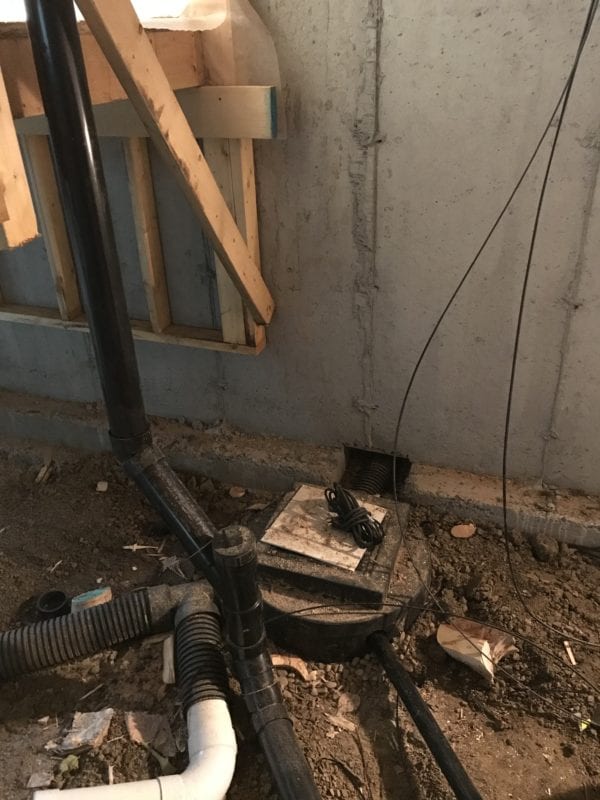
Backwater Valves
The next step here in Alberta is to install a device called a normally open backwater valve. What it does is protect the house should the sewers back up for any reason. If this happens, a flap comes up and seals the house off from any potential dangers.
Backwater valves typically come in two styles: normally open and normally closed. You can use normally closed backwater valves on branch drains that require protection for the fixture it serves. An example includes a basement laundry that needs to be tied in before installing the main backwater valve. The reason we normally use an open backwater valve is that houses are used to vent the city plumbing system. They need a constant flow of fresh air to keep things working properly.
Completing the Plumbing Rough-in Job
Once the groundwork is complete, the last step is to run your water service to where the prints call for it and install your water shut off. Then you can water test the house to ensure there are no leaks before drywall starts going up.
Roughing in a house for the plumbing trade is a very labor-intensive job that is hard on the body but very rewarding at the same time. Now that you know how to do a plumbing rough-in, perhaps you’ll have a leg up if this is the route you choose in your career as a tradesman.
Of course, we know you probably do things a little differently in your neck of the woods. If so, be sure to leave us a comment below on how you do things on your jobsites.
