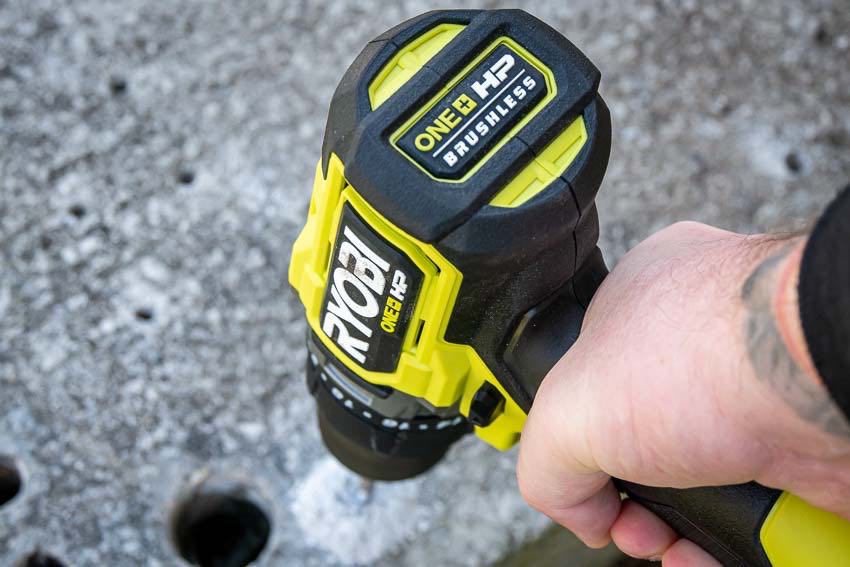
Ryobi is one of the most popular tool brands in the country, meeting the needs of DIYers all the way to value-minded Pros. If you’re getting your hands on some of those tools for the first time, you may be wondering what all the Ryobi drill settings are and how to use them. We’re here to help, so enjoy the read and if we didn’t answer a question you have, leave us a comment below!
What the Numbers Mean On A Ryobi Drill
For our example today, we’re using the Ryobi PBLHM101. It’s currently the best Ryobi hammer drill and part of the 18V One+ HP Brushless line. Don’t worry about the fact that it’s a hammer drill. The only difference between it and a regular drill is an additional impacting mechanism to help you drill in concrete. Everything else is the same.
Learn more about the difference between a drill and a hammer drill.
Interpreting the Numbers
Let’s take a quick look at some specifications:
- No-Load Speed: 0 – 500 / 0 – 2100 RPM
- Maximum Torque: 750 in-lbs
- Hammer Rate (or blow rate): 31,000 BPM
The no-load speed is how fast the drill’s chuck spins if you pull the trigger without actually drilling or driving into material. Our example drill has two gears, so there are two speed ranges. Both start at 0 because this drill has a variable speed trigger. If you pull the trigger just a little, it starts to run at a slow speed. The more you pull, the faster it gets.
Once you start drilling and driving into wood, metal, concrete, or other materials, the drill will slow down some because the load is making it harder to maintain the speed.
Torque is a measure of how much rotational power the drill has. The higher the number, the more force it can apply as you’re working. When you’re working with small drill bits, almost any drill can do the job. But when you start using spade bits, self-feed bits, and auger bits, you need more power to keep them turning.
The hammer rate, or blow rate, only applies to hammer drills, not standard drill drives. An additional mechanism between the motor and the chuck is able to create a forward/back chipping action to help you drill into concrete and masonry. The number—in this case, 31,000 BPM— is a measure of how many blows per minute the mechanism creates. And yes, it’s crazy high!
How to Use Ryobi Drill Settings to Change Gears
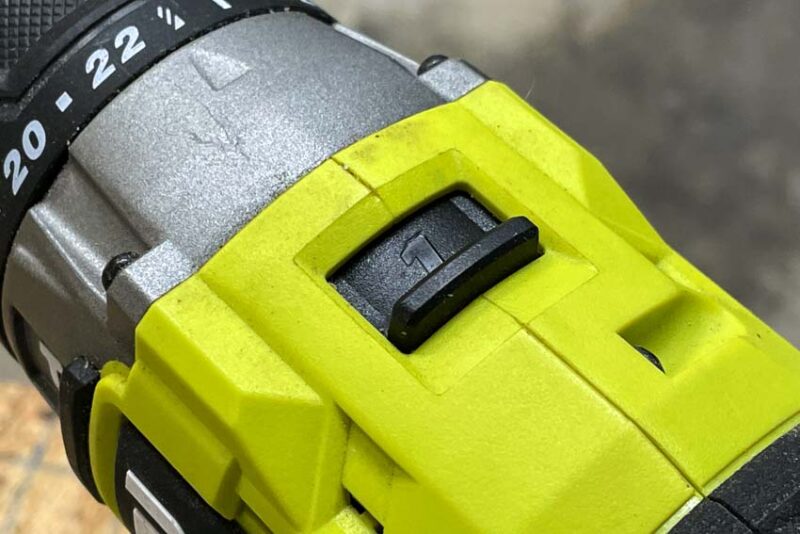
Unlike an impact driver, a drill’s gearing creates an inverse relationship between speed and torque. When you’re in the lower gear, you get lower speed and higher torque. Switch to the high gear and you get higher speeds and lower torque.
Changing gears is a matter of flipping the switch on top of the drill. Low gear is marked with a 1, and high gear is marked with a 2.
How to Use Ryobi Drill Settings to Change Between Forward and Reverse
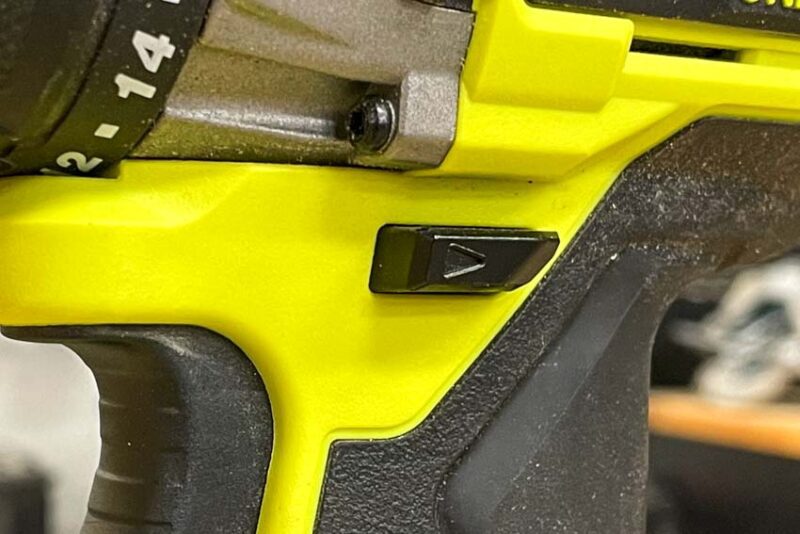
At the top of the handle and behind the trigger, there’s a switch that changes between forward and reverse. While it may seem like it’s hiding a bit, the position is intentional, allowing you to switch without having to take your hand off of the drill to do it.
If you look closely, there are direction arrows on the sides of the switch to let you know which direction they go. It’s simple enough—push the left side in for forward and the right side for reverse. If you want to make sure the drill doesn’t come to life in your tool bag, position the switch in the center to lock out the trigger.
Need to learn how to change drill bits?
How to Use Ryobi Drill Settings to Change Modes
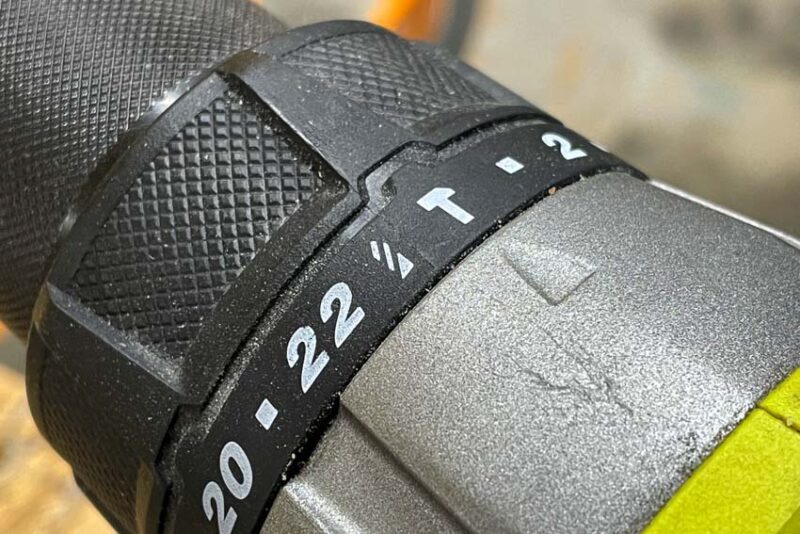
Modern drills usually have two modes—drilling and driving. Hammer drills have those two and add a hammer drilling mode for a total of three.
There are two primary styles of mode changes. Our Ryobi HP Brushless hammer drill has all of its settings on a collar behind the chuck. To change modes, you just twist the collar to the position you want to work in.
The other style uses a separate switch. It works in the same fashion, though. You just flip the switch to the mode you want to work in.
Each mode has a symbol and they tend to be the same no matter which brand you’re using. A hammer icon indicates hammer drill mode, a drill bit symbol indicates drilling mode, and a screw icon indicates driving mode. If your Ryobi drill isn’t a hammer drill, you won’t have the hammer icon.
How to Use Ryobi Drill Clutch Settings
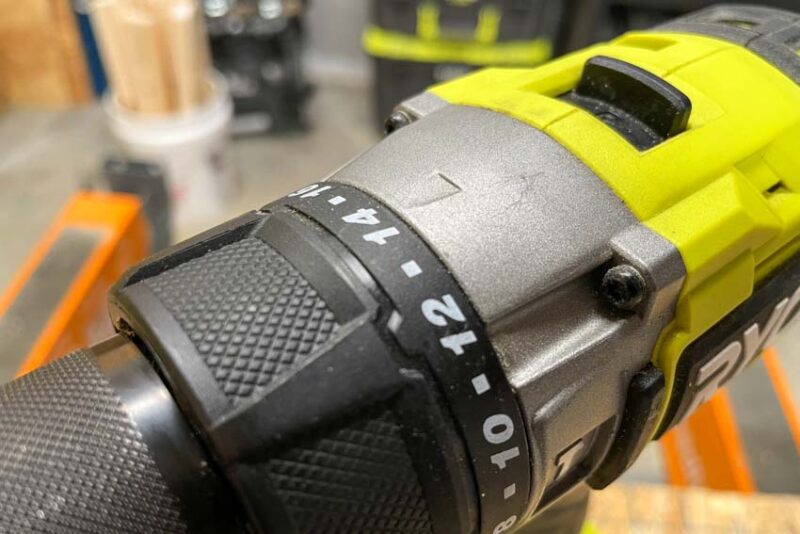
The clutch settings on your Ryobi drill are only useful in driving mode. Notice the numbers on the collar—as you move from the smallest to the largest, the drill is able to provide increasing torque.
The purpose is to help you avoid overdriving screws and damaging the material you’re working with. If you have soft or thin wood, or you’re working with small screws, twist the collar d to lower clutch settings. As you start working with harder, thicker materials, or larger fasteners, you move higher on the clutch settings to get more torque.
Learn more about how to use clutch settings on your drill.
So there you have it! Hopefully, you’re coming away with more knowledge and confidence as you get started with your Ryobi drill. If you have a question we didn’t answer, please leave us a comment and we’ll do our best to answer it for you!
want to get your hands on the Ryobi 18V One+ HP Brushless hammer drill from the photos? Click the button below to order it at Home Depot!

