

Repair Concrete Expansion Joints Early to Save Time and Money
Thanks to a botched install (not one of our crews), we had the pleasure of restoring concrete expansion joints at a local church. If you’re not sure how to repair concrete expansion joints or you’re looking for an easier way to get it done, you’ve come to the right place. We’ll show you what went wrong on this install and give you some tips to repair it before it becomes a really expensive fix.
Note: Many people, including the professionals we consulted with on this article, use control joint and expansion joint interchangeably. Technically, an expansion joint is a complete separation that allows expcted movement. A control joint is a partial cut that allows for natural cracking in predicatable locations where the crack can be hidden on the joint line. Because so many people use the term expansion joint when they mean control joint (think Kleenex vs tissue), we’re mirroring that in this article.
Why You Should Repair Concrete Expansion Joints Before It’s Too Late
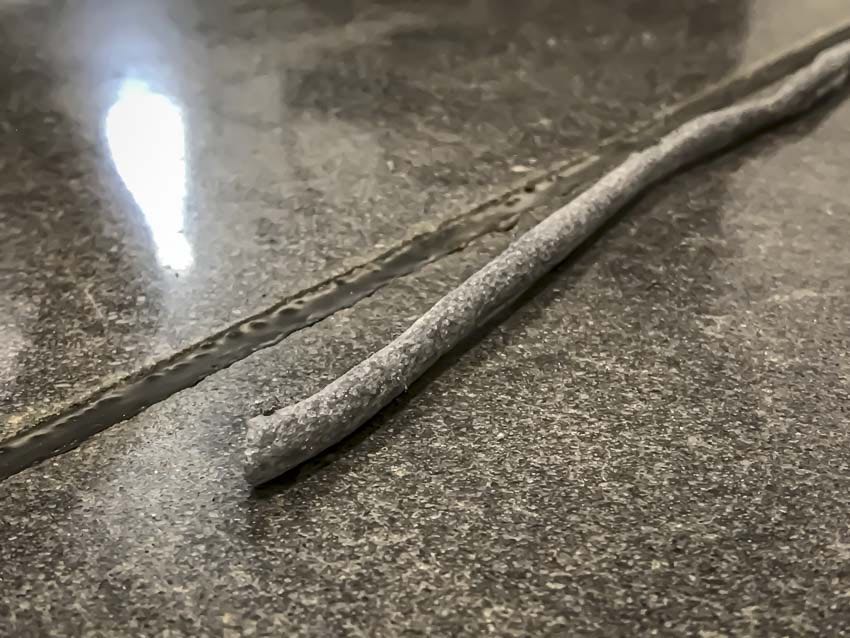
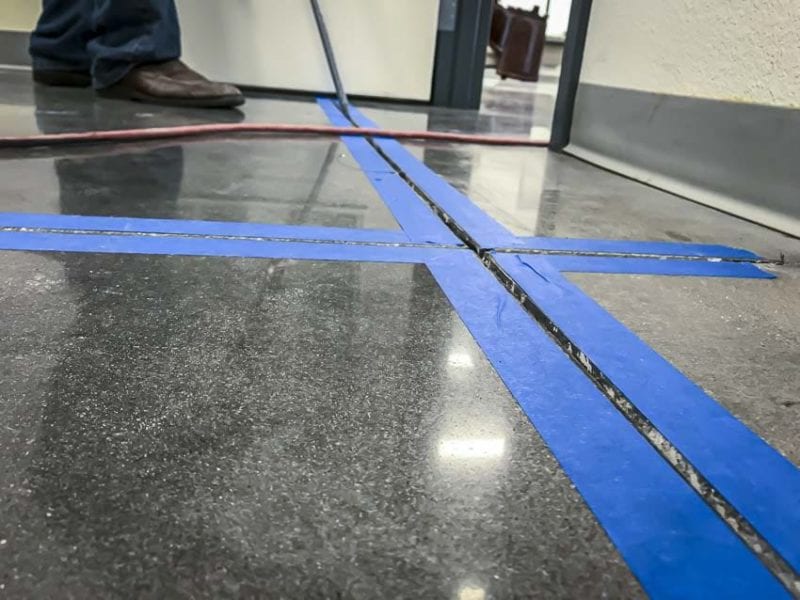
On our project, the original installer used a combination of foam backer rod and a concrete expansion joint filler that was too rigid for the application. With only the two joint sides to bond with and not the bottom, the contractor got paid for sub-par work that left unsightly cracks in the filler less than a year later as the building settled.
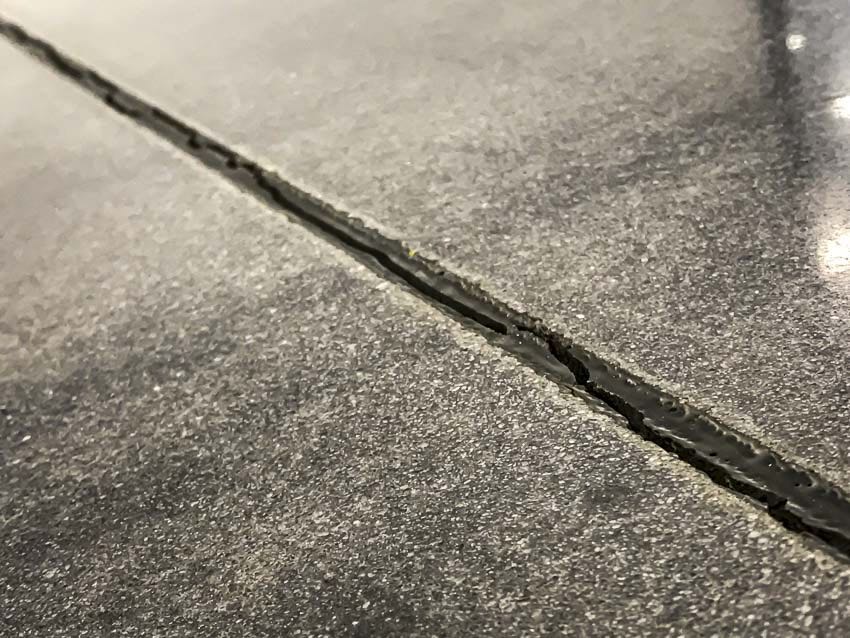
Without going through a repair cycle, the edges would eventually start to expose. That would lead to a slow erosion of the expansion joint sides. As this “Grand Canyon” effect erodes the sides over time, it eventually gets to a point where the repair becomes prohibitively expensive.
In a small church, the erosion is very slow. But in a warehouse, store, or other heavy-traffic environments, equipment crushes down the sides and corners much faster. We’ve heard stories of $1 million annual forklift maintenance costs due solely to severe impacts from constantly running over damaged expansion joints.
You can do a standard expansion joint repair up to around 1″ or so. Once you get beyond that, the process is much more painful to your wallet. You need to start by cutting out a gap some 4″ wide, rebuild a concrete layer, and cut a new expansion joint. That kind of expansion joint repair runs nearly $20 per linear foot.
Hopefully, your facility isn’t to that point yet.
Restoring Concrete Expansion Joints the Hard Way
One of the common ways to repair concrete expansion joints involves some basic tools and a lot of time.
- Use a scraping tool, like a 5-in-1, to scrape out the old concrete expansion joint filler.
- Vacuum out the concrete expansion joints.
- Use a caulk gun with your filler of choice and refill the joints.
- Scrape the sides and top of the joints to leave a clean finish.
Even in a small area, it takes a lot of time and you’re on your knees for most of it.
Restoring Concrete Expansion Joints the Easy Way
Step 1: Sawing and Cleaning Out the Joints
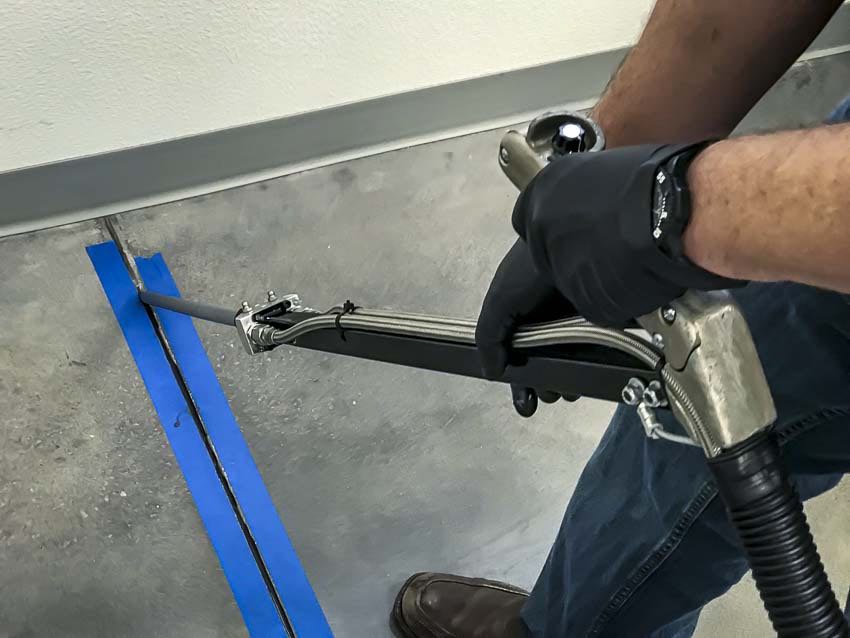
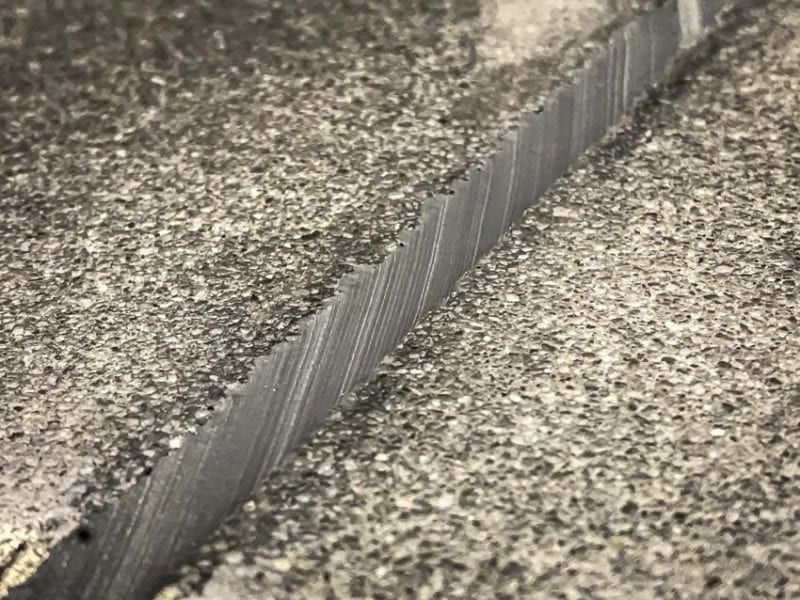
To remove the old concrete expansion joint filler, we started with the US Saws Dust Buggy Mark III. This saw takes an 8″ diamond blade that cuts up to 2″ deep. We only needed to cut down 1″ and the 1/4″ wide blade we used was able to clear the joint in a single pass.
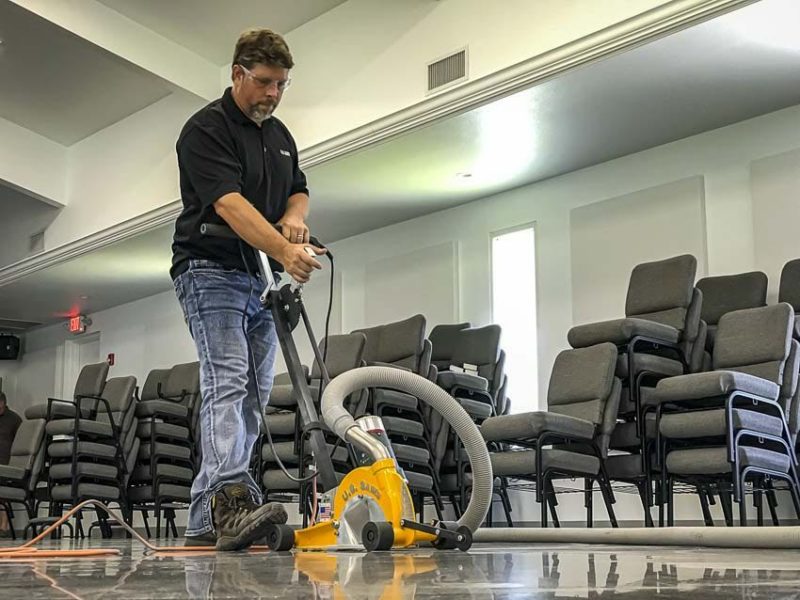
With Objective Data in hand, the saw is an OSHA-compliant solution that doesn’t need any water and runs on a standard 120V, 20A outlet. You need 25 CFM for every 1″ of blade diameter, so you need a vac with at least 200 CFM. We used a US Saws model with 220 CFM, leaving our surfaces as clean as you can hope for.
It’s not only fast (you can cover up to 10,000 linear feet on an 8-hour shift), it’s also designed to let you work standing up and with much greater precision than other options out there.
Compared to manual scraping or a handheld power tool, it’s incredibly fast, clean, and easier on your back.
Step 2: Vacuuming Out the Joints
There’s no change in this step. Just run your dust extractor across the joints to pick up any heavier particles it missed when you were sawing.
Step 3: Concrete Expansion Joint Filler
Choosing the right concrete expansion joint filler is key to getting the best results. While our church doesn’t have the kind of traffic you see in a warehouse, we went with Metzger McGuire Spal-Pro RS 88 – an industrial level 2-part polyurea. It’s a great fit for environments that stay in the 32°F to 120°F range.
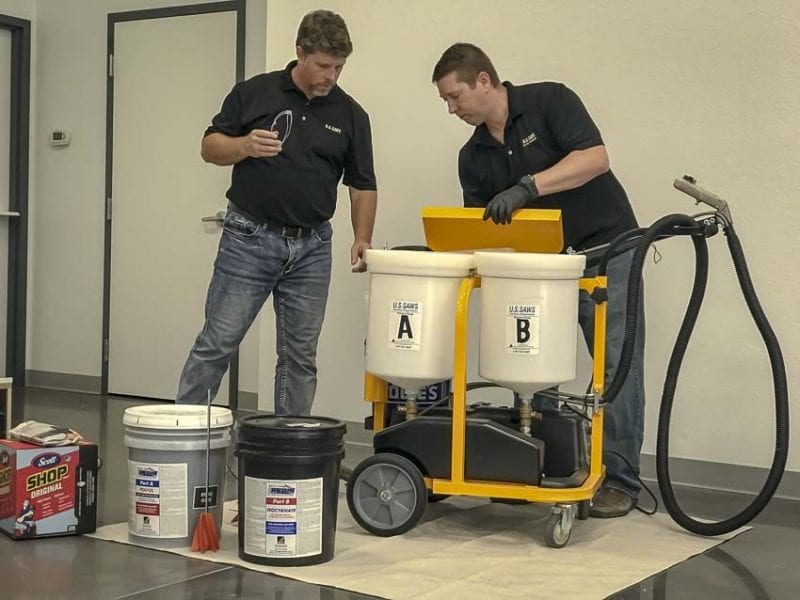
This concrete expansion joint filler is thin enough to get down into the cracks from the building’s settling, yet sets up quickly enough to finish in 10 – 15 minutes. You can match or contrast your flooring in a wide range of colors.
Before mixing, we put down painter’s tape on both sides of the joints.
We turned to US Saws’ One Man Polymer Pump to apply the filler. It gives one person the ability to correctly mix and apply the filler. Like the Dust Buggy, you get to stay off your knees instead of crawling around on the floor. It’s easy to apply and fast to fill your joints.
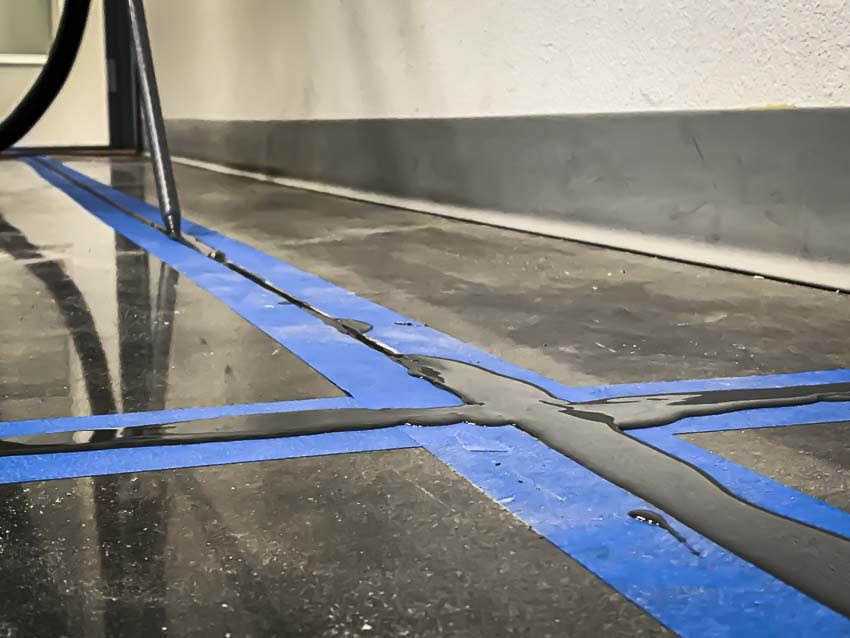
We used a two-pass system to apply our Spal-Pro RS 88. The first allows the concrete expansion joint filler to settle into the joint and fill any cracks below it. The second pass fills the joint and overfills it slightly with the tape protecting the floor. Even with the two passes, a couple of spots needed a little more to eliminate low spots.
Step 4: Finishing Your Concrete Expansion Joint Repair
For the last step, we used a homemade scraper. It’s intentionally long and heavy to let us get some mass behind it from a standing position. To finish off the process, just take your scraper and cut under the tape. It cuts the top of the concrete expansion joint filler flush with the top of the floor and removes your tape at the same time.
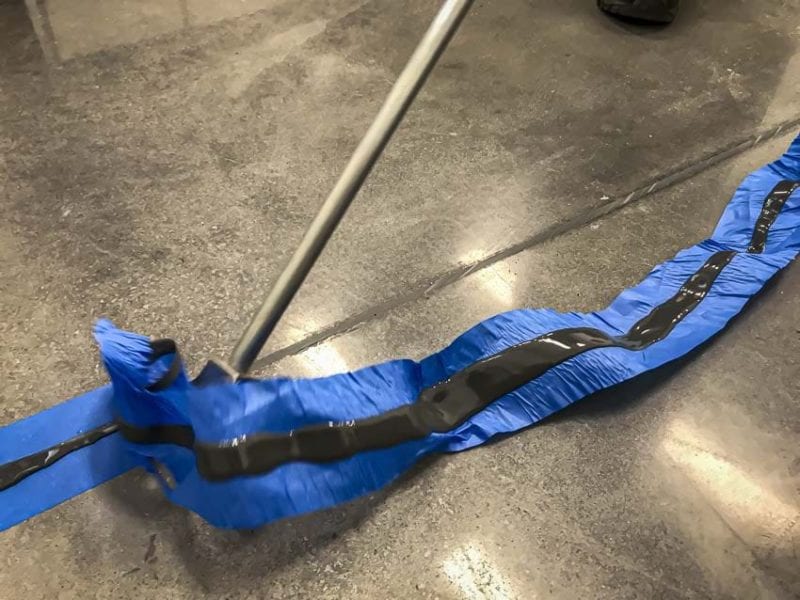
For our Spal-Pro RS 88, we gave it 15 minutes to set up before scraping it. Check the documentation on your filler to know for sure how long you should wait.
Once you’re done with the scraping process, follow the manufacturer’s curing guidelines before letting traffic back on it again.
Equipment List
- US Saws Dust Buddy Mark III Concrete Joint Saw – $1650
- US Saws One Man Polymer Pump – $7250
- Metzger McGuire Spal-Pro RS 88 – $450 (10 gallons)
- Scraper
- Painter’s Tape
- Chemical-resistant gloves
