
I ran into a situation where a home had a toilet installed with a 15-inch offset from the rear wall. The typical offset is 12-inches for most residential toilets. As a result, the toilet had 4-inches behind the tank. It looked like it was trying to participate in the activities of the bathroom rather than sit quietly until needed. This would seem to be a hopeless situation. I mean, who wants to completely remove and cut out a new toilet drain hole? In actuality, you can make this right using a simple solution. We show you how to install an offset toilet flange to move a toilet closer or further away from the wall.
What Is an Offset Toilet Flange?
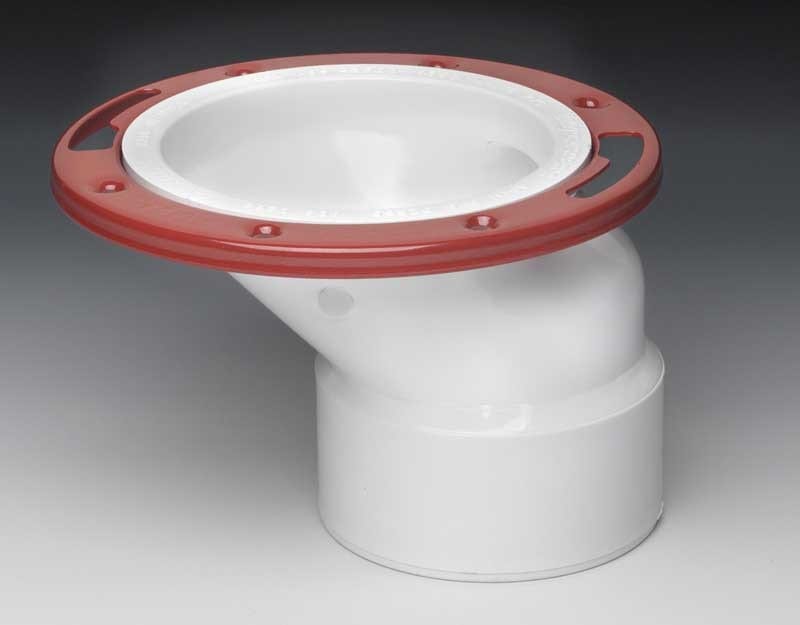
Shop at your local home improvement store, and you’ll find a device called a toilet offset flange. This product gives you approximately 2-inches of extra distance in any direction from the existing toilet sewage pipe. It works with both 3-inch and 4-inch sewage pipes. The outer diameter (OD) fits inside of a 4-inch pipe. The inner diameter (ID) lets you fit it over a 3-inch PVC pipe. Typically offset toilet flanges run less than $15.
Here’s what an offset toilet flange looks like:
How to Install an Offset Toilet Flange
As you can see, the offset toilet flange is primarily PVC, with a metal or PVC flange ring that circles the top that can be rotated to center the bolts as needed underneath the toilet. This also gives you one more advantage. The toilet can be moved in any direction—forward, backward, even diagonally if needed.
Supplies (based on 4″ PVC sewage pipe, adjust accordingly for 3″):
- Offset toilet flange
- 4″ schedule 40 PVC pipe
- 4″ schedule 40 PVC coupler
- One-step PVC cement
- Wax ring and bolts (double-thick kit)
- Great Stuff Window & Door expanding foam
Tools Needed
- Reciprocating saw
- Cordless drill
- Dremel or other rotary tool with a cutting blade
- Adjustable wrench
- Bolt cutters or metal saw (can use an oscillating multi-tool)
We intended to move our toilet straight back. To do that, the following steps illustrate how to install an offset toilet flange for this purpose:
Remove the Existing Toilet
Use an adjustable wrench to remove the nuts on the retaining bolts and lift the toilet off the existing flange.
Remove the Old Wax Ring
Remove and dispose of the old wax ring. Clean the toilet base in preparation for the new wax ring and flange.
Block the Waste Hole
Stuff a thick rag or disposable towel into the existing toilet hole. This blocks the sewer gasses from escaping into the room. You’ll thank us later.
Plan Your Fit
Plan how your new offset flange will fit. The base of an offset toilet flange typically fits over 3-inch PVC pipe or inside a 4-inch pipe. Do your best to make sure that waste flows down into the sewage line without being impeded. You don’t want seams or anything that could cause a backup or restrict the flow of…waste.
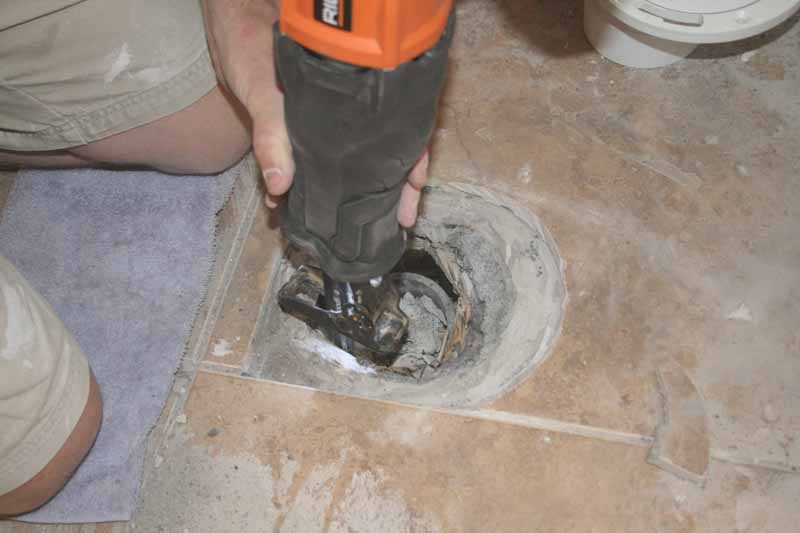
Out with the Old
Remove the old toilet flange by removing the screws that secure it to the floor. Use a Dremel or similar tool to cut around the piping from the inside to connect a new pipe. If you have a crawl space, you can cut the pipe from below using a reciprocating saw. You want to end up with a pipe that you can couple to the new offset flange. Be sure to measure the depth so you can successfully use a coupler. At worst, you may need to use a rubber boot to join the two new pieces together.
Finally, remove and discard the old toilet flange.
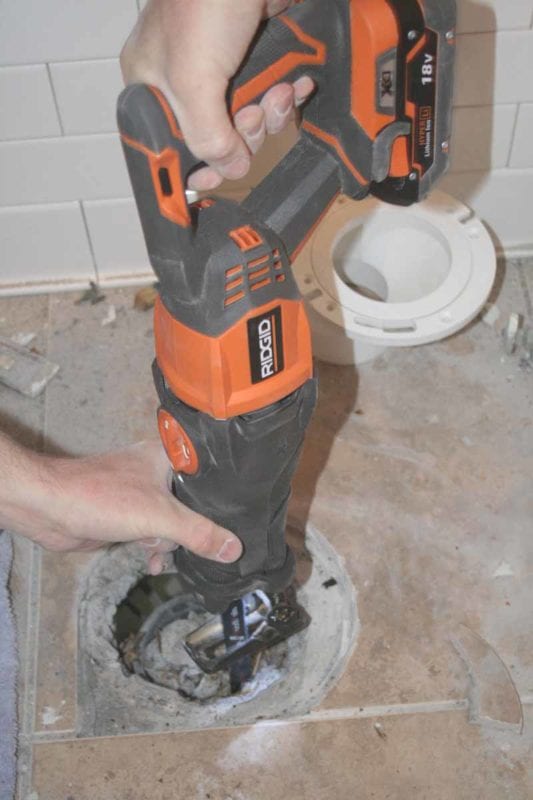
Cut Out the Floor to Make Room
Using a reciprocating saw, cut out where the offset flange will need to be in order to set the toilet back further towards the wall. This is best done with either a wood or a demolition blade. You may need to angle the blade slightly to avoid cutting away too much material. Remember, you need the new flange to fit snugly so that you have enough wood left to fasten it securely to the floor.
Test Your New Fit
Dry fit the new offset flange until you are satisfied with its fit.
Install the New Offset Toilet Flange
Apply a generous amount of one-step PVC cement to both the pipe and the end of the offset flange and fit them together. Alternatively, if you find you need to use a rubber boot, fit the boot over both pieces and secure with a flat-head screwdriver. Typically a boot will only be possible with a crawl-space environment since you need access to make it work.
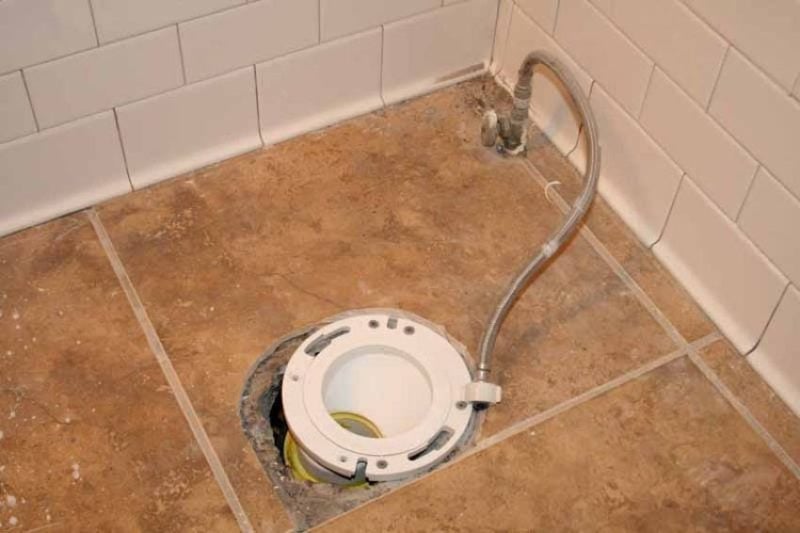
In our particular situation, we also had to cut out some additional floor tiles. For this, we used an angle grinder with a continuous diamond cutting wheel. It let us make the appropriate curved cut so we could install the new toilet flange directly to the floor.
Fill the Gaps
If there is any space along the front of the new offset flange (and there should be, if you did it correctly), fill it with Great Stuff Window & Door expanding foam. Be careful so you don’t have to trim it back too much. If you happen to overdo it, just wait until it’s dry and use a razor blade or something with a serrated blade to trim it flat. The toilet should cover the exposed area you just filled.
Install the Hardware
Insert the new hardware bolts into the offset flange. This secures the toilet to the flange and floor so it doesn’t move.
Install the New Wax Ring
Place the double-thick wax ring on the flange, waxy side up, with the short rim inserted into the flange opening. We always recommend a double-thick wax ring as we’ve had too many toilet installs where the gap exceeded the depth of the basic wax ring. You almost cannot overdue to the wax ring.
Re-place the Toilet
Replace the toilet by carefully lining up the holes at the base with the bolts sticking out of the new offset toilet flange. This step is much easier with two as the toilet itself tends to block your view of the flange bolts. Work the toilet down until it is seated flat on the floor. Secure the bolts with the washers and nuts provided.
As a final step, clip the bolts to length with a pair of bolt cutters. You can also use a metal blade on your oscillating multi-tool or reciprocating saw. Then you can place the plastic caps (if included) to cover up the bolts.
Conclusion
That’s all there is to it. Now you can “enjoy” your newly-moved toilet as if it were properly installed to begin with. This is a relatively easy project to undertake. Knowing how to install an offset toilet flange and doing some pre-planning will usually determine whether or not you have an easy or tough time of things.
