
We all love tools. Deep down, we know that having more tools will not translate into being a better woodworker. Learning the craft and then practicing makes one a better woodworker. If there is one tool that, just by owning it, will make you a better woodworker, it is the router. Why? Because there are so many things, it can do. Not just edge profiling, but making joints, cutting out complex patterns, and much more. When you learn how to use a router table, you more than double the number of things it can do.
The purpose of this article is to make you more comfortable with the router table and give you the confidence to use it. You can purchase a router table, or you can build one that is ideally suited to your needs. I have done both. Once you have a router table, it will be as valuable a tool in your shop as your table saw.
Table of Contents
- What is a Router Table?
- When Should You Use a Router Table?
- Different Types of Router Tables
- Parts of a Router Table
- Setting Up Your Router Table
- How to Use a Router Table – Step-by-step Guide
- Safety Precautions and Best Practices
- Frequently Asked Questions About Router Tables
Recommended Articles
What is a Router Table?
A router table is a table with a router installed under the table, with the bit protruding from the surface. A fence is included to facilitate guiding the workpiece through the bit. This allows you to make joints, custom molding, rabbits, grooves, dados, decorative edges to the workpiece, etc. A router table can even be used as a small jointer.
A router table can have much better dust collection than a handheld router. It is also safer to use massive bits in the router table. Some bits are too large to use in a handheld router. These include raised panel door bits and 45-degree locking miter bits. A router table usually has a miter gauge slot. This is for use with not only a miter gauge but also other jigs, feather boards, and hold-downs.
Importance of a Router Table in Woodworking
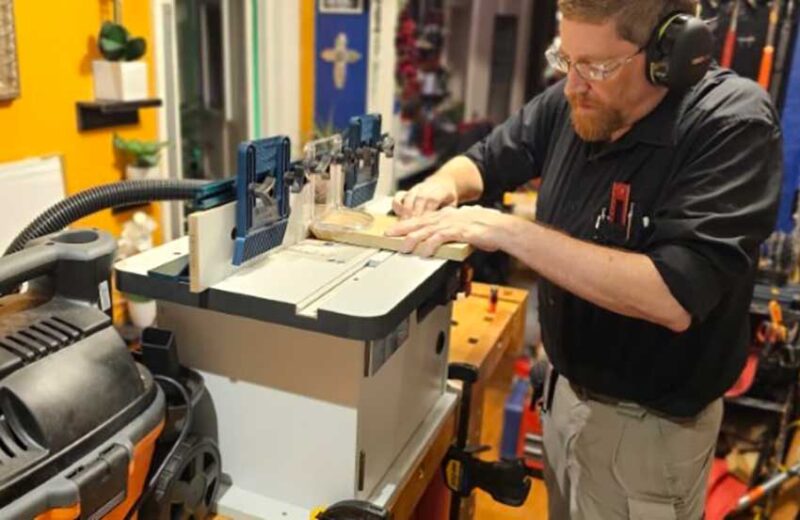
In my opinion, the number one reason to use a router table is control and safety. The router table makes working with small pieces of wood much safer. This also means you don’t ruin your expensive wood or injury yourself.
The other reason to use a router table is production efficiency. Router tables let you set up jigs. Once they are set up, you can feed hundreds of feet of wood through it. This lets you create your own custom molding for your house door jams, window sills, picture frames, etc.
When Should You Use a Router Table Instead of a Handheld Router?
A handheld fixed base or plunge router does an impressive job with larger pieces of wood where the base of the router can ride comfortably on top of it. There are many times that only 1/2 or 1/4 of the base is on top of the workpiece. In these instances, the router may feel unstable and not in control. This is where you should be using a router table. You should also use the router table on long thin stock. An example is when creating molding for picture frames. In this case, the router would be too unwieldy riding on such thin strips.
I use the analogy of a circular saw and a table saw. A circular saw is great at cutting down 4-foot x 8-foot sheets of plywood. It is not the right tool for the job when you have 4-inch square pieces of plywood that you want to cut in half. For this, you would use a table saw. The same applies to a router. If you are using large pieces of wood, you would use a handheld router. If you are using small pieces of wood, then you use the router table because you can safely control the wood with push sticks.
Different Types of Router Tables
There are three types of router tables – bench tops, freestanding floor models, and those that are built into other tools such as the table of a table saw or your workbench. All three types can be purchased, or you can build them yourself. Building your own router table is a great weekend project, and there are many plans on the Internet.
In addition to the size, one thing that differentiates router tables is whether they are open or closed cabinet bases. An open base is merely table legs or a frame that holds the router table-top up. This is the cheapest method of making a router table, but the least useful.
When I built my first router table, I bought a set of metal workshop legs for power tools from Sears. All I needed to add was the top, which I made by gluing two pieces of 3/4-inch plywood together and then covering it with plastic laminate. The center plate that holds the router I made from a single piece of 3/8-inch acrylic.
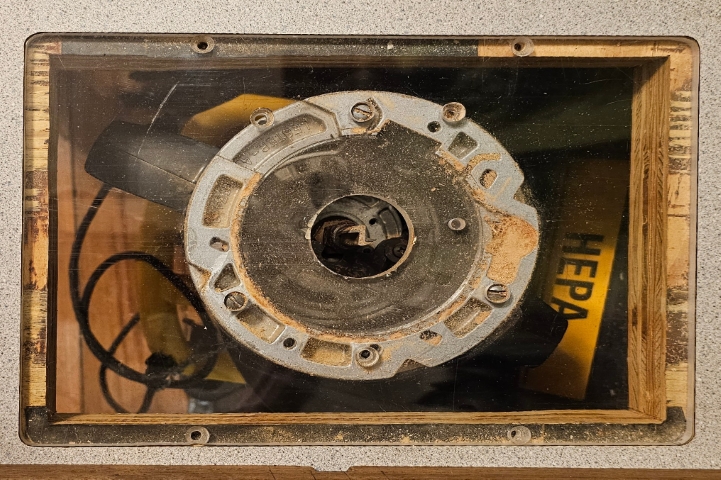
The other method is to make a fully enclosed cabinet. This has four advantages. First, it reduces the noise of using the router in a router table. Second, it keeps the dust contained inside the cabinet, making dust collection much easier. Third, it gives you convenient storage space for all your router accessories. Finally, it makes the router table weigh more. This is an added benefit when you use larger bits because the added mass keeps the vibration down, supposedly giving you smoother cuts. As a bonus, it also looks better!
Bench Top Router Tables
In theory, benchtop router tables save space from their larger floor models. In reality, it depends on what you are going to put underneath it. If you are an occasional woodworker, then bench-top router tables are great. You can move them out of the way when not in use. Having lived with this, I can say it is a lot of work moving it out of the way every time you want to use it. Mine is about 50 lbs. I would rather leave mine set up all the time if possible.
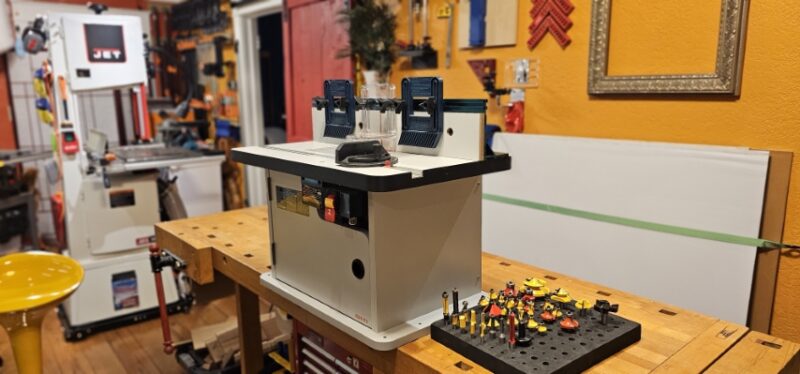
When it was time to upgrade my old router table to a new one, I chose a cabinet-style benchtop router table made by Bosch. I built my first router table, but the Bosch table has all the bells and whistles. With the price of materials these days, I would be hard-pressed to build the same thing for the same amount of money. This is especially true considering how good the table insert and the fence is in the Bosch. Two years later I am still happy with it.
Router Table for Compact Routers
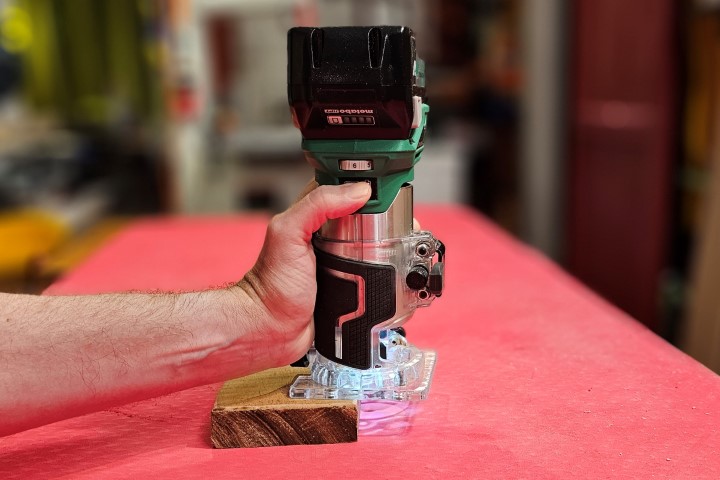
My philosophy with the router in a router table is, the more HP the router has, the better. Most router tables are designed around full-size routers, not compact routers. The woodworker YouTuber Jonathan Katz-Moses takes a different approach. He has developed a versatile benchtop router table for your cordless compact router.
It is meant to be portable, so you can take it to job sites. It doesn’t take up a lot of space in your workshop or work truck because it is small. In about 15 seconds, you can remove the baseplate. Then you use your router as a normal router with a custom 6-in-1 base. This 6-in-1 base is a very useful jig in itself. The base was developed as a collaboration with Katz-Moses and 3X3Custom-Tamar, another YouTuber you should also be watching. The combination of the base and the portable router table makes this a great router table for trim carpenters or contractors working on a job site.
Free-Standing Router Tables
My first freestanding router table was an open-base model I built 30 years ago. It worked well for years, and I would still use it if I wasn’t limited by space. My old table was open underneath, so I could at least keep my shop vac under it. Once I moved to my new shop a few years ago. I needed a smaller version, so I replaced it with a benchtop model. The size of your shop will determine which one will work best for you.

The most significant difference between an open base and a cabinet-style router table is storage. Do you want an enclosed cabinet, with drawers, and router bit storage? Many of the plans for building router tables include drawers and bit storage in cabinet-style tables. The dust collection is generally better in closed cabinets, too.
Table Saw Router Tables
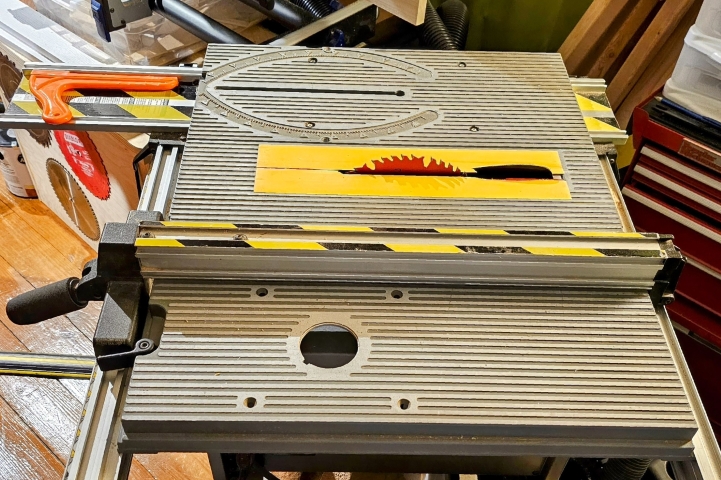
Some woodworkers like to incorporate their router table into a table saw table or workbench. Your table saw already has a very nice fence and a smooth top. All you need to do is provide the router. My Ryobi table saw came with a router mounting plate already machined into the underside of the table. Other woodworkers add one manually to the extended fence side of the tale saw.
The downside is that you can’t just leave jigs or bit sets on your router table. For the sake of consistency, I never take down my set-up until I have to run something new through the router table, table saw, or drill press.
If you are interested in combining your table saw and router table, you can either make it yourself or some companies have started offering solutions for their saws. Check out this Sawstop Router Table, which is meant to go in line with their Sawstop Table Saws.
Key Components of a Router Table
All router tables share the same basic components. You can build the entire table or buy some or all of the components. Below I go over each part of the router table.

Tabletop
When I built my first router table, the top was 24-inches by 36-inches. That turned out to be an excellent size for a floor model. Many commercial router tables are 24 inches by 32 inches.
My Bosch bench-top router table is 25 inches by 16 inches. There are times I wish it was larger, but 99% of the time it is just right for a small shop. Some commercial bench-top router tables either have extension wings or are built long, such as Ryobi’s Universal Router Table, which is 32 inches wide but only 18 inches deep. This would be great for routing moldings but falls short when it comes to edge profiling, or pattern/template cutting larger shapes.
Melamine is a very popular material for making router table tops because of its low friction. It is easily damaged, especially from moisture. If I take the time to build a router table, I’m going to use plywood and cover it with plastic laminate countertop material (aka Formica). Plastic laminate is much more durable than melamine, so it will last a lifetime.
Base Plate Table Insert
A router attaches to the router table by removing its baseplate and using a custom or universal baseplate insert. This baseplate attaches to the router and then drops into the tabletop. It is held in place with a dado around the edge. Formerly, when you built a router table you made the insert out of acrylic, plexiglass, Bakelite, or aluminum. This is still an option. When using any of the plastics, use 3/8-inch thin material. 1/4-inch sags over time with the exception of aluminum.
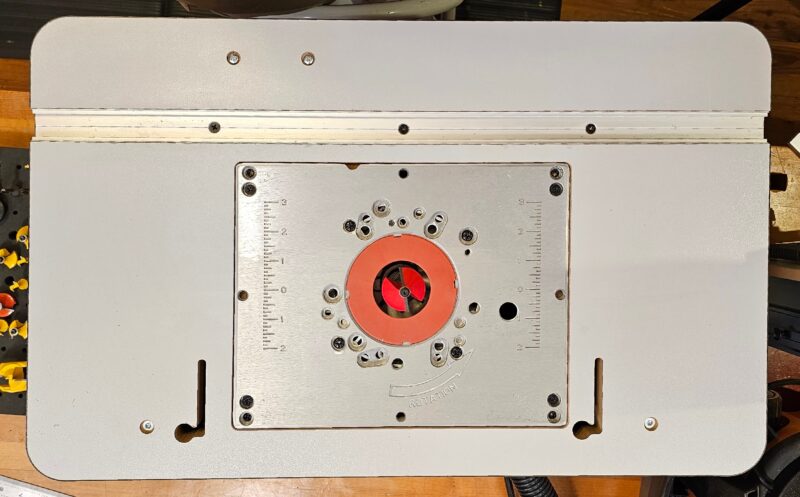
Today, many excellent aluminum universal table inserts exist with many features that would be difficult to make yourself. I would recommend buying one of these even when building your router table. They provide insert ring sets which reduce the size of the opening around the bit. This lets you have larger openings in the table for large bits and a smaller opening for smaller bits.

Another common feature with these is a starting pin that screws into the table and makes it safer as you plunge the stock into the spinning bit when you are not using a fence. Many of these table inserts have scales etched into them to help align the fence. Some even come with a miter gauge and grooves in the table for it, and even a fence.
Author’s Note: Here is an inexpensive baseplate table insert, but here is the one I recommend from Taytools unless you decide to get a lift kit below.
Lift Kit – The Ultimate Table Insert
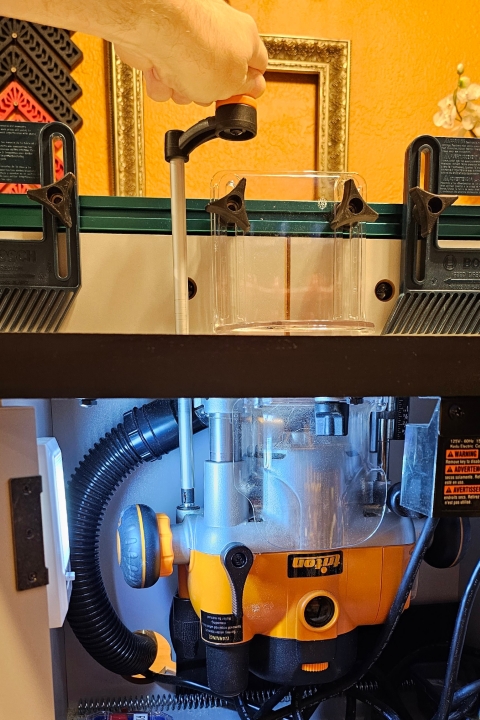
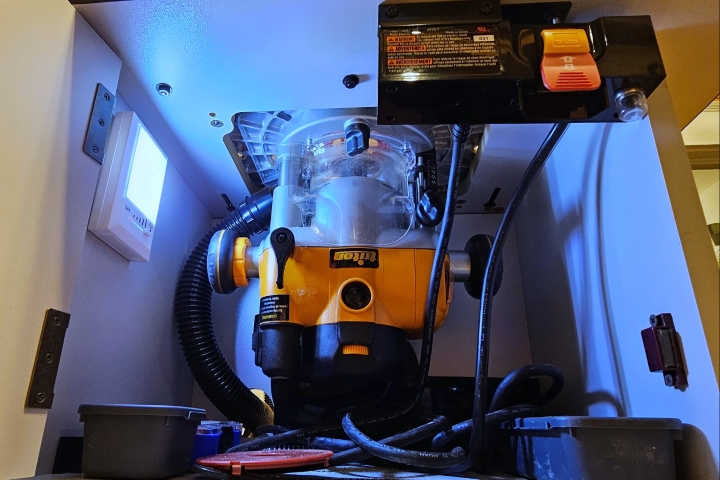
A router table lift kit is purely a luxury, and you don’t need it. Once you buy it, you will be kicking yourself for not buying it earlier, though. It raises and lowers the router from above the table, thereby adjusting the height of the bit. In my Triton router, it raises the bit so high that the collar sticks above the table, making changing the bit far easier than with any other router I have used because you don’t have to access it from under the table. Some lift kits are electric. You can push a button, and they go up and down, but most use a hand crank and a hole through the table.
Most decent lift kits used to be around $300. There has now been a glut of knockoffs flooding the market. There are so many new ones now that, at the time of this writing, most of the cheap ones don’t even have ratings on Amazon. The ones that do aren’t good. You get what you pay for. When it comes to lift kits, you can’t go wrong with JessEm or Kreg. They both make excellent woodworking tools. The lift kits come with their own high-quality baseplate table inserts. At least you will not need to buy one of those.
Fence
Next to the router, I would argue that the fence is the single most important part of the router table. If you build one, it can be as simple as a single board and two clamps. Better still, two boards, or it can be very fancy with all the bells and whistles. If you build your own router table, don’t build a fence. Many high-quality fences exist on the market that have all the qualities you need. Check out this one in either a 32-inch or 24-inch fence. Once you have one, you can even share it with your drill press.
Look for the following:
- Durable, well-built, and 90-degrees to the table
- Able to add stop blocks
- Able to hold feather boards. Many will often come with them
- Both sides of the fence must move right and left. This is to close up the space between the bit and the fence
- The left side should allow you to slip a 1/16-inch or 1/8-inch spacer behind it. This is so you can use the router as a jointer for small parts too dangerous to use on a regular jointer
- The fence must connect your dust collector or shop vac
- Needs a bit guard to protect you from coming in contact with the spinning bit. This also aids in dust collection

Miter Gauge and T-Slot
A miter gauge slot is not a necessity, but it is nice to have. Much of the time you will be using the fence with the router table. Occasionally, you are going to want to route the end grain. To make a precise 90, 45, or any other angle trim, you will need the miter gauge. Commercial tables often will not come with miter gauges. Fortunately, they can be purchased relatively inexpensively.
One thing to note about miter gauges and safety with a table saw. You probably have always heard that you should never use a table saw and the miter gauge together. The reason is that it can cause kickback of the loose piece after it is cut free. With a router table, that is not an issue because you are not cutting parts out. There is nothing loose to get between the blade and the fence. It is safe to use them together and is quite common practice.
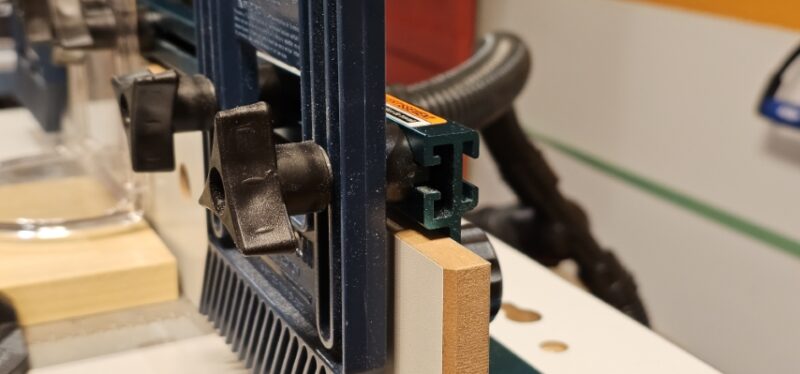
The T-Slot
A T-Slot is an aluminum channel (usually) that is in the shape of an upside-down or sideways capital T. With T-Slot bolts or even carriage blots, the head of the bolt is locked into the T. This leaves the remainder of the bolt sticking out, so you can screw accessories down to the T-Slot track. Be aware that since it is aluminum, do not over-tighten it, or you will deform the track.
The T-Slots on a router table allow for the use of other accessories. These include feather boards, hold-downs, or your purpose-built jigs. Often the T-slot and the miter slot on many router tables are the same thing. A good fence with have T-Slots in it as well, so you can add stop blocks and feather boards. If it doesn’t, you can always clamp a stop block to the fence with a spring clamp, but it is not as convenient.
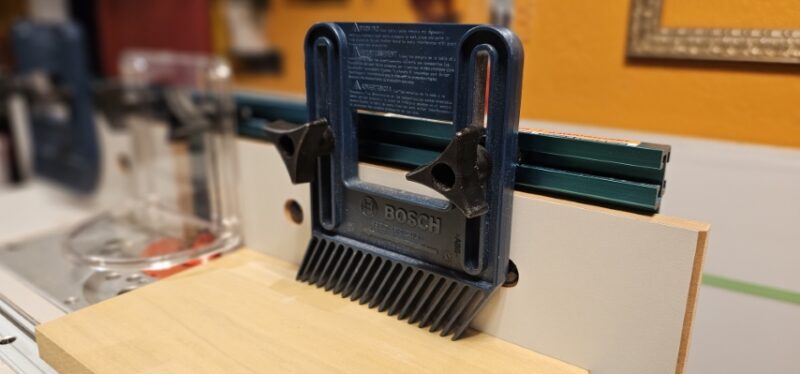
Feather Boards
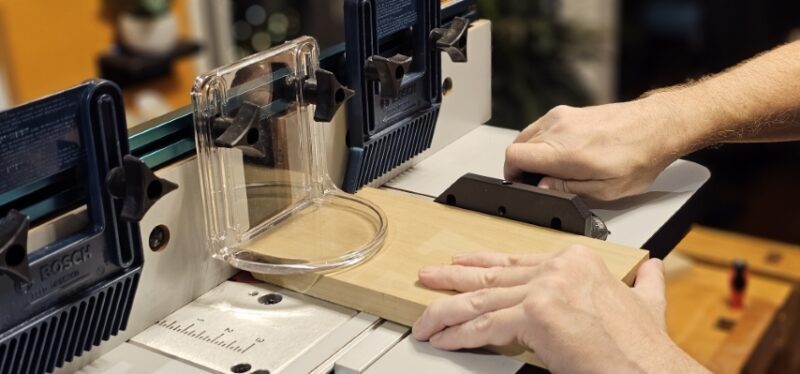
A feather board is a safety device that holds the workpiece against the fence or the table and helps prevent kickback. When installed correctly, a feather board will let the wood feed in toward the bit, but you will not be able to pull the work back toward you. This also means the bit has a harder time kicking the workpiece back at you.
You can either make your own or buy them. Some router tables or after-market fences will come with a set. Aftermarket feather boards for table saws work well in the miter gauge slot of the router table. They are often too big to fit on the fence of a router table or drill press. For the fence, search for feather boards made for the router table, such as these by Powertec.
Router
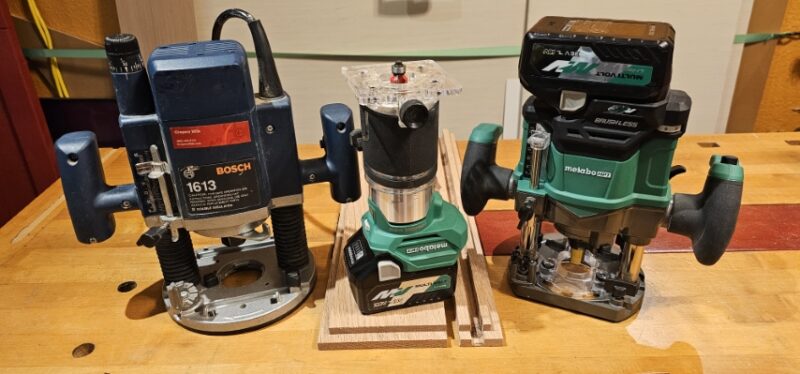
Routers are extremely versatile. They are so versatile, that the first question you need to ask yourself when buying one for your router table is, am I buying this just for my router table or am I going to take it off and use it as a handheld? It is pretty annoying to remove a router from the router table, make a cut, and then put it back on or vice versa. If you have the budget for it, it is a huge luxury to have multiple routers. At the very least, I recommend having a 2 HP or larger router for your router table and a cordless compact router.
Most people find they reach for a compact router about 75 percent of the time when they use a handheld router. The cordless models work great. The other 25 percent of the time, then you have the option of using the router on your router table as a handheld router. One day when you tackle that kitchen remodel, then you can justify that 3-1/4 HP router for your router table and use your 2 HP as your handheld for those 25 percent situations.
Plunge Router of Fixed Base?
The other big choice you have to make when choosing a router for your router table is a plunge router or fixed base router. This is not much of a choice at all. Get a fixed base router. With a few exceptions, plunge base routers are much harder to precisely adjust the depth of the bit. I have a Bosch plunge router. It has a micro adjustment which is great for precisely getting the bit those last few fractions of an inch. Unfortunately, I kept having to take it out of the router table. I had to push against the plunge mechanism to get it close to my bit depth first. That was a pain, and so I upgraded to a new router. I would not have to do that with a fixed base router.
The router I upgraded to is a 3 1/4 HP Triton Dual Mode Router. This has been my dream router for many years. It is a plunge router with a trick up its sleeve. By removing the plunge spring, it converts the router into a fixed base router for use in a router table. It also comes with a handle that lets the router bit be raised and lowered from above the router table like a lift kit. This feature alone can cost more than some router tables. I think this makes the Triton Dual Mode Routers the best value on the market for router tables.
Setting Up Your Router Table
Take your time setting up the router table to make each cut. Nothing will ruin an expensive piece of wood faster than rushing and having one of the measurements off. If you are making multiples of the same part, use stop blocks. These let you control the exact starting and ending point of every cut, so each piece will be identical. You may even consider making a jig, especially if you will be making these parts again in the future.
Your first step will always be selecting the correct router bit. Whenever possible, always use 1/2-inch shank router bits. They have much more mass, so they stay cooler. This means they stay sharper longer, so the theory goes. Most importantly, they don’t deflect when making deep cuts the way 1/4-inch bits do. This means you get a smoother cut. Freud, who makes high-quality bits, has a handy router bit selection guide.
One thing many woodworkers don’t consider is that you can combine router bits to make fancier profiles. With a basic set of bits, it is possible to make multiple passes over the same piece of wood to create a more complex edge profile than you would have, thought.
The base of one of the columns in my 98-year-old house is rotting. They don’t make router bits in that shape. By combining various router bits, I should be able to get a close enough match that I can replace it without having to go to the expense of having a custom router bit made, which is an option. Check out this video by James Hamilton, AKA Stumpy Nubs, on how to combine bits.
Selecting and Installing the Router
You can certainly get by using a 1/4-inch shank, low-powered 1 or 1 1/2 HP (horsepower} router in your router table. I did it for years. However, this rules out being able to use 1/2-inch bits. A 2-horsepower motor is much better for the task and will use both 1/4-inch and 1/2-inch bits.
At some point, you may want to step up to a 3-1/4 HP router. You will need one if you start doing things like making raised panel doors or flattening giant slabs to make tables. Both of these tasks take bits so large they can burn out the motors in 2 HP routers. 3-1/4 HP routers will drive any bit you put in them, no matter how large or how small. They also do it without complaining all day long.
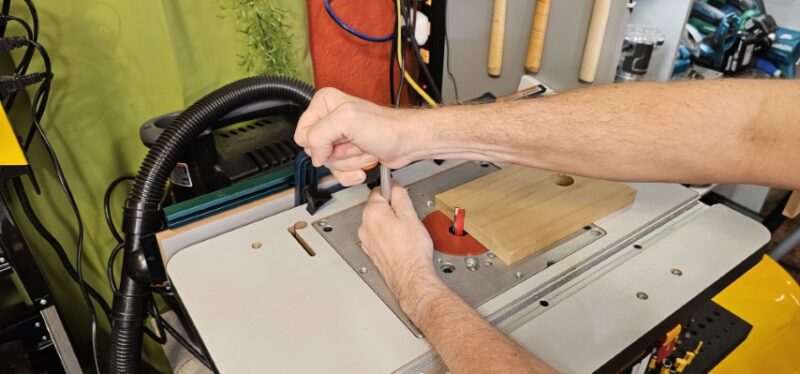
To attach most routers to the router table with the following steps:
- Unscrew the baseplate from the base of the router. Take the screws that you just pulled out and tape them to the baseplate. Store this someplace safe, like inside the router table cabinet if it has one
- Attach the router to the new universal table insert that comes with your router table or that you purchased. Use the screws provided. They are typically longer than the ones for your standard baseplate. If you are making your own, measure the screws in your old baseplate and purchase slightly longer ones. Mark, drill, and counterbore holes for them
- Pass the power cable through the opening at the top of your router table. Drop the new universal table insert in with the router attached
- Use a ruler or straightedge to level the table insert with the surface of your router table. Most good table inserts have screws along the edge to raise or lower them. Get the surface of the table insert, so it meets perfectly flush with the surface of the table. If it doesn’t have an adjustment, you will have to use sandpaper to lower it, and duct tape to raise it- have fun with that!
Positioning the Fence
The position of the router table’s fence depends on the bit you are using and the type of cut you are making. A good fence will be split into a left and a right half. They should move side to side independently. This is so you can take up the space around the bit. If your fence does not do this, you can use a sacrificial board. Cut a clearance notch around the bit with a jig saw or band saw. Next, clamp, screw, or bolt the board to your existing fence.
Most good commercial fences will allow the space on either side of the bit to be taken up by sliding each half of the fence toward the bit. Leave about 1/8-inch on either side. If you are taking multiple passes and using a bit that is wider at the base than the top, like a chamfer bit, be sure and widen the clearance space around the bit each time you raise it, or you will damage your fence.
Setting Up Feather Boards
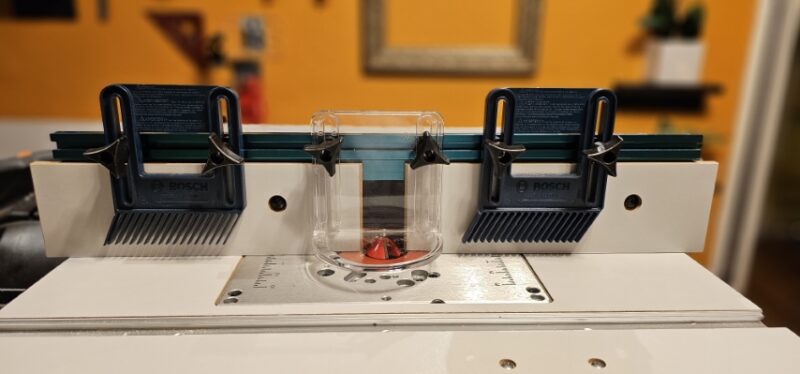
I always use feather boards in pairs – one on the in-feed side and one on the out-feed side. I usually have a pair on the fence, pushing the work down against the table. Sometimes it may be easier to have the feather boards on the side pushing into the fence while I push down. It just depends on the shape of the workpiece. Some woodworkers like to use four feather boards. Two would go on the fence and two on the table, especially with larger bits. I don’t like this because the feather boards interfere with push sticks.
Safety Measures While Setting Up
The number one rule when using a router table is to unplug the router when changing the bit. That seems obvious, but there are plenty of woodworkers with missing tips of their fingers. They didn’t follow this rule.
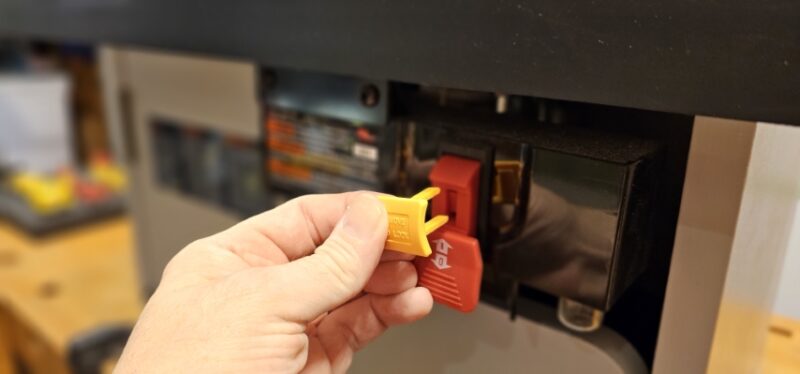
This rule can be nuanced depending on the router or router table. Some router tables and tools have plastic plugs that you can remove. This is so that your kids cannot turn on your device. I don’t trust these completely. They can be bypassed by creative kids with a couple of thin pieces of metal. If possible, turn off the breaker to your tools or your shop. Then put a padlock on your circuit breaker box if you have children around the house.
Some routers, such as my Trition have a physical cover that automatically goes over the On/Off switch. The cover will not open when the router is raised all the way up to change the bit. Therefore, I cannot access the switch to turn it on. This is an outstanding safety feature and one of the reasons I chose the Triton for my router table.
Always be aware that the bits are cutting tools, i.e. blades, and are very sharp. Some bits, like spiral bits, will cut you effortlessly if you are not careful with them. HSS bits (High-Speed Steel) bits are generally shaper than carbide when they are new, though they don’t stay that way nearly as long. Also note that carbide bits can shatter if you drop them on concrete.
How to Use a Router Table – Step-by-Step Guide
There is an unlimited number of things you can do with your router table. Most of them boil down to either feeding the wood through it using a bit with a guide bearing, using a fence, using a miter gauge, or using a jig. Here are the techniques for each one:
Using Router Bits with Guide Bearing
- Unplug the router or render it safe
- Install the bit
- Set the bit height. Do not try and take too deep a cut. It is better to take several shallow cuts than one deep one, even with a powerful router
- Install a starting pin to make the start of the cut safer
- Plug in the router or activate it
- Put on your eyes, ears, and if necessary, lung protection
- Turn on the dust collection and the router
- Make contact with the starting pin. Then, slowly push the wood into the bit from the right side of the table to the left. Make a pass, feeding the wood into the cutting edge of the bit
- Make a second, and possibly a third pass to make sure you removed all the material
- Turn off the router
- If necessary, raise the router bit and make an additional pass or two until you get to the final depth of cut
- Double-check the entire edge of the workpiece before you take down your setup in case you missed a spot. You don’t want to have to set it up again because you missed an area – ask me how I know!
Using a Router Table with a Fence, Miter Gauge, or Jig
- Unplug the router or render it safe
- Install the bit
- Set the bit height. Do not try and take too deep a cut. It is better to take several shallow cuts than one deep one, even with a powerful router
- Set the fence depth, controlling how much you are exposing the bit. Again, do not take too large a cut at once
- Set up any feather boards or hold-downs you may need
- Plug in the router or activate it
- Put on your eye, ear, and if necessary, lung protection
- Turn on the dust collection and the router
- Push the wood into the bit and make a pass going from the right-hand side of the table to the left
- Turn off the router
- Raise the bit height if necessary and make another pass or two until you reach the final depth
- Double-check the entire edge to make sure the cut looks good. Check that you didn’t miss a spot before you remove your setup. Pay particular attention to the very beginning and end of the cuts
Correct Router Speed Setting
Follow this rule of thumb: the larger and/or heavier the bit, the slower your cutting speed needs to be. Here are some recommendations:
- Up to 1-inch, your speed should be 22,000 to 24,000 RPM (as fast as your router will go)
- 1-inch to 2-1/2-inch, speed should be 16,000 to 18,000 RPM
- 2-1/2-inch to 3-inch, speed should be 12,000 to 14,000 RPM
- 3-inch or larger, speed should be 10,000 (as slow as your router will go)
If you run your router at full speed with 3-inch or larger bits, the outer edge of the bits will be traveling at over 200 mph! They are not meant to go that fast, and the excessive vibration and heat can cause a serious accident.
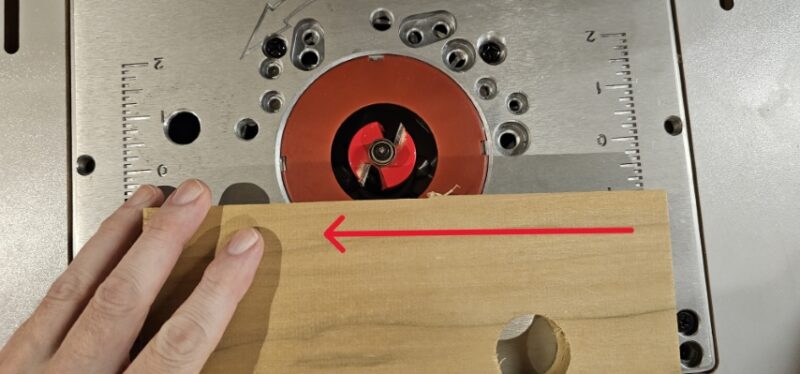
Feed Direction
Which way to feed the wood is often the source of confusion among new woodworkers. This is especially the case when they switch between handheld routing and the router table. That is because the router bit and motor flips 180 degrees when you go from one to the other. The direction you feed the wood must flip as well. What happens if you feed the wood in the wrong direction, known as a climb cut? If you are lucky, the wood can be snatched out of your hand by the bit and launched across the room. If you are unlucky, the wood can pull your hand with it into the cutter as the kickback occurs.
On the router table, when using a fence, feed the wood from the right side to the left side. That is the same when using a miter gauge. Feed from right to left.
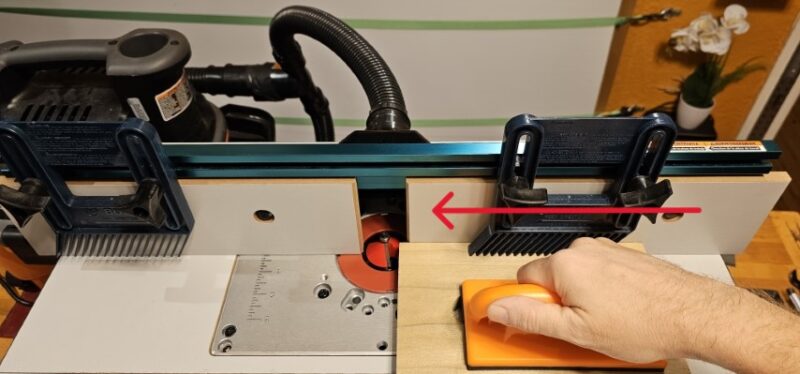
If you are using a bit with a pilot bearing, go counterclockwise. This is still feeding the wood from right to left when the wood is between you and the router bit. The confusing part is that this is the opposite direction as you would go if you were handholding the router.
If the shape you are cutting has an interior cutout, like a picture frame, then you would go clockwise on the inside part. Again, this is the opposite of what you would do if you were hand-holding the router.
Router Table Techniques – Setting the Bit Height
Most of us love to buy woodworking gadgets. There seem to be more gadgets out there to set router bit height than there are “multi-tools” that include a bottle opener. Those of us who have been around for decades always used to use a combination square. Mainly because that was all we had. We didn’t know how primitive that was because we could be off by as much as 1/128-inch.
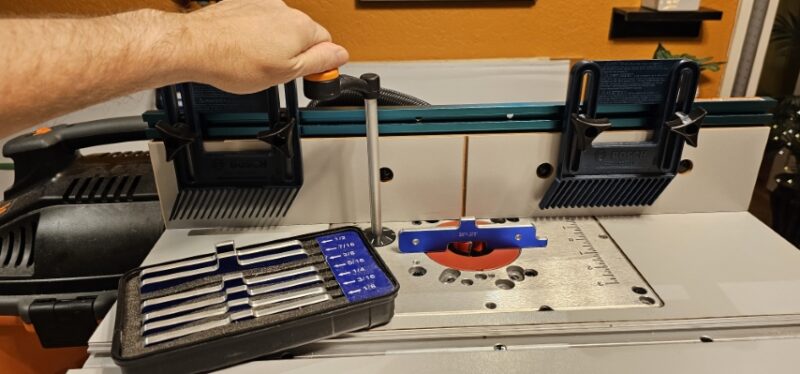
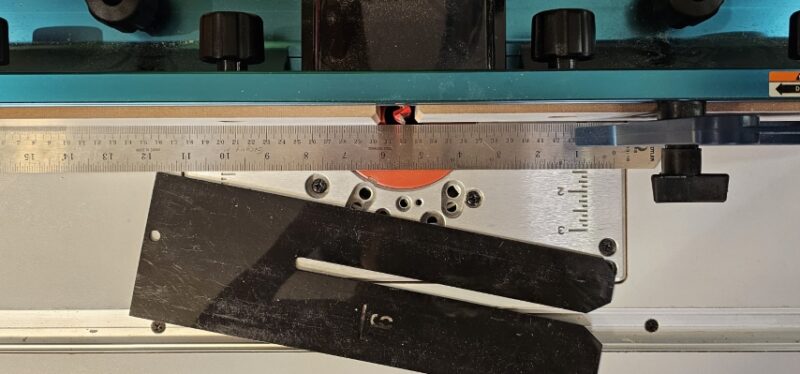
I do recommend you buy two devices to set your bit height. Then save your money when the new gadgets come out. The new ones, don’t make your old ones stop working. The first thing is a set of router table setup blocks. Get ones that have a gap in the middle, like mine in the photo. They will span across the hole in the router table.
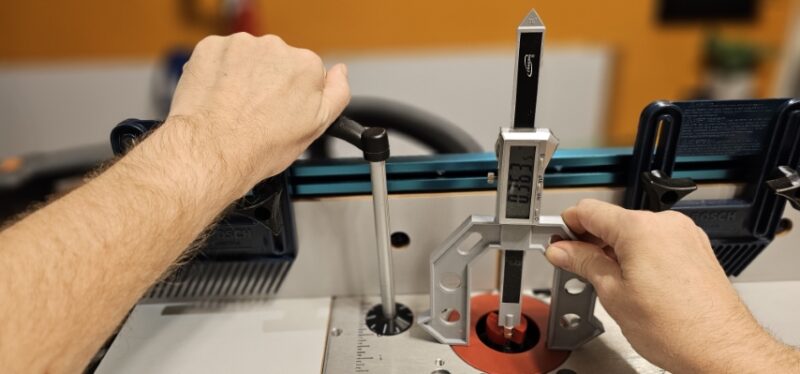
iGaging Digital Router Table Depth Gauge and Saw Gauge
The other device I recommend for setting the height of the router table, router, and table saw is the iGaging digital router table depth gauge. I have the old model (pictured) but the new model has several improvements. The new one has a wider base and a depth rod for measuring hole depth. For all practical purposes, they put digital calipers on a depth gauge, so it measures your bit accurately to 0.001 inch. There are a couple of other cheaper brands, but they have several disadvantages. The most obvious is that they do not have a steel anvil to touch your router bit while taking the measurement. It appears to be just hitting bare plastic and will wear out much faster than the iGaging,
Making the Cut
If you are using a fence, set the depth of cut. Don’t be afraid to take a shallow pass or two first. This is done by setting the depth of cut with the fence less than you need for the first pass. Then the second pass, move the fence in and take another pass. The final pass should be a lighter pass to get the cleanest cut without any burning on the wood. This is especially important with woods that a prone to burning like cherry.
As an example, if I need to make a 3/4-inch deep cut, I would start with a 5/16-inch cut and make my first pass. Then I would reposition the fence and make another 5/16-inch cut. Finally, I would make my last cut at 1/8-inch to get 3/4-inch. The result should be a nice, clean cut.
Using a Starting Pin
What if I was not using the fence? Then I would use a starting pin, also known as a fulcrum pin. Temporarily screw a starting pin into your table insert anytime you are about to use the router table without the fence. Position the workpiece against the starter pin and then push the work into the spinning bit. This gives you a stable point of contact in the horizontal axis to prevent the wood from kicking back when you are first plunging into the cutter head.
My Bosch router table had treads for a metric starting pin but didn’t come with one. The only one I could find in Florida was on Amazon. It was 1/4 – 20 which is Imperial measurements, not metric. I had to drill into my aluminum table insert, and then tap threads to be able to use the starting pin.
Safety Precautions and Best Practices
There are three main hazards with the router table. The first and most obvious is the spinning cutter head. This would be devastating to any part of your body that comes in contact with it. Therefore, keep your hands away from it and use push sticks and paddles. Here is my favorite inexpensive set of push sticks, or you can make your own out of wood.
The second danger is kickback. Just like with the table saw, a router and router table can kick back. With the router table, the workpiece can get jerked from your hand. If you are not prepared for it, it can even jerk your fingers into the router bit. The best way to protect yourself from kickback is to:
- Feed the wood in the proper direction
- Don’t take too deep a cut
- Pay attention to the grain direction – Read a great article on grain direction by Johnathan Katz-Moses
- Choose the appropriate speed for the size bit you are using
- Use sharp bits
- If you are not using the fence, use a starter pin
- Use hand screw clamps for holding small pieces
- Use push sticks and push paddles so that if you do get kickback, your fingers are safe
The third most common danger from a router table comes from the noise. Routers are some of the loudest tools in your shop. Always wear hearing protection when using a router. The damage from sounds accumulates over time and is irreversible. I have never met a single person with hearing loss who doesn’t regret not taking better care of their hearing.
Importance of Personal Protective Equipment (PPE)
As with all woodworking tools, wear your eye and ear protection. You may or may not need a dust mask. This depends on if you have good dust collection on your router table. You should be collecting dust from the gap behind the fence. You should also be collecting it under the table at the bit with your vacuum. It is not safe to wear gloves with a router table. If the wood kicks back, or the cloth comes in contact with the bit, it could pull your fingers into the spinner cutter head.
Router Table Maintenance Tips
Router tables need a small amount of maintenance. Occasionally blow the dust out of the router. Vacuum the dust out of the router table cabinet. You should wax your table and fence twice a year with paste wax. Check all the nuts, bolts, and handles and make sure the vibration hasn’t loosened them up. I mounted an LED light inside my router table cabinet to make it easier to see. I change the batteries once a year. That is about the extent of the maintenance you need to perform on your router table.
Avoiding Common Mistakes
Mistakes happen, especially in woodworking. My cabinetmaking teacher always said his number one job was to figure out how to correct our mistakes. If you are lucky and clever, your mistakes won’t cost you any extra material – AKA money. Sometimes you may have to change your design, sometimes you may have to replace a part, and sometimes you may have to start over. Been there, done that.
The best way to avoid mistakes is to:
- Plan your project out carefully first. The more you have thought through the pitfalls that can occur, the less likely they will happen to you
- Measure twice and cut once. As cliché as it sounds, this is excellent advice. If it is crucial, measure more than twice and with different methods to see if they match
- Learn from other people’s mistakes by soaking up as much information as you can online, in books, and even in person from a local woodworking club
When it comes to mistakes on the router table:
- Pay attention to the feed direction. If you start to feed the wood the wrong way, you will most likely get kickback. This is not only dangerous, it can ruin your workpiece
- If you are getting burning on your wood, clean your router bit and…
- Don’t take too deep a cut. Take multiple shallow passes, especially the last pass for the best result
- If your edge profiles seem inconsistent and not perfectly even, use feather boards to help you hold the wood tight to the router bit. Then take a couple of passes at the same height to make sure you remove all the material. This can be a big problem with long pieces, like when you are making custom molding
- If the wood is not smooth after you cut it, use a higher speed as long as it is safe to do so
- If you screw up with an edge profile, you can often go deeper. Or change router bits to a different profile to cover up a mistake. You can’t do that if you screw up a joint you are making on the router table, though
Frequently Asked Questions About Router Tables
You can find lots of information on jigs online, but much of the woodworking wisdom online and on YouTube today comes from these books. This one by Sandor Nagyszalanczy is one of my favorites. Even after reading everything written on the subject, you may still have questions. Below are some of the most common questions we get about how to use a router table and router tables in general.
What are the best materials for a router table use?
While primarily thought of as a woodworking tool, routers and router tables can be used with most plastics. Make sure you are using a sharp bit. Some plastics like expanded PVC, available at Lowes and the Home Depot, work exactly like wood.
Harder plastics require a slowing down of your feed rate and the speed of the bit. Here is where having a variable-speed router is beneficial. With brittle plastics like acrylic, slow the router down as much as possible and do some test cuts first.
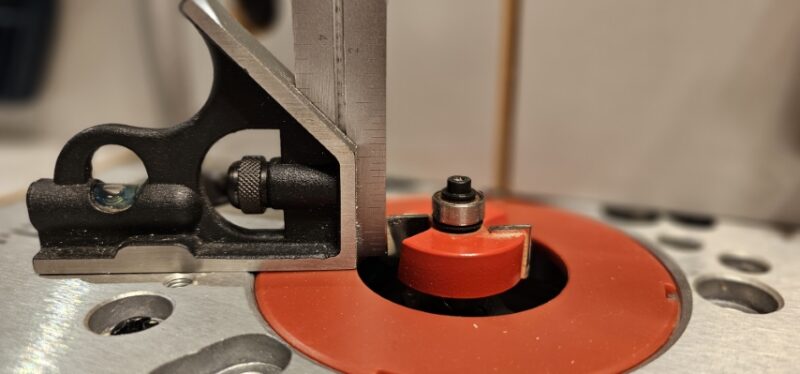
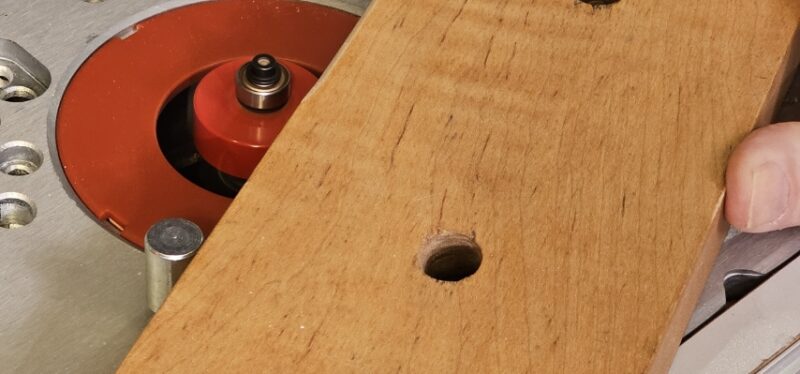
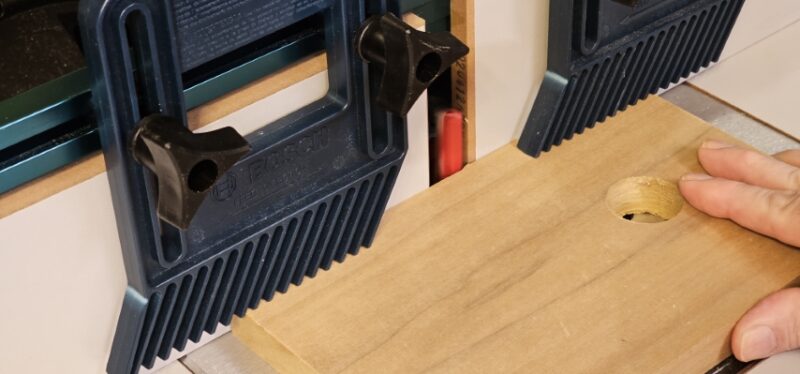
Can I use a router table as a jointer?
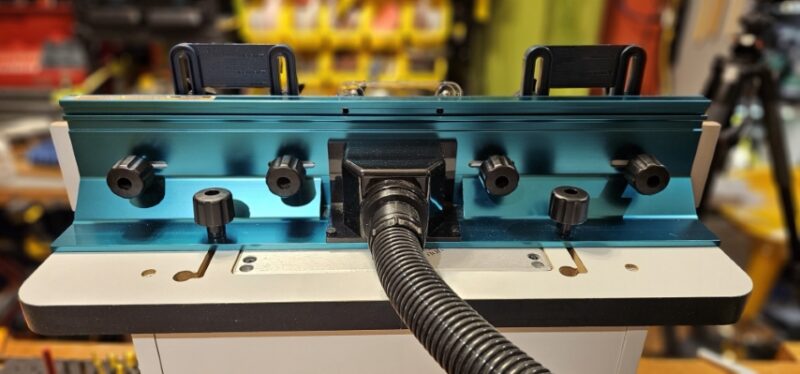
It is very unsafe to join small pieces of wood on a full-size jointer. How can we do this safely? By using our router table and a thin shim or two. By slipping one or two 1/16-inch shims between the metal bracket of your fence and the wood/MDF/melamine on the left-hand side, you create an uneven fence with the left side sticking out further than the right. Next, we install a straight cutting or spiral cutting bit. Set the fence even with the left-hand side using a ruler as shown in the photo. Now you have a small jointer!
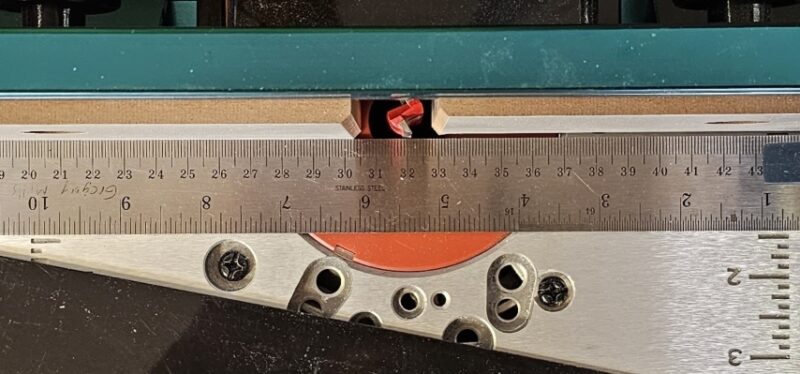
Pass the wood to be joined from right to left. Any unevenness in the edge will be removed after a few passes. This works great for edge joining but not face joining because the surface area of the bit is too small.
What router speed should I use for different materials?
Always use the top speed of your router as much as possible. Slow them down when using larger bits. I slow it down when I use any bit over 3 inches in diameter, which is massive. Routers depend on the high speed to get clean cuts. However, the giant bits become a safety concern when they are moving that fast.
What is the Best Router and Router Table I Can Get on a Tight Budget?
In my opinion, if you are on a budget and want to get started with a router and a router table, the best value is the SKIL RT1323-01 router table and fixed base router kit. You get a pretty nice 2 HP fixed base router. You also get a capable, bench-top router table with some nice features – both for less than $200!
