
Importance of Knowing How to Use a Router
If you like woodworking, you need to know how to use a router. It is one of the most important and versatile power tools you can own, no matter your skill level. In this comprehensive guide, we’ll cover the basics of using a router, explore different types of routers, discuss safety tips, provide a step-by-step guide for setup, highlight common uses for them, offer maintenance tips, and answer frequently asked questions. Be warned. By the end of this article, you will probably want to own at least three routers!
Table of Contents
- Different Types of Wood Routers
- Router Basics: Understanding the Parts and Components
- Safety First: Router Safety Tips
- Direction of Cut
- Preventing Blowouts – Route Your End Grain First!
- Working with Router Bits
- Getting Started: Router Setup
- Changing Router Bits
- Common Uses for a Router
- How to Maintain Your Router – Maintenance Tips
- Conclusion
- Frequently Asked Questions About Routers
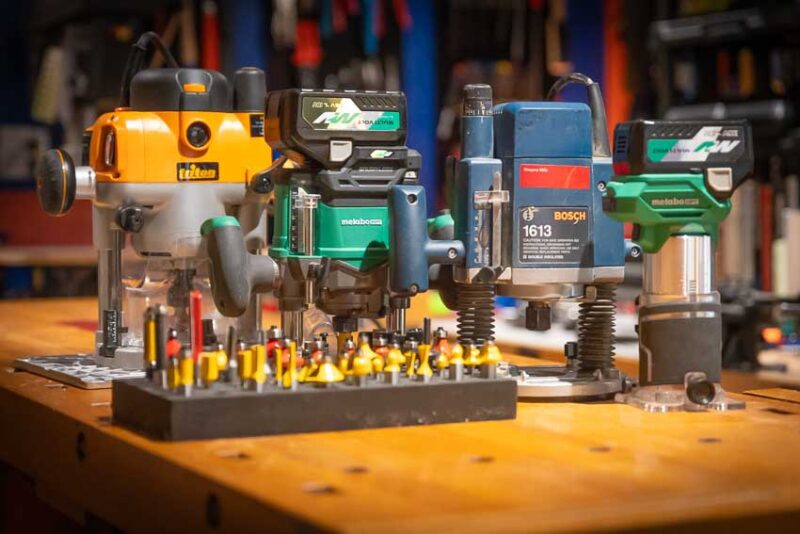
Different Types of Wood Routers
Any kind of router features a high-speed motor enclosed in a housing that spins a bit used for cutting or shaping wood. You can mount this motor in several different ways, resulting in many different types of wood routers. The most basic is a fixed-base router. A plunge router takes that basic concept and adds vertical rails to let you plunge the router into the material. When you mount a fixed base router underneath a table, you get a router table. Mount one of these tools overtop a table with computer-aided control and you get a CNC router.
Following are the many different types of routers you can use:
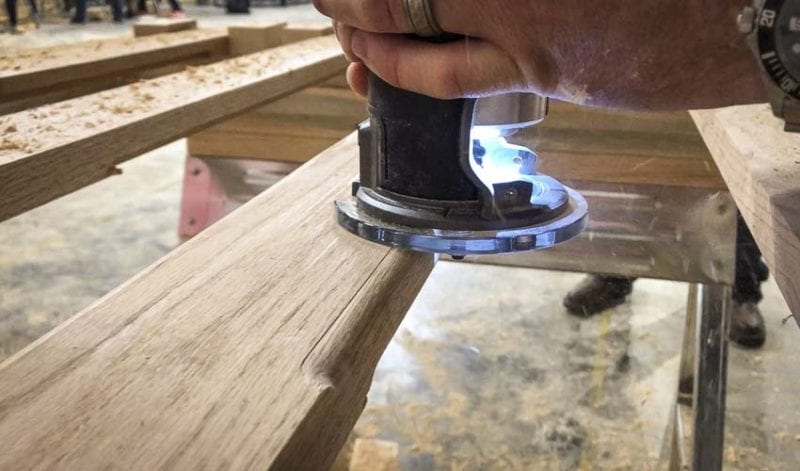
Compact Router
Compact routers—particularly cordless models—feature smaller motors and let you use them one-handed. Weighing less than 5 lbs, these routers weight less than half that of full-size fixed and plunge routers. We reach for these routers first when doing many lighter projects.
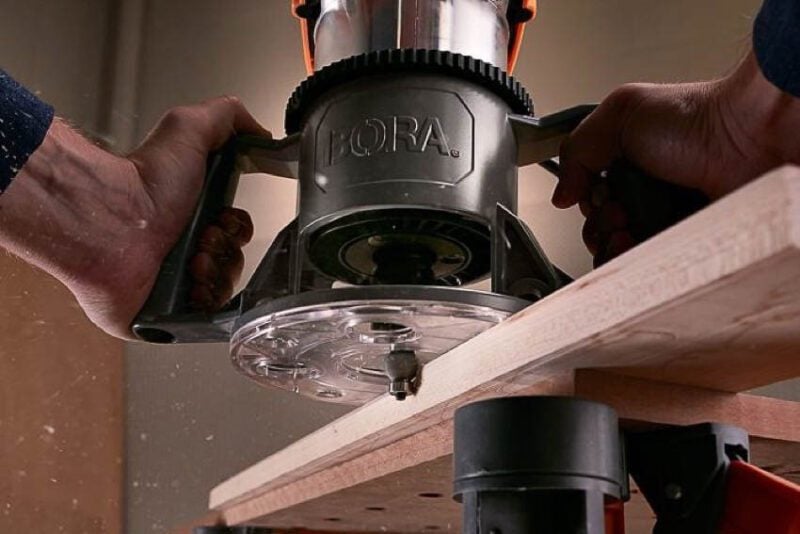
Fixed-Base Routers
Fixed-based routers serve as the workhorses for craftsman and woodworkers. While compact routers have gained in popularity, fixed-base routers still dominate when used in router tables and for heavy-duty work where you don’t require the features of a plunge router.
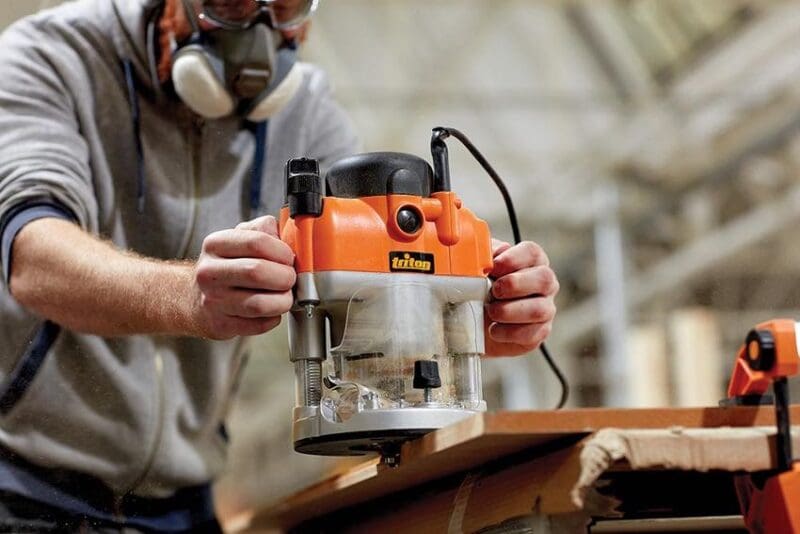
Plunge Routers
Plunge Routers utilize guide rods and a spring mechanism to let the router slide up and down its base and also lock into place. Used strategically for mortises and tenon joints, they tackle all the jobs of a fixed-base router but with more features.

Combo Routers
Combo or dual-mode routers combine the features of fixed-base and plunge routers into one. You can find these in kits with a motor and two bases or where you can remove the spring to use it with a router table. The Triton TRA001 falls into this category and provides flexibility that other models do not.
Router Table
A router table is one of the most useful tools in the shop for doing everything from making joints to cutting out shapes to making your own molding. You can build your own or buy a tabletop or floor model. These tools work with existing fixed base routers but may require you to customize the plate to fit your particular tool.
CNC Routers
CNC wood routers feature a large bed where you clamp your work in place. The router moves overtop the material suspended from an articulating gantry arm. A computer controls the movement and speed of the router to make the cuts.
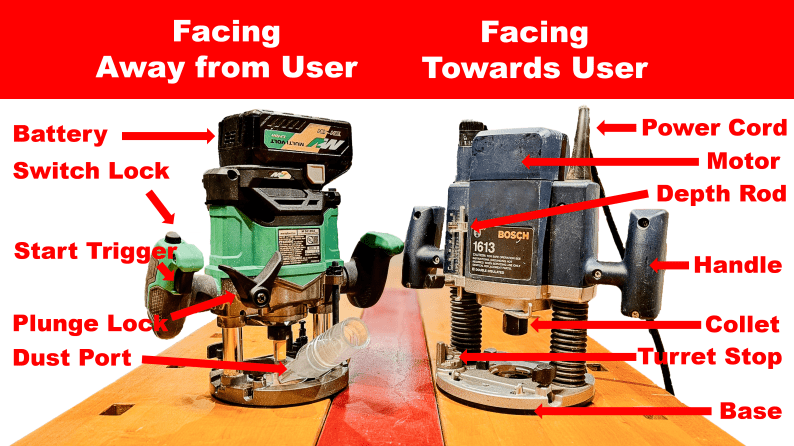
Router Basics: Understanding the Parts and Components
In order to learn how to use a router, let’s take a look at each of the basic components common to all routers. These apply no matter the size or whether they or cordless or corded.
Base
The base of a router rides on the workpiece. Seems simple enough. If you are cutting/shaping a small piece with a big router, the base becomes unstable. The cut or the edge profile will not be smooth. This is a case where you should use a smaller router or a router table.
Motor
One of the most important things you are paying for when you buy a router is how powerful the motor is. Cordless handheld routers have been around for a while but it was not until the summer of 2021 that Metabo HPT introduced the world to the first full-size cordless router. In most cases, a 2 HP motor is plenty of power for a full-size model. 1-1/2 HP is fine as long as you take multiple passes when you use larger bits (start shallow and gradually increase the depth of cut).
If you want to flatten slabs to produce large solid wood table tops as you see on YouTube or Instagram, then you will want a 3 1/4 HP motor. The bits to do this type of work are huge. The motor is left running for long periods at a time and often it is making deep cuts. I bought a router to do this and most of the time it stays in my router table so I can use any size bit I want.
Collet
The collet on a router is a special chuck that holds the bits. They come in two sizes, 1/4-inch and 1/2-inch. If your router only came with a 1/4-inch collet, then the router’s motor is not strong enough to run larger bits which could burn out the motor.
Router Bits
The router bit is the cutter or “blade” of the router. They come in literally hundreds of different profile shapes. Some have a bearing on the top or bottom. Others do not. The ones that do not usually require the use of a jig, fence, or edge guide to make the cut.
Setting Router Bit Speed
Some tools allow you to set router bit speeds using either a variable speed dial or a multi-position switch. As a rule of thumb, you should run your router at the top speed unless you are using a very large bit. Routers need high speeds to make clean cuts. You should slow your router speed down when using larger bits as the rim or edge of that bit travels at much higher speed than a smaller-diameter bit.
Safety First: Router Safety Tips
A router is one of those tools where everything appears to be going fine. Then, seemingly out of nowhere, something can happen that causes an injury. This can occur very quickly—either from kickback or from contact with the cutter. Understanding how to use a router safely is key to a lifetime of woodworking without a trip to the emergency room.
Personal Protective Equipment (PPE)
Always wear appropriate personal protective equipment (PPE) when using a router or any other workshop power tools. This means Eye, Ear, and Lung protection. You want to wear safety glasses for your eyes, hearing protection for your ears, and a dust mask for your face. The links are to my personal favorites, including eye protection that fits over prescription glasses. These wipes will keep your glasses from fogging up, even when wearing a mask.
Safe Handling and Operation
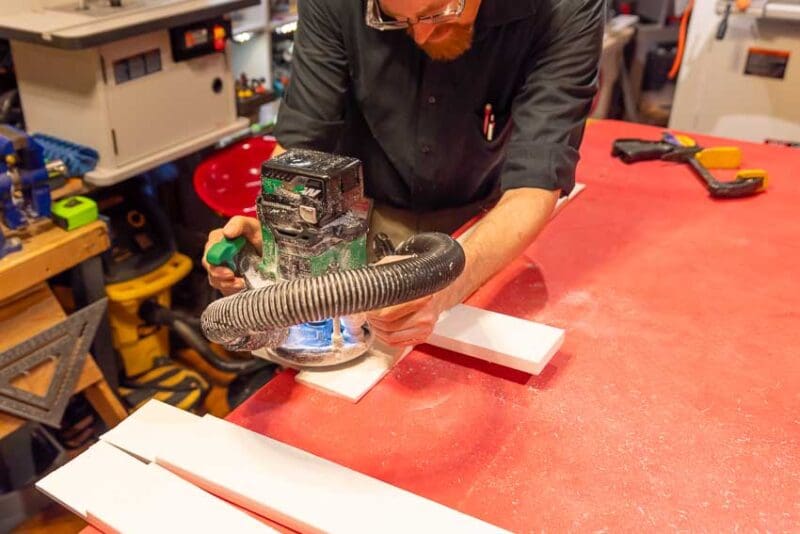
- Always secure the material you will be shaping/cutting. You can use clamps but they usually get in the way. Friction pads or pucks are much more useful and faster to use. I actually use a yoga mat. They are cheaper, much larger, and just as effective. Plus they come in fun colors to match your workshop! Make sure you stick with 1/4-inch thick mats.
- Full-size routers have two handles on them for a reason. Always use two hands to control them. On the other hand, you can use compact routers with one hand. Just be sure to keep the other hand well away from the work area. I prefer to keep it behind my back which is a pro painter’s trick so they don’t accidentally put their hand in wet paint. In this case, you want to avoid accidentally putting your hand in the path of the cut.
- Never force the router through the material. It is better to take two or more lighter passes than one deep pass with the bit—especially with 1/4-inch bits. This reduces the chance of kickback and takes it easier on the motor. You also get a cleaner, smoother cut that requires less sanding.
- Always route in the appropriate direction. Going in the wrong direction is called making a climb cut. It is an advanced technique that is only used in certain situations by woodworkers with a lot of experience. It is also very dangerous and requires you to clamp the material down—not use the friction methods described above.
- ALWAYS remove the power source when changing bits. Either remove the battery or unplug the tool.
Direction of Cut
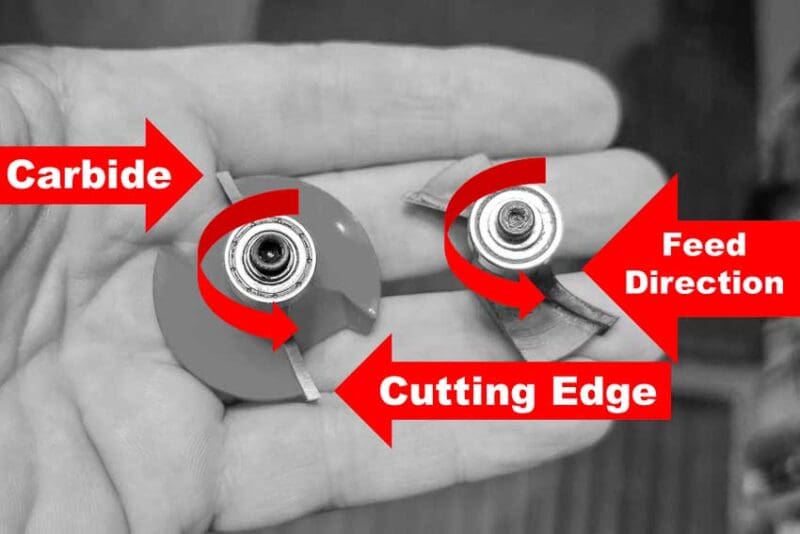
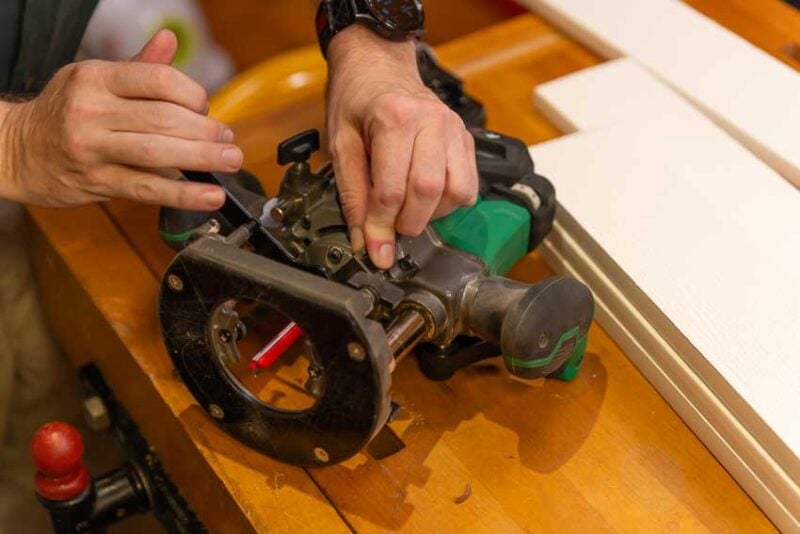
There are a lot of ways to remember which direction to move the router. It appears to be the opposite direction when using a router table because the router is upside down. There is the “rule of thumb trick”, the “right-hand thumb trick” and more. I never bothered to learn any of those tricks. Once you know how you can look at a router bit and know the same thing (see the photo).
Look to see which part of the bit’s carbide cutter is facing forward and which is facing backward, simply feed the wood against the cutter head. This is rather like understanding which way a circular saw blade cuts. You wouldn’t feed the wood from the backside of a table saw, would you? The wood would go flying out of your hand if you did. This is exactly what happens when you feed a router bit the wrong way or do a climb cut. There are times to do this, but that is an advanced technique.
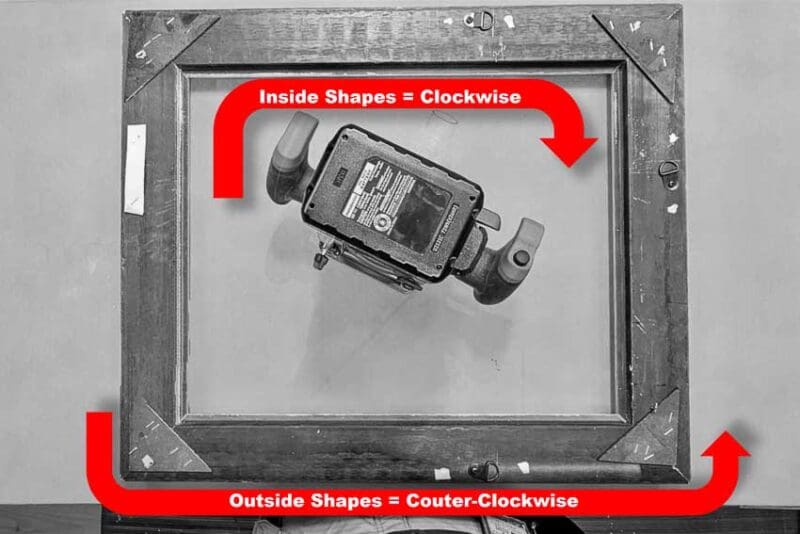
Once you know this, you can instantly know which direction to feed the wood, whether the router bit is in a handheld router, or in a router table. It also doesn’t matter if you are inside or outside a frame. Push the router’s cutter into the wood (see the photos).
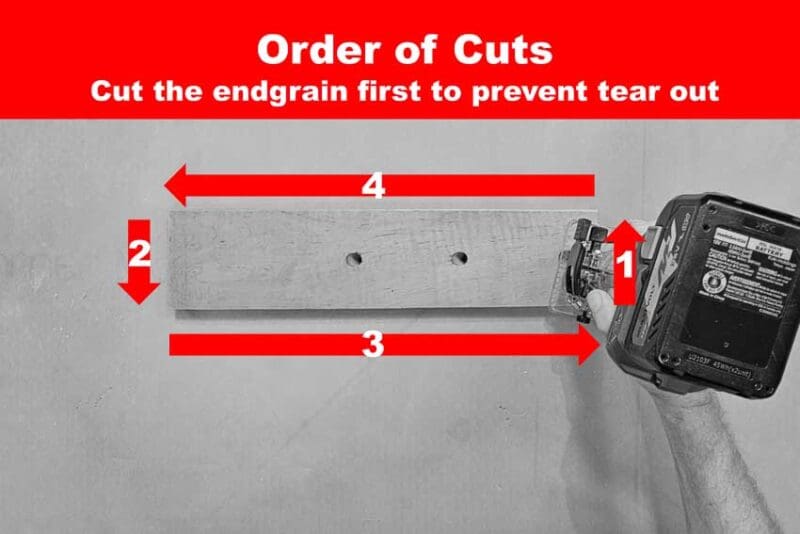
Preventing Blowouts – Route Your End Grain First!
Some species of wood (think walnut) can blow out when you make the transition from end grain to long grain at corners. To prevent this, always route your end grain edges first then come back and do the long grain. I actually do this regardless of the type of wood as it represents the best practice for how you route anything.
Working with Router Bits
Learning how to use a router means knowing your router bits and their proper use. There are literally hundreds of bit shapes on the market. First, decide whether you need 1/4-inch shank, 1/2-inch shank, or both. 1/4-inch bits fit into any router, whether compact, full-size, or a router table with a huge 3-1/4 HP router. If that is the case, why would anyone want to buy 1/2-inch bits?
Easy. Larger router bits have substantially more mass. This means the shanks don’t flex like 1/4” bits when making deeper cuts. That also means smoother cuts. The extra metal also keeps the bits cooler and thus keeps them sharper longer.
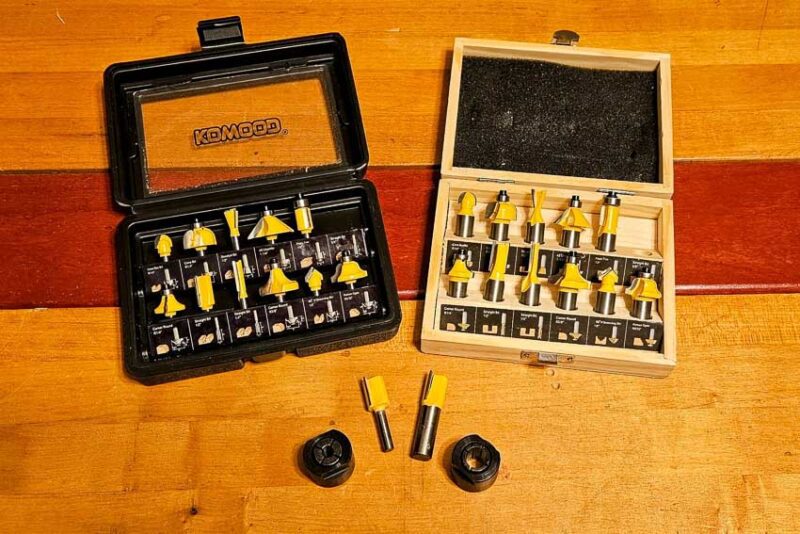
Thanks to the plethora of Chinese and Taiwanese router bits on the market, buying identical sets of 1/4-inch and 1/2-inch bits is now affordable. When you wear out specific ones, replace just the ones you use often with high-quality Bosch, Freud, or Whiteside bits. Keep these tips in mind:
Router Bit Tips
- Bits are sharp and will bite you if you are not careful when handling them, even when not inserted into a router.
- Refer to your router’s manual if unsure how to replace the bits. Every manufacturer will offer free PDF versions of their manuals online. Just google your router make, model manual, and the words Manual Download. For example Skill RT1322-00 Manual Download. Sometimes it is helpful to add the word PDF at the end.
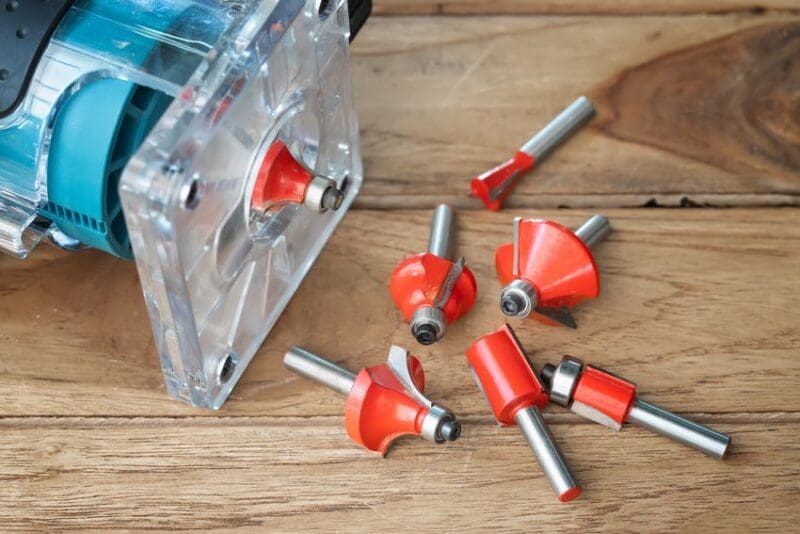
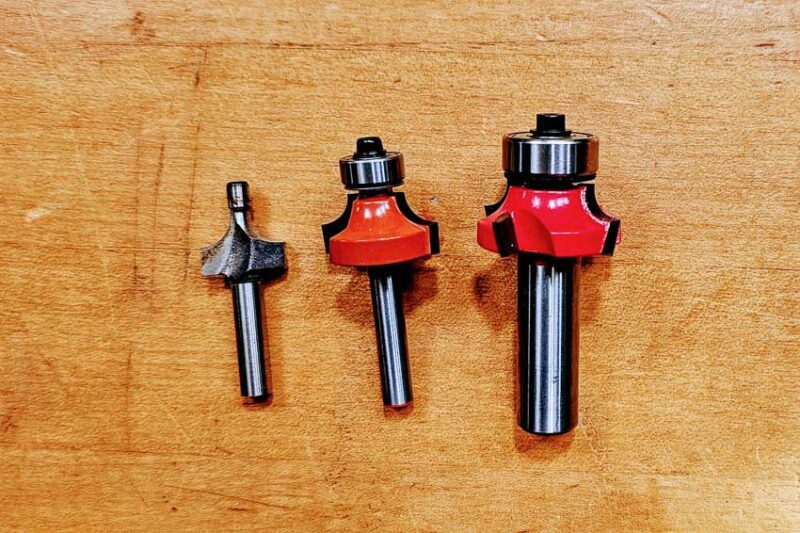
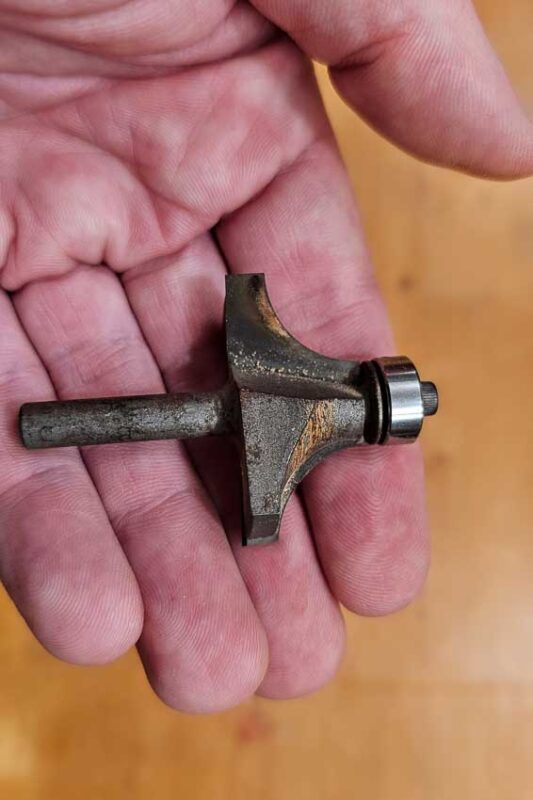
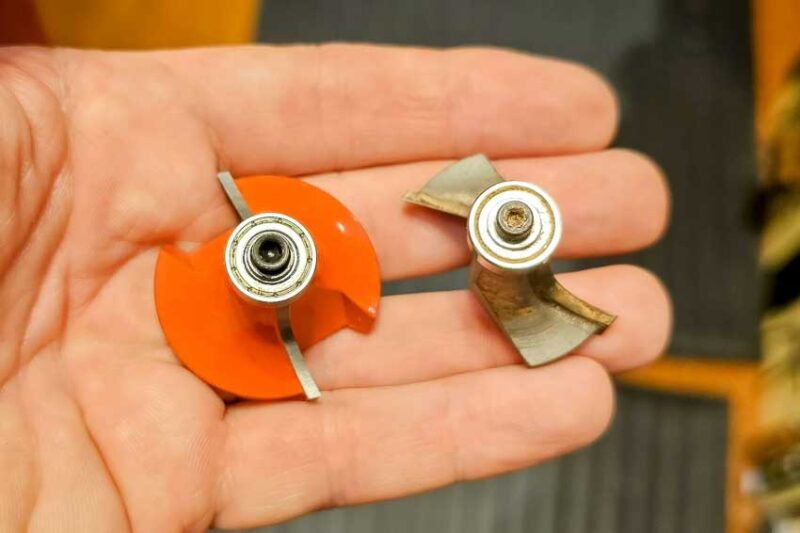
- Router bits that use guide bearings have three different levels of quality (see photo below).
- Friction-bearing (cheap junk, don’t buy)
- Small inexpensive roller bearings (mid-price, good quality, for occasional use)
- Large high-quality bearings (high-end, best quality for daily use-Freud, Whiteside, Bosch)
- Router bits come in HSS (High-Speed Steel), cheap carbide, and high-quality carbide bits. The cheap carbide is thinner and can’t be sharped as much and higher-end bits which also stay sharp longer. You get what you pay for, but on a bit you only use once a year, do you need a premium carbide?
- You can send your bits out to have them sharpened. Often companies that sharpen circular saw blades will sharpen router bits. With a diamond stone, you can sharpen many of them yourself.
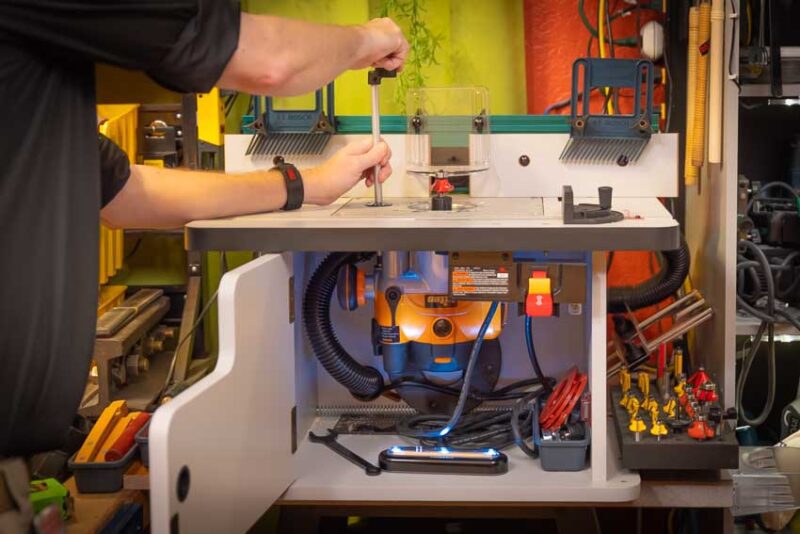
Getting Started: Router Setup
Most routers are setup roughly the same way with a few minor differences. The differences are enough to damage the tool or cause an injury, so always read the manual for the initial setup for your particular router.
Your first choice when making a cut is whether it is better to take the router to the workpiece or take the workpiece to the router- i.e. should you use a router or router table? As a rule of thumb, if the workpiece is large, I use a router. If the workpiece is small, I use a router table.
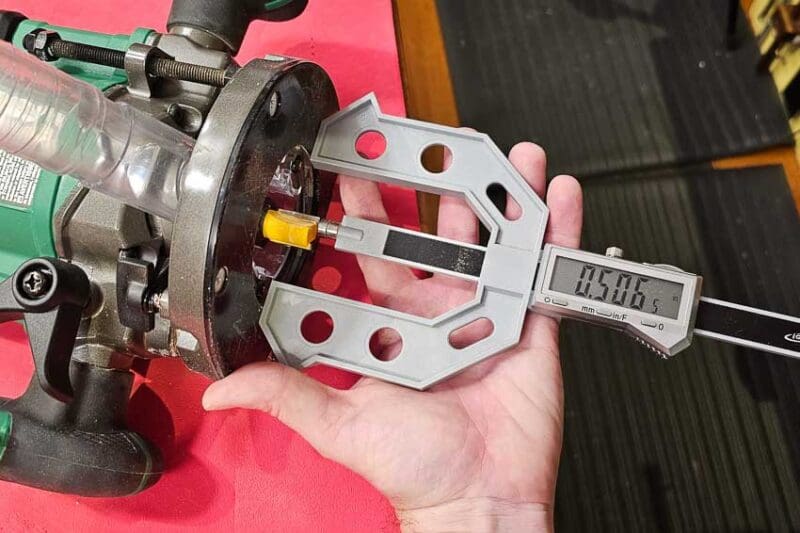
The next step is to decide on the correct bit and perhaps the correct size router. If you have a choice, choose a 1/2” shank if possible. Make sure the bit is in good condition. Set your bit depth BEFORE you plug in the tool or install the battery.
Before you make your cut, you MUST secure the workpiece somehow. Once you use a friction pad, you will never go back to clamps. When using a router table, keep your hand away from the bit and use push blocks to prevent life-altering accidents.
Finally, look at the bit and make sure you are pushing the router in the correct direction before you start. Always wear eye, ear, and lung protection.
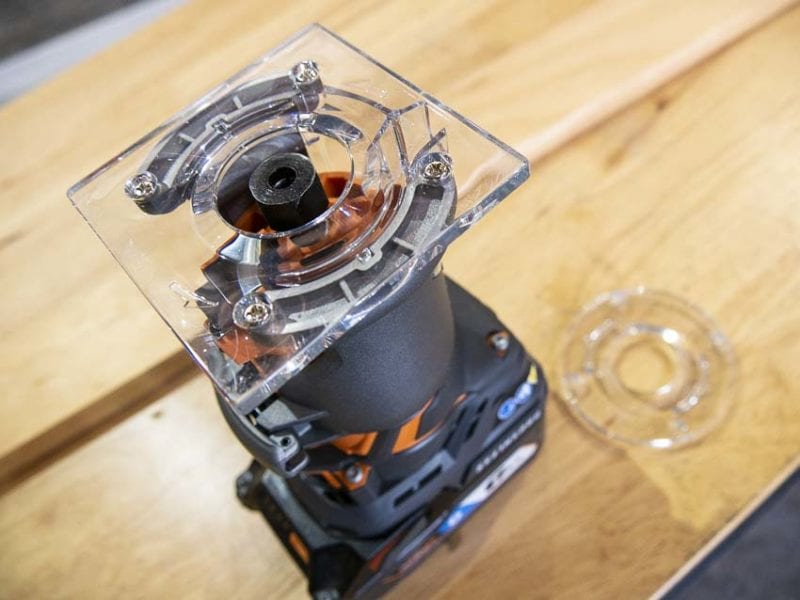
Changing Router Bits
ALWAYS UNPLUG OR REMOVE THE BATTERY from your router before you change the bit.
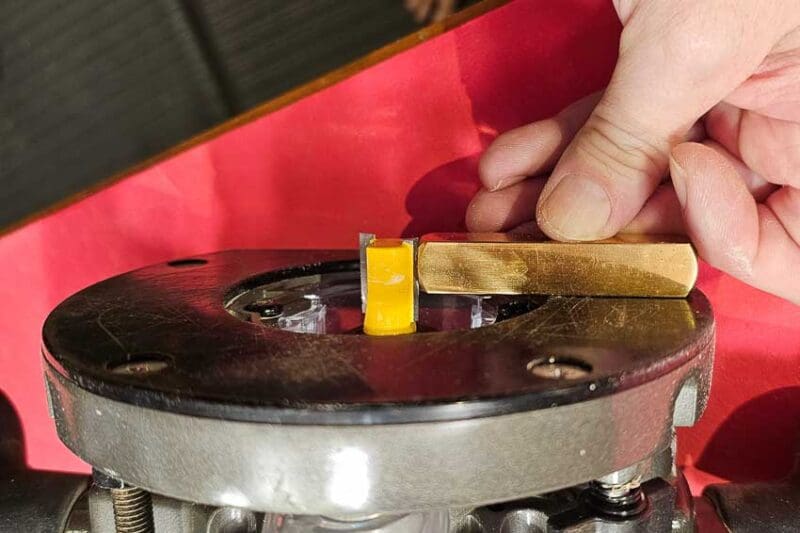
Once your tool is rendered safe, raise or lower the bit so you can access it. Remove any dust port if needed. Next lock the shaft so the bit doesn’t spin when you turn the wrench. Either press the shaft lock or use both wrenches in opposite directions depending on the tool. Remove the collet using the wrench that came with your router. If you lost it, a metric open-end wrench of the correct size should work.
When you loosen the collet, it will come free and spin by hand for a few rotations then stop again. The bit will not come out. You will then need to use the wrench again for another turn or two. This is called a safety collet. After the second time, the bit should be free.
Insert the new bit, changing collet sizes as necessary. Insert the bit shaft all the way down into the collet so it doesn’t come flying out when you turn on the router. Tighten the collet. You want to tighten it very firmly but do not over-tighten it. Remember that you have to undo it next time.
Common Uses for a Router
Most woodworkers agree that second only to a table saw, there is no more versatile stationary tool you can own than a router. Entire books have been written about how to use a router. The vast majority of those pages are taken up with various jigs that let you use it for many different applications far beyond the scope of this article.
Once, I even ran across a set of jigs to make baseball bats with a router. To be fair, I have seen jigs make similar wood turnings on the table saw too. Once you learn how to use a router, you will find many more uses you never thought of. Let’s take a look at a few common uses.
Edge Routing
Arguably the first thing that comes to mind when you think of buying a router is to add a decorative edge. This can be a simple round-over, a chamfer, or a classic Roman Ogee bit. These decorative edges are used on furniture, picture frames, door, and window molding, or anything else that would benefit from a little “beautification”.
Production shops will often buy a dedicated cordless router and leave a 1/8-inch round-over bit in it to ease the edges for sanding.

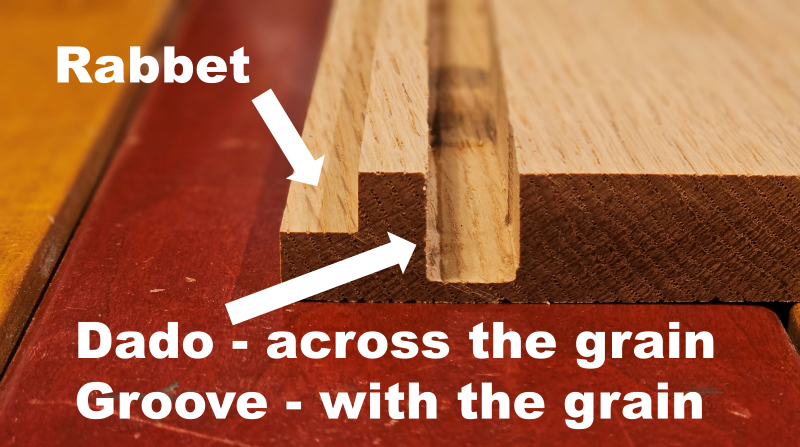
Cutting Dadoes, Grooves, and Rabbets
A dado is a groove cut in the middle of a board going across the grain. A groove is cut with the grain. Some people refer to grooves as dadoes, but technically this is not accurate. A rabbet is a groove cut on the edge of the board. Furniture built with dadoes, grooves, and rabbets generally are much stronger than those built with locking systems like those used by Ikea. Once you learn how to use a router, you will find lots of uses for dadoes, grooves, and rabbets.
Pattern Cutting
Pattern cutting involves using a pattern to trim or cut out shapes on the router or router table. This is done with either a bit that has bearings that follow the pattern or guide bushings available for your router. You can make your own templates or buy them. You can buy templates such as the alphabet so you could make a wooden sign like you see at National Park Service stations. Here is a good video tutorial from Popular Woodworking on pattern cutting. There are pros and cons of using pattern or flush trim bits with the patterns in some instances and guide bushings in other instances. Here is another great video from Stumpy Nubs explaining when to use each.
Making Joints
If you make furniture, you need a router because they are basically joint-making machines, especially plunge routers. In addition to dados, grooves, and rabbet joints, they are great for mortise and tenon joints, dovetail joints, and many more.
If you want the strongest joint possible, forget pocket holes, biscuits, or Dominos. Get a 45-degree locking miter joint bit or a finger joint bit. When you learn how to use a router it opens up any number of possibilities for creating strong joints.
How to Maintain Your Router – Maintenance Tips
Proper maintenance of your router is essential to ensure its longevity and optimal performance. Regular cleaning and maintenance will help you avoid issues and ensure that your wood router remains in good working condition. Here are some maintenance tips we specifically recommend:
Regular Cleaning
After using your router, blow all the sawdust out of the motor. I used an air compressor, but now that I use all cordless nail guns, I switched to a small cordless leaf blower. It works great and ensures that my power tools will last longer by staying cool as I keep the fan intakes clean. A quick wipe-down with a damp paper towel is all that it takes to finish cleaning the outside of the tool.
Lubrication
Other than the plunge mechanism there is not much to lubricate on a router. I do not recommend WD-40 or machine oil as these attract sawdust. Instead, use something like Blaster’s Dry Lubricant. Designed for woodworking tools, it leaves a dry, slick film. You can use this on your plunge mechanism as well as the base of your router to help it glide across wood more easily. You can also use it on the surface of all your cast iron tools such as your table saw, band saw, drill press, etc. I even use it on the screw threads of my vices.
Checking and Replacing Router Bits
Regularly check your router bits for signs of damage, especially if you drop one. Carbide bits often do not survive being dropped onto concrete and chip easily. For this reason I like to work standing on rubber floor mats. Look for chipped or dull cutting edges, as they can affect the quality of your cuts and put unnecessary strain on the router’s motor. Look for the buildup of resin, aka “gunk” from the wood, especially if you work with a lot of pine. This resin buildup eventually causes the bits to burn your wood and cuts will not appear clean.
Rather than replace your bits, clean them first by soaking them in Pine-Sol for about 15 minutes. Next, scrub them with an old toothbrush. If this doesn’t work, you can try sharpening the bits. Always replace any bits that show significant wear or damage.
Storage
To store your router, make sure the bit is below the level of the base to prevent accidental cuts or to prevent damaging your bit. Like all power tools, keep the router away from high humidity. If you must store your tools in a non-climate-controlled space, keep them in a cabinet or drawer with silica gel packets to absorb the moisture and prevent the metal parts and internals from rusting. I also like keeping my bits in foam trays specifically designed for router bits.
Conclusion
Learning how to use a router will dramatically improve your woodworking skills and the multitude of possibilities for what you can do. From cutting joints to creating cylinders to flattening slabs, and so much more. Every woodworking needs at least one router and a router table.
Frequently Asked Questions About Routers
Q: What is the difference between a plunge and a fixed-base router?
A fixed base router is a router whose base doesn’t move up and down. A plunge base router adds a mechanism that allows the router to up and down. This is useful for making mortises and grooves.
Q: What safety measures should I follow while using a router?
Always wear eye, ear, and lung protection. Maintain a secure grip on the tool and secure the workpiece. Always remove the power source when changing bits. Do NOT wear gloves when using a router and avoid loose or baggy clothing.
Q: How often should I clean or maintain my router?
If you cut just a few joints or short dados/grooves, you should be fine putting your router right back on the shelf. After any sort of serious use though, blow it out to keep it clean.
Q: How do I choose the right router bit for my project?
Since there a so many router bits to choose from, Freud’s router bit profile page can help you decide which ones you need. If I have the option, I always choose a 1/2-inch shank because they last longer and, in some instances, give a cleaner cut.
Q: Can I use a router for all types of wood?
Routers work in all types of wood. With harder woods you may need to slow down and really let the bit and tool do the work. Some species like walnut are also prone to blow out when you make the transition from end grain to long grain at corners. Check out our tips above for how to prevent this by routing your end grain edges first before the long grain.
