

Using a router to form beautifully finished edges on wood is an analog to painting a drab room. In a very short amount of time with minimal effort, you can improve the look of a boring edge. It only takes a little woodworking experience to find many ways to do things incorrectly. The many nuances of routing involve setting the right router bit speed. It also involves the interplay of that speed with bit diameter, stock hardness, feed rate, and bit sharpness. Although more manufacturers are printing suggested bit RPMs on packages, bit speed information isn’t always readily available. We created a handy router bit speed chart for you to use for all types of routers.
Why You Need to Set Your Router Bit Speed
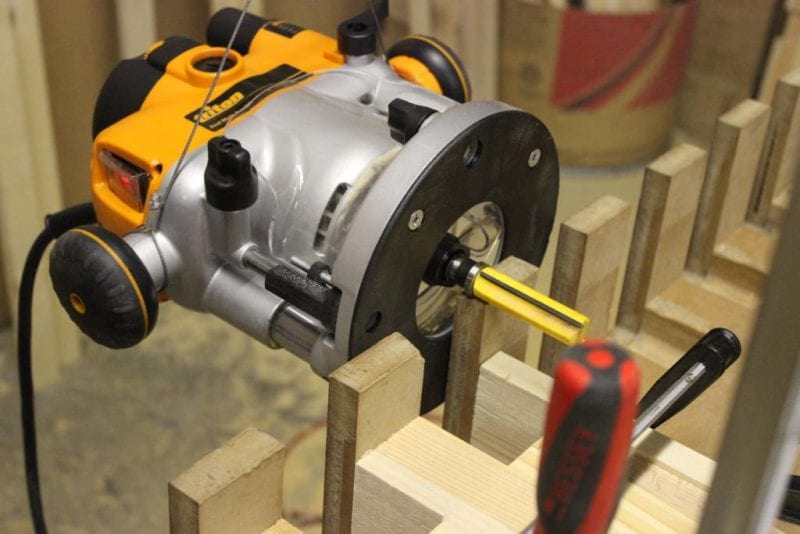
As a general rule of thumb, the router bit speed has to do with what we call rim speed. Grab a couple of router bits with dramatically different diameters to get a sense of the importance of rim speed. They can be from larger plunge routers like the Triton TRA001 or smaller trim routers like the Milwaukee M18 FUEL router. It really doesn’t matter.
Some basic geometry quickly illuminates the fact that 1.5-inch diameter and 3.5-inch diameter bits running at the same RPMs have dramatically different rim speeds at the edge. The rim speed difference at equal RPMs is more than twice that for the 3.5-inch bit than the 1.5-inch one!
Without the proper context that may not seem terrible. However, suffice it to say it’s an unsafe speed—for both the wood and the user—on the larger bit. It’s the difference between a moderate acceleration and leaving Back to the Future DeLorean tire rubber fires. For one, it can actually burn the wood. It can also exaggerate even the tiniest imbalance in the bit or router and cause vibration or a dangerous bit failure.
General Router Bit Speed Chart
Of course, running bits too slowly can also cause vibration that damages the stock.
Here’s a general guide, or router bit speed chart to get you started. (Please refer to the manufacturers’ recommendations and keep in mind the speeds they suggest are maximum):
| Diameter | Max RPM +/- 10% |
|---|---|
| Up to 1-inch | 22,000 |
| 1- to 2-inches | 20,000 |
| 2- to 2.5-inches | 18,000 |
| 2.5- to 3.5-inches | 10,000 |
Generally, the rim speed will be around 100 to 120 miles per hour. You can’t clock that, so use the RPM as a proxy for rim MPH.
How Fast is That Router Bit Speed Really?
To understand just how the bit diameter affects speed, let me walk you through a few examples. The formula for calculating rim speed has you finding the circumference of the bit, calculate that to inches per minute, and eventually translating it to miles per hour. Let’s start with a few different circumferences:
Circumference = π x (router bit diameter)
Let’s first calculate the circumference of a few simple bits sizes for example:
1-inch diameter bit = 3.142 x 1 in. = 3.142 in.
2-inch diameter bit = 3.142 x 2 in. = 6.28 in.
3-inch diameter bit = 3.142 x 3 in. = 9.42 in.
Calculating Rim Speed
Now we can calculate the rim speed—or the speed at any point along the outside edge of the cutting router bit—using the following equation:
Rim Speed = circumference x router speed (RPM)
What we get are results expressed as inches per minute. For the sake of simplicity, let’s assume a router speed of 20,000 rpm:
1-inch diameter router bit speed = 3.142 in. x 20,000 rpm = 62,830 in/min.
2-inch diameter router bit speed = 6.28 in. x 20,000 rpm = 125,660 in/min.
3-inch diameter router bit speed = 9.42 in. x 20,000 rpm = 188,490 in/min.
If we covert those into the more (American) familiar miles per hour (mph), we get:
1-inch diameter router bit rim speed = 59.5 mph
2-inch diameter router bit rim speed = 119 mph
3-inch diameter router bit rim speed = 178.5 mph
So, using the above example, a 1-inch router bit spinning at 20,000 rpm cuts at a rate of 59.5 mph. That cutting speed occurs at the edge of the bit where it does most of its work. That same router, however, drives a 3-inch bit at 178.5 mph at the cutting edge.
If you fail to adjust your router speed when moving from smaller to larger bits, you create a situation where you can end up cutting at 3X the speed (or more) of your smaller bits. That can result in a loss of control or worse.
Consider Taking Multiple Passes at Material
While we strongly suggest you only make cuts you’re comfortable making, you can also ease into certain cuts. It’s good to keep in mind that you don’t have to remove all of the material in one fell swoop. When we created our circular ash table, we used multiple passes with a router to make the cut for the curved outer edge. On each pass, we plunged the bit deeper until we were through the 2+ inch thick material. It worked much better than any jigsaw, and gave us a nice straight edge to sand.
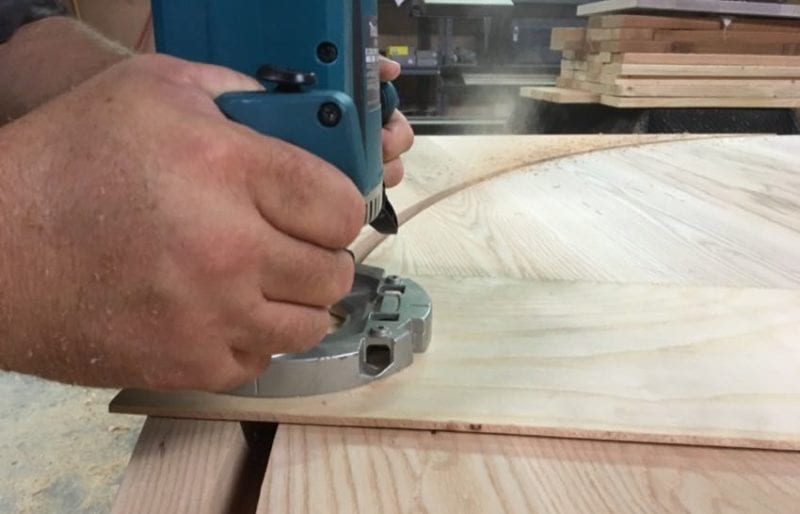
As the router bit diameter increases and/or the wood gets harder, you can take multiple passes with the router. In this way, you can maintain a safe and effective rim speed without putting any undue pressure on the tool or yourself. Let the tool do the work and “feel” the tool. If you feel the tool straining, or you need to really bear down on it, you need to make an adjustment.
Check Your Router Bits for Sharpness
In addition to following our router bit speed chart, you want to check the condition of the bits themselves. only want to use bits that are in excellent condition. We recommend putting on your safety glasses even when you’re just walking through your shop (how often do you say, oh I’m just going to do this or that really quick?). However, it’s incredibly important to do so when operating high-speed rotary tools.
It’s unsettling (but easy) to imagine the damage that can be done by metal flying in any direction at 120 mph. Whenever you use a router, inspect the bit first for signs of damage. If you see even the slightest hint of damage, get a new bit. This goes for grinders and grinding wheels as well. Bits can accumulate sap and wood material so be sure to wipe them off after each use to keep them in good, sharp working order.
Using Variable Speed vs Fixed Speed Routers
We recommend against the use of large diameter bits on fixed-speed routers and also smaller cordless routers. Fixed speed routers have one speed usually near the high end of the RPM range. That means they are only appropriate and safe or the smallest diameter bits. Don’t try larger bits or use any after-market devices designed to lower the RPM.
The router is one of our favorite workshop tools. You can turn ordinary dimensional lumber into a beautiful piece of furniture in a very short time. To ensure the best results, setting the best router bit speed is the place to start.
If you’re a Pro and you have some tips on setting router bit speeds, add them in the comments below—or share them with everyone on Facebook, Twitter, and Instagram.
