
If you’re looking for a secure storage solution that doesn’t eat up floor space or stick out like a sore thumb, the SnapSafe In-Wall Safe offers a clever solution. Designed to fit cleanly between standard wall studs, it aims to give you reliable protection, quick access, and a surprisingly simple installation process—all without requiring a major home renovation.
SnapSafe In-Wall Safe Basics
SnapSafe designed this to slide right between standard 16-inch studs, so no crazy carpentry skills are needed. The body is 16-gauge steel, and the door is 8-gauge steel, which feels solid—certainly not tank-grade, but definitely tougher than any decorative lockbox pretending to be secure.
The locking mechanism is controlled by a digital keypad with a programmable 4–6 digit code. It’s not fancy, but it works, and importantly, there’s a backup barrel key if the batteries die. If the four AA batteries are going low, you will hear audible and LED low-battery warnings.
This safe is available in two sizes. The standard model measures 22 x 16.25 inches (H x W) with two removable shelves, while the tall model measures 44 x 16.25 inches with five shelves. Both models are four inches deep.
Feature Highlights
Considering the size, this is a much more functional design than other models that simply secure some bulk space. Here are the major highlights:
- Removable Shelves: arrange the shelves to fit jewelry, documents, or a handgun
- Magnetic Hooks: easily hang keys or small items without additional modifications
- Magnetic Document Holder: quickly hang important papers you don’t want creased
- Innovative Latch Design: doesn’t hog any interior space
- Spring-Assist Door: the door pops open cleanly for quick access
SnapSafe In-Wall Safe Installation Guide
As I mentioned before, installation is easy. Basically, if you’re comfortable hanging a TV or replacing an outlet, you can probably handle this, too.
Thanks to this safe’s low profile design, it’s ideal for installation in closets, laundry rooms, or in plain sight while covered by a framed picture. While it doesn’t sit exactly flush against the wall, the outer lip is minimal and doesn’t stick out too much.
For added convenience, you can install the safe so the door will swing out right or left without any additional modifications.
Here’s a quick 4-step guide to help you out.
Step 1:
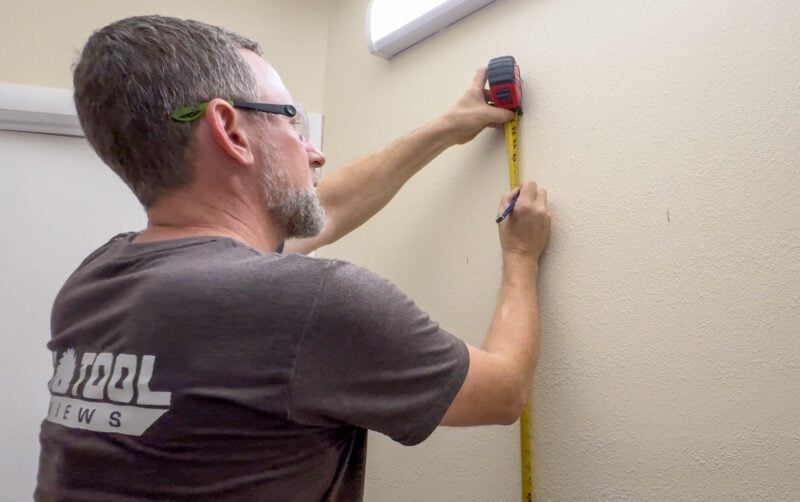
Pick an appropriate location and ensure the studs are properly spaced. I highly recommend using a battery-powered stud finder—it’s much more reliable than the ol’ knock on the wall trick.
Step 2:
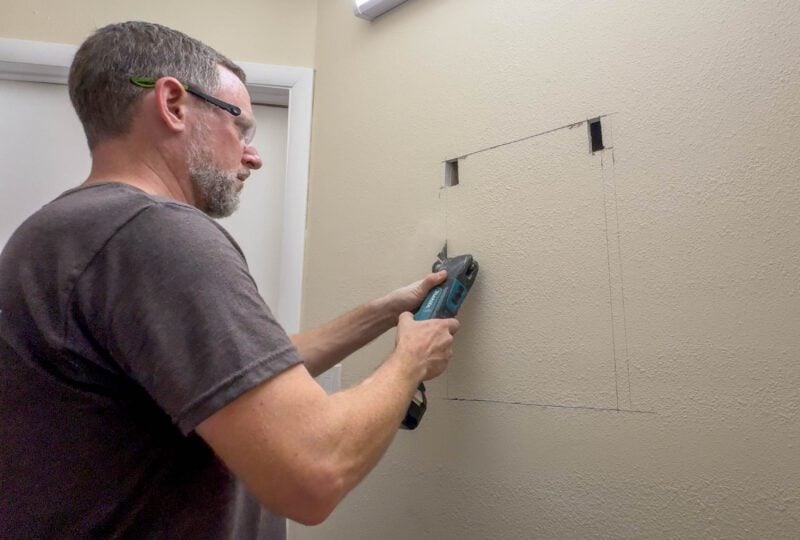
Measure and cut a rectangular hole in your drywall. If you have help, you can also trace the the back of the safe directly onto the wall, just be sure to double check your measurements before you cut!
We found that using an oscillating multi-tool was the best tool for this application, but you can also use a drywall saw if power tools are in short supply. Goldblatt makes a good, affordable one you can pick up here.
Step 3:
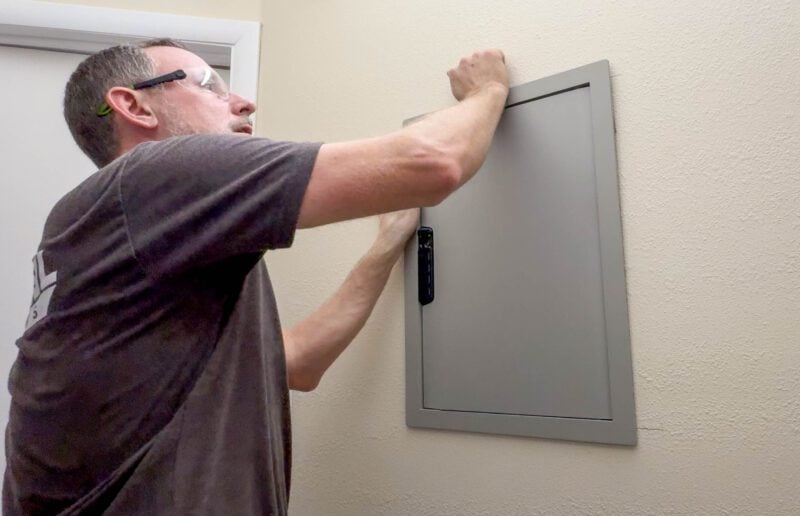
Insert the safe into the rectangular hole. If you’ve cut the hole to the proper size, the safe should fit snug but be mindful that it doesn’t fall out before you’ve secured it to the stud.
Step 4:
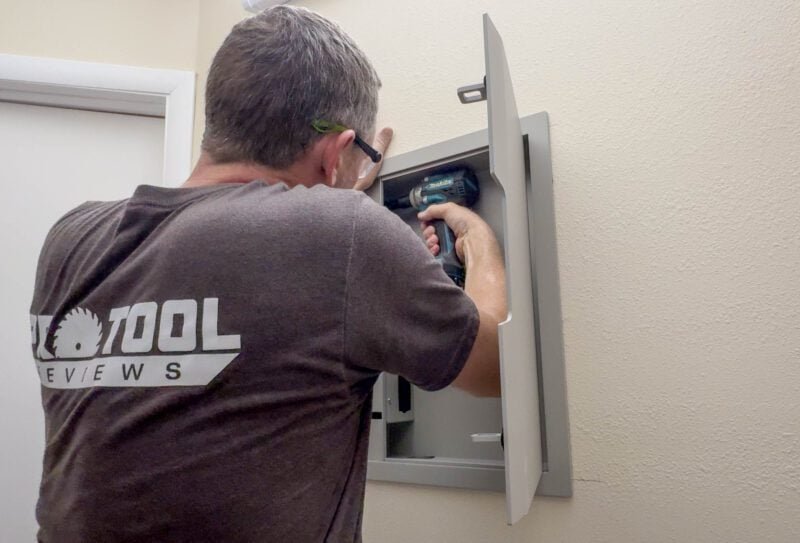
Lastly, secure it to the studs using the included lag bolts using your favorite impact wrench or impact driver. There a pre-drilled holes on the side panels of the safe, so it’s ready install right out of the box.
During the install, we did notice that there was still a small gap between the safe and the studs. For this, we opted to position the safe directly up against the left stud, drive the lag bolts, and then drove the remaining lags until they were snug. This method felt more secure than leaving a small gap on both sides of the safe.
Should You Buy It?
Overall, the SnapSafe In-Wall Safe is a great option for folks who want to keep valuables secure but don’t necessarily want to commit to a full-blown traditional safe. Its DIY-friendly installation
It’s not trying to be a bank vault—it’s about convenience and concealment. If you want something out of sight but still readily accessible, this checks off some crucial boxes. I would say that for its intended purpose of using dead space in your wall to secure valuables, it does the job really well.
Like what you see? You can get the model we installed for $287.99 (model 75413) or the tall version for $440.99 (model 75414).
