
It’s now prime time cutting season here in Central Florida. We get our afternoon thunderstorms and the nights are around 80°F. To say the grass is growing like crazy is an understatement. With the afternoon thunderstorms rolling in several times each week, it leaves little daylight to get the grass cut. Thankfully, Exmark makes mower LED lights 126-5382 for our Exmark Radius X Series Zero Turn. This is the mower we reviewed earlier in the year, so check it out.
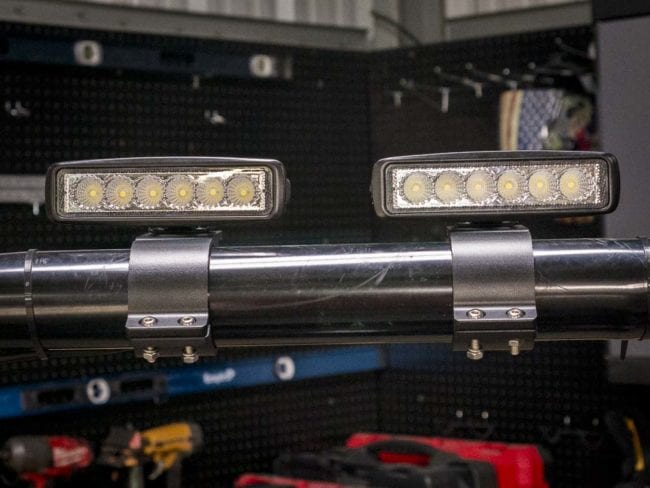
The LED light system comes in a kit with 2 LED light clusters, the complete wiring harness, switch, the mounts, fasteners and even zip ties and instructions. Opening the box, everything seems pretty self explanatory. However, to humor myself I stick closely to every word of the instructions. Sure!
Installing The Mower LED Light System 126-5382

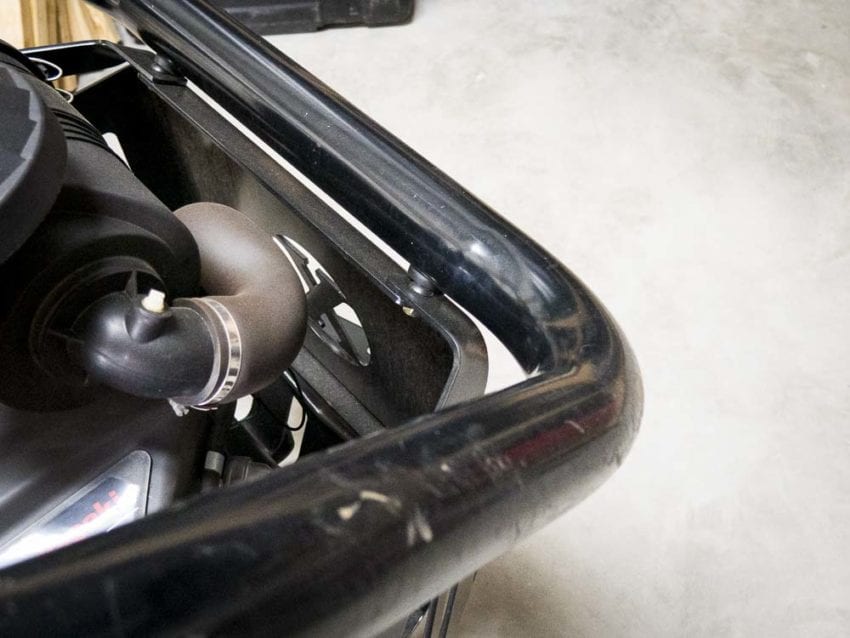
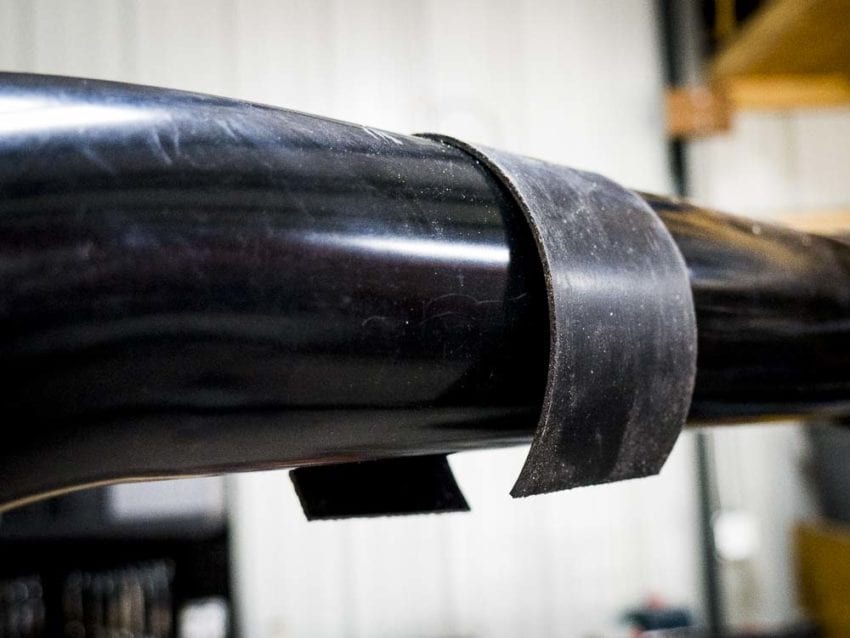
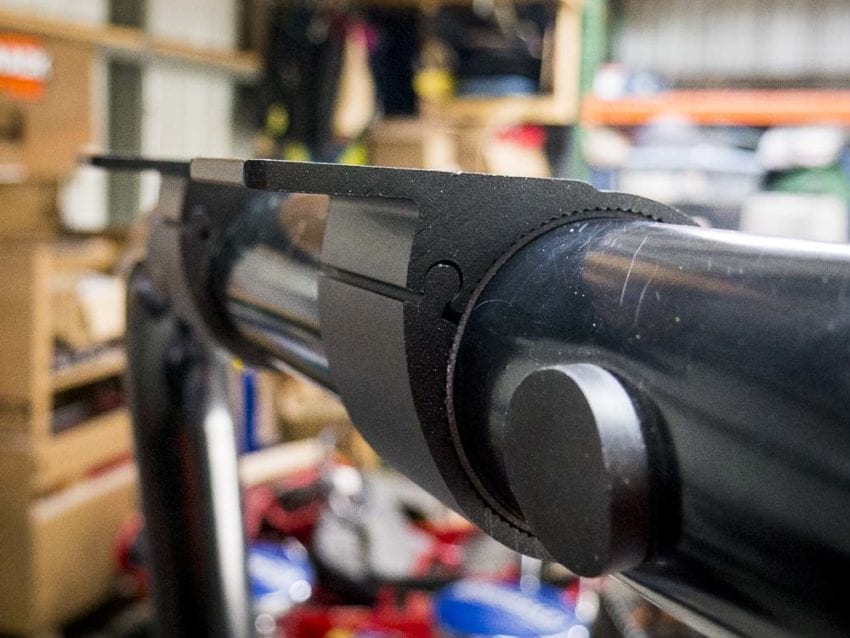
First, we lay everything out on the workbench to ensure we have everything. Then, we gain a good understanding of what each piece is, and which fasteners go with what. The mower LED lights mount to the ROPS (Rollover Protection Structure), hence the round tubing that goes overhead and can pivot to lay flat behind the motor. We’ve seen these mounted on the sides of the ROPS, but we decide to mount them to the top.
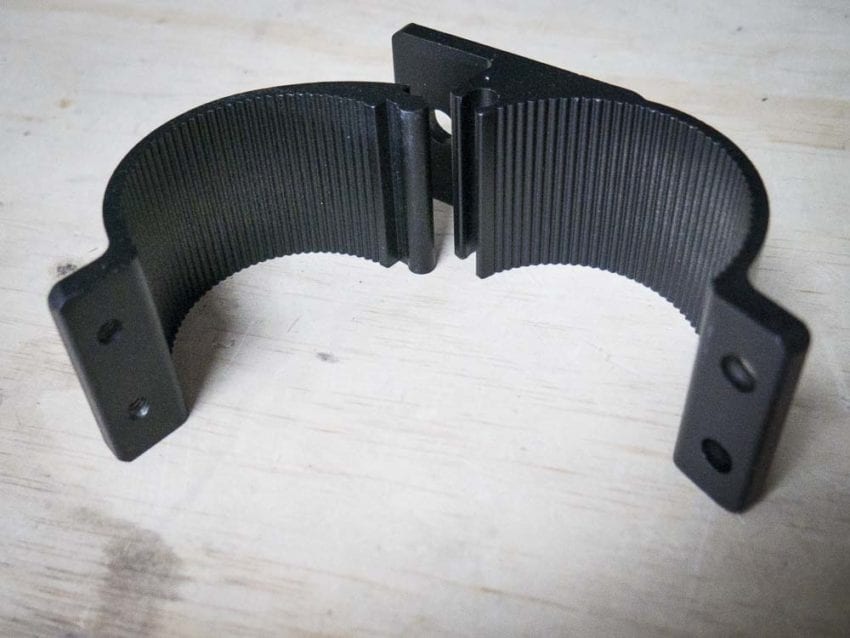
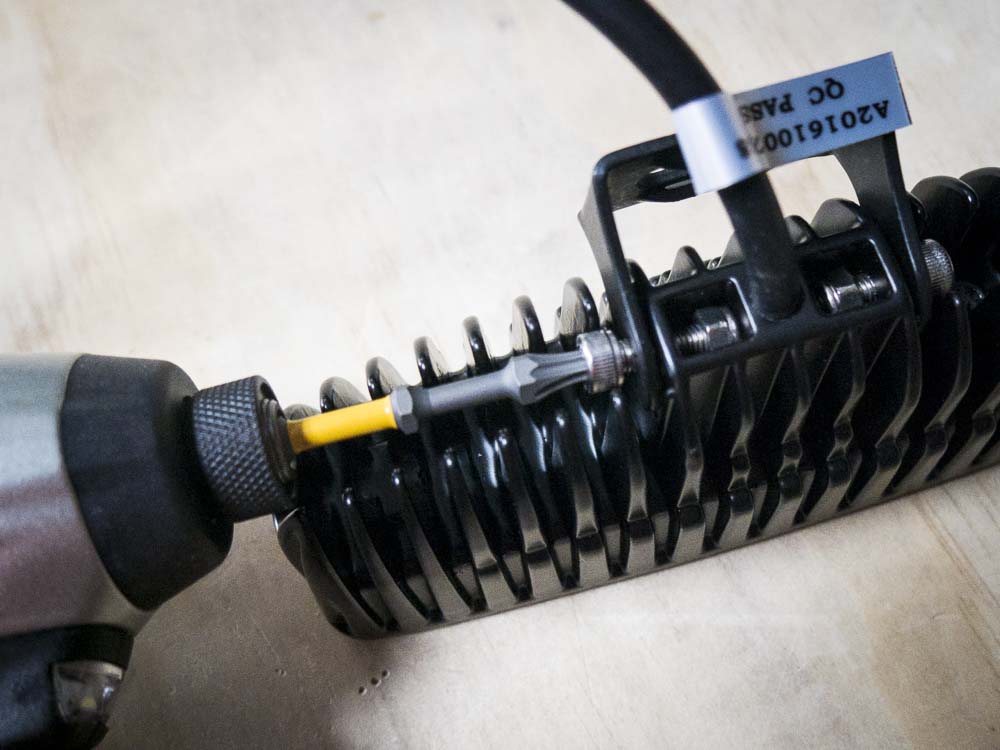
The first parts to install are the two mounts for the LED lights. Each of the two mounts come in two pieces which slide together, so they almost act like a hinge. Don’t attach the mounts directly to the ROPS. Be sure to place one of the rubber strips around the ROPS bar first, then place the LED mount on the ROPS. Once you have the rubber strip and the mount aligned, thread in the two stainless screws for each mount. The screws thread-into the mount, then a lock waser and nut are added to the other side of the fastener. Ensure that both mounts are tight and that the flat parts of the mounts are on the same plane (level).
Mower LED Lights Brackets And Mounts
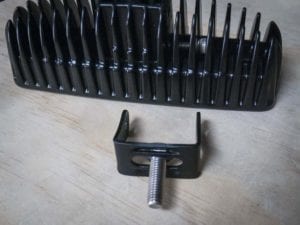
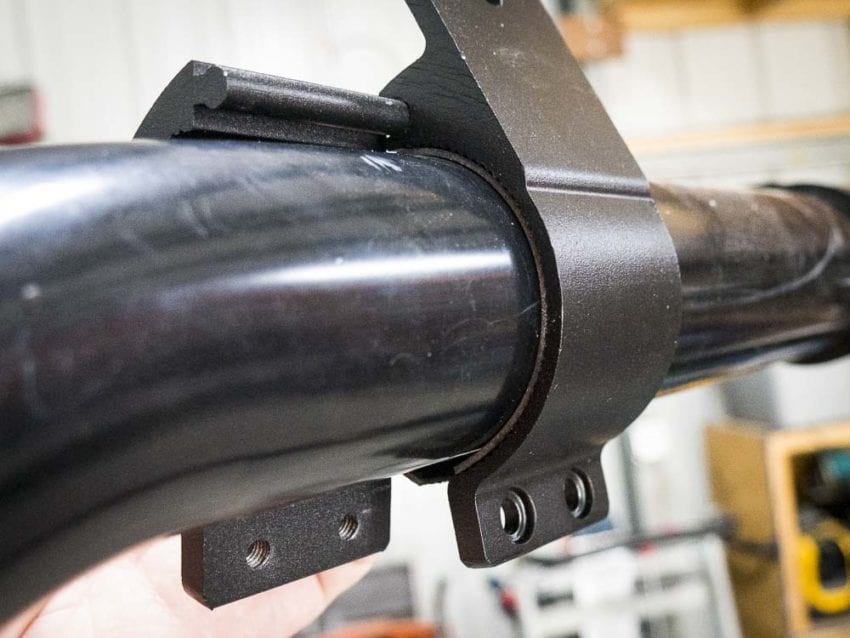
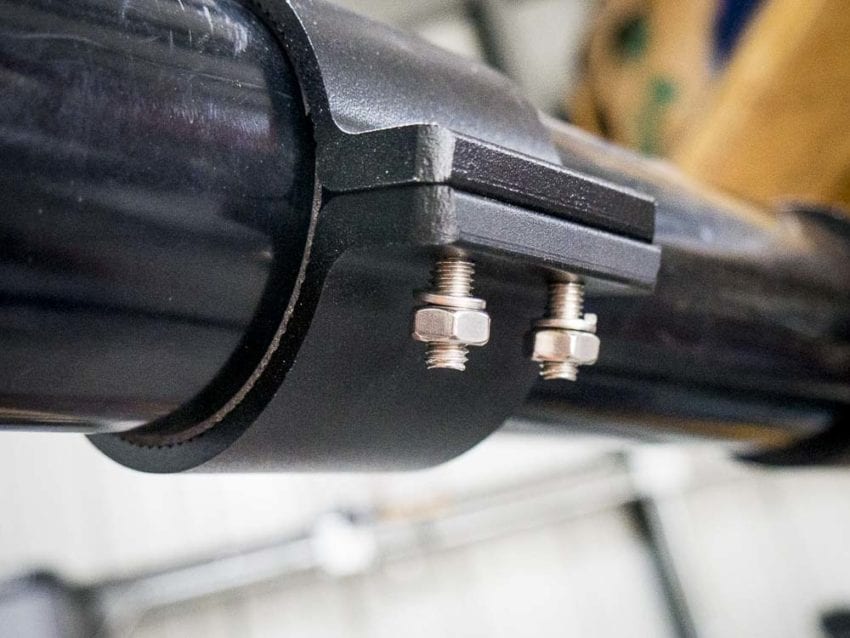
Next, it’s time to assemble the lights and brackets. These brackets hold the LED lights to the mounts we just installed on the ROPS. Each LED needs to have the U-shaped brackets attached. To do this, make sure you place the stainless bolt (hex bolt) through the U bracket before attaching the bracket to the LED. I didn’t the first time, so I had to backup and start over.
Once both LED lights have the brackets attached, place the LED and brackets on the ROPS mount. You should be able to just feed the stainless bolts (sticking through the LED U-shaped bracket) through the hole in the ROPS mount. Fasten the LED lights with the stainless nut and washer for each LED.

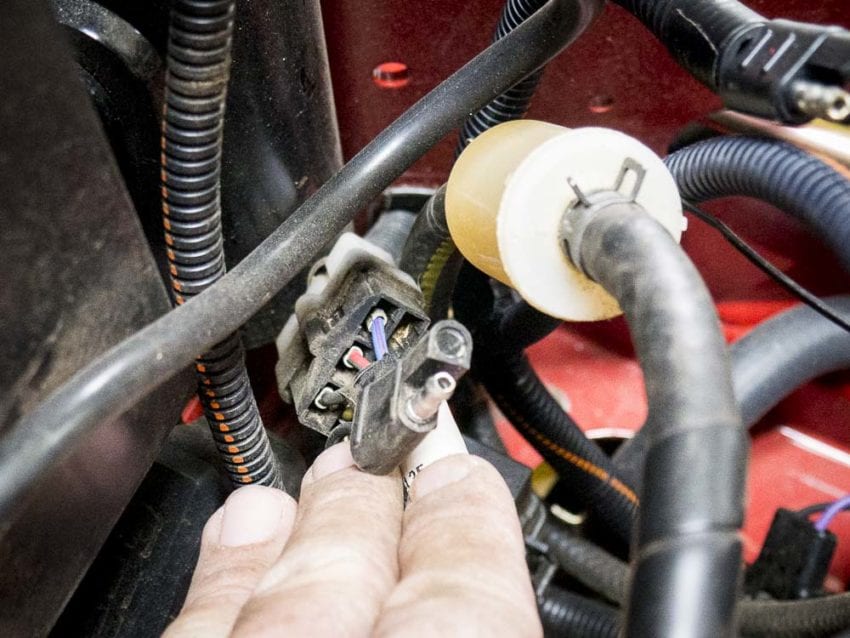
Remove And Reinstall Control Panel – Switch Installation
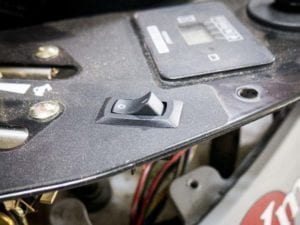
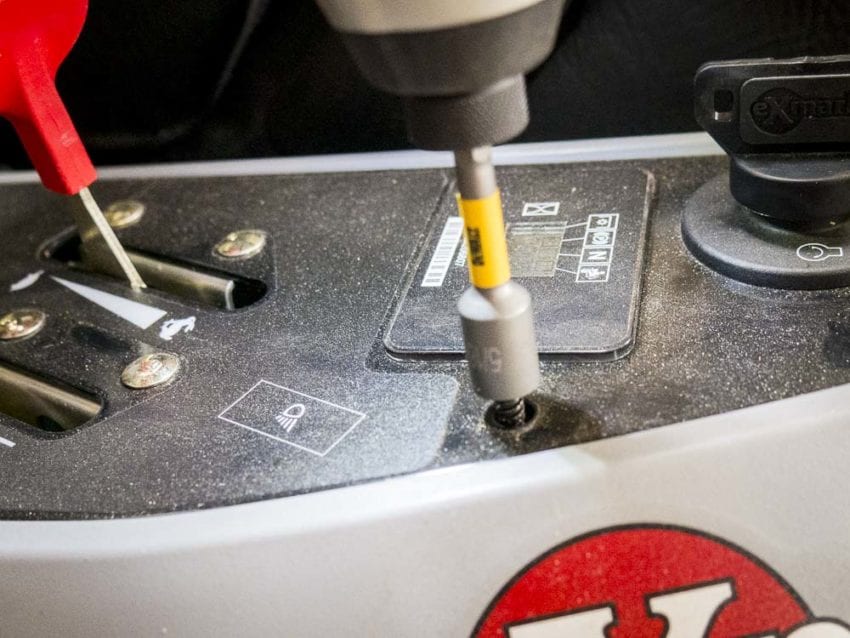
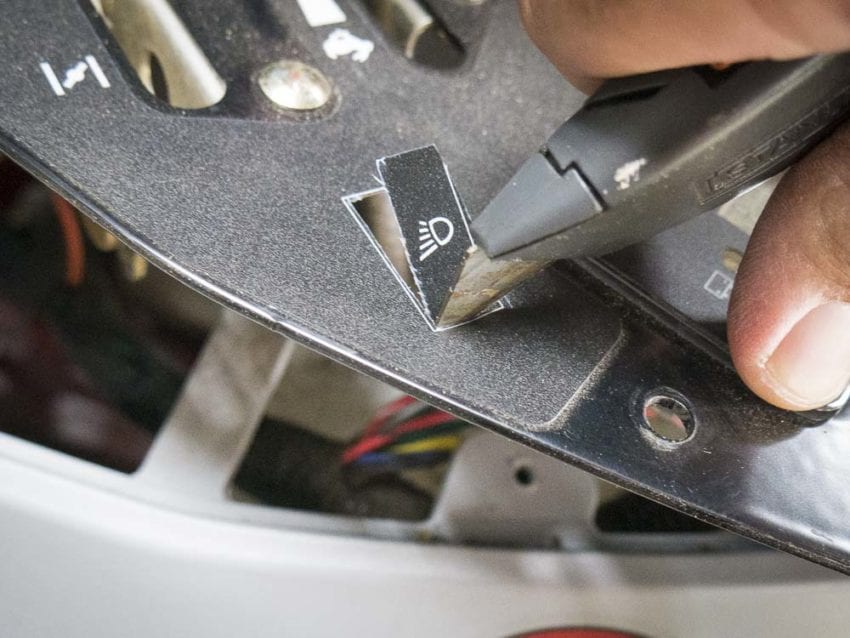
Using a 5/16” or 8mm nut driver, remove the few hex screws holding down the mower control panel (on the right side of the mower, where the key resides). You will see a rectangle on the control panel with what looks like the headlights symbol on your vehicle. Take a sharp razor-knife and cut out the rectangle. This is easy to do, just follow along the cutout in the metal.
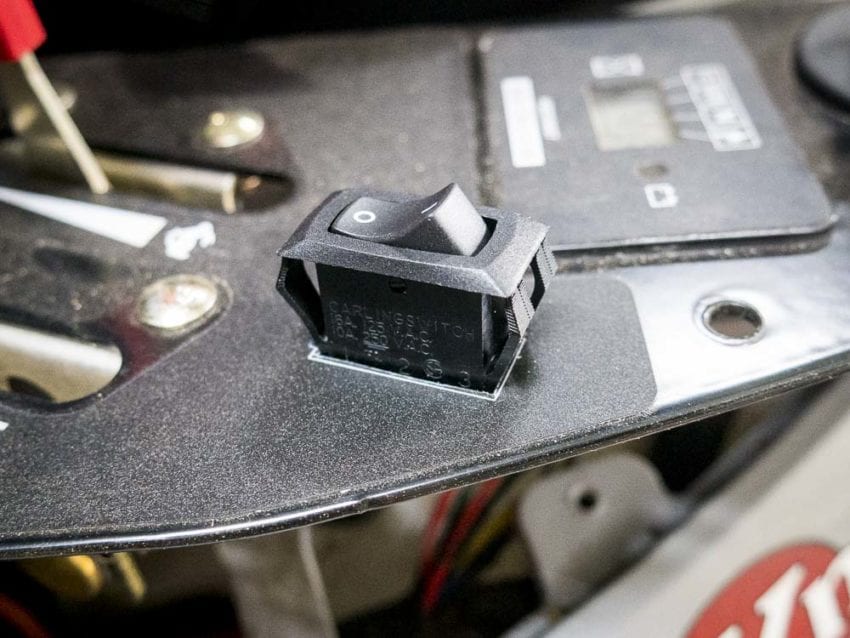
Now, the switch needs to be installed in the rectangle cutout. The switch should just slide and click when it locks into place. The LED lights and switch are now installed, so it’s time for the wiring harness. But don’t replace the fasteners in the control panel yet.
 Exmark Radius X-series LED Light Wiring Harness
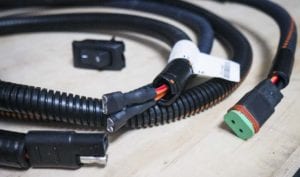
Sometimes wiring harnesses can be scary, but this is not one of those times. It’s pretty easy to look at the terminated ends of the harness to tell what goes where. Find the end that attaches to the switch we just installed. The wiring will feed behind and under the control panel. You should see a passage where other wires are navigating from the engine compartment to the control panel area. Feed the wiring harness through and attach to the switch. Now, replace the fasteners (5/16” hex screws) on the control panel.
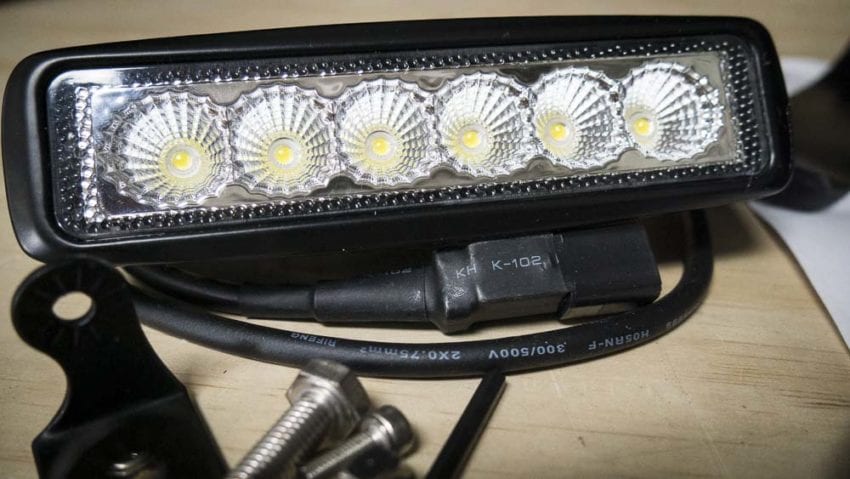
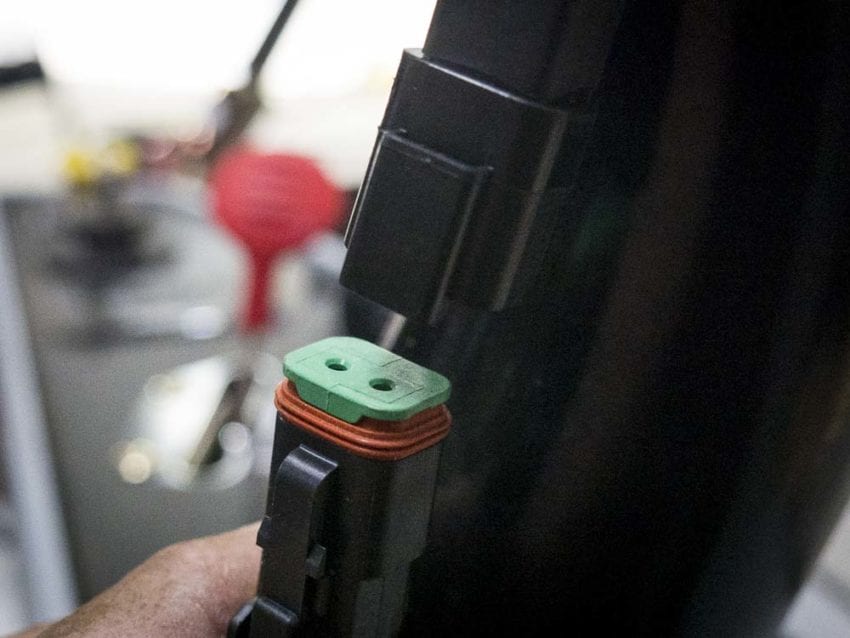
We need to tap into the electrical or battery wiring, and there are a couple of areas to do this. The one we found was near the left side of the mower, in the engine compartment. Just follow the wires, they’ll lead you there. Plug the LED light wiring harness into the newly found 12V-ignition source. There should only be power to the lights when the key is in the “On” position. Finally, plug the two waterproof plugs (with green ends) into each LED light.
Zip ties can now be used to tie the wires back out of the way. You may want to wait on doing this until you ensure that everything is performing well and adjusted to your liking. Then you can zip tie everything out of the way, so wires don’t get pinched, etc.
Mower LED Lights Performance
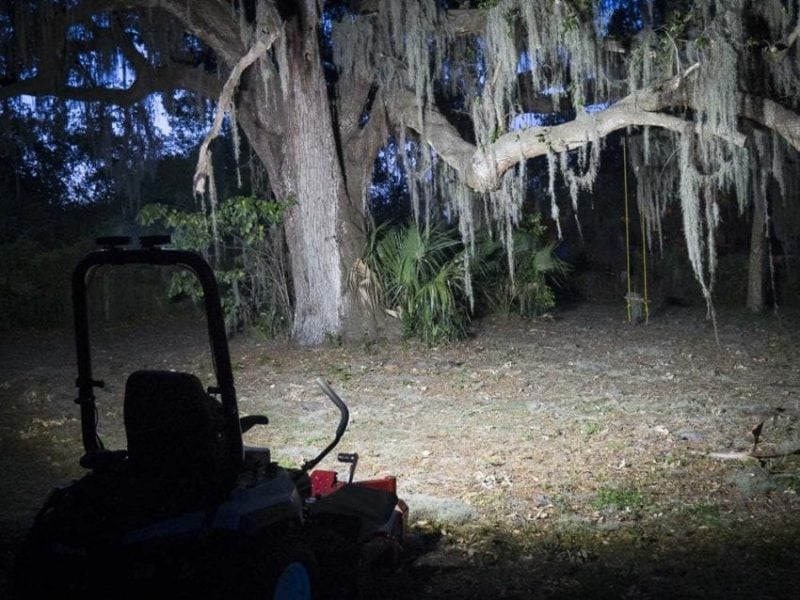
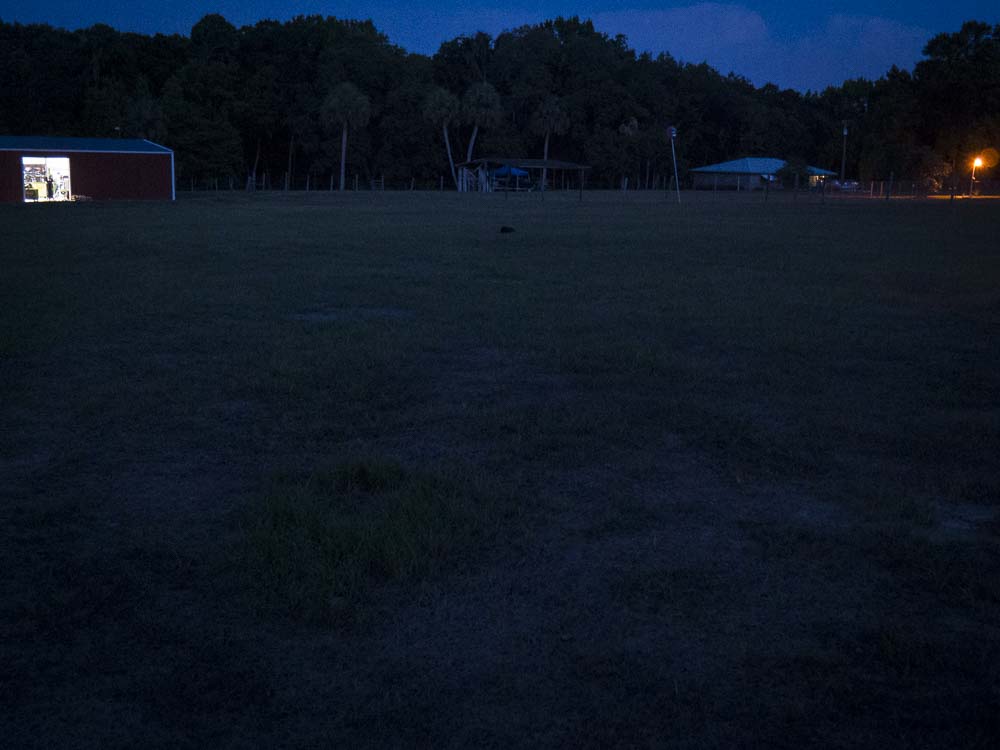
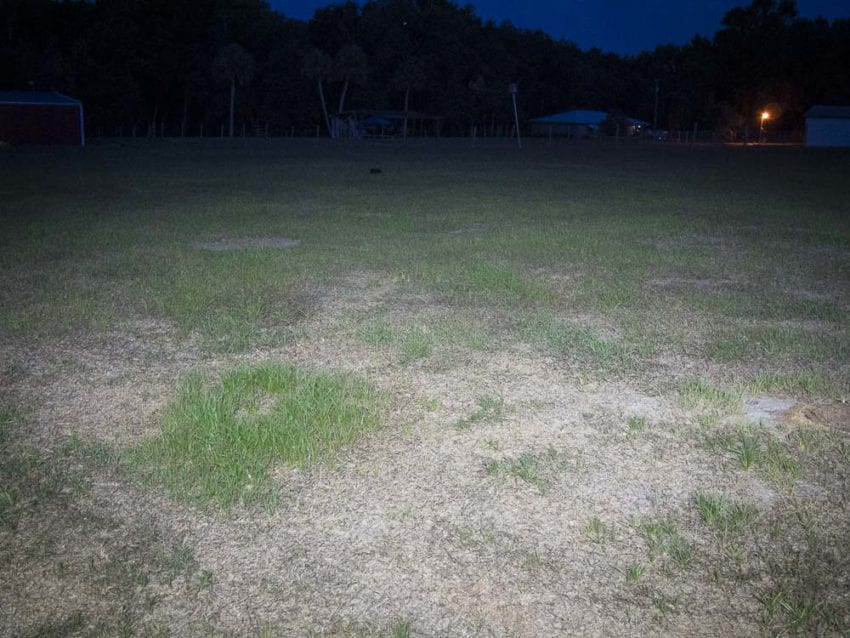
Timing is near perfect, as I wrap up the mower LED lights on the Exmark Radius X-series, the sun has now set. The skies grow dark, so a great time to test the mower LED lights. In all honesty, my expectations run low, as I have seen many LED lights that weren’t so bright. Thankfully, I’m positively surprised with the first flip of the switch. Still in the shop, I turn the key on and flip the light switch. WOW!! These are very bright lights that seem to disperse, or broadcast the light very well also. Now, it’s time to bring the Exmark Radius out of the shop and into the night.
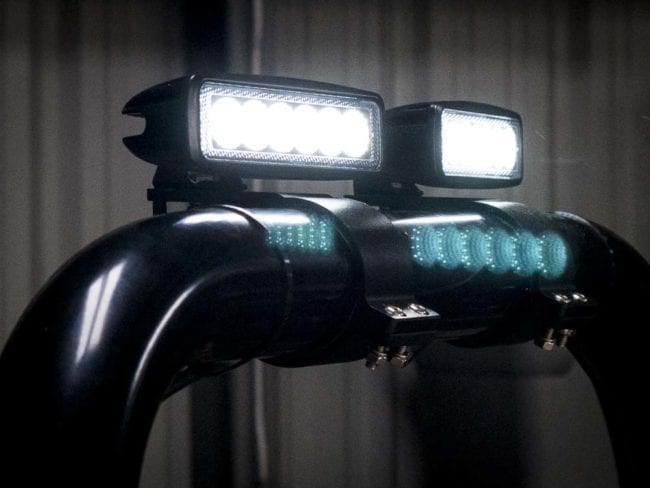

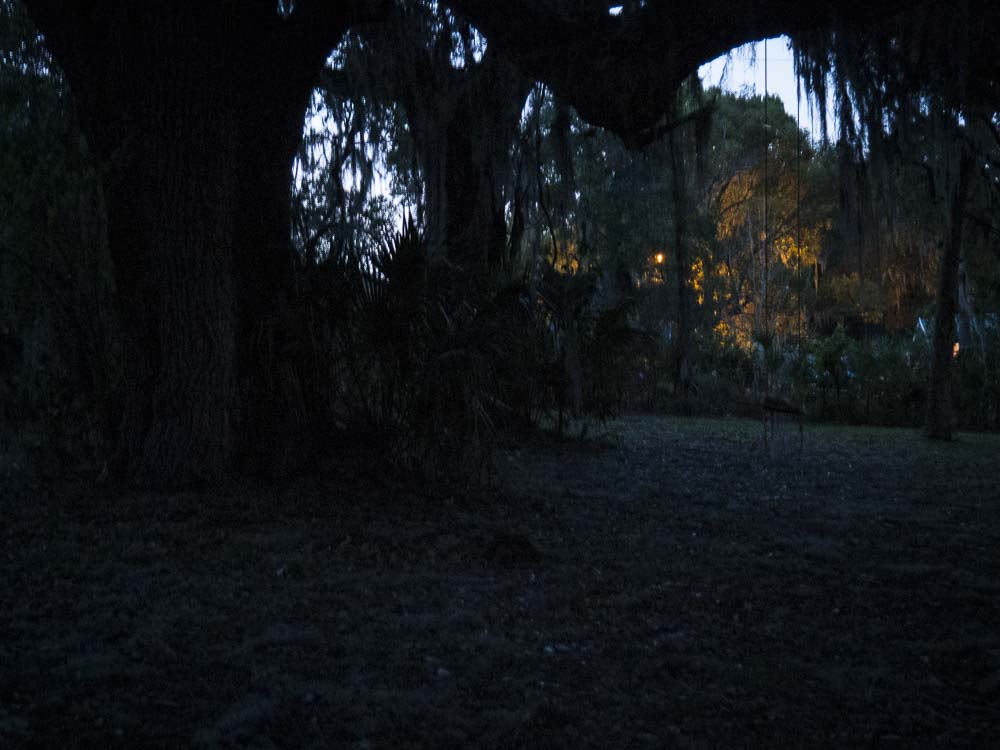
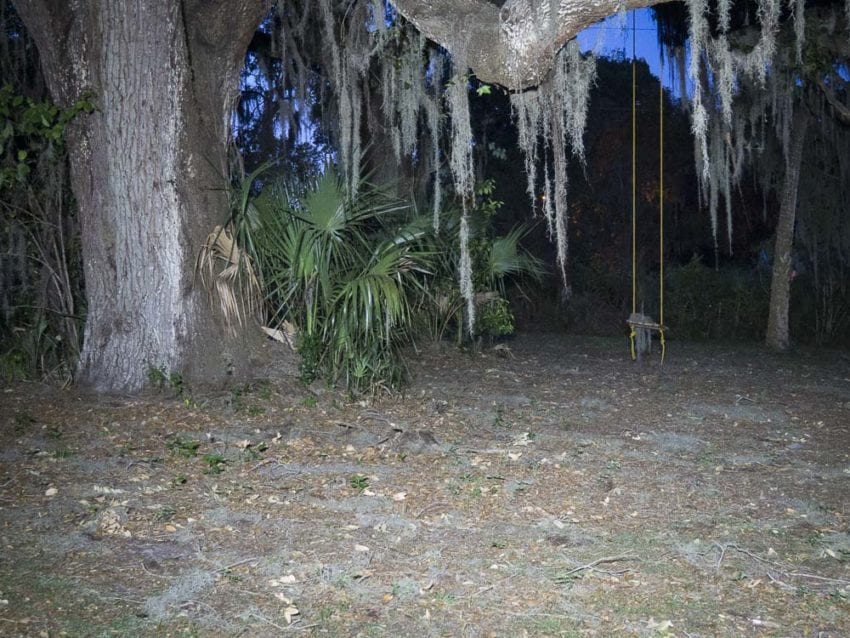
Even with the LED lights blazing in the shop, I still had doubts if the two LED lights can provide enough light to mow in the night. Again, my doubt is quickly extinguished with the performance of just the two LED lights shining like a beacon in the night. Atop the ROPS bar on the Exmark Radius, that mower LED lights throw the light over the operator’s head and onto the lawn in front. It’s easy to see debris and undulations with these Exmark mower LED lights. We tried it under a couple big oak trees as well as in the open lawn. The LED lights perform very well on the Exmark, and we would definitely recommend this LED light kit from Exmark. Find your Exmark dealer here, and ask for the 126-5582 LED light kit.
Caution Lights
With the new mower LED lights installed, mowing in the afternoon and into the dark is now possible. I’m not sure that we recommend that you cut throughout the night, but it will help to finish that lawn as night approaches. Make sure to not get too ambitious with mowing at night, as you know, on a zero turn, you can turn very quick. Without having lights all the way around, you could turn into an unseen obstacle or somebody. Always mow with caution.
