
Cost-conscious homeowners are doing everything possible to lower their heating and cooling costs. Here’s what you need to know about blown-in insulation and how to use it in your home.
What is Blown-In Insulation?
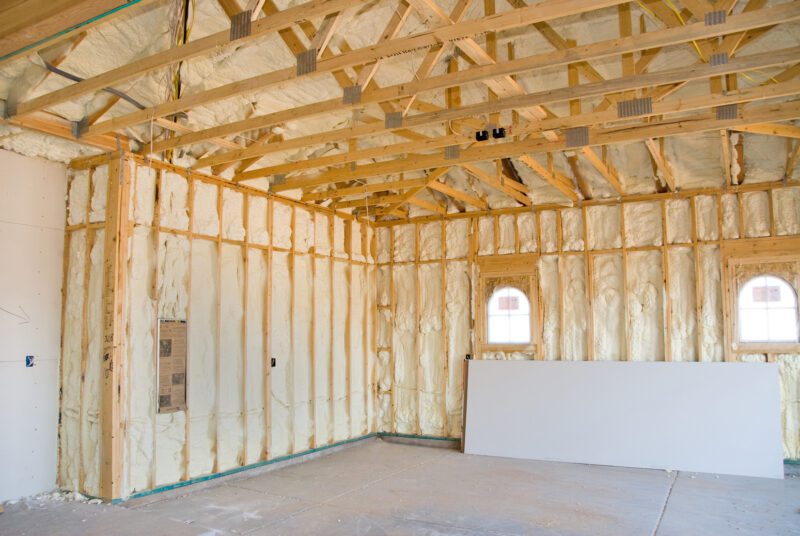
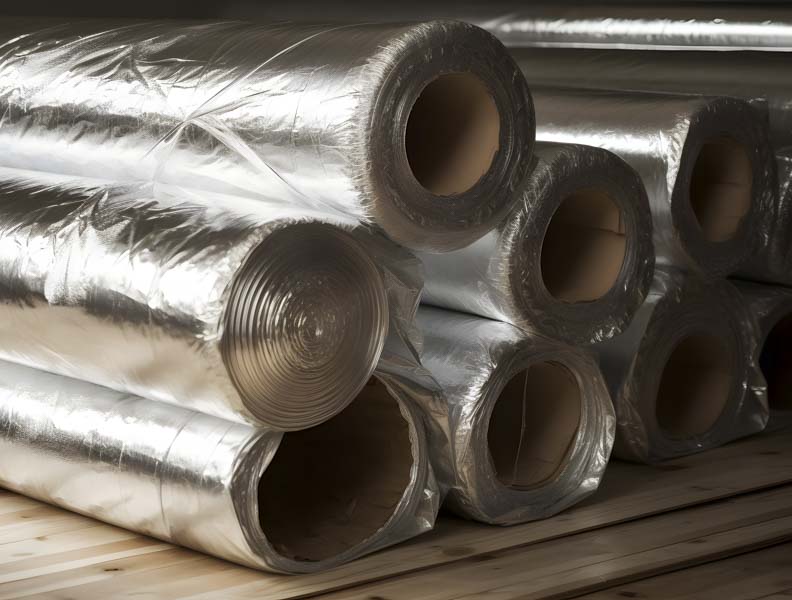
The most common type of insulation comes in blankets, usually in batts or rolls that fit between joists or studs. Blown-in insulation, on the other hand, is loose fill installed by blowing into place.
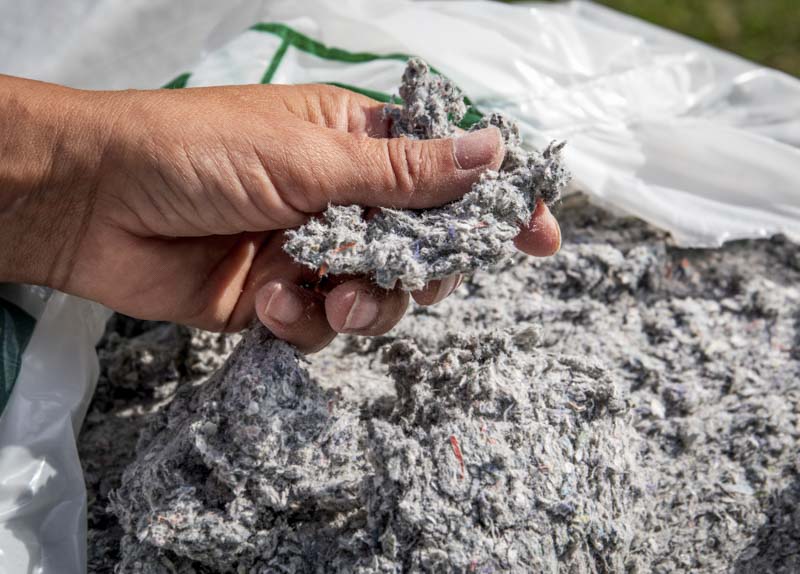
Blown-in insulation is more a method of installing various insulation materials than a type of insulation. The most popular materials used for blown-in insulation include fiberglass, cellulose, and mineral wool.
How Does Blown-In Insulation Work?
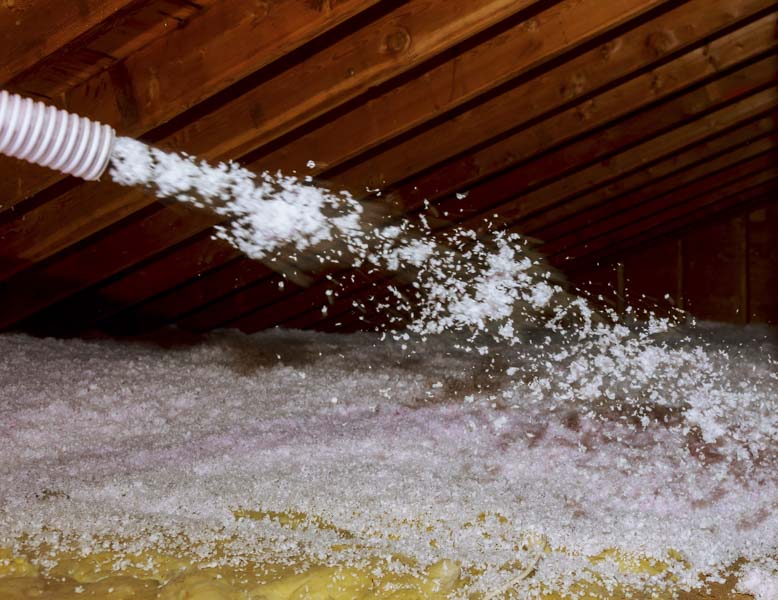
As the name implies, you install blown-in insulation by blowing loose fill insulation into areas like attics or walls. Installers use a machine with a blower hose to blow the insulation into the designated spaces.
This is the easiest way to make an existing home more energy-efficient. It’s much easier to install than fiberglass batts or rolls, which would require that you take down walls or ceilings.
With blow-in insulation, all you need is a small access point, a machine, and some fill, and you can easily add insulation to enclosed areas. Usually, you can leave the old insulation in place and blow more in on top of it to increase your home’s R-values.
Explore more ways to keep your house efficient with our guide to weatherization techniques that work!
Types of Materials Used in Blown-In Insulation
Also known as loose-fill insulation, blown-in insulation is typically cellulose, fiberglass, or mineral wool.


| Insulation material | R-value | Description |
|---|---|---|
| Loose-fill fiberglass | 2.5 per inch | Blown-in fiberglass insulation is made from tiny glass fibers. It’s naturally fire-resistant. To achieve R19 in an attic, it must be 6.75″ thick, which requires about 8 bags per 1,000 square feet. |
| Cellulose | 3.7 per inch | Cellulose is made from recycled newspapers and other paper products. It is treated with borate as a flame and insect retardant. To achieve R19 in an attic, it must be 6” thick, which requires about 25 bags per 1,000 square feet. |
| Mineral wool | 3.3 per inch | Also known as rock wool, it’s made from melted rock or slag spun into fibers. To achieve R19 in an attic, it must be 4.75” thick, which requires about 19 bags per 1,000 square feet. |
The Benefits of Using Blown-In Insulation
In certain circumstances, blown-in insulation has several advantages over other insulation types. Learn more about the benefits of using blown-in insulation.
Energy Efficiency and Cost Savings
According to Energy Star, homeowners can save up to 15% on their heating and cooling costs by installing blown-in insulation. Since this amount reflects about 11% of your total energy costs, you can easily determine how much you’ll save each year by multiplying your bill by 0.11.
The average cost depends on several factors, including the cost of labor, accessibility factors, and the type of material you choose. For example, here are some typical costs for loose-fill cellulose insulation:
- $1.25 per square foot for blown insulation in attics
- $1.50 per square foot for blown insulation in walls
Blowing insulation into existing walls is more complicated than blowing it into attics since it requires more access points.
Improved Comfort and Indoor Air Quality
When you properly insulate your home, it creates a level of comfort from extreme temperatures that you can’t achieve with heating and cooling systems, no matter how much you spend on them.
Reducing heat transfer to and from your roof is especially critical, and you’ll be surprised at how much more comfortable your home will be when you add blown-in insulation to your attic.
Additionally, insulation plays a key role in protecting the air quality in your home. By blocking air leaks, insulation keeps everything that comes with air out of your home, including pollen, smoke, and other outdoor pollutants.
Environmentally Friendly Option
Increasing the insulating value of your home reduces your carbon footprint. Manufacturers make eco-friendly insulation materials like cellulose from recycled paper products and sustainable plant materials. As such, you can keep them out of the waste stream at the end of their life cycle.
Versatility and Accessibility
Some attics are extremely tight spaces with limited accessibility. Installing batt insulation in most existing homes would be impossible. However, blown-in insulation can move around obstructions in walls and attic spaces and fill gaps in hard-to-reach places.
Disadvantages of Blown-In Insulation
Learn more about the disadvantages of such insulation.
Settling and Loss of R-Value Over Time
It takes between 15 and 30 years, but over time, blown-in insulation settles and loses some of its R-value. Proper installation techniques, adequate ventilation, and choosing the right materials for your climate will minimize settling.
Uneven Distribution and Gaps
Gaps in insulation can significantly impact the R-value of your insulation. Distributing blown-in insulation evenly is challenging, especially if you have limited access to your attic.
Potential Health Concerns
The health concerns related to blown-in insulation primarily involve mishandling or improper installation. All types of blown attic insulation consist of tiny particles, and when you blow them into place, they can be hazardous to your eyes and airways.
DIY Challenges and Equipment Rental Costs
Installation is not the friendliest DIY project. It’s at least a two-person job that could take up most of the weekend.
Hiring a professional may be preferable when you factor in the time and cost of renting the equipment and your labor and materials.
Environmental Considerations
While blown-in cellulose insulation is a sustainable product, loose-fill fiberglass and mineral wool are not. When it comes to environmental concerns, choose a product that uses renewable resources so that you can divert it from landfills at the end of its lifespan.
Comparing Blown-In Insulation to Other Insulation Types
How does blown-in insulation stack up to other types of insulation? Discover the pros and cons of blown-in insulation versus batt, spray foam, and radiant barrier insulation.
Blown-In vs. Batt Insulation
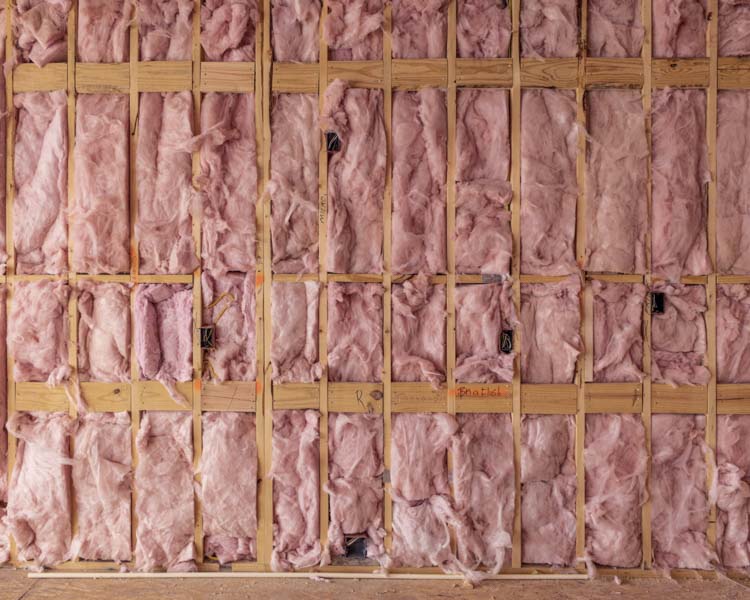
Blown-in insulation offers seamless coverage compared to batt insulation, which can leave gaps. Fitting bats into irregular spaces is difficult, leading to gaps that can reduce R-values by 35% to 50%.
Blown-In vs. Spray Foam Insulation
Spray foam insulation provides a better air seal and provides the best R-value, but it’s much more expensive and even less DIY-friendly than blown attic insulation. It’s also not as environmentally friendly as cellulose loose-fill insulation.
Blown-In vs. Radiant Barrier Insulation
Blown-in and radiant barrier insulation address different types of heat transfer. If you live in a warm climate, you can lower your cooling costs with radiant barrier insulation, which keeps your roof from heating your house.
However, if you live in a cold climate, installing blown-in insulation is preferable because it will lower your heating costs by preventing heat transfer through the ceiling.
Tips for Installing Blown-In Insulation
Installing blown-in insulation is hard, dirty work, but it’s not that complicated. Follow these tips for successful installation.
Pre-Installation Preparation
You need an enclosed space to use blown-in insulation, so start by filling small gaps with spray foam sealant or caulk. Choose the loose-fill insulation material, then measure and plan how much insulation you need based on recommended R-values.
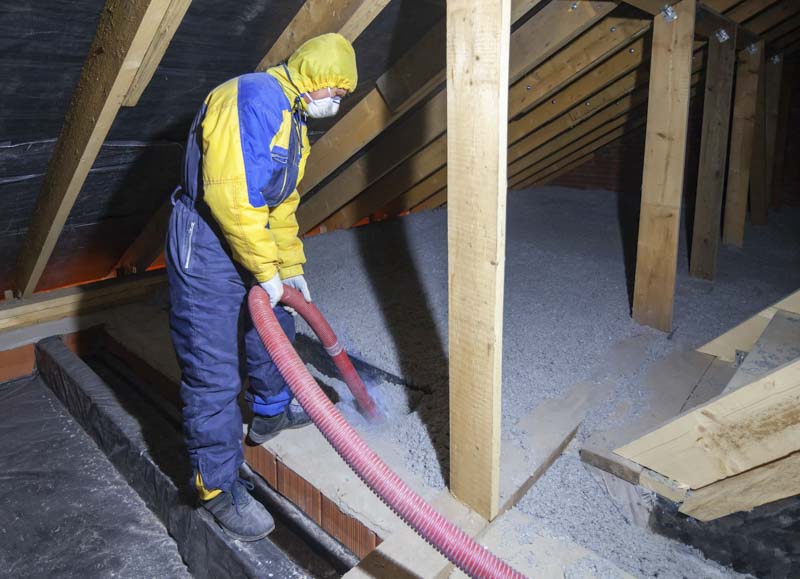
Safety Measures
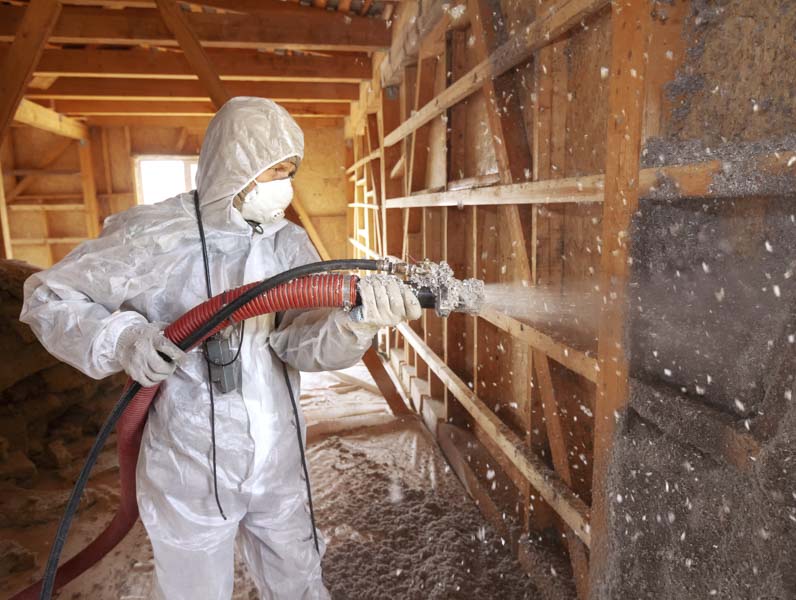
Proper safety gear, including respirators and goggles, is essential when installing blow-in insulation. To prevent fire hazards, you should also ensure that the insulation doesn’t cover electrical components.
DIY vs. Professional Installation
While it’s not easy work, blown-in ceiling insulation is something many DIYers tackle. If you enjoy a challenge, you can purchase the loose fill and rent the equipment from a big box store. With the help of an assistant, you can do an attic in one weekend.
Professional installation costs about $0.75 to $1.00 per square foot for R38 blown-in insulation (about 12” deep). That means, for each 1,000 feet of attic space, you’ll pay $750 to $1,000 for professional installation.
For many, the trouble of renting the equipment and doing the work isn’t worth the trouble. It will take about a day to prepare your attic properly, and another day to blow the insulation in. It’s hard work, and for many homeowners, the peace of mind you get with professional installation is worth the extra cost.
Common Mistakes to Avoid
If you choose the DIY route, avoid these common mistakes:
- Ignoring safety precautions–Wear appropriate safety gear to protect your hands, eyes, and lungs. Use caution when operating the equipment.
- Uneven distribution–Ensure that you get an even distribution of insulation over the entire area.
- Ignoring ventilation requirements–Make sure to leave space for ventilation. It’s possible to use too much insulation in an attic space.
- Covering electrical wires and fixtures–Avoid covering electrical wires and fixtures, which makes them hard to access in the future and can create potential fire hazards.
Who Should Consider Blown-In Insulation?
All homeowners should consider it for their attic spaces, which is the easiest way to enjoy savings on heating and cooling costs, no matter your climate. It’s also an excellent solution for walls in new construction.
Additional Considerations When Using Blown-In Insulation
Consider the following additional factors if you’re considering using blown-in insulation for your home.
R-Value and Thickness
Many DIYers wonder how deep blown-in insulation should be. Use the Energy Star Recommended Home Insulation R-values map to determine how much insulation your home needs based on your climate.
Settling and Compression
Depending on the humidity in your climate, it takes between 15 and 30 years before you start to notice that blow-in insulation is losing effectiveness due to settling and compression.
Moisture and Mold Prevention
Once insulation gets wet, it can take a long time to dry, so to prevent moisture and mold in blown-in insulation, it’s critical to check your attic space for leaks. If you have a leak, you may need to remove some of your insulation.
Professionals charge about the same amount to vacuum it out as they do to install it.
Maintenance and Longevity
Most insulation doesn’t require much maintenance, but your ventilation system does. Ensure that your attic is properly vented and that fans work as designed. Put the ventilation system on a semi-annual home checklist to ensure your insulation lasts as long as possible.
FAQs About Blown-In Insulation
What is the installation cost?
The average cost for blown-in insulation for most homeowners is $1,000 to $4,000. It typically costs about $2,000 to add insulation to an existing home. Since most heat is transferred through the roof, insulating your attic can be well worth the costs, saving you about 10% to 15% on your energy bill.
Is blown-in insulation safe?
There are hazards related to installing blown-in insulation, but once it’s in your attic, it’s completely safe. The risks associated with it are due to the tiny particles released into the air when blown into your attic, so you must wear safety gear like goggles, dust masks, and respirators.
Can blown-in insulation be used in existing homes?
It’s the ideal choice for existing homes. When you can’t access areas to install batts or foam boards, you can choose blown-in insulation to add more R-value to your attic and walls.
Can I do blown-in insulation myself?
You can install blown-in insulation yourself. DIY installation of blow-in insulation is a tough job, but it can save you a lot of money. You’ll need a blower machine, insulation, and safety gear. The machine will cost about $100 to $500 to rent for the weekend, and for a 1,000-square-foot attic space, you’ll need about 10 to 20 bags, which will cost about $300 to $800.
How long does blown-in insulation last?
How long blown-in insulation lasts depends on the conditions where it’s installed and the type of insulation. Cellulose insulation tends to compact faster than rock wool or fiberglass. If it’s kept completely dry and isn’t infested with pests or insects, it will last 50 to 100 years. If it’s installed in an area with a lot of humidity, rock wool is the best blow-in insulation to use.
