
There may not be a more economical way to cool down a large shop than to install a commercial exhaust fan. Let’s face it, options are limited once you exceed 2400 square feet. You could install an AC unit, but that involves a huge up-front expense in both hardware and insulation. It also involves the ongoing costs to run and maintain the system. Large “ceiling fan” solutions also exist from the likes of Big Ass Fans (which we have yet to review). Sometimes, however, just getting the hot air out of the shop makes a huge difference. That involves mounting an exhaust fan high up in the eave to pull that air out of the building while drawing in cooler air from below. We’ll go over how to install a commercial wall exhaust fan to help you lower the overall temperature of your workshop or larger garage.
Companies like Canarm and others make standard exhaust fans to work efficiently and with a minimal amount of installation. Pricing also adds to the attraction of these products. Most wall-mounted exhaust fans come as single-speed, single-phase 120V, but you can also purchase them in two-phase or variable speed.
Table of Contents
Choosing Your Commercial Wall Exhaust Fan – AirFlow
To make sure you get the right fan for your needs you first want to understand how much fan is required to cycle the air in the space. To do this, take the number of cubic feet in the room divided by the number of minutes you want per air change. That’s the required CFM (cubic feet per minute) of capacity the fan must have:
- Room size (cu. ft.) / air change (minutes) = CFM —or—
- Room size (cu. ft.) / CFM = air change (minutes)
Our shop is 2,400 square feet with an average ceiling height of 14 feet. That yields about 33,600 cubic feet. If we want an air change every 10 minutes that would require a fan with a CFM rating of around 3,360 CFM (assuming 1/8″ SP (static pressure).
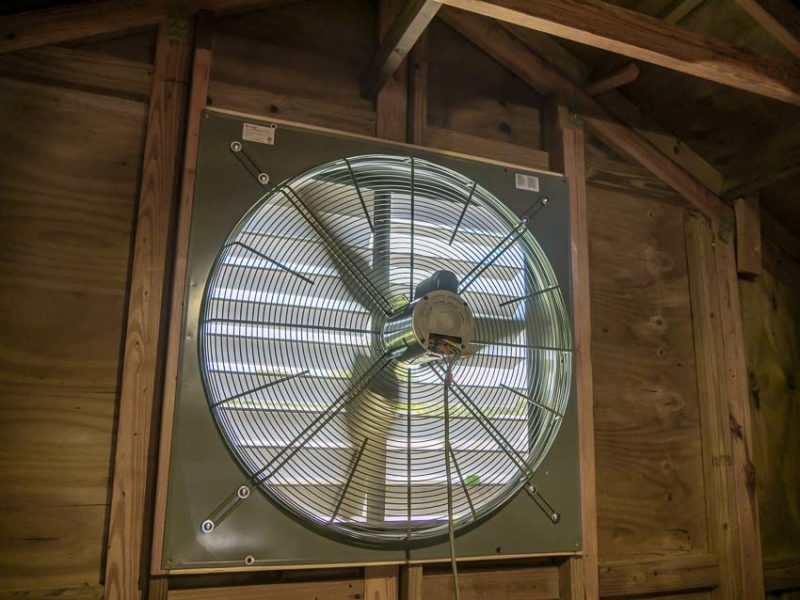
Now, we’re a bit crazy around here, and we had the room for a larger fan, so we opted for a Canarm 36″ standard exhaust fan (model SD36-G1D). That model can move 8000 CFM at 0.125″ static pressure. Do the math, and this fan will cycle the room every 4.2 minutes:
- 33,600 cu. ft. / 8,000 CFM = 4.2 minutes
Canarm Wall-mounted Exhaust Fans Features
- Available in 8” to 48” sizes (150 – 15,300 CFM)
- Single, two and variable speed models are available.
- All fans use a totally enclosed, thermally protected motor.
- The rugged steel welded box housing has a durable powder-coated finish.
- Aluminum louver shutters are supported by long life nylon bushings (30”, 36”, 42” & 48” have PVC louvers).
- 8” – 24” models have heavy wire chrome-plated OSHA guards on the intake side of the fan (30”, 36”, 42” & 48” models have grey
powder-coated guards.) - All fans are shipped completely assembled.
Preparing the Wall
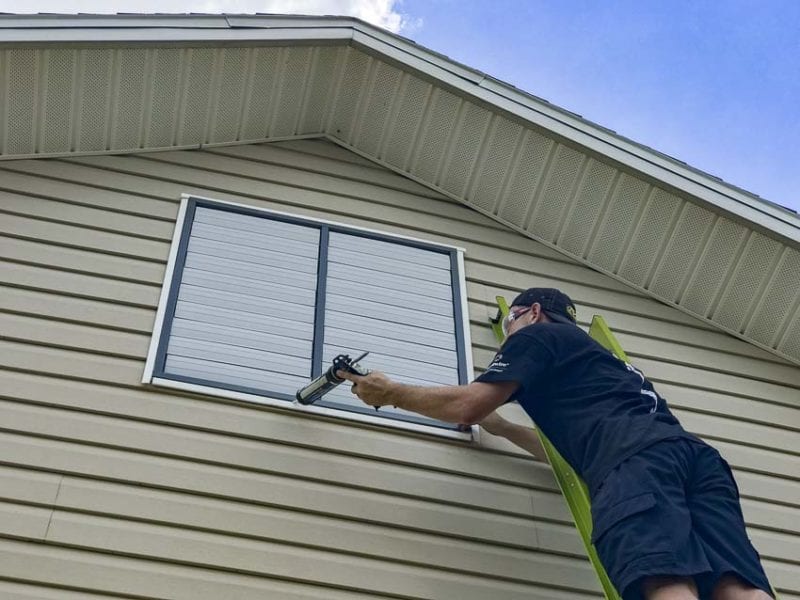
Because our loft had no insulation, we had an easier time prepping the area. We opted to cut out the hole from the inside. As it turns out, the last folks bottom-nailed the exterior vinyl siding. This makes it quite difficult to remove and cut. Before cutting, we drilled four 1-inch holes using Bosch Daredevil spade bits. Using a thin metal blade with fine teeth, we then grabbed our Milwaukee M18 Super Sawzall and “connected the dots”.
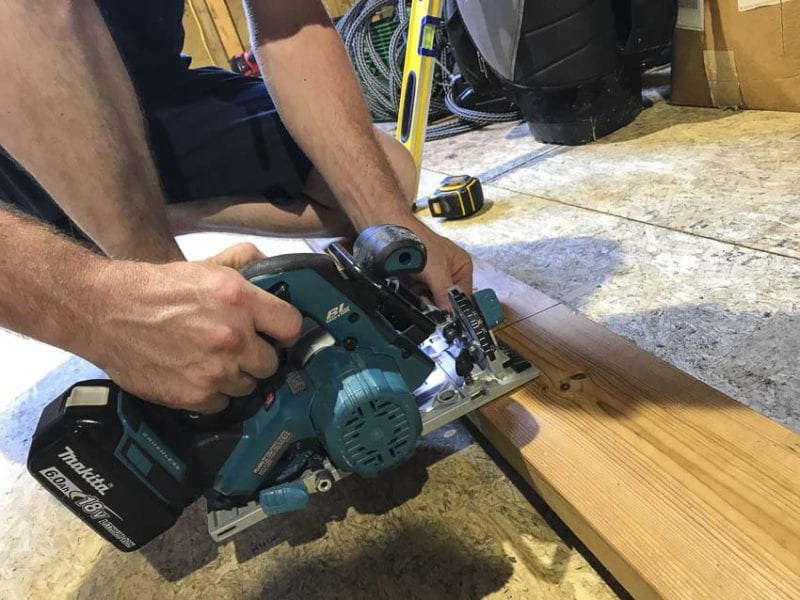
Once we had our square hole to the proper size, we cut out a top flat header and bottom saddle from some 2×6 pine lumber. That gave us the clearance we needed for the fan body. We wanted it securely fastened to the frame of our shop without protruding on the outside. A Makita 18V brushless circular saw made short work of these boards.
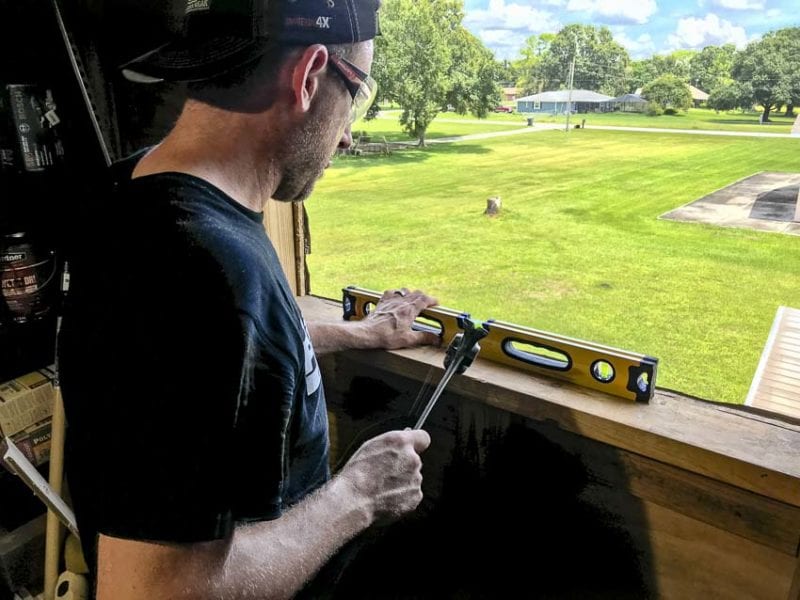
We then cut back the middle studs. This allowed our newly-made flat header and saddle 2×6’s to nestle perfectly in place. Once leveled and fastened with nails, this gave us a perfectly secure attachment point.
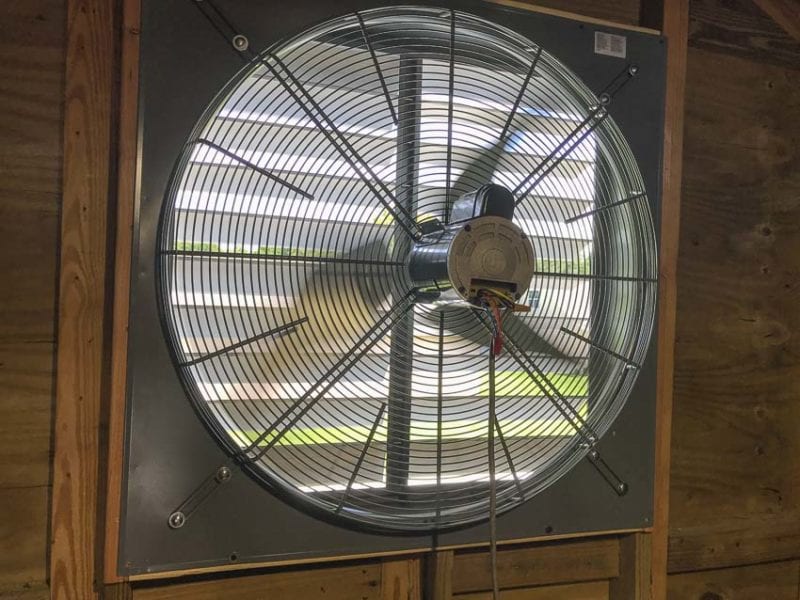
Next, we reinstalled the J-channel from the inside and slid the siding back into place. Once that was done, we secured the fan to the stud frame using screws and washers.
Moving outside, we caulked the J-channel to the frame of the commercial wall exhaust fan using DAP DynaFlex Ultra window and door sealant. Given the height of our shop, it was a good thing we had a Little Giant Hyperlite ladder on hand that could comfortably get us to the peak. That’s one of the best ladders we keep around the shop.
Wiring It Up
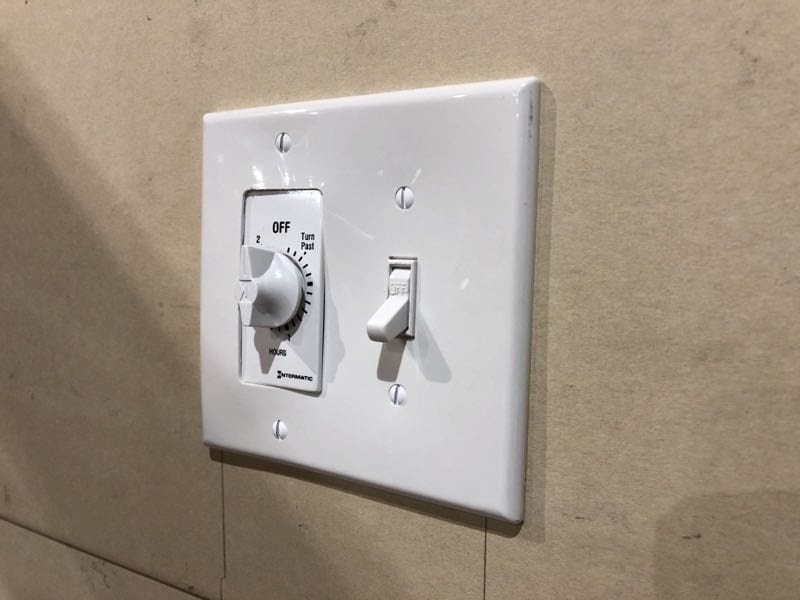
Our fan only required about 6.6 amps of 120V power. After everything was installed, we ran a line to the fan location and passed it through a 2-hour timer switch. This lets us turn the fan on without fear of leaving it running overnight when we close up the shop. It also keeps anyone from operating the fan too long should the oversized 14×18 shop door get closed, cutting off the primary source of air.
Conclusion
While an AC unit will cool down a shop and make it pleasant to work in, consider the expense. A wall-mounted exhaust fan cuts costs while providing much-needed airflow. A properly sized system quickly moves hot air out of your shop while drawing in cool air from below. Installation may seem daunting, but the right tools and some attention to detail will put you on the right track.
Other considerations for alleviating heat in a large unconditioned space include:
- Installing radiant barriers to control heat buildup inside the space
- Adding insulation (this can also include elements of a radiant barrier system)
- Consider a limited AC solution with direct airflow to where you work
- For drier climates, a “swamp cooler” system may be of some benefit to your workspace depending upon your type of work and materials used.
For more information on Canarm Exhaust Fans, check out their website here.
