
This year for our anniversary, my husband and I decided to make each other gifts. He asked for a fishing rod holder to contain his rods and reels, which up to now have been stacked against the wall in the garage next to boxes of his fishing equipment. In an ongoing attempt to organize the garage, I decided that a two-in-one DIY fishing rod holder with storage system was what he needed.
I spent an hour searching the Internet for DIY fishing rod holder systems as well as several retail versions. I finally came up with my design, which combines a fishing rod holder I liked with a Lego storage unit with sliding drawers. You never know where you’ll find inspiration, amiright?
Ideas Can Come from Anywhere: I discovered that the Lego storage unit from the picture I liked was an IKEA system called TROFAST. My plan became to mimic the TROFAST system with some adjustments. Luckily for me, I have an IKEA close by, so I picked up a couple 4” sliding drawers as well as a set of shelves that go with the TROFAST system.
If you’d rather not spend time building the frame of the unit, you can opt instead to buy the TROFAST frame and add the top and bottom panels. If this is your plan, skip down to Step 3.
Building a DIY Fishing Rod Holder with Storage
Supplies List – Tools and Accessories
- Table saw (or circular saw)
- Drill
- Forstner, wood-boring bits, or a hole saw in 2” and 1.5” diameter
- Kreg Jig or other pocket hole system
- Eye protection
- Ear protection
- Dust mask
Shopping List – Materials
- 2) Edge Glued Panel project boards 3/4 x 12 x 36″
- (or 3/4″ plywood cut to size)
- 1) Edge Glued Panel project board 3/4 x 16 x 48″ (either cut in half to two 24″ lengths or 3/4 plywood cut into two 16 x 24″ sheets)
- 1) 1×2 or 1×3 for the braces (the wider it is, the more stability)
- 2) TROFAST 4″ deep storage boxes
- 1) TROFAST set of 2 shelves
- 4) 2″ Castors (optional, but recommended)
- Small box of 1.25″ pocket hole screws
- Wood glue
- Stain (or paint) in preferred color
Step 1: Make Your Cuts
To build the frame of this DIY fishing rod holder, you need two 16” x 24” panels for the top and bottom, and two 12” x 36” panels for the sides. I had originally planned to use 3/4” plywood, but found project panel boards in the dimensions that I needed and decided to use those instead. I prefer the look of the project panel boards over the plywood, but either one will do.
If you don’t want to make the cuts yourself, typically a hardware store will make the cuts for you for a small charge.
Step 2: Cut Your Dados
It may sound intimidating if you’ve never cut your own dados before, but I promise you there’s nothing to it if you have a table saw or router. I made my dadoes with a table saw, but if you have a router with a 1/2” straight edge bit, that will work just as well.
You’ll be cutting dadoes in the panels that form the sides of the fishing rod holder. These hold the shelves and the storage boxes.
This is where you can customize your unit according to your preference. The TROFAST system offers storage boxes at different depths (4″, 9″, and 14.25″), as well as shelves.
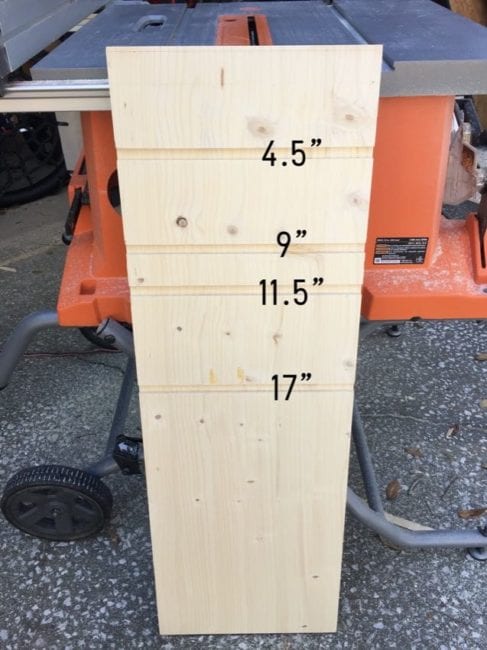
Decide which depth boxes and/or shelves will work for your fishing rod holder storage needs, then mark on the sides of the unit where you want them placed.
Customize to Taste
For my husband’s DIY fishing rod holder, I chose two shelves to hold clear plastic compartments for his bait and tackle, and two storage boxes at 4″ each. I left plenty of space at the bottom for his tackle box. If you have more gear to store, add more storage boxes or shelves.
Measure and draw lines on both side panels (double-check to make sure they mirror each other). When you are making your marks, make sure to account for the 1/2” dado you will be cutting.
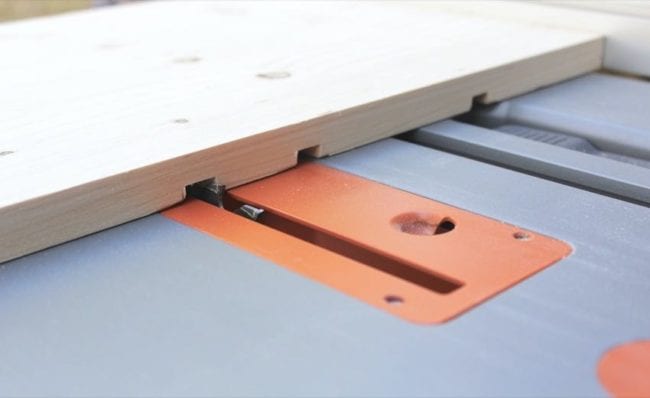
Now it’s time to cut those dadoes! Raise your table saw blade up 1/4” and cut along the line you marked, then nudge your fence over little by little, cutting as you go, until you’ve cut a 1/2” dado into the board. Repeat for each of your marks. Use a wood chisel to clean out each dado to ensure the shelves and storage boxes will slide easily.
Step 3: Drill the Holes for Your Fishing Rods
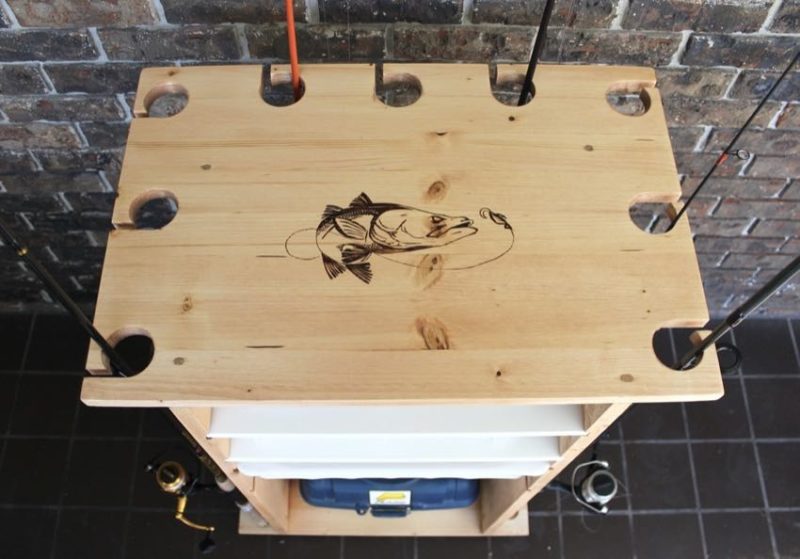
This fishing rod holder I made can hold 9 rods. You could add more holes to the sides and back if you need more storage. I spaced the center of each hole 1.5″ away from the edges and about 5.5″ away from each other. Mark the center of each hole on both the top and bottom panels. Make sure they mirror each other so your rods stand up straight.
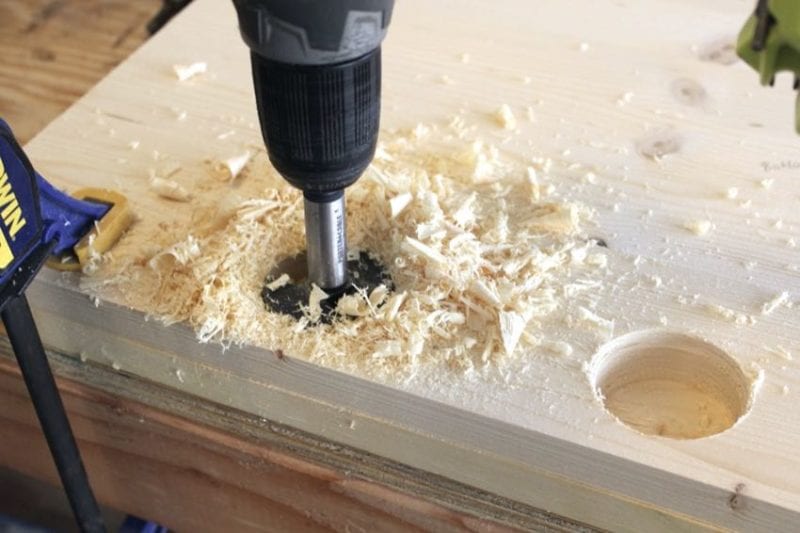
For the top board, you will need to drill all the way through the board using your 2″ Forstner bit or hole saw. For the bottom panel, drill down about 1/4″ using a 1.5″ Forstner bit, or just enough to make a holding space for the bottom of the rod.
After you’ve finished making the holes, cut 1/4″ slots on one side of each hole on the top panel, providing a space for the rod to slide into the hole.
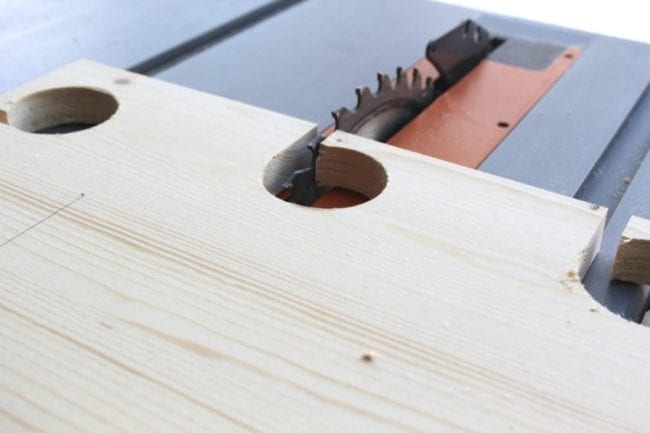
I used my Ridgid table saw, but you could use a circular saw or even a hand saw to make the slots.
Step 4: Assemble the Frame
The sides of the frame need to be exactly 16″ apart from the inside edge. This will provide enough space for the shelves and storage boxes to slip snuggly into the dadoes.
On the top and bottom panels, make a mark at the exact center. Then measure out 8” towards the right side and 8” towards the left side and make your marks. The inside edge of the side panels should touch this mark. The side panels should be flush with what will be the front of the frame.
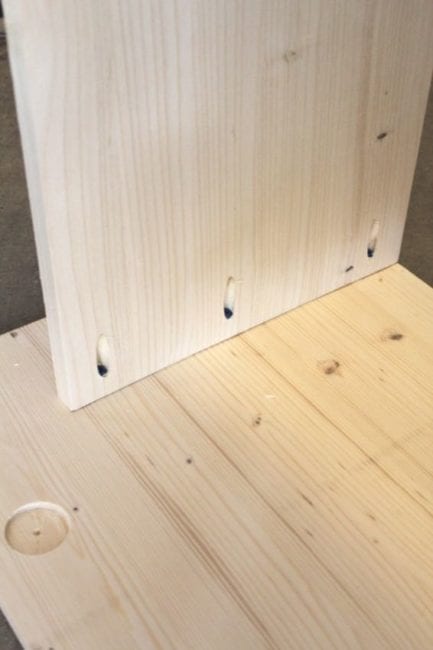
Attach the sides to the top and bottom using wood glue and pocket holes. For additional strength, you could also drill a couple 2-1/2″ wood screws through the top and bottom panels into the side panels.
See our article: How to use a Kreg Jig to make pocket holes.
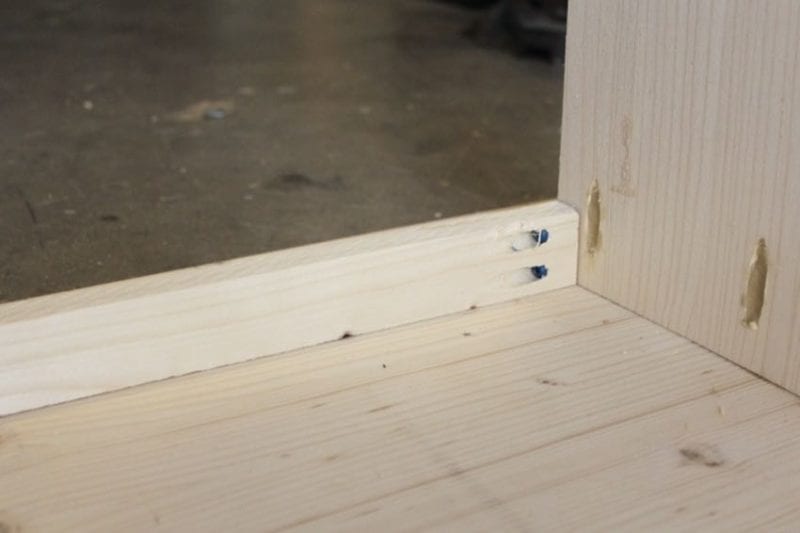
Step 5: Add Braces for Stability
I had scrap 1x2s laying around, so I cut two 16” lengths and attached one to the top and one to the bottom on the back of the frame with pocket holes for extra stability.
Step 6: Customize Your DIY Fishing Rod Holder
I recommend adding castors to the bottom for easy mobility. After you’ve added them, sand and then stain or paint the project to your preference. I wood burned a snook onto the top as a nod to my husband’s love of saltwater flats fishing.
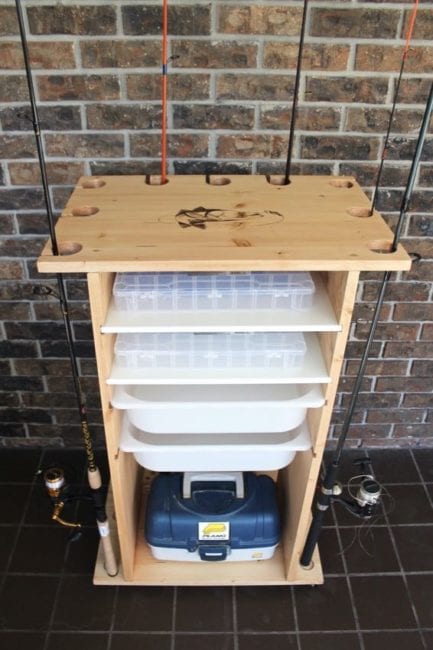
Thanks for following along with my tutorial! I’d love to see your versions of this project. Leave a comment below!
