
This one goes out to all of those “quarantine” adoption animals. We just got our new puppy and I wanted to tackle a DIY pet feeder station. I need a solution that would:
- Allow the kids to easily access food so they could help feed the puppy
- Look good in a central location in the kitchen
- Grow with our pet, and
- Make clean-up easy and quick
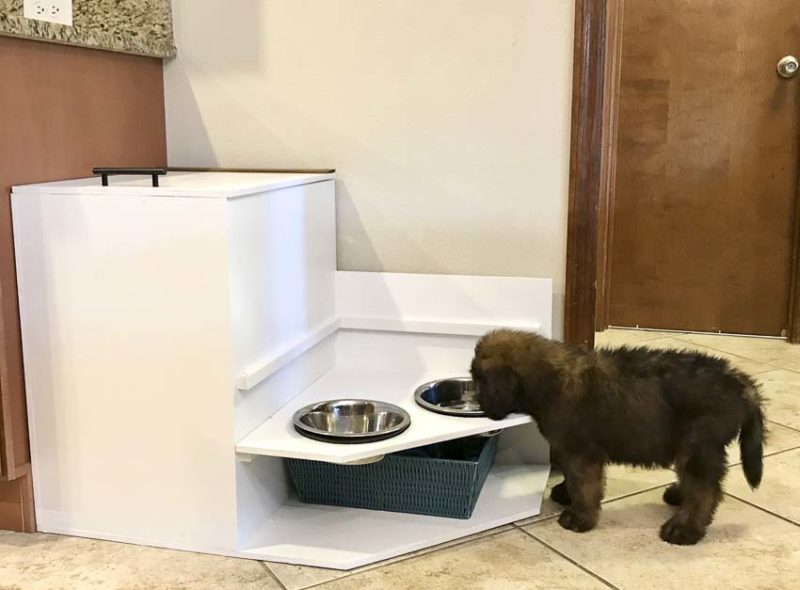
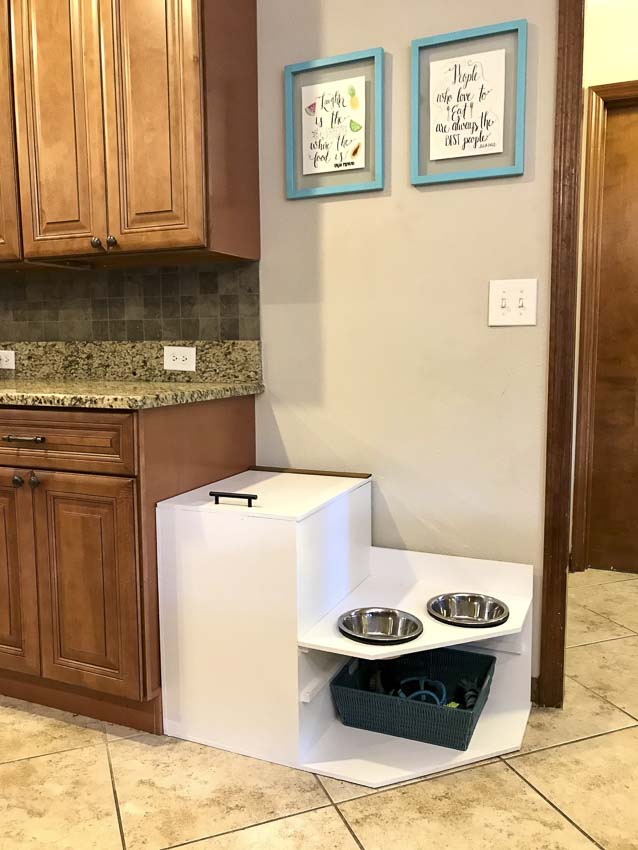
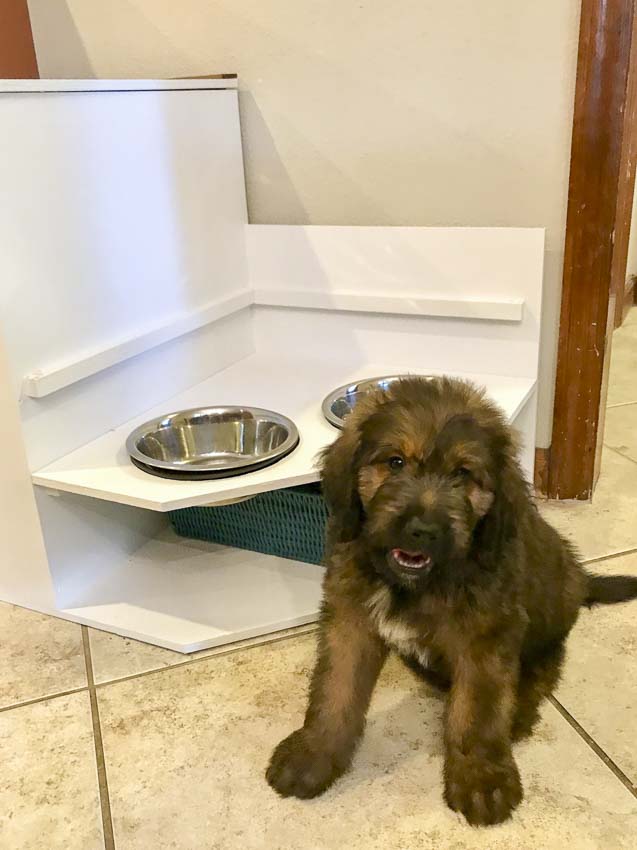
My latest DIY pet feeding station build is my solution. This attractive unit tucks perfectly into the corner of the kitchen. It saves space, incorporates food storage, and has an adjustable bowl height for our growing pup. Finally, it includes a “food guard” around the bowls to keep the kibbles and water on the platform instead of all over the floor.
Tools Used
- Circular saw
- Drill
- Brad nailer
- Jigsaw
- Clamps
- Pencil
- Tape measure
- Speed square (optional)
- Eye + ear protection
DIY Pet Feeder Materials List
- 4×8 sanded plywood sheet (I used 1/2-inch primed blonde wood)
- Scrap 1x1s
- 3/4-inch screws
- 1-inch brad nails
- Wood glue (I like Titebond)
- Set of hinges
- Handle or knob
- Paint or stain
- Weatherstrip
- Pet food container
- Dog bowls
Cuts Made for This Project
- 2) 24 x 21 in. plywood
- 2) 24 x 15 in. plywood
- 19 x 16 in. plywood
- 19 x 20.5 in. plywood
- 21 x 16 in. plywood
- 21 x 35 in. plywood
- 2) 18 x 1 x 1 in. pine
- 2) 19 x 1 x 1 in. pine
How to Make a DIY Pet Feeder Station | Step by Step
Step 1 Making the Basic Cuts
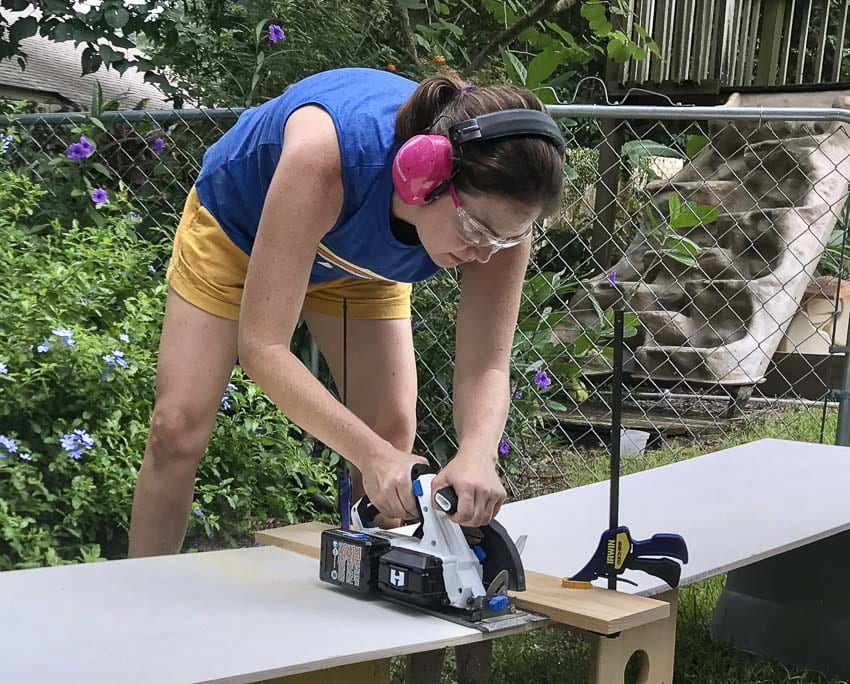
Cut your larger pieces using a circular saw. We used a Hart 20V circular saw for this simple task. A clamped board can give you a nice straight edge for super-straight cuts.
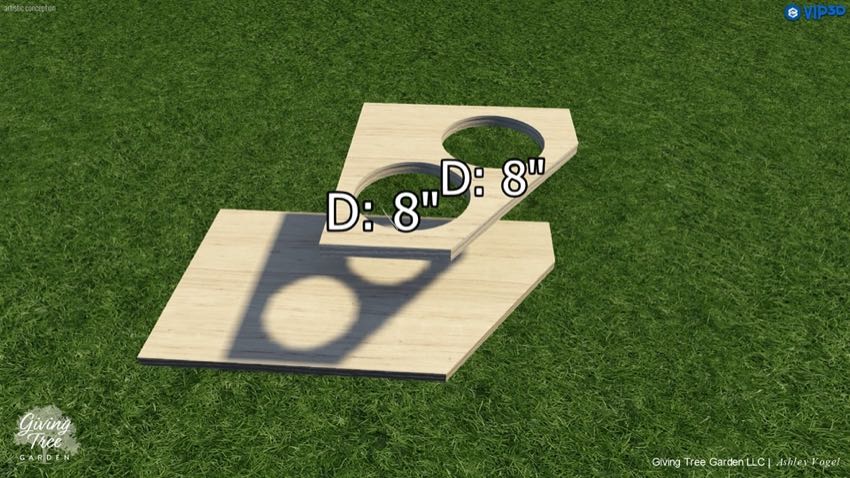
Cut the corners off of the base piece (21″ x 35″) and the piece that will hold the bowls (19″ x 20.5″). Then trace out two circles (just a bit smaller than the circumference of the food bowls) and cut those out with a jigsaw. We used a Hart 20V jigsaw because of its convenience. Any jigsaw should work provided you have the right blade.
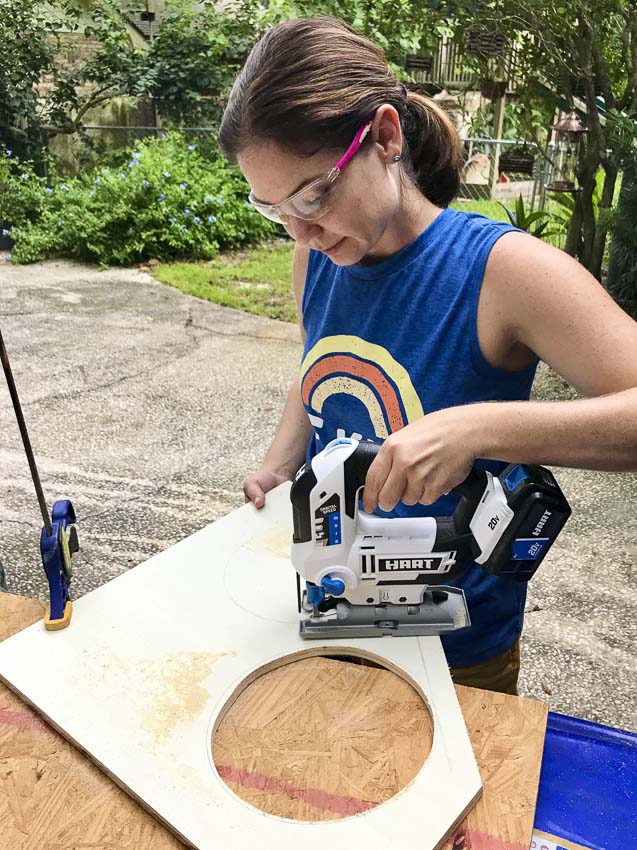
Tip: Make a large hole with a 1/2-inch twist drill bit to give the jigsaw blade a starting point. You can also use a paddle or spade bit.
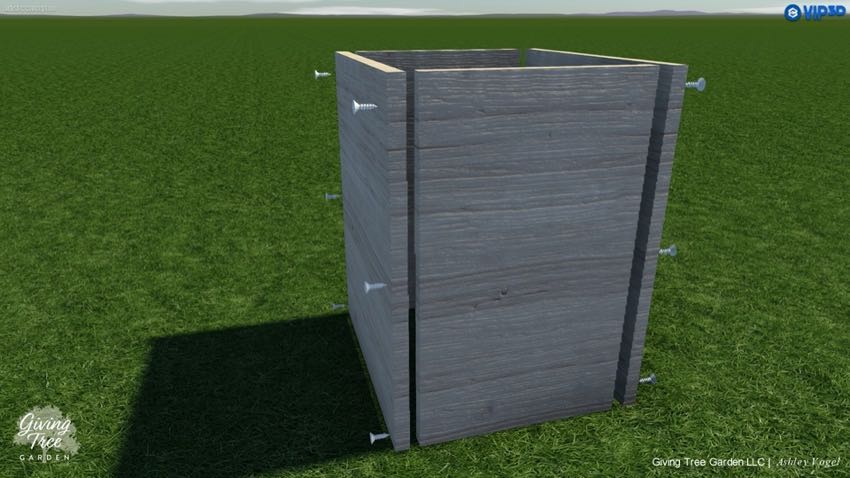
Step 2 Rough Assembly of the Base
Attach all four sides of the box by pre-drilling pilot holes and then securing them with glue and 3/4-inch screws.
Step 3 Attaching the Bottom
Flip the box on its side and attach the bottom of the box to the base of the unit using more glue and 3/4-inch screws.
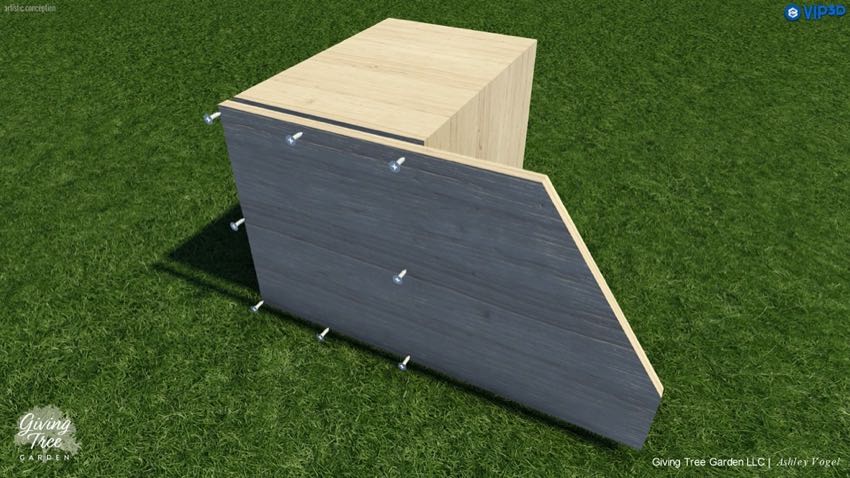
Next, align the 19″ x 16″ piece with the box and base and attach.
Tip: To attach the side of the back piece to the box, you’ll need to drill the screws in diagonally from inside the box. Use a small drill bit to drill your pilot holes first to help the screws go in at a 45-degree angle.
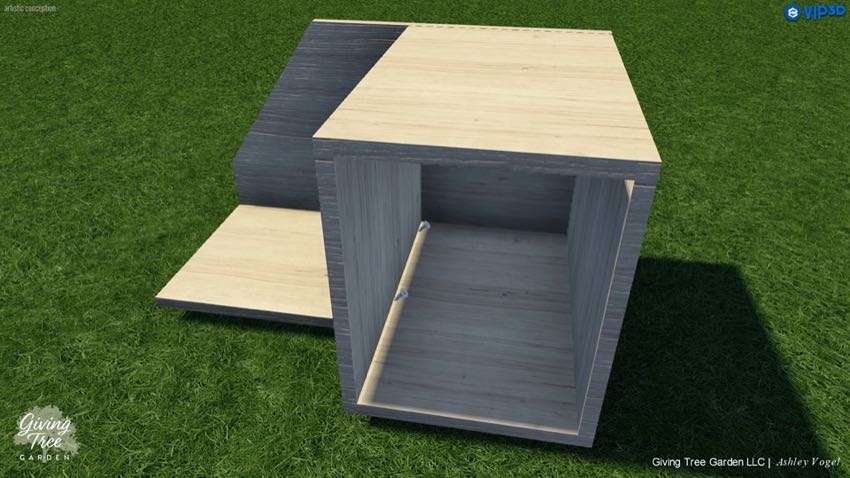
Step 4 Food Bowl Placement
Set your in-progress DIY pet feeder station right side up on its base. Use your tape measure to make marks at your desired heights for where you want the food bowls to rest. Given the breed and predicted size of my dog, I marked it out at 7” and 12” from the bottom of the unit.
Using clamps, secure the 1 x 1-inch strips alongside your marks, and attach using glue and brad nails.
Step 5 Painting or Staining Your DIY Pet Feeder Station
Paint or stain the DIY pet feeder station including the lid and the food bowl holder. You can go with any desired color or finish. I chose a gloss white latex trim paint that I already had in the garage. It’s easy to scrub and maintain.
Step 6 Attaching the Hinged Lid
You want to be able to access the inside of your DIY pet feeder station. This lets you store and access food as needed. Attach the storage lid to the box using hinges. YOu can pick up any kind of hinges online or via your local home improvement warehouse store.
For the handle, just drill a hole (or holes) in the top of the lid and attach the handle of your choice. You should even be able to find something that matches the hardware of your nearest cabinets.
Step 7 Wrapping It Up!
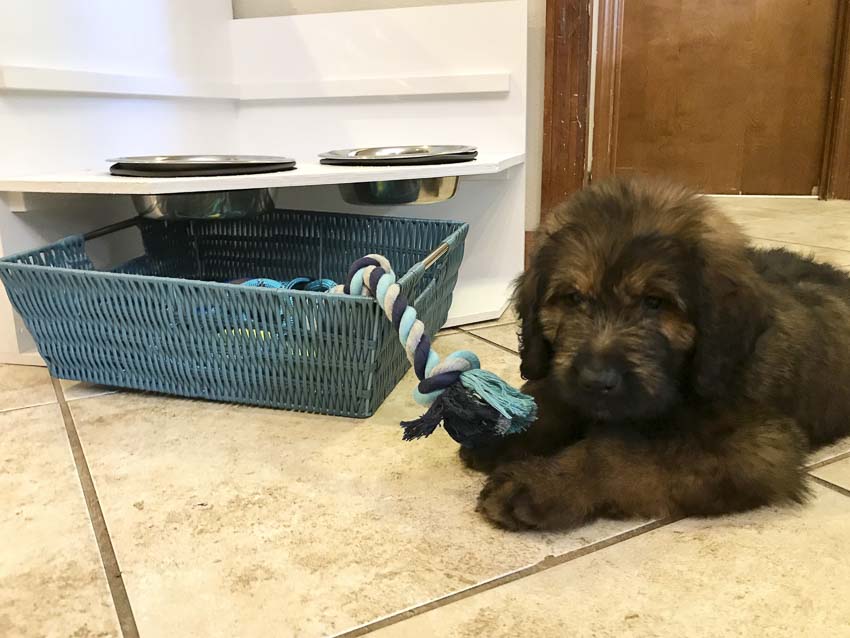
Drop the food storage Tupperware into the box (it should fit nice and snug), slide the food bowl holder onto the bottom level for your pup, and enjoy!
I found a storage basket that fits underneath the bowls, which is where I keep his dog toys and leash. Here’s the link to the basket on Amazon.
Step 8 (Optional) Tweaking!
I found that the bowls I ordered slid around a bit too much as the puppy ate, so I cut a piece of rubber weatherstrip (the kind you put around a door) and tacked it around the perimeter of each hole. This keeps the bowl nice and snug.
I hope this DIY build helps all you pet parents stay a little neater, tidier, and more organized!
Happy building!
