
Some of my favorite memories as a kid are of visiting my godparents’ house for Halloween. Their house is nestled underneath a canopy of old live oaks draped with Spanish moss, which was the perfect setting for the Halloween extravaganza they’d host each year. They didn’t need a DIY spooky Halloween tree—they had several real ones!
Back then, the whole family dressed up in costumes that would put the actors from Halloween Horror Nights to shame, and they decked out the yard (and trees) with the absolute spookiest decorations. Their house was even on the news once or twice for their elaborate display—I kid you not!
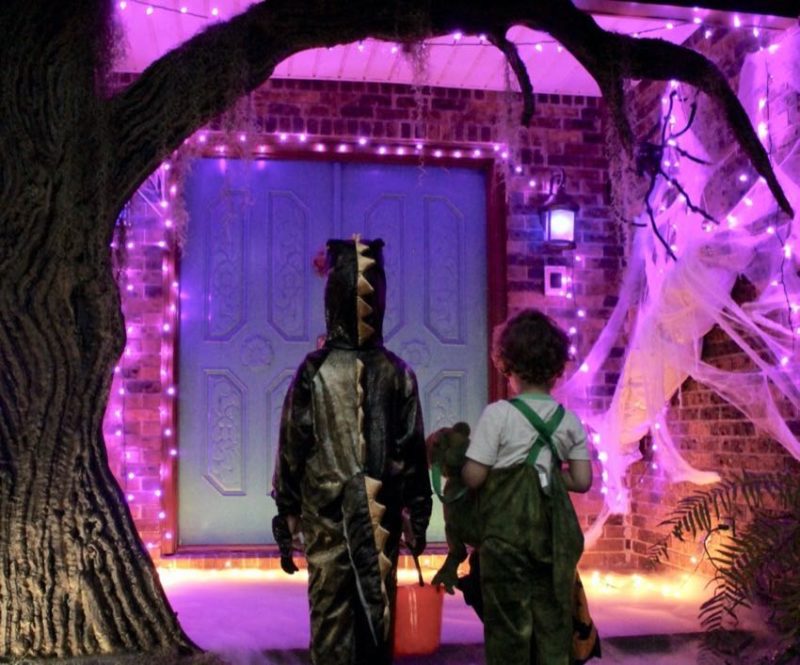
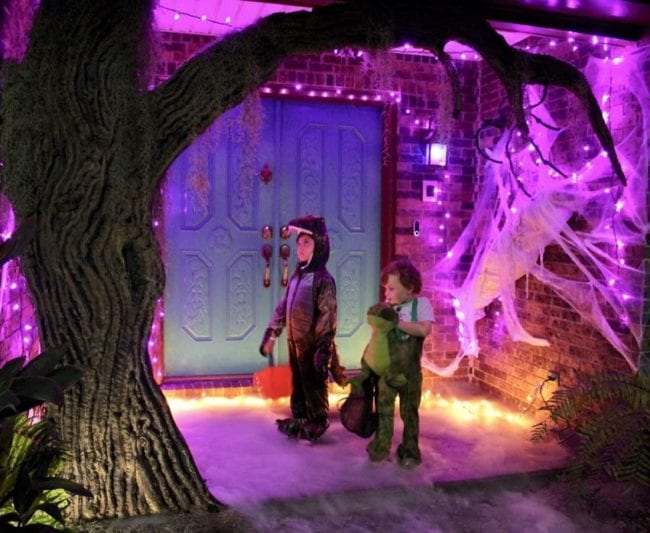
While I may never be able to attain that level of Halloween awesomeness, I am trying to up my spooky decoration game this year. I turned my front porch into a haunted forest, complete with cobwebs, a spider victim, and a gnarled DIY spooky Halloween tree, reminiscent of the ones in my godparents’ yard.
A few inexpensive materials at the hardware store and a weekend are all you need to get achieve this look.
Materials List
- 4×8 sheet of 3/4-inch plywood
- Gap filler spray foam (I used 4 cans for my tree)
- Paint
Tools Needed
- Jigsaw
- Cordless drill
- Paint sprayer (optional, you can use cans)
- 2-1/2 ft 1x scrap board
- Smal box of 1-1/4″ screws
Step 1: Trace and Cut Out Your Tree Shape
Sketch out your tree onto the plywood using a marker. Be sure to account for the height of your front entrance so you don’t have to go back and cut it down later like I did. With the plywood propped up on blocks (or in my case, paint cans) I cut out the trunk base using a cordless Ryobi jigsaw. Once you cut out the main part of the tree, use the leftover plywood to cut out a long hanging branch (or a couple of branches depending on your design).

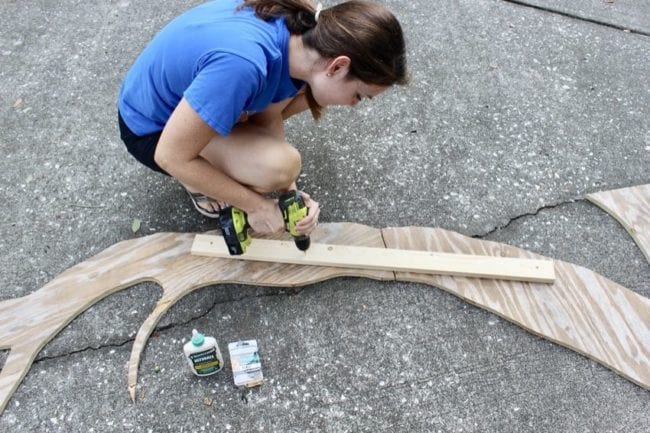
Step 2: Attach Your Hanging Branch
Flip your trunk and hanging branch over with the backside facing up and lay them on your driveway or a flat surface. Line up your trunk base and the hanging branch how you want them arranged, then place your scrap board across the two pieces. If you don’t have any scrap boards, you could even use a piece of the leftover plywood as a brace. Drill several 1-1/4” screws through the brace board and into the plywood.
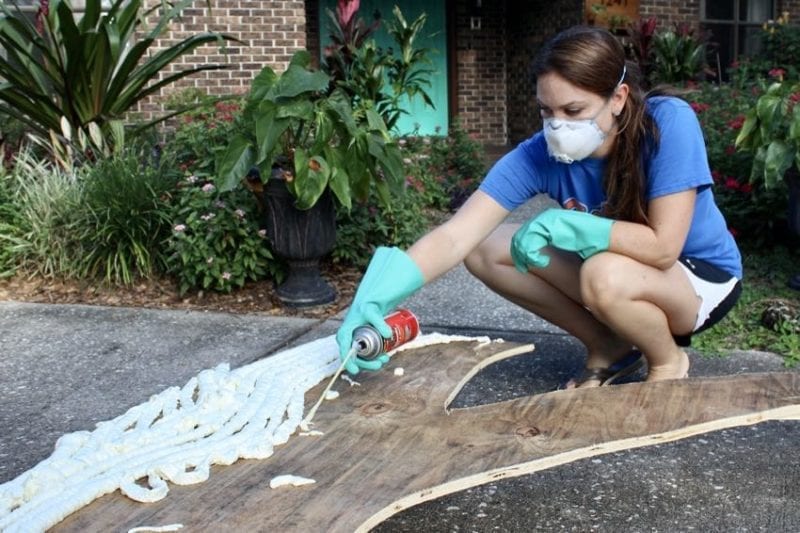
Step 3: Creating the “Bark” of the Tree with Foam
Now that your branch is attached, flip the tree back over with the front side facing up. Using long, sweeping motions, spray the gap filler up and down the trunk, and from side to side on the branch, mimicking the look of bark. Leave some gaps and holes here and there to create space for shadowing.
Step 4: Spray Your Base Coat of Paint
I used a spray gun to apply the brown base coat of this DIY spooky Halloween tree, but you could use spray paint. Even a foam or bristle brush works in a pinch. Make sure to walk around the tree and check it from every angle to ensure you get in all the gaps and voids.
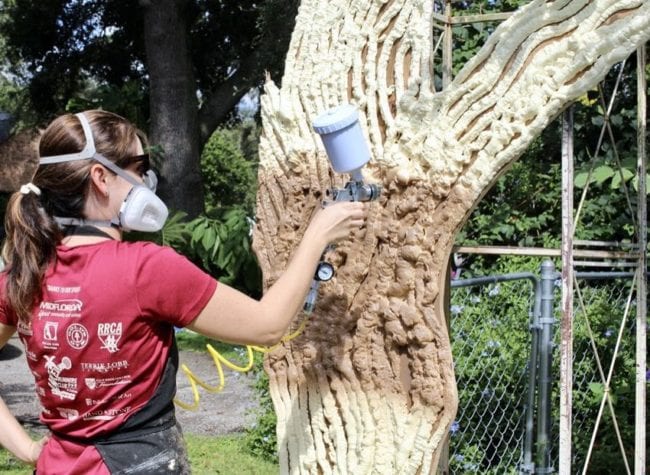
If you choose to spray on your paint using either a gun or can, make sure to wear a respirator. A standard dust mask isn’t sufficient. You can pick one up at your hardware store for around $30 and reuse it over and over.
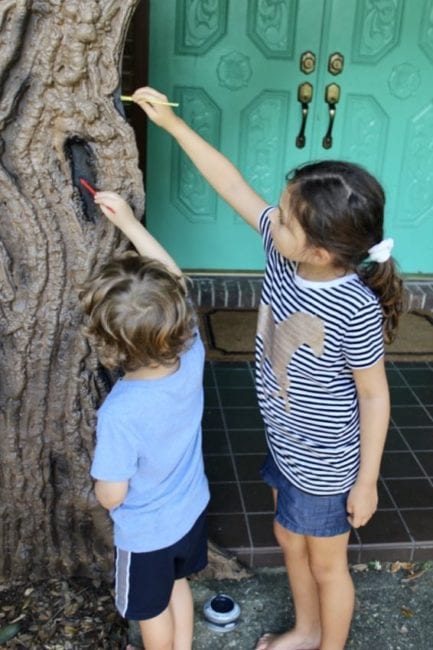
Step 5: Shade in the Tree
Once the base coat was dry, my little goblins helped me shade in all the cracks and crevices with a darker color to give the “bark” a more realistic appearance.
Step 6: Secure the DIY Spooky Halloween Tree
Once the paint is dry, prop up your DIY spooky Halloween tree where you want it to stand and add supports so it won’t fall over. I wedged my tree up against the brick of my house and the roofline, so it needed minimal support to keep it in place. If you want a free-standing tree, you’ll need to add supports to the back. A simple support system using a couple of 2×4’s and gate hinges can be found here. I also recommend supporting the branch from the ceiling as well since the tree will be top-heavy.
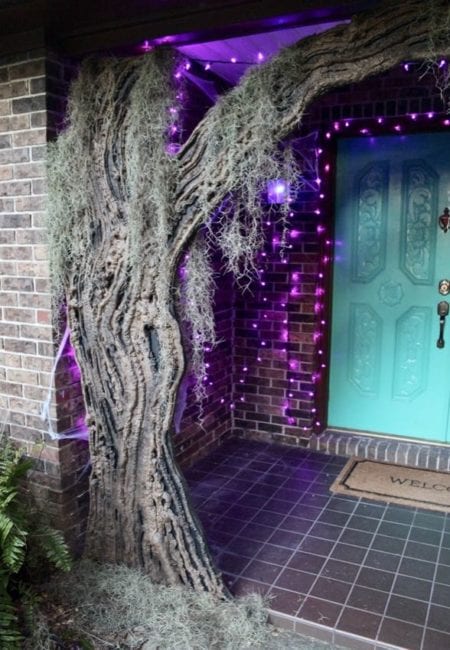
Step 7: Spook It Up!
Living in Florida, I don’t have to go far to find loads of Spanish moss. For the finishing touch, I collected some from a friend’s live oak and hung it all over my tree. I’ve seen Spanish moss for sale at my the hardware store if you can’t harvest some yourself.
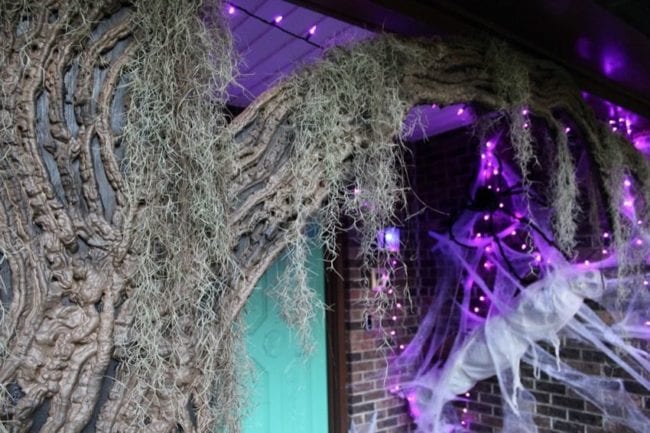
Consider adding hanging bats, rubber snakes, peeping eyeballs, or plastic spiders for an extra spooky element.
Thanks for reading my DIY tutorial! I’d love to see your take on the spooky tree, so feel free to comment below with your own “haunted forest” pictures!
Happy Halloween!
