
As the name indicates, the Forney 220 MP Multi-Process Welder can tackle four different types of welding processes. Who might find this useful is the guy looking for a single tool solution for welding steel, stainless, cast iron, and aluminum. It also lets you handle a variety of material thicknesses ranging from sheet metal to 1/2-inch thick steel. This ideal tool seems perfect for anyone from the do-it-yourself project guy to the light industrial repair/fabrication worker. We tested both stick and MIG welding on steel and MIG welding on aluminum.
Pros
- Space-saving (four processes in one unit)
- Simple to set up for each process
- Flexible power source (120V-220V)
- Digital LCD settings display
Cons
- No presets or automated programming
- Shorter duty cycles compared to dedicated process equipment
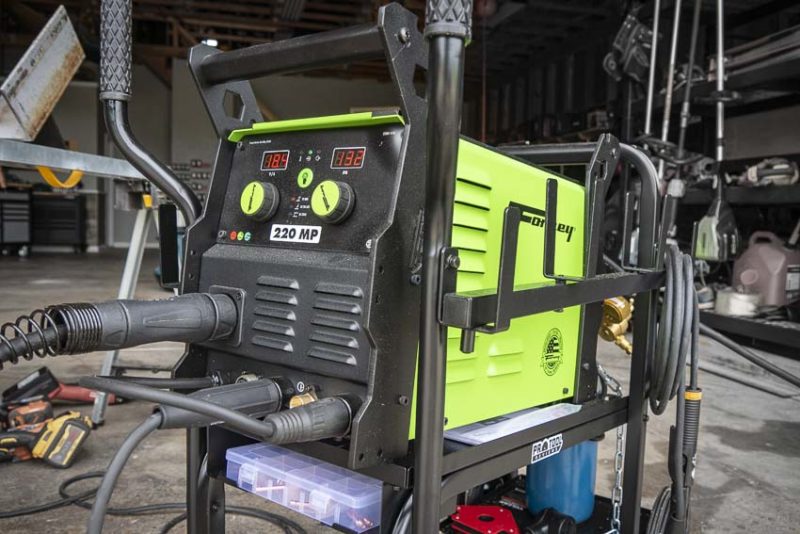
Forney 220 MP Jack-of-All-Trades Welder
“Welding” comprises many different processes and systems. While Forney makes many types of welders, the 220 functions as a multi-process or MP welder. The Forney 220 multi-process welder supports four main welding processes. When comparing MIG, TIG, or stick welding, it’s nice to have a single unit that does them all.
MIG (Metal Inert Gas) Welding (or GMAW)
MIG (Metal Inert Gas) welding involves the use of a spool of wire and a MIG welding gun. This welding process does great on both steel and aluminum. It handles anything from sheet metal to material up to 1/4-inch thick. Depending on the setup, MIG welding utilizes an inert shielding gas (we used a mixture of 75% Argon and 25% CO2).
Flux-Cored Arc Welding
The Flux-Cored Arc Welding (FCAW or FCA) process requires a continuously-fed consumable hollow electrode with a flux core. This process requires no shielding gas. The flux actually creates a gas that protects the arc during the weld. Of all the welding processes, we consider this the most portable. It can handle windy conditions outdoors, use less power, and is a little easier to master.
TIG (Tungsten Inert Gas) Welding (or GTAW)
Tungsten Inert Gas (TIG) welding, also known as Gas Tungsten Arc Welding (GTAW) uses a non-consumable tungsten electrode. This pairs with a separate consumable filler rod and uses an inert shielding gas like 100% Argon. TIG welding produces less heat than MIG and works extremely well for light metal alloys.
Stick Welding (SMAW)
Stick Welding, the most basic type of arc welding, uses a consumable electrode. You heat both it and the workpiece until they melt—welding the two parts together. The welding rod comes coated in flux to protect the weld from contamination. This type of welding produces a lot of heat. As a result, stick welding works well for heavy-duty applications joining together thicker or heavier metals. Stick welding also leaves a large slag deposit on top of the weld from the flux. This needs to be chipped away or hit with a stiff wire brush.
Setting up the Forney 220 MP Welder
Getting the Proper AC Connection
The setup of the welder started with a trip to The Home Depot to pick up the correct 240V outlet. We had a dedicated 240V power source, but it expected a newer 4-pin plug. While the Forney 220 multi-process welder converts to run on 120V, more power in means more power out. We wanted the increased duty cycles 240V affords.
After converting our 4-pin outlet to the 3-pin version Forney preferred, we stopped in at a local welder supply house. We grabbed some E6011 and E6013 welding electrodes (for stick welding). Next up came a spool of .030 steel MIG wire. Lastly, I swapped out our new empty 20 cubic foot gas tank for one filled with 75% Argon and 35% CO2.
We planned to make good use of the MIG process on a project. We also went ahead and picked up a welder cart to make the system more portable in our shop. Forney sells a nice welding cart for around $125, but we located one with a bit more capacity at Harbor Freight for just $100.
Setting Up the Forney 220 for MIG
Once we put the welder on the new cart, we decided on which welding process to start with. Since we have another flux wire welder in the shop, we figured we’d set it up for MIG. Don’t get me wrong, we can weld fine with flux, but gas produces a much-improved result.
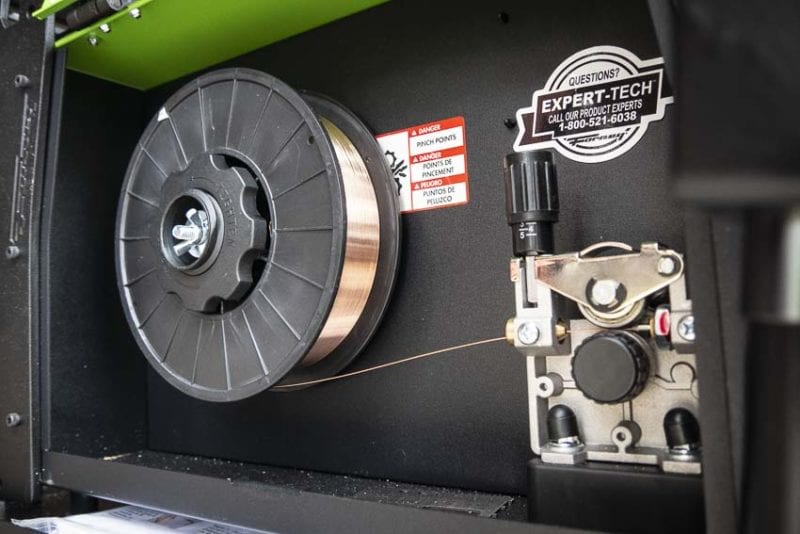
I connected the gas tank, gauges, and hose to the back of the welder as instructed. Next, I inserted the spool of .030 wire and installed the MIG gun on the front of the welder. Be sure to pay attention to use the proper polarity for the MIG welding process. In our case, Direct Current Electrode Positive fits the bill.
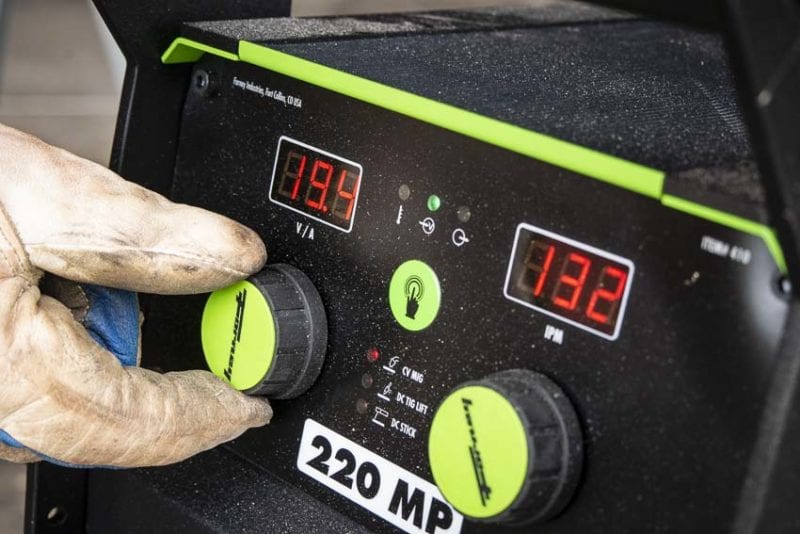
Next, I turned the welder on and pressed the trigger on the MIG gun to feed the wire through to the tip. From here on, the gas pressure, voltage, and wire feed adjustment all needs to match the application. While this welder has an easy-to-read digital front LCD display, you must manually adjust all your settings. Overall, setting the welder up seemed fairly straightforward. Anyone used to MIG welding should find the Forney 220 MP welder simple to set up and adjust on the fly.
Our review welder also came with the optional TIG setup including the TIG gun and the foot control pedal. For this review, we tested only the MIG and Stick welding features.
MIG Welding with the Forney 220
Here in the Pro Tool Review shop we always have little side projects and things needing repair. On our best impact driver testing rig, we discovered some design issues with our original model. Even though we had it clamped to a table, the rig still flexed under the heavy loads we gave it.
The existing rig consists of a three-foot-long piece of 5 x 5 x 5/16-inch thick angle structural steel. To create a more stable base, I cut two 12-inch pieces of the same angled steel to create a base. This would stabilize the rig when using our torque multiplier to set specific high torque values on the nuts.
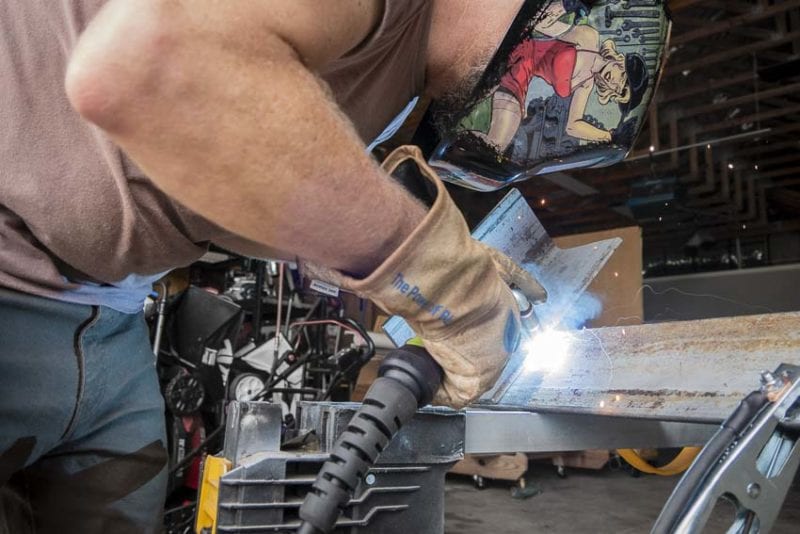
As in any welding operation, we started by cleaning and prepping our workpiece. I used a grinder to remove a layer of the galvanized steel in all the areas that I had planned on welding. I also made sure to clean off an area for my ground clamp to ensure good continuity.
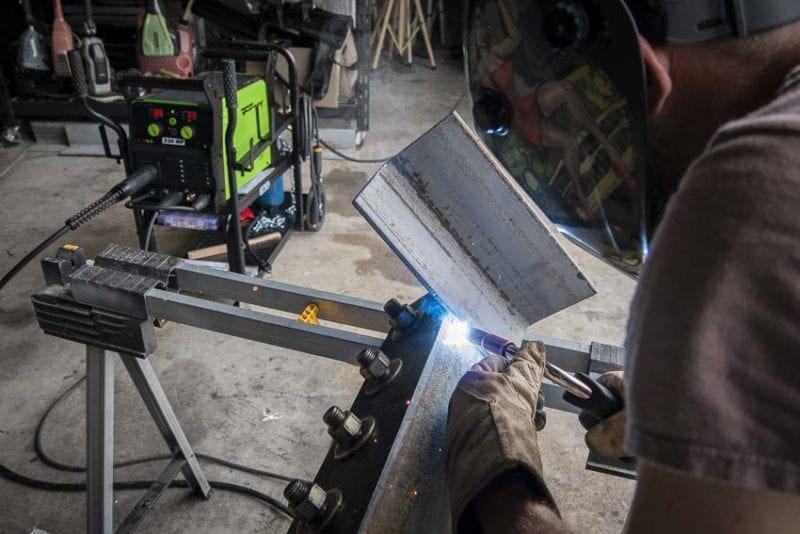
MIG Welding 5/16-inch Steel
I started off welding some scrap pieces of steel to make sure I could dial in my welds before starting on the real project. Setting the feed and the voltage was pretty easy. Forney gives you a handy-dandy chart inside the cover that gets you in the ballpark for what you might be trying to do. After setting it based on those numbers, I further dialed it as I worked on the test material.
The dials on the front of the Forney 220 multi-process welder are large and easy to adjust. This held true when wearing thick leather welders gloves. The large, bright LED readouts also read easily as you work. I didn’t have to go back and forth too many times to get things set correctly. The thick steel fell just about outside the abilities of the .030 wire I had selected. Even so, I found it just took more time and patience to secure the new bracket supports to the bottom side of the torque testing rig. I got clean welds with more than adequate penetration into the base material. I also noticed plenty of filler build up in the joint.
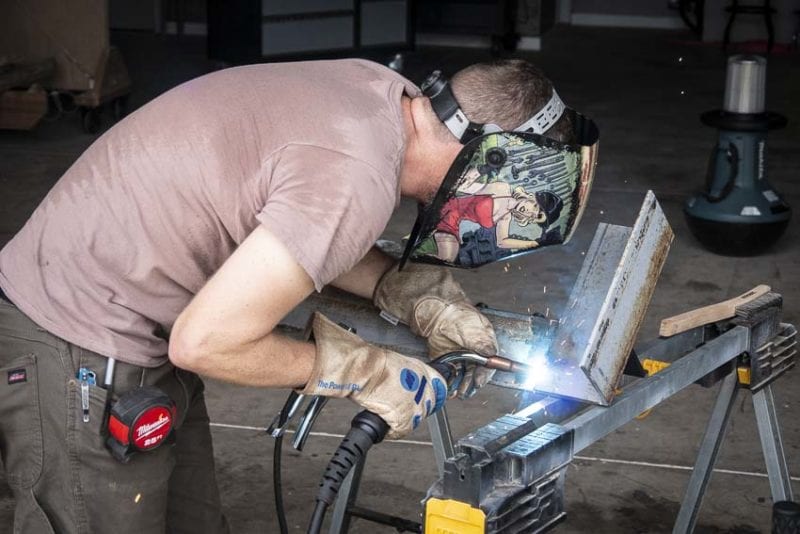
Stick Welding with the Forney 220 MP
To test stick welding, I left the top side welds undone and switched modes. Given the heavier material of this testing rig, stick welding proved the ideal choice for connecting the two pieces together. With the Forney 220 MP multiprocess welder, I just installed the electrode lead and the ground clamp into the correct terminals. I then installed one of the E6011 welding rods into the electrode holder. Be sure to set the electrode polarity correctly when connecting the ground clamp and electrode leads to the front of the unit.
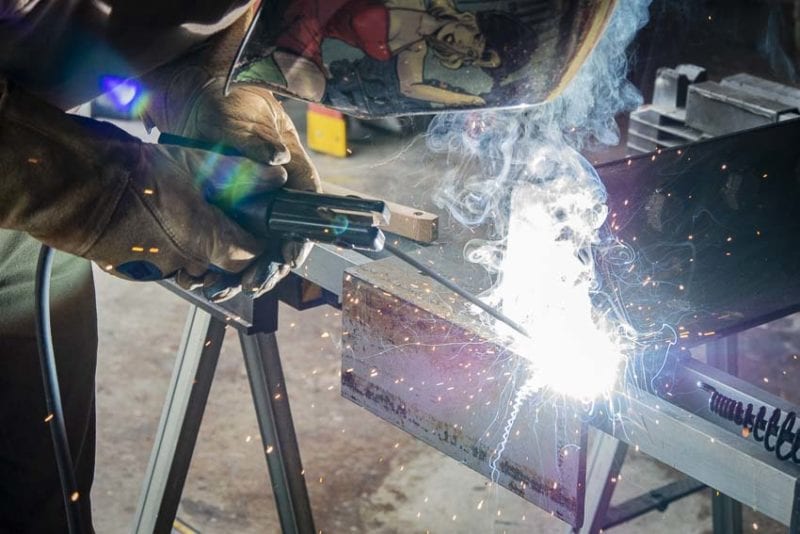
With the dial, I set the Amperage to the appropriate setting for my project. After doing a little more flap disc sanding to prep the area, I started the weld. Since we only had short welds on this project, I had no issues running into the duty cycle of the welder. Dialing in the proper amperage was easy enough as well once I glanced at the chart inside the machine. I then added just a little bit more amperage once I got a feel for what the welder wanted to do.
Welding Stainless Steel in 120V Mode
One of the more impressive moments of our experience with the Forney 220 MP came when welding stainless steel. We decided to test this welder in 120V mode when welding a stainless steel downpipe. Setting up the Forney for MIG, we swapped out the power cord to 120V and began welding. To our delight, the system automatically dialed in the power and tackled our small pipe reinforcement project without hesitation or difficulties. Using this method we were able to preemptively reinforce a known issue with this stainless steel Volkswagen pipe.
Final thoughts
Welding is one of the few trades left that leaves much of the results of the final product up to the user. Learning to weld well is a skill that requires a lot of practice. With experience, dialing in settings and understanding materials becomes second-nature. In our shop, we only fabricate and make repairs on occasion. Having a multiprocess welder around really makes sense. First, it saves a tremendous amount of space. Second, it gives us a great deal of flexibility as to what we can build or repair. Finally, it offers portability since we might throw it on the back of a truck with a generator and make some repairs out in the field.
We think this welder presents an ideal solution for a variety of users. For around $2000 we find it amongst a lot of competition. Check out this and other products at the Forney Industries website.
