
I wanted to add some curb appeal to my front entrance. The concept of a DIY wood address planter came to mind as it takes only a few materials and a short time to build. With this quick and easy How-To build project, you can take an afternoon to complete the entire project.
Tools Needed to Make a DIY Wood Address Planter
You don’t need a ton of tools to complete this DIY wood address planter. The big picture has you fastening cedar boards together and adding the box and house numbers. After that—you just sand and paint! Not to worry—we include specific steps and details below.
- Miter saw (great excuse to buy one if you don’t already have this tool)
- Finish nailer
- Kreg jig or pocket hole system (preferred, but not required)
- Clamp
- Cordless drill
- Sander (corded or cordless)
- Measuring tape
- Pencil
Materials Needed for this Address Planter Project
The materials needed to make this DIY address planter include cedar boards, fasteners, hanger D-rings, glue, and materials for sanding and painting. The list stays wonderfully short, making this one of the easier projects you might take on this year.
- 1x6x6 cedar board
- 1x4x6 cedar board
- 1x2x6 cedar board
- 1-1/4″ exterior pocket hole screws
- 1-1/4″ brad nails
- 2 x heavy-duty D-rings
- Sandpaper (120 and 220 grit)
- Wood glue (I like Titebond III)
- Address numbers (I used Hillman 6″ floating numbers)
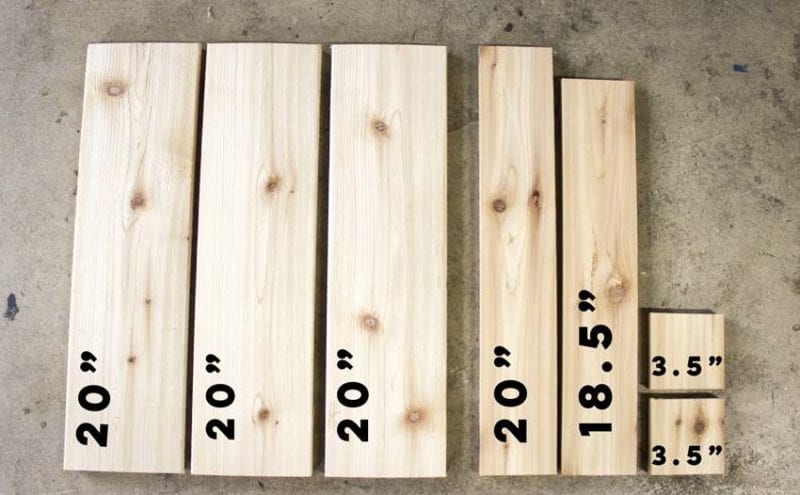
To save you some time, use this photo as a quick guide to the board sizes you need for this DIY project:
Steps for Building the Wood Address Planter
After you gather your materials, cut your cedar boards to size (see above). Cedar is naturally rot-resistant and holds up well to the elements. It should last for many years.
Cutting Your Cedar Boards
Using your miter saw, cut three 20-inch pieces from your 1×6 cedar board.
From your 1×4 board, cut one 20″ piece, one 18.5″ piece, and two 3.5″ pieces.
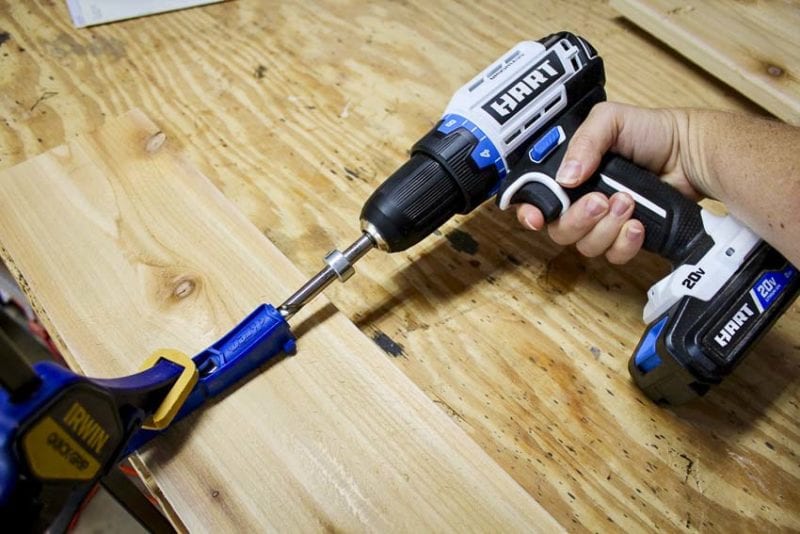
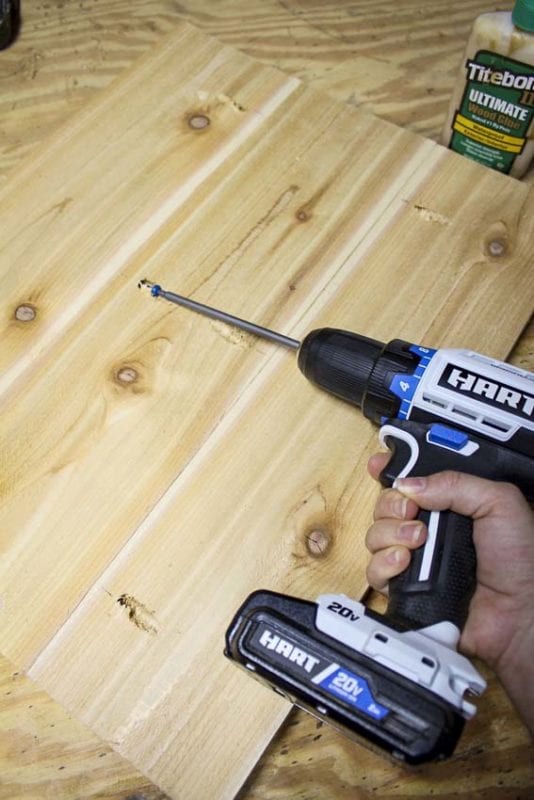
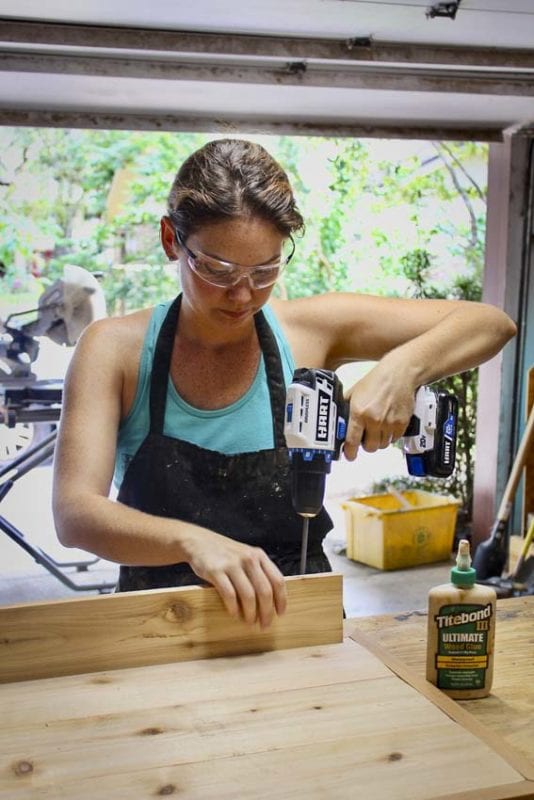
Glue-up and Pocket Hole Joinery
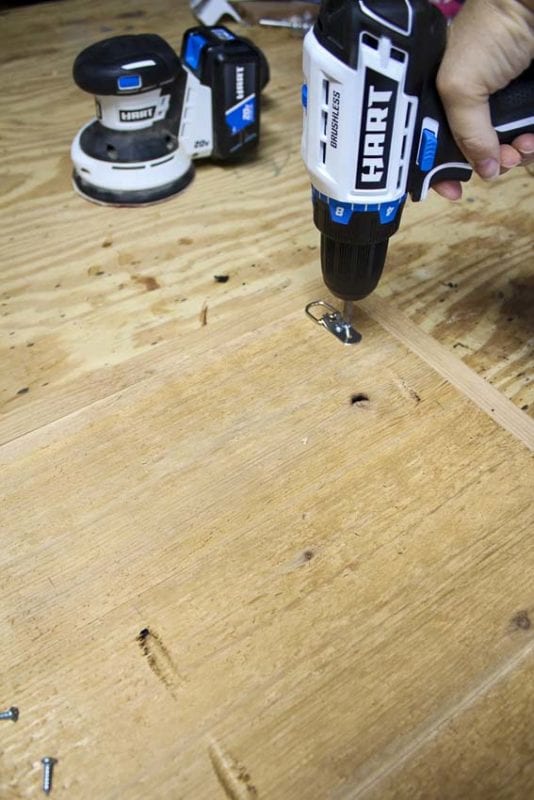
Flip your three 20″ 1×6 boards over to the back and attach them together using wood glue and your pocket hole system. For drilling, we grabbed a cordless drill from our Hart 20V brushless tool kit. It does a great job on projects like this.
Once the cedar boards are attached together, you should have a rectangle measuring 20″ by 16.5″.
Measure and Cut the Frame for the Planter Box
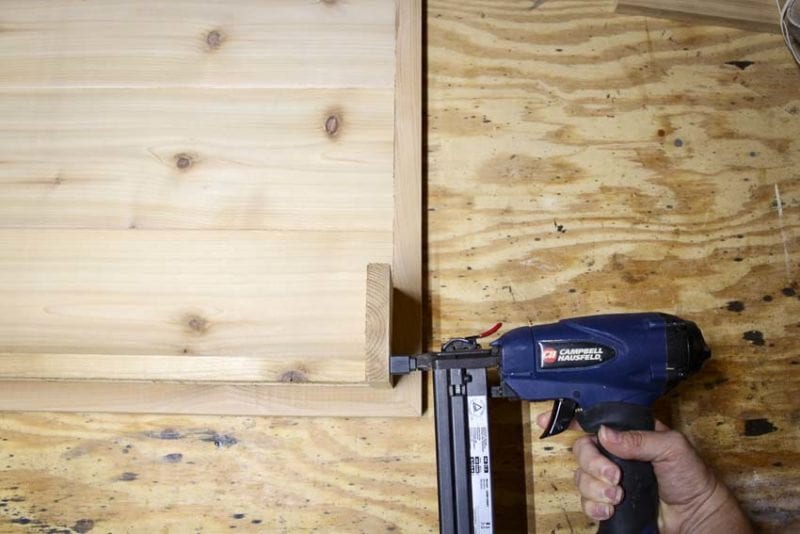
Turn your best miter saw to a 45-degree angle and measure out and cut a frame to fit using the 1×2 board. Attach the frame using wood glue and brad nails.
Assemble the Planter Box
Next, assemble the planter box. Using the pocket hole system, attach the 18.5″ 1×4 piece using wood glue and pocket screws. This will be the bottom of your planter box.
Editor’s note: See our article on how to use a Kreg jig to make pocket holes.
Next, attach the two 3.5″ pieces to the sides of the 18.5″ piece. Finally, attach the 20″ piece of 1×4 to the top, finishing your planter box.
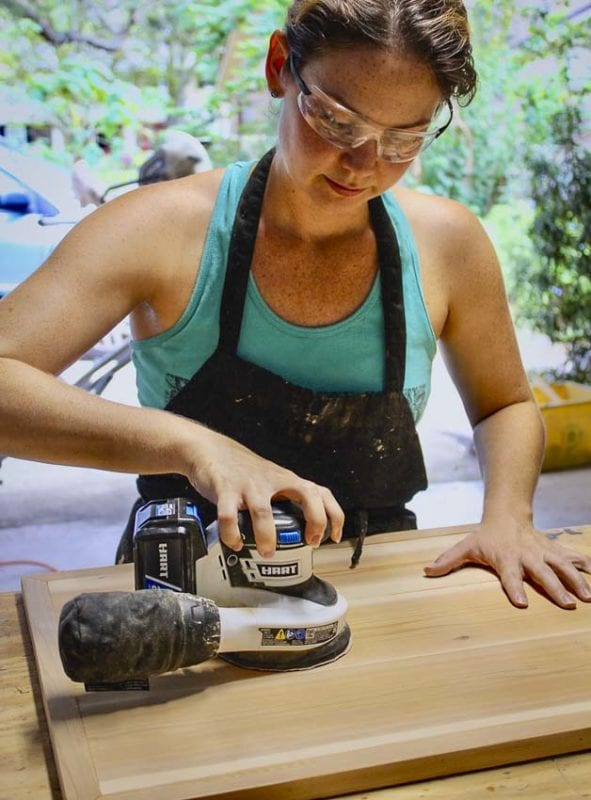
Sand Using 120 and 220 Grit Sandpaper
Sand your address planter using 120 then 220 grit sandpaper until smooth and even. While you can do this by hand, we loved using our Hart 20V cordless random orbit sander.
Adding the Finishing Touches
Once everything is sanded to your liking, add your heavy duty D-rings to the back of the planter for easy hanging.
Stain your planter if desired. I like to finish my address planters off with a deck sealer that is UV and moisture resistant.
The final build step involves adding your address numbers. I prefer the modern look of the Hillman floating 6″ numbers, which you can find on Amazon.
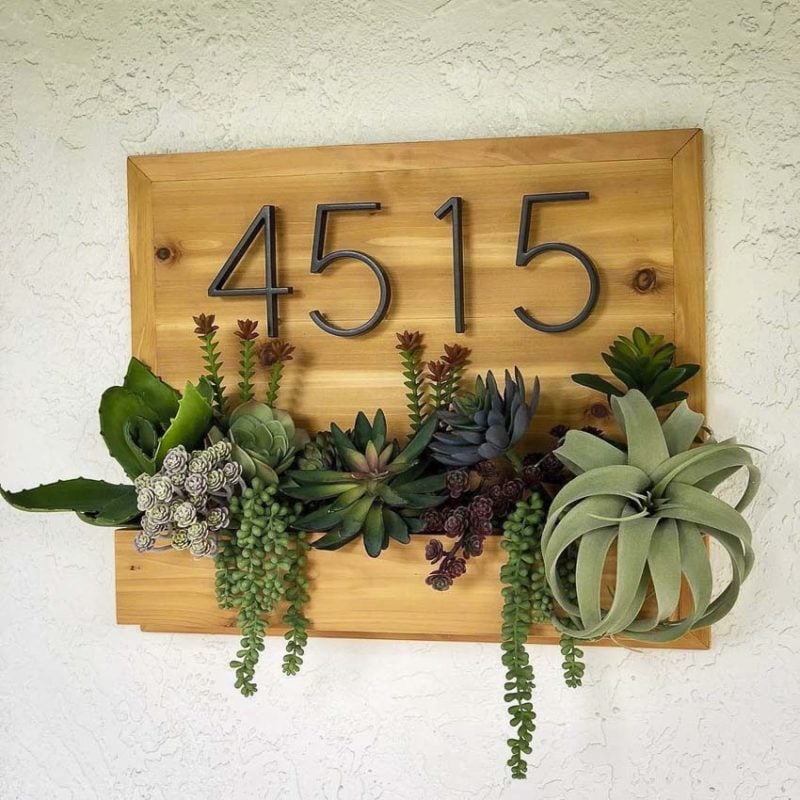
Finally, hang, and style! Swap out your plants seasonally according to the holidays, or plant low-maintenance plants like succulents for year-round interest. If you’ve got a “brown thumb” but like the look of real plants, Hobby Lobby has some very convincing-looking fake succulents that are maintenance-free!
