
In our series on woodworking measuring and marking tools, we covered many ways of measuring. This time, we want to focus on how to use precision measuring tools like calipers and feeler gauges to get our accuracy down to 0.001” or greater. When I took cabinetmaking in college, we built a wooden toolbox. We dropped a letter grade for every 1/64” our toolbox was off in any overall dimension. If you are a machinist, you are laughing right now at how sloppy those tolerances were!
Table of Contents
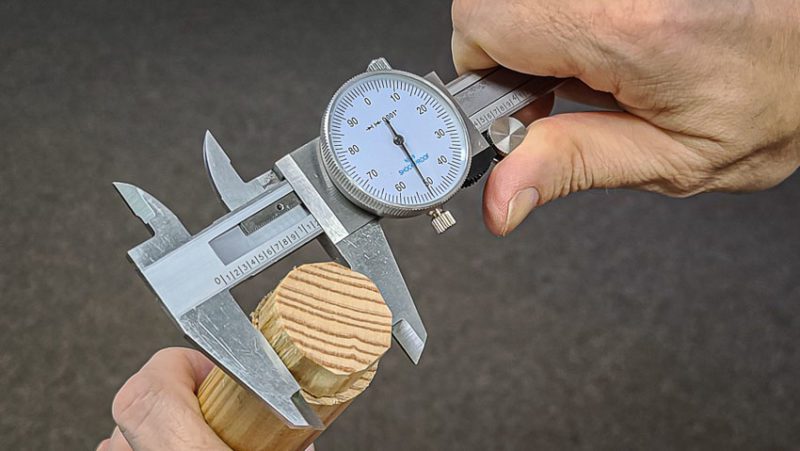
Calipers – The Ultimate Precision Measuring Tools
Most of the tools used in this article come from machine shops. The first is a caliper which takes precise measurements of an object. Calipers are precision measuring tools and they come in three variations. You have vernier calipers, dial calipers, and digital calipers. I learned to read vernier calipers in science class, but I promptly forgot how to use them once I passed physics. My metal technology class was already using dial calipers, which I much preferred.
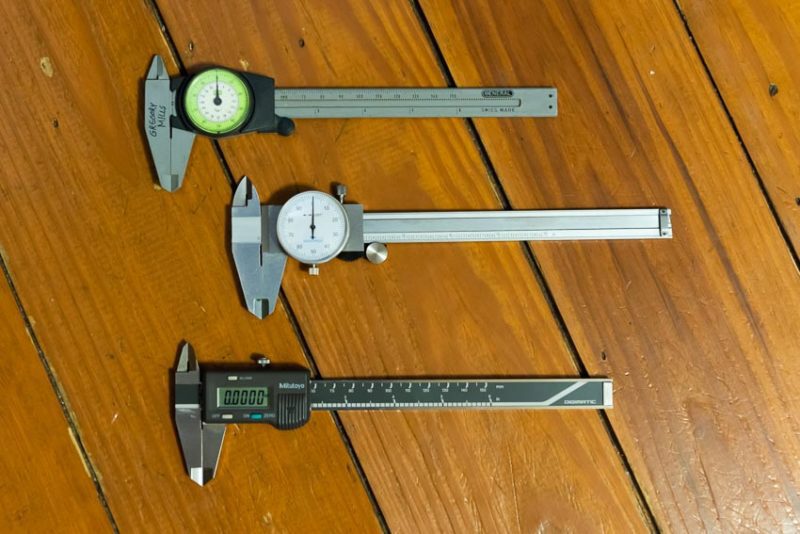
When buying a new set, I recommend you go digital. Once you go digital, you will never go back, especially when you get older and your eyesight worsens. All three types are accurate to 0.001-inch. The digital has memory recall functions and can show both metric and imperial measurements. You don’t need the costly models for woodworking purposes. Many highly rated models from Amazon are available for less than $25, but my favorite set is iGaging.
Four Methods of Caliper Measuring
You can hold calipers in one of four positions, and each one takes the exact measurement: outside, inside, depth, and step (see photos below).
I use my calipers as precision measuring tools when measuring drill bits to see what diameter they are if they are not in an index. I also measure the depth of holes I am drilling. Another use is to measure how thick my board is to know if I have planed it thin enough. Calipers are great when you need to measure tricky objects like a pipe inside or outside. You can even measure a small sphere with them.
New woodworkers will make their first dado for 3/4” plywood 3/4” wide. Then they will drop the plywood in, and it does not fit because plywood is not the dimension it claims to be. Intermediate woodworkers know that 3/4” is actually 23/32”. Advanced woodworkers know every sheet of plywood is of a different thickness. The only way to know is to measure it with calipers. Then your dado will fit perfectly.
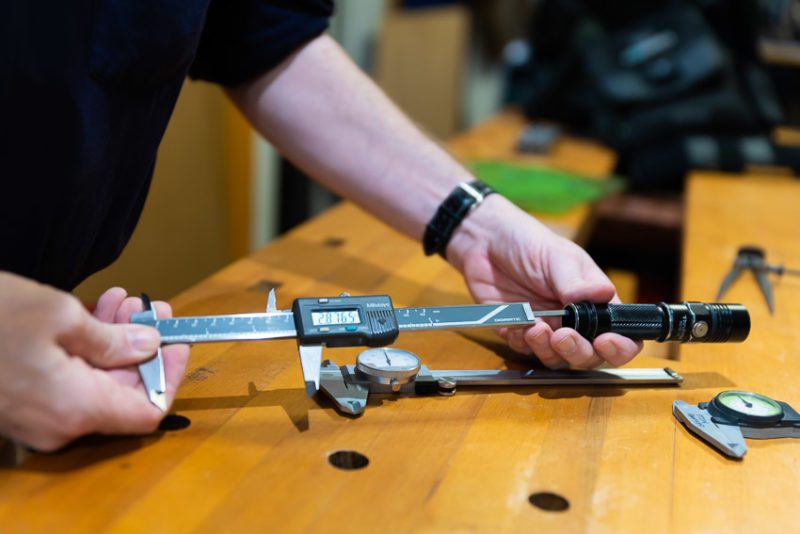

Using Calipers to Make Outside Measurements
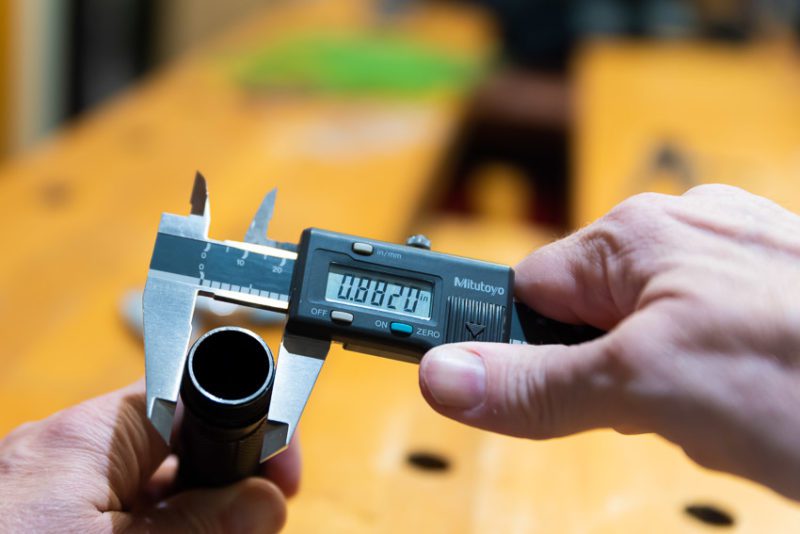
The easiest, most direct measurement you can make with calipers involves taking an outside measurement. You simply slide open the jaws and close them again around the object being measured. You want to slide the jaws until they firmly contact the workpiece, however, don’t feel the need to try and apply excessive pressure. All you need to do after that is read the measurement on the dial or LCD screen.
One thing you need to take into account involves the angle of the calipers to the measurement you take. For example, if you measure a pipe, the calipers need to be perfectly perpendicular to the length of the pipe. If not, you actually end up taking an “oval” measurement. You also want to make sure nothing gets between the jaws of the caliper and the material. Even a small amount of grease or dirt throws off your accuracy.
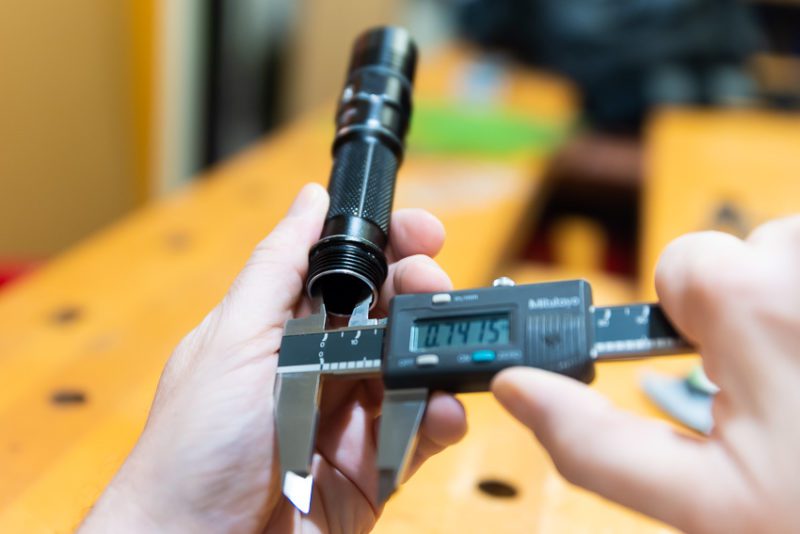
Taking Inside Measurements
On the backside of most calipers, you can find “reverse” jaws. You use these smaller jaws to make inside measurements. Manufacturers have placed these jaws precisely so that the outside distance lines up exactly with the measurement between the larger main jaws.
Take a measurement in much the same manner as you did with the outside measurement. This time, close the jaws so that they are small enough to get inside whatever you are measuring. Once you have the smaller jaws inside, open up the caliper until they make contact with the inside of the material and won’t extend further. at this point, take your measurement.
Similar to how you can get off-kilter with an outside measurement, take special care that you are perfectly square to the material when taking an inside measurement.
Getting Depth Measurements with Calipers
Calipers include a depth gauge that extends at the very end of the tool as you open the jaws. You use this
extended gauge to make depth measurements. By placing the machined end of the caliper against the rim of the hole or area you want to get a depth reading on, you can open the jaws until bottoming out the depth gauge. Once you hit bottom, read the dial or LCD screen and record the measurement. Be sure to keep the caliper perfectly vertical to the hole when measuring depth.
Making Step Measurements with Calipers
Most people don’t realize you can make step measurements with a caliper. Step measurements give you a measurement from the bottom of one “step” to the next. You could use this to measure the depth of a rabbet, for instance.
To make a step measurement, open the caliper about 1/8″ or so. Put the sliding jaw on the upper “step” of the
material you want to measure. All you need to do now is open up the caliper until the fixed jaw bottoms out against the lower step. Record your measurement, and you’re all set!
1-2-3 Blocks – Precision Measuring Tools?
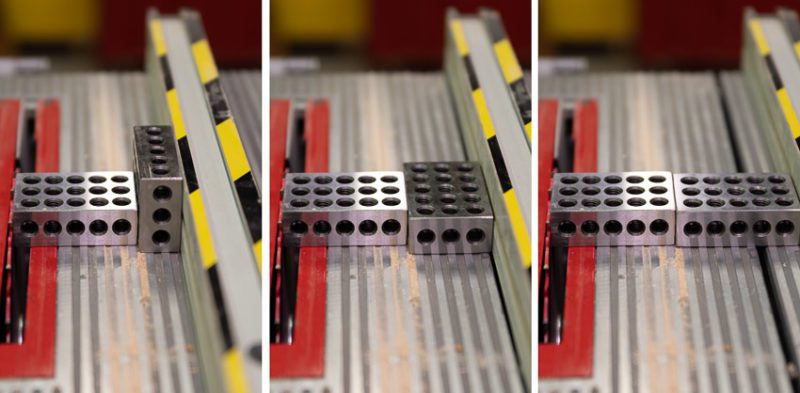
At first glance, you might not think of 1-2-3 blocks as precision measuring tools. They look more like paperweights. Again, these come from the machine shop and are highly machined blocks of solid steel. They are 1″ x 2″ x 3″, hence the name. Most of these blocks are so finely machined that they are accurate to 0.0005″ in their dimensions and squareness.
They will speed up your setups, especially around your table saw. Need to set your table saw blade to 90 degrees? Just stand a 1-2-3 Block beside the blade for reference and line it up to the block. Need to set the saw’s blade to 1”? Lay the block down and then raise blade height to it. Need to adjust your fence to various even dimensions? The photos below show you how to easily position the blocks instead of measuring with a ruler or tape measure. Using this method is much more accurate and faster.

How to Use Brass Height Gauge Bars as Precision Measuring Tools
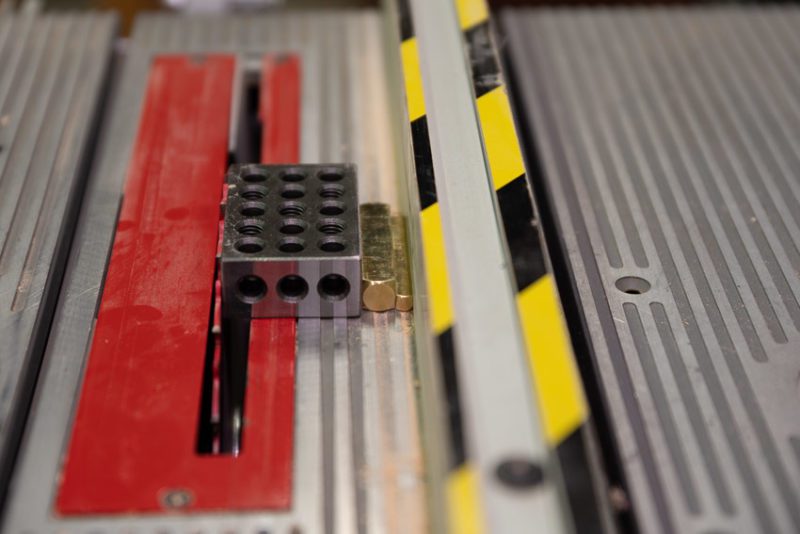
Similar to the 1-2-3 blocks are brass height gauge bars. These are a set of five bars, about three inches long. Each one is a different thickness, from 1/2” down to 1/8” with an accuracy of 0.002″. For reference, most human hairs are 0.004-inches thick. I use these bars to set the height of my router bits or table saw blade. Using these bars is one of the fastest and most accurate methods available. Most people’s fingers can feel the difference in height of about 0.001″ if objects are side by side, so you can feel if the height of your bit or blade is correct easier than you can see it. These bars can be placed beside the wood you are planing as well as a reference sample if you are trying to get it to one of these exact thicknesses.
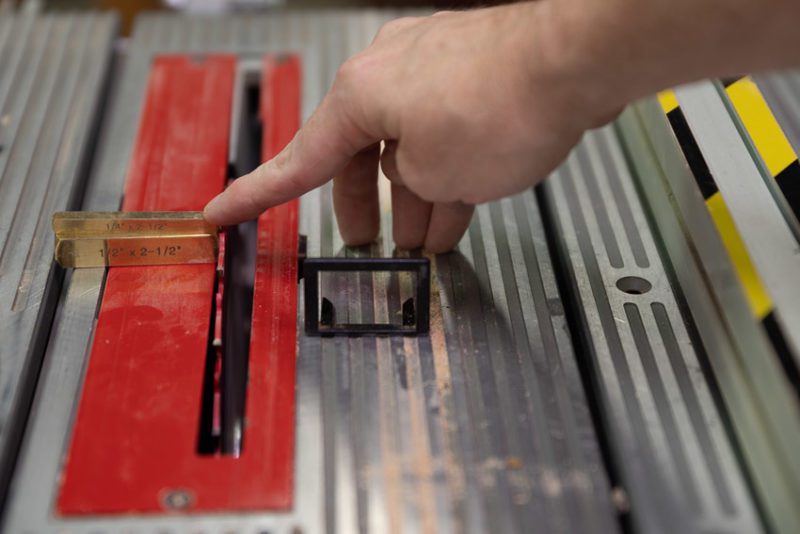
Where brass height gauge bars really shine though is when you combine them with 1-2-3 blocks. This will allow you to set a measurement of, say 2 -3/4”, very accurately and quickly by using the 2” dimension of the 1-2-3 block, plus a 1/2” brass block, plus a 1/4” brass block. The only thing you have to watch out for is that you don’t trap dust between the blocks.
And don’t drop the brass blocks down in between the gap around your table saw blade where it gets caught in the dust collector hose—ask me how I know!
A word of caution: brass is very soft. If you dent the height gauge bars, they will mushroom and not read true. There are sets available in aluminum, but that is not any better. The brass will protect the teeth of your saw blades, drill, and router bits. Just use them carefully and don’t drop them.
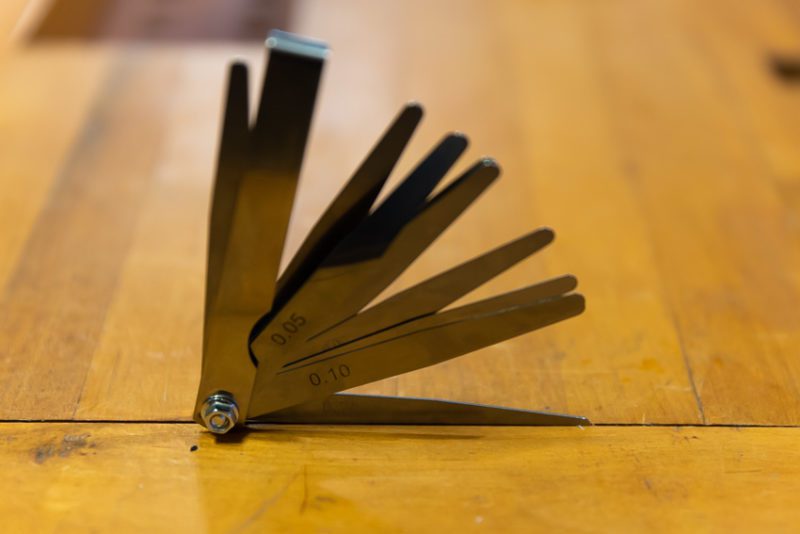
Feeler Gauge
Auto mechanics use a feeler gauge as a precision measuring tool when working on car engines. Unlike calipers or 1-2-3 blocks, these let you take precise measurements in very small, tight areas. They are a series of progressively smaller, thinner blades that you can slip into thin gaps to measure the exact dimension of the gap. This lets you adjust your cutting depth by the same about to close the gap in the woodworking joint you are cutting. I find I don’t need them very often, but when I do, they are the only measuring tool that will do the job.
Another use for feeler gauges is when using plunge routers without micro-adjustments. The feeler gauge blades can become the micro-adjustments. Do this by slipping them between the plunge mechanism stop as you raise and lower it to get the perfect height.
iGaging
If you have read this or my article on how to measure and mark wood, you will know I prefer iGaging tools. The reason is they have the accuracy of Starrett and Woodpecker, but not the prices. iGaging does not have the polish and high finish of those companies, but it is good enough. If Starrett and Woodpecker were Lamborghini and Ferrari, iGaging would be Toyota—good, reliable, and safe.
Another precision measuring tool I highly recommend is the iGaging Magnetic Angle Cube. The full name of the tool is a real mouthful, but it explains what it does in the title. You can stick this on your table saw blade to see the exact bevel angle in real-time.
In the photos below, I chucked in a long screwdriver bit in my drill press and stuck the iGaging Angle Gague Level Cube to it. It reads 0.95 degrees. I then put it on my table and tilted the table until it reads 0.95 degrees too. This ensures the table is perpendicular to the drill bits. I can use the cube to accurately level my drill press. Once it is level, I then use the cube to measure the angles when I tilt the table instead of using the inaccurate built-in scale on the drill press. You don’t, need to have your drill press or table saw perfectly level to use this. The cube is accurate to better than 0.2 degrees.

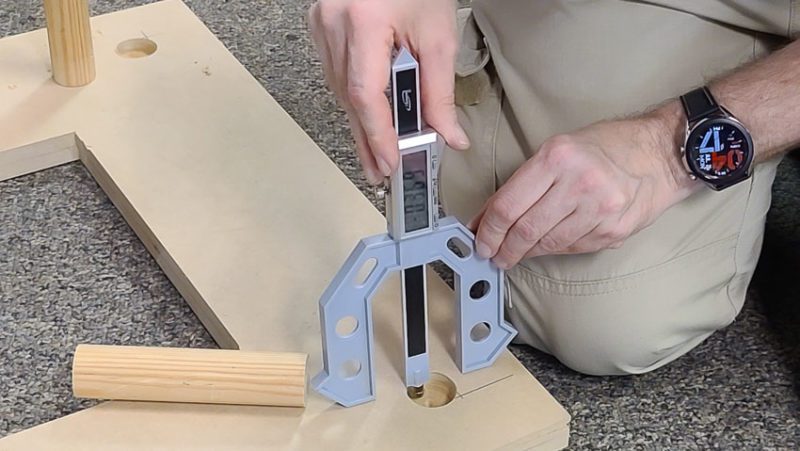
iGaging makes another precision measuring tool, the iGaging Digital Multi-Gauge. They specifically market this for woodworkers and welders as a 3-in-1 tool measuring height, thickness, and depth gauge.
In my opinion, this is the best tool on the market for measuring the height of router bits. The key to this tool is the yoke shape. Unlike calipers, this allows you to get a reference point over an open area like the opening of a router. At $20, this is an excellent value for something that digitally reads both metric and imperial measurements.
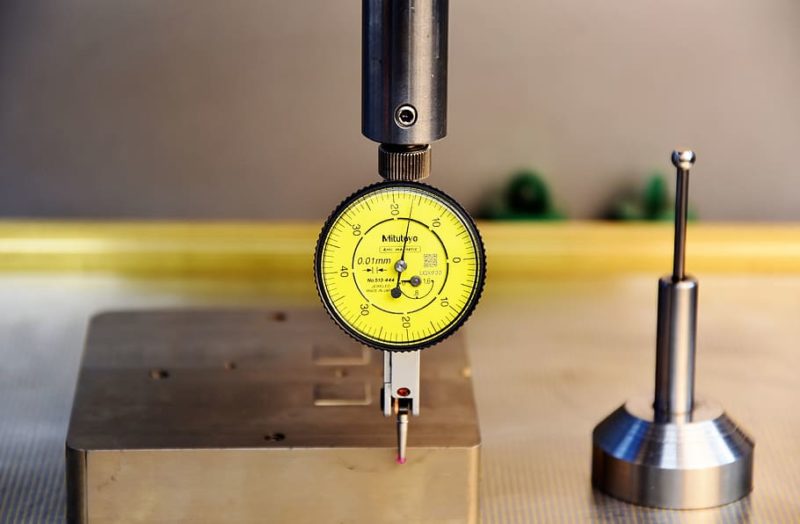
Dial Indicator
Something I have not needed since I did machining as a sculptor’s apprentice is a dial indicator. These have a rotary dial with a feeler arm attached. The feeler lightly touches either the work or the tool, your drill press chuck for instance. You rotate it by hand and it tells you how much it is out of alignment. Woodworkers will find these most useful if they suspect there is something wrong with their stationary tools.
A good example of how to use a feeler gauge is feeling if a table saw blade is warped or the arbor shaft is bent. Attach one to a magnetic base and touch the feeler to the side of the blade. Manually rotate the blade and watch the indicator to see how much it is wobbling. If it is wobbling, take the blade off and place it on a completely flat surface, such as a piece of thick glass. If the blade is flat, the table saw’s arbor is bent.
amzn_assoc_placement = "adunit0"; amzn_assoc_search_bar = "false"; amzn_assoc_tracking_id = "protoorev-20"; amzn_assoc_ad_mode = "manual"; amzn_assoc_ad_type = "smart"; amzn_assoc_marketplace = "amazon"; amzn_assoc_region = "US"; amzn_assoc_title = ""; amzn_assoc_linkid = "1dfcc6a55da4fe6bbe16f18f78ba6760"; amzn_assoc_asins = "B000GSLKIW,B00IG46NL2,B000VDTH28,B091YRR9SZ";
Precision Measuring Tools – Conclusion
There are many more precision measuring tools that machinists use when accuracy counts. Due to the expansion and contraction of wood, woodworkers did not think they had to be as accurate as machinists. For the most part, they don’t. But when you want to step up your game and make work to the best of your ability, precision is an absolute must.
With trends today, many woodworkers do not work with just wood. They also work with plastic, cast epoxy, 3D printing, metalworking, etc. Knowing how to work with greater accuracy is always a good thing.
