
The heart of most woodworking shops is a table saw. Knowing how to use a table saw lets you do anything from cutting sheet goods down to size to making very small parts for models or crafts. When you have the choice of using a track saw vs table saw, table saws still find a home in most serious woodworking and DIY workshops. Of all the tools, the best portable table saws provide tons of versatility. With the right jigs, you can cut box joints, spline joints, tenons for mortise and tenon joints, and many more. This table saw guide should get you started regardless of your skill level.
Using a homemade crosscut sled for your table saw, you can crosscut boards more accurately than you can with a miter saw. Taper jigs let you make cuts that are difficult to do by any other method. My cabinetmaker teacher who taught me how to use a table saw in college could even make an entire round bowl using nothing but a table saw! Here is a video by Colin Knecht of WoodWorkWeb.com using a similar technique.
Table Saw Guide Contents
- Types of Table Saws
- 8 Safety Rules on How to Use a Table Saw
- Table Saw Safety – Saw Stop
- Using the Various Table Saw Controls
- Using a Table Saw for Cutting Wood
- How to Make Rip Cuts
- How to Use a Table Saw to Make Crosscuts
- How to Use a Miter Saw to Make Miter Cuts
- A Guide for Cutting Sheet Goods on a Table Saw
- How to Use a Table Saw for Dado and Rabbet Joints
- Dust Collection While Using a Table Saw
- How to Use an Outfeed Table with Your Table Saw
- Wrapping It Up
Types of Table Saws
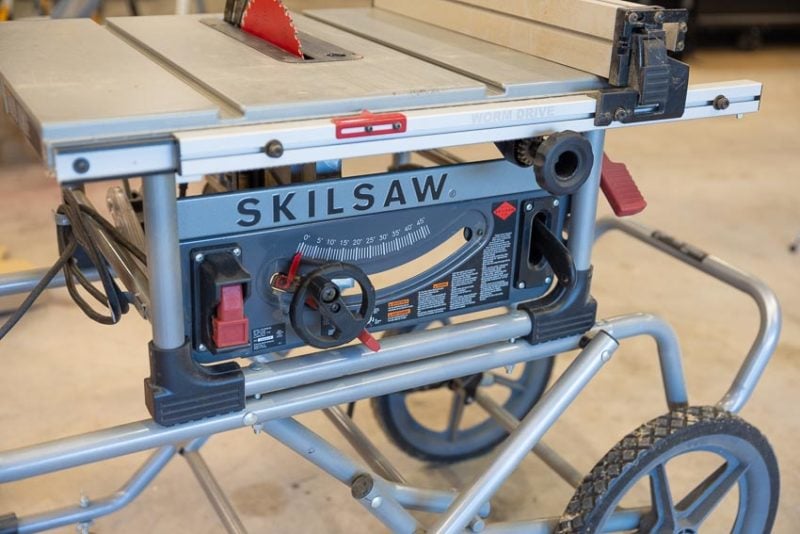
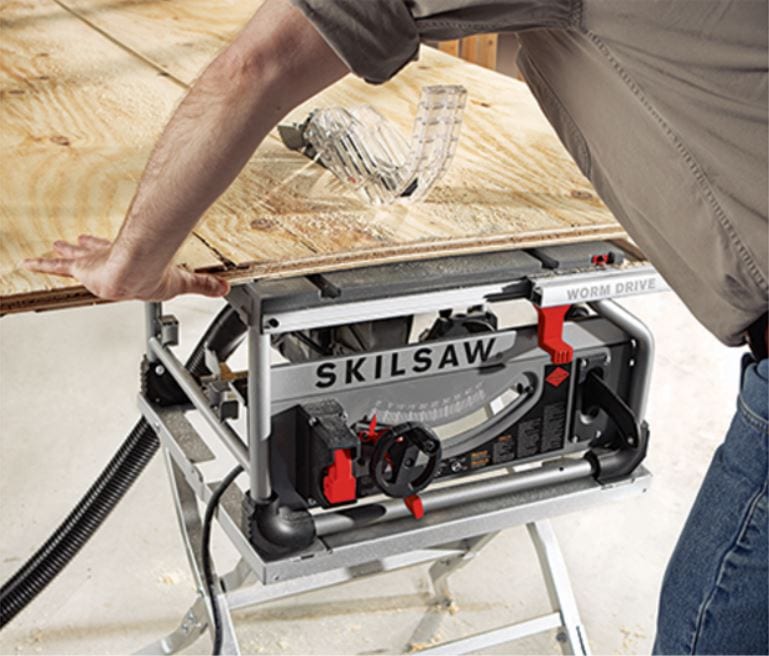
Rather than go over the various types of table saws again, we can summarize under the categories of benchtop, jobsite, contractor, and cabinet table saws. We also wrote a helpful article on buying a table saw. There is one saw type worth mentioning again—the sliding table saw. I own a small version of this saw that you see pictured in many of the photos.
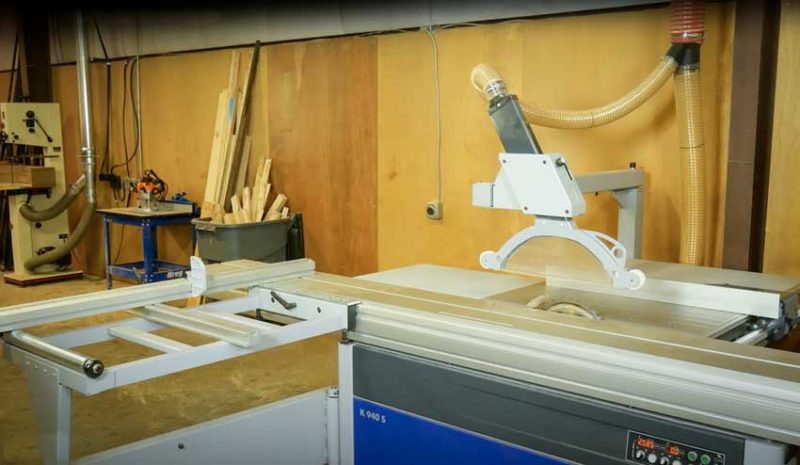
Sliding table saws, also known as European table saws are industrial saws. They are huge. Much bigger than cabinet saws. The advantage of them is they can take full sheets of plywood and push them through the blade on a movable table. This makes them the ultimate saw for accuracy and efficiency. If I had the space, this would be my dream saw. They come with a nightmare price tag though. A modest one starts at $5,000 and I have seen them as high as $15,000. Ironically enough, about 25 or 30 years ago, Ryobi made an amazing smaller portable sliding table saw. This is the saw I have been using for the past 25 years.
8 Safety Rules on How to Use a Table Saw
Let’s get one thing straight. Table saws are one of the most dangerous tools in the shop. According to the National Consumers League, every year 40,000 people go to the Emergency Room because of table saw accidents. Every day 10 amputations occur from a table saw. This table saw guide should help you avoid some of that.
I am not telling you this to scare you off from using one. It is usually not the new users learning how to use a table saw that get hurt. It’s often those who have used them for years. We can get too complacent and forget the safety rules. Always be careful, follow the rules below, and you should be okay.
Rule #1 – Don’t Cut Rough Sawn, Cupped, or Warped Lumber on the Table Saw
Table saws are meant to cut wood that is finished (dressed) on at least one face and one edge. The smooth finished face rides down on the table and the finished edge goes against the fence. Cutting cupped or warped wood on the table saw can pinch the blade and lead to kickback. Kickback is where the blade grabs the wood and hurls it back at you at over 120 MPH (193 KPH)! Kickback is the number one way people get injured on table saws.
Some Quick Math: My table saw uses 10-inch blades and spins at 4,800 RPM. That means the teeth are traveling at approximately 150,816 inches per minute (or 9,048,960 inches per hour). Covert inches into miles and that translates into 142.82 miles per hour! Under load, the blade slows down which is why I estimated 120 MPH earlier.
Rule #2 – Prevent Kickback by Never Using the Miter Gauge and Rip Fence at the Same Time
When you do, the piece that gets cut off can get trapped between the blade and the fence. This can lead to kickback. Instead, move the fence far away from the blade when using the miter gauge. You can still use the fence as a stop, but you need to put a stop block in between the fence and the end of the wood. If this table saw guide teaches you anything—ensure you only use one of these at a time.
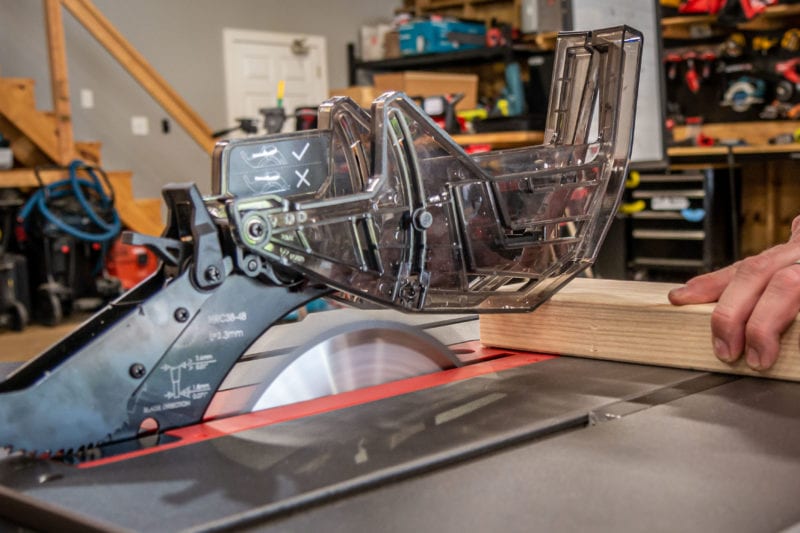
Rule #3 – Always Use the Riving Knife and Guard as Much as Possible
Guards keep your fingers/hand out of the saw blade. Riving knives reduce kickbacks. These safety mechanisms work by preventing the wood from pinching the blade. It also does this by keeping the wood from twisting—preventing the teeth on the backside of the saw blade from lifting the piece up and throwing it at your body!
There are a lot of people out there who immediately remove the guards as soon as they get their hands on a table saw. This is a bad idea and is the equivalent of cutting the seatbelts out of your car because in some instances it is not convenient to use.
Newer table saws have guards that are much easier to use than older saws. If you have an older saw like mine that is not as easy to use as a modern saw, at least always use a riving knife. Keep in mind, there are some instances where you have to remove it, such as when you use a dado blade.
Rule #4 – Keep Your Fingers and Hands Away from the Blade
Do I really have to say this? Well, I have watched the dumb things people do on YouTube, so… yes, yes I do. Imagine a laser beam in line with the blade. When you start making your cut, keep both hands out of this line and NEVER put your hands in line with the blade while operating the saw.
When I am making a cut I am focused on the wood where it is contacting the fence. I am also focused on where the wood is contacting the table. It is important to also concentrate on whether the blade is following my line. I don’t have enough brainpower to keep track of where my hands are because my attention is divided too much already. Therefore I have made it a 30-year habit of always making sure my hands are out of the danger zone before starting my cut.
A table saw will cut off your fingers so cleanly and so quickly that you will not even know you have just amputated your fingers. Instead of putting your finger near that spinning blade see rule #5.
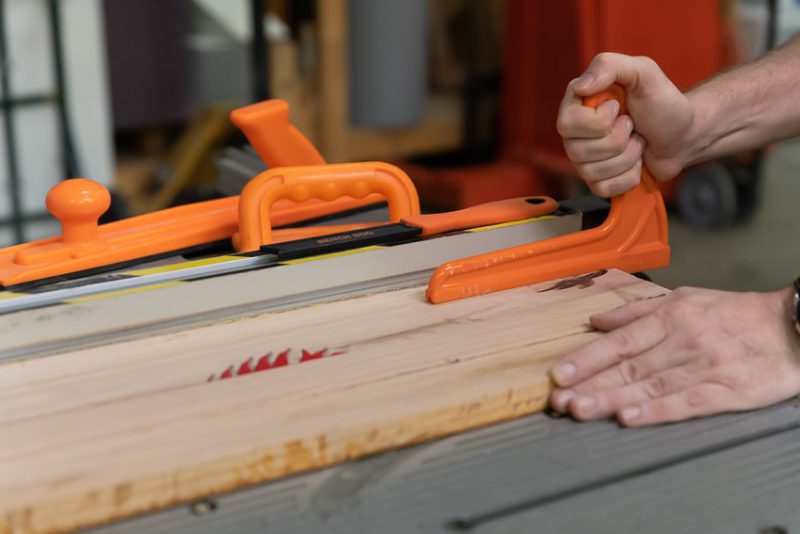
Rule #5 – Use Push Sticks When Proximity to the Blade is Unavoidable
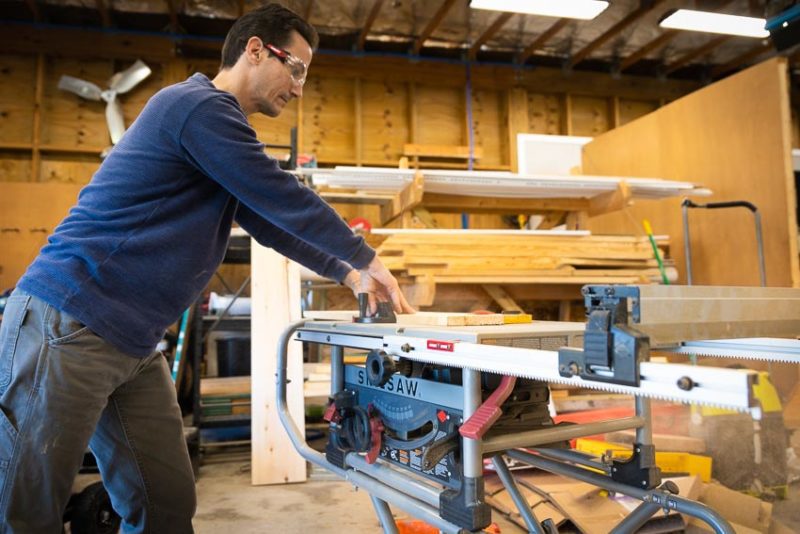
If the table saw were an oven, push sticks would be the oven mitts. They keep your fingers attached to your body by giving your something to safely manipulate the wood. They come in a variety of shapes and sizes but this is my favorite set. These work with table saws, router tables, shapers, band saws, and jointers. You can also make your own. Make sure to keep at least one within reach at all times while guiding or pushing wood through the table saw blade. I keep one of these push sticks in my shop apron at all times.
Rule #6 – Never Use the Rip Fence to Make Cross-Cuts
A table saw’s rip fence is for ripping. The miter gauge is for crosscuts and miters. When you use the wrong tool for the job, you not only get poor results, you increase your chances of kickback. Never guide a piece of wood through the table saw using both the rip fence and miter gauge.
Rule #7 – Always Hold Wood Tight to the Table and Fence at the Same Time
This particular point in our table saw guide both prevents kickback and also gives you the most accurate, straightest cuts. I often imagine my left hand is holding the wood like a pool cue with a couple of fingers wrapped around the left edge and my pointer finger and thumb on top of the board. My right hand feeds the wood forward while my left hand is pushing the wood down and to the right towards the fence in front of the blade.
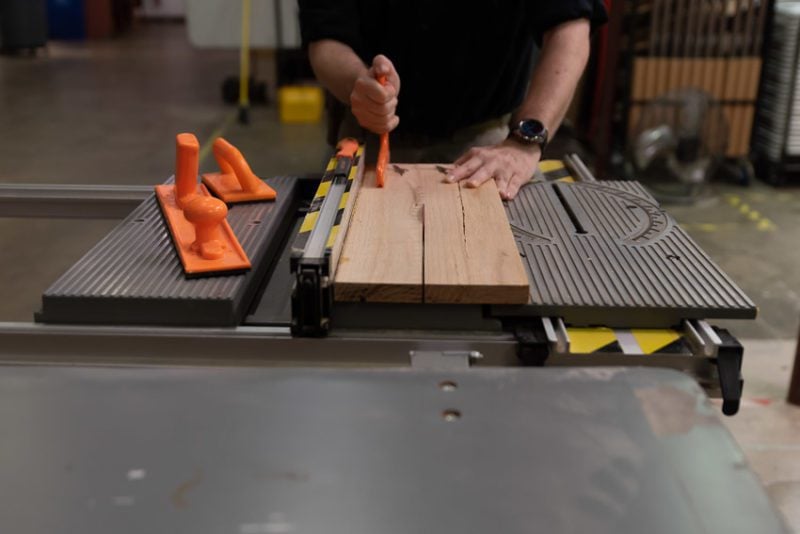
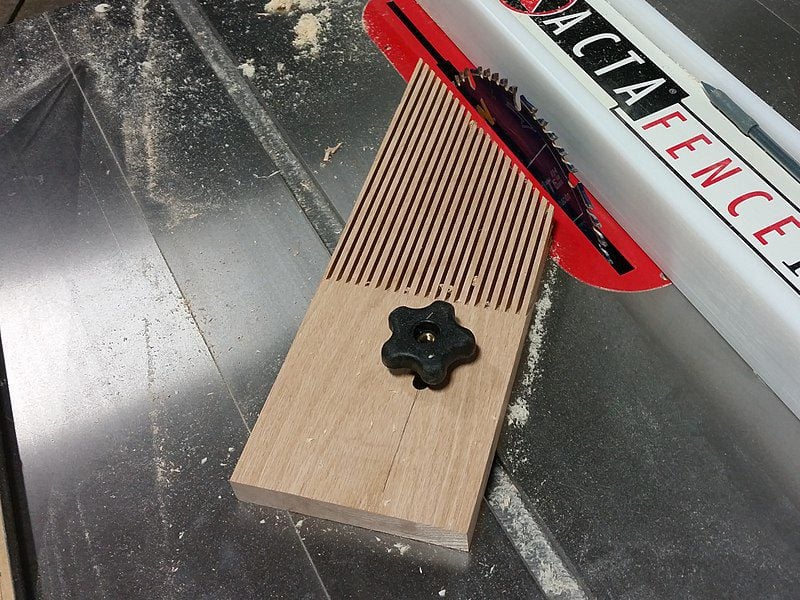
For larger pieces, use a feather board if needed. Feather boards apply lateral and/or downward pressure against the wood to keep it tight against the fence or against the table. You can make them or buy them. When using feather boards, don’t put them so they apply pressure again the spinning blade or that can result in kickback. These are meant to guide your material through the table saw blade smoothly and precisely.
Rule #8 – NEVER Freehand a Cut on a Table Saw
You never want to freehand a cut on a table saw. That means never making a cut without using either the table saw rip fence, miter gauge, or some other jig to guide or hold the material. Violating this rule is an easy way to lose a few fingers or get a board thrown at your face. Enough said.
Table Saw Safety – Saw Stop
Years ago, Saw Stop came out with the technology to sense when your fingers make contact with the blade and almost instantly stop and lower the blade below the surface of the table. This revolutionary technology has undoubtedly saved many fingers from permanent injury. Today, Saw Stop is a manufacturer of high-end table saws with their own line of saws. You have the Sawstop portable jobsite saw, a contractor saw, and also full-size cabinet saws. Now that Festool acquired Sawstop, we expect to see even more products with this technology. If you are in the market for a new saw, it’s worth at least considering. Expect to pay more for this saw technology, however, if it protects you from a single injury, we consider it well worth the investment.
Using the Various Table Saw Controls
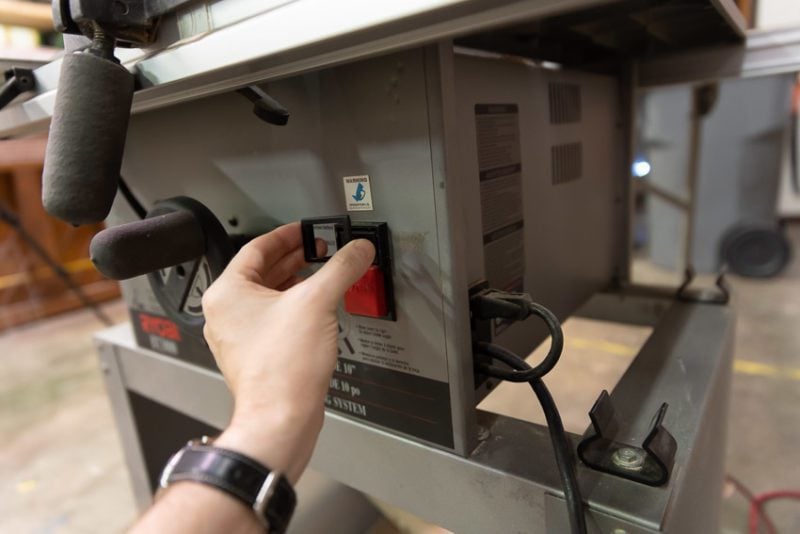
When learning how to use a table saw, you will quickly find that every saw has the same basic controls. They may be in a different location or operate slightly differently, but when you learn to work one table saw, you can use them all. On the front or sometimes the side, you will find handwheels to raise and lower the blade. You will also find a wheel to tilt the blade. On many saws, the handwheel to raise/lower the blade and the tilting wheel are combined into one wheel with a lever to shift its function.
Using a Table Saw for Cutting Wood
When you get ready to make your cuts, check your wood first. Look for rough edges that might catch on the lip of the table saw as you feed it forward. Look for loose wood or splinters that could poke you as you feed the wood forward. As annoying as getting a splinter is, do not be tempted to wear gloves while using a table saw. This is a very dangerous practice. The blade can catch the material of your glove and jerk your entire hand into the blade.
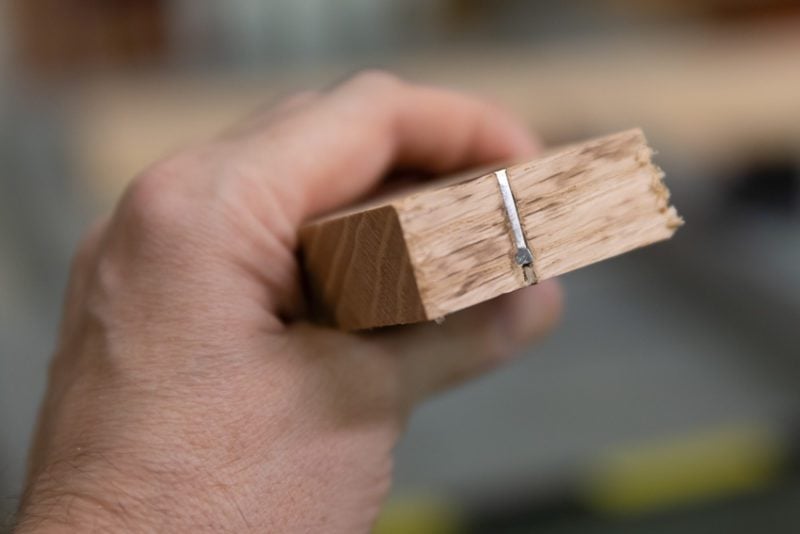
Another thing to watch out for is nails and screws in the wood. Examine each board closely before you make a cut, especially if it is reclaimed wood. Make sure your cut line is free and clear of metal. I recently built a rolling barn door out of old pallets that were full of nails, staples, and screws. A cheap handheld metal detector saved my saw blade as the wood was full of nails or staples that I couldn’t see.
If you do woodworking long enough, you are going to hit a bullet embedded in the wood. Typically a hunter missed their mark, hit the tree, and the tree healed over the bullet. Carbide blades can cut through the occasional nail or screw without much damage, just don’t make it a habit.
How to Make Rip Cuts
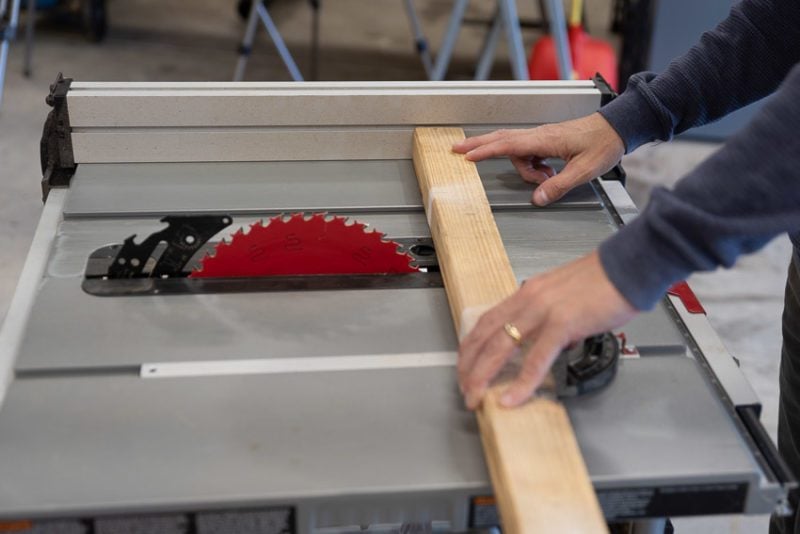
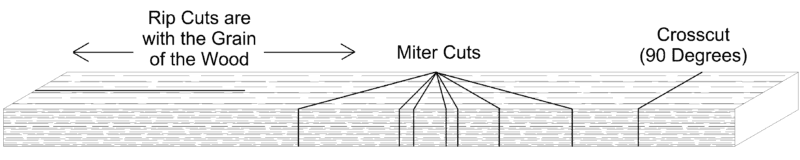
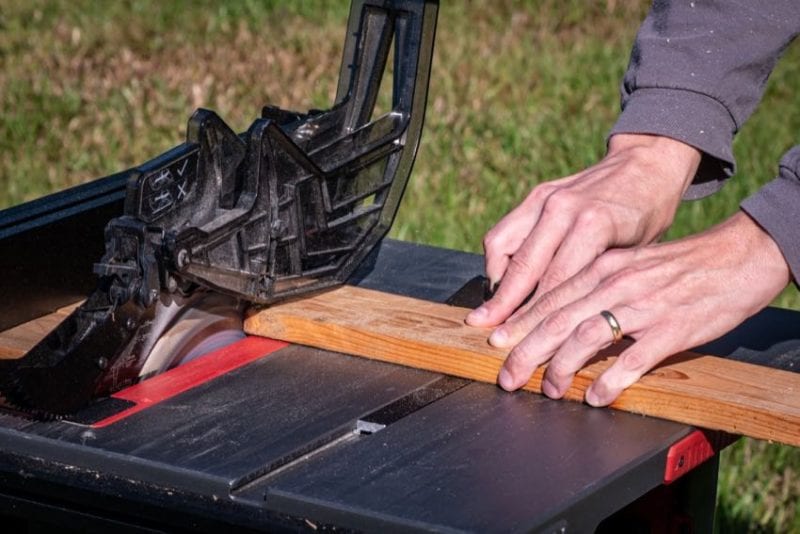
This guide keeps talking about how to use a table saw to make rip cuts and crosscuts. Let me define them more thoroughly for those who don’t know the difference. A rip cut is a cut that cuts with the grain of the wood. This is almost always the long dimension of the board as shown below. This is why you probably bought a table saw in the first place. A crosscut is a cut at 90 degrees to the grain of the wood. Miter cuts are any other angle cut to the grain. Most people immediately think of using a miter saw for making crosscuts and miters cuts. The table saw is perfectly capable of making those cuts in all but the longest boards.
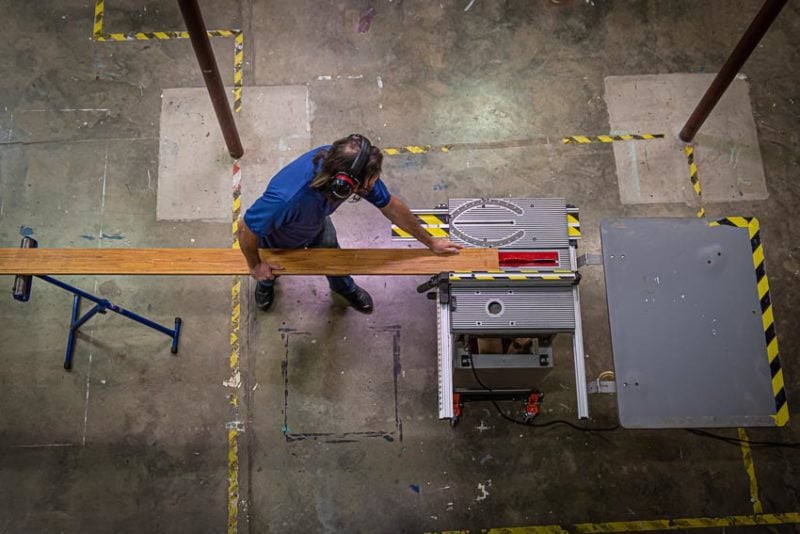
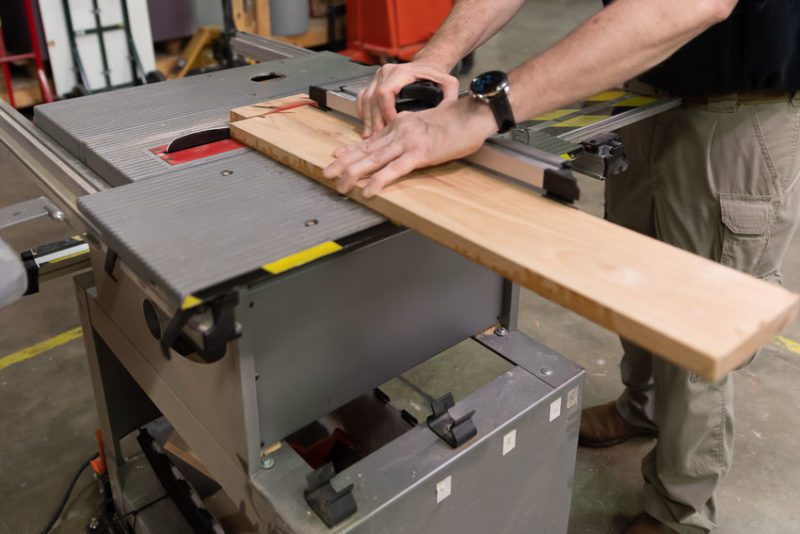
With very long boards, it may take two people to feed the work through. The second person should hold the work with palms up like a shelf (see the photo below). THEY SHOULD NOT GRASP OR HELP PULL THE WORK AT ALL! This can cause poor quality cuts as well as lead to kickback since you now have two operators trying to control the board and they may be fighting each other without realizing it.

How to Use a Table Saw to Make Crosscuts
While I usually reach for my miter saw when I need to make crosscuts, if I am cutting small parts or need to be very precise, I use the table saw. A table saw crosscut sled (see photo below) is the most accurate method for cutting crosscuts in all but the longest board as there is always going to be play in miter saws. Crosscut sleds are also the safest method for cutting small pieces that are too small to be safely handled on a miter saw. Some woodworkers keep a pencil by their table saw and will use the eraser end as a hold-down device on a crosscut sled when cutting very tiny pieces.
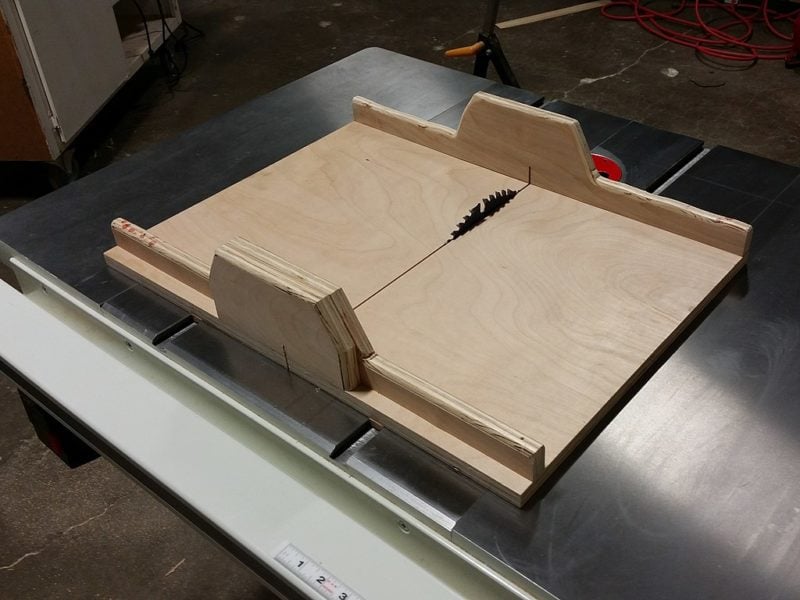
You can find many plans on the Internet for how to make crosscut sleds. Some involve basic no-frills jigs like the one pictured above and others incorporate stop blocks, measuring gauges, hold-down clamps, and safety guards.
My table saw came with a miter gauge, why do I need a crosscut sled!?
The answer is simple. The miter gauge that came with your saw has side-to-side movement in it so the cut will not be any more accurate than a miter saw. An after-market miter gauge is a different story. Many of them come with ways to take out the play and to make them slide through the miter gauge slot perfectly. If they don’t, or if you only have the original miter gauge, add layers of tape to one side of the bar to make it a precise fit. The downside is you will have to replace it periodically. This still does not solve the safety issue when cutting small pieces, so you still need a crosscutting sled.
How to Use a Miter Saw to Make Miter Cuts
When learning how to use a table saw, a necessary skill is learning how to use the miter gauge. Not just to cut crosscuts but also to cut miters. No table saw guide would be complete without teaching this skill. Many miter gauges have stops or detents at commonly used angles such as 45 and 22.5 degrees. The biggest mistake people make when cutting miters is not holding the wood securely enough against the miter gauge so the wood slips as it is being fed through the blade. If you are lucky this results in a poor quality cut. If you are unlucky, this results in kickback.
Many woodworkers will attach a larger wooden board to their miter gauge. This gives them more surface area to hold the wood against when making cuts. Others will go so far as to use spray adhesive and glue sandpaper to the wooden board on their miter gauge to make it extra grippy.
Pro Tip: After you finish making your miter cut, loosen the miter gauge screw, flip the miter gauge upside down and put it in the miter gauge slot. Now push it against the front edge of your table saw which will be 90 degrees. Tighten the miter gauge screw, pull it out and flip it rightside up. You have just perfectly set your miter gauge to 90 degress without even looking at the scale.

A Guide for Cutting Sheet Goods on a Table Saw
Here I’m going to be controversial but this comes from 30 years of experience. Unless you have a big table saw with a big fence and a big outfeed table, I would not use a table saw to make the initial cuts on full sheets of plywood. Even then, if I needed really accurate cuts, I would not use the table saw. It is too easy to let the sheet drift away from the fence just a little. Full sheets are just too heavy and bulky to keep perfectly against the fence. I am sure some of you can do it. I can’t without a second person to act as a human featherboard, and I work alone most of the time.
In my cabinet-making class, we got a letter grade off for every 1/64-inch off we were on our year-end project. If I want that kind of accuracy on full sheets, I am going to use a track saw. Once I break the sheet down into smaller parts, then I switch from the track saw to a table saw. Track saws are great for large sheet goods, but they cut more slowly overall. Once the sheet gets smaller than 4 feet by 4 feet, I will exclusively use my table saw. Finally, nothing beats a table saw when it comes to repeatable cuts.
How to Use a Table Saw for Dado and Rabbet Joints
You can make a multitude of joints with a table saw. None is more ubiquitous than the dado and the rabbet. While you can make these on the router table, they are far slower and require multiple passes. They also wear out your router bits much faster than a dado blade.
Using dado blades is actually prohibited by EN and IEC standards. That means you cannot use them in the European market. In fact, table saws manufactured there typically use shortened arbors so you can’t make your own stacks or buy them from third-party sellers. If you can’t use a dado stack, a full-size (not thin kerf) flat ground rip blade works but you need to make multiple passes.
You make both dados and rabbets on the table saw using a dado set. A stacked dado set consists of two sawblades on the end with more than one chipping blade sandwiched in the middle. By varying the number of blades along with some brass shims between them, you can achieve various thicknesses. If you use a Sawstop table saw, you need a different brake cartridge when using dado sets. You also cannot use a blade guard or riving knife with a dado set.
Dust Collection While Using a Table Saw
Table saws make a lot of dust. I mean they make a LOT of dust. They also throw that dust everywhere, including in your face. For this reason alone you should always wear eye protection. The blade guard on most saws will help keep the dust from flying up at you. Most table saws also come equipped with dust ports for either a shop vac or a dust collector. I always use them. Jobsite and contractor saws are open on the bottom allowing the dust to fall through and collect on the ground under the saws.
I always keep a large plastic bin under them to collect the dust, but it also gives me a place to toss my cut-off scraps. Cabinet-style table saws are fully enclosed on the bottom and therefore their dust collection works much better. That is one of the things you get for that higher price tag.
How to Use an Outfeed Table with Your Table Saw
If you have the room, and you can locate your table saw in a permanent location, build yourself an outfeed table. This table sits on the back of your saw and extends the size (depth) of your table saw. It lets you more easily and safely push large boards and sheets of plywood through the saw. There are many plans on the Internet for how to build them. They range from simple tables to full cabinets with drawers and additional storage space under the table.
Make sure your outfeed table matches the height of your table saw. It should also not interfere with your fence. We also like when they allow the miter gauge slots to continue for a few extra feet.
Wrapping It Up
We hope this guide on how to use a table saw proves helpful. Nothing beats experience. The table saw is such an amazing and versatile tool that entire books have been written on them. In fact, books have been written just on jigs you can make for the table saw.
Use this guide as a starting point and refer back to it as needed—especially the safety rules. Leave a comment below if you have questions.
