
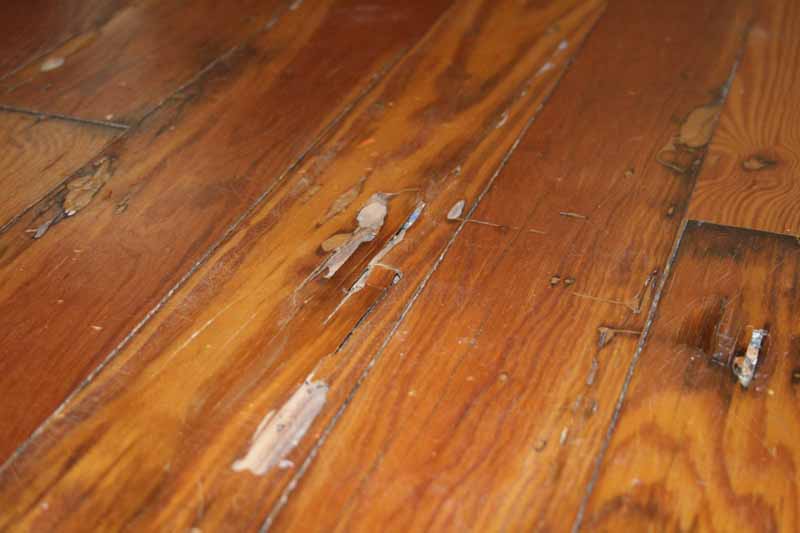
If you’ve ever lived in an old house—a really old house—then you know the problem of termites. They can wreak havoc on old wood floors. If you have access to replacement wood (in our case, heart pine boards taken from the attic), you can get those floors looking good as new in virtually no time flat. Knowing how to repair and/or replace wood flooring in an old house can really save you some money. Learn this skill and you can increase your home’s value while helping it look fantastic in the process.
Tools Needed to Repair Wood Flooring
We recommend having the following tools handy for this job. It doesn’t take a ton to replace wood flooring, but you will end up making lots of cuts. You also need to fasten the new pieces using a pneumatic or cordless nailer.
- Flat bar or pry bar
- Shop vaccuum or dust extractor
- Cordless circular saw (with vacuum attachment)
- Oscillating multi-tool
- Air compressor
- Ridgid 15ga finish nailer
- Belt sander (with vacuum attachment)
- Orbital sander (preferably with vacuum attachment)
First Step: Remove the Old Wood Flooring
Before we can show you how to replace your wood flooring you need to get rid of the problem areas. We recommend picking an out-of-the-way area to start. Once you get the hang of things, you can move back into those high-traffic areas towards the center of your living room.
The first step in repairing wood flooring is to size up the area to be repaired. You want to remove as much of the damaged wood as possible. Wood putty doesn’t look good, so don’t try and save a piece that’s 80% good unless you absolutely don’t have enough replacement material.
We also like to get a birds-eye view of the work to be done. This especially helps you prioritize when you have multiple locations that need replacing. Once you map out the best way to allocate your replacement wood for the repair, you can get started on your first area.
Making the First Cuts
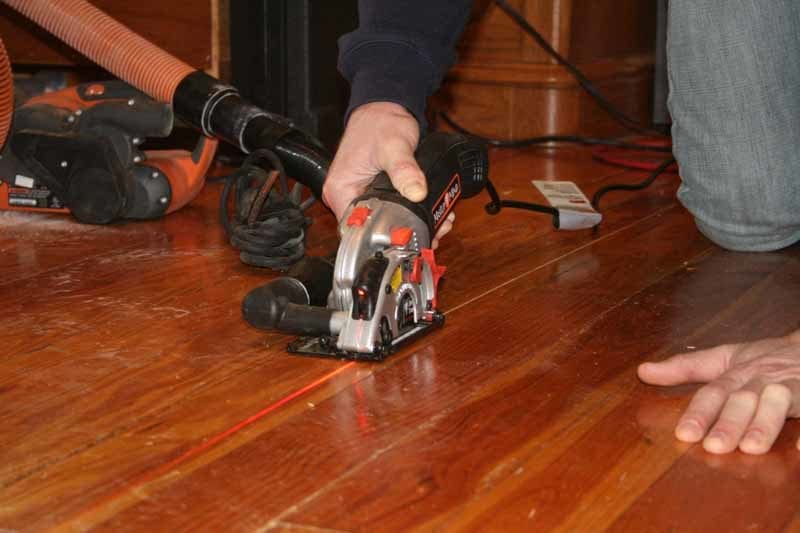
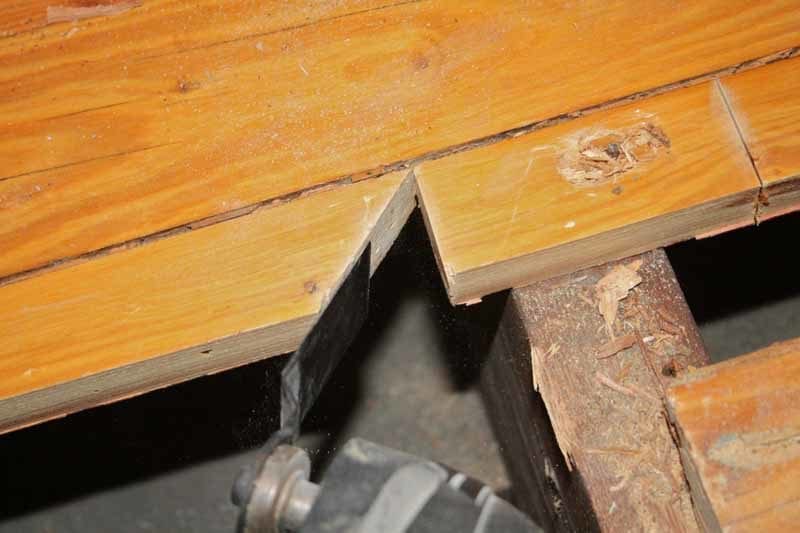
Starting with a circular saw, make two rip cuts down the middle of the first board. You want to rip two lines because you want to remove the wood by pulling it horizontally away from the adjacent boards. You don’t want to lift upward as that would damage the tongue of the pieces you intend to leave in place. We prefer using a circular saw we can connect to a shop vac, thereby minimizing dust.
Prying Out the Bad Board
After you’ve ripped a couple of channels into the wood, you can then use a small flat bar or pry bar to remove the channel.
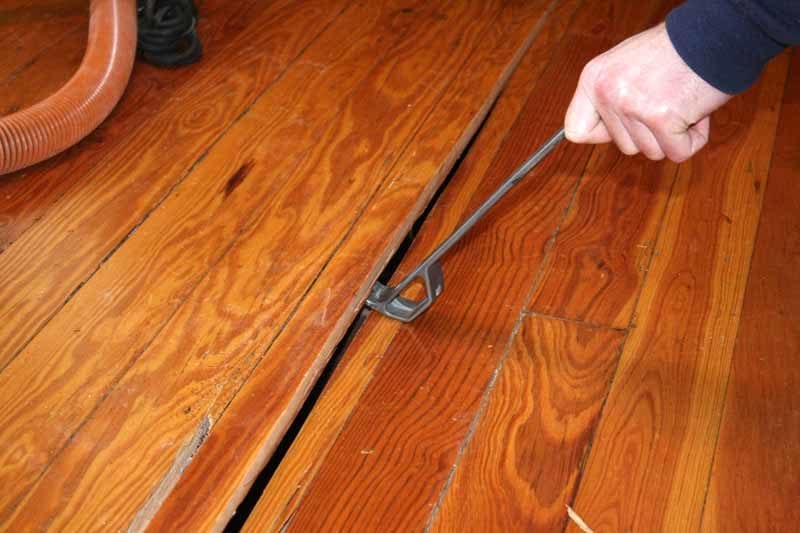
Once the channel is removed you can coax the remaining wood out and clean the area of the wood flooring you intend to repair.
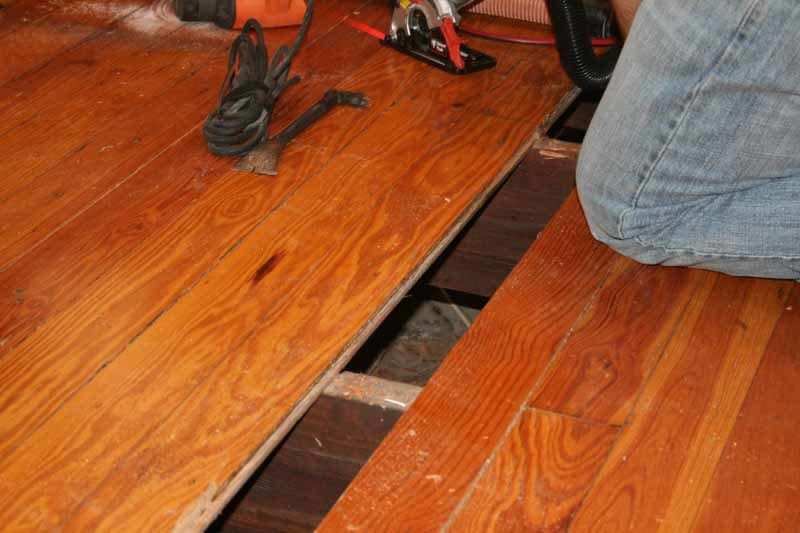
Keeping Partial Boards in Place
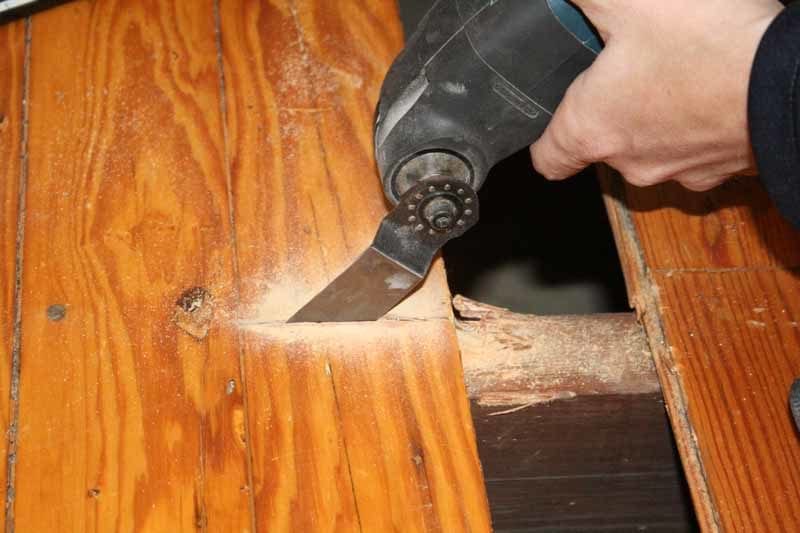
Keep in mind that if you don’t need to remove an entire board when you repair wood flooring. You can use an oscillating multi-tool to cut a perpendicular line across the wood to form a break point. Make sure you make the cut right over the center of a floor joist. That gives you somewhere to nail the new board:
Removing Tough Boards
You don’t want to break any tongues off adjacent boards. Should you run into difficulty removing part of a board, make a wedge-shaped notch cut near the end using your oscillating multi-tool. This lets you swing the wood back on itself safely without breaking off the tongue of the adjacent piece of the wood flooring you’re not repairing.
Installing New Wood Flooring
After the difficulty of removing wood, adding in the new piece seems like child’s play. You do want to measure and cut very carefully to minimize the number of gaps between the pieces of wood. We cut the wood outside, using a cordless circular saw and then brought it in for final installation. You could also use a miter saw.
Finish the wood flooring installation by using a finish nailer to fasten the boards directly to the joists. Our 1920’s home had no underlayment so we had to pick our fastening points carefully. Two pops per joist are sufficient, and you’ll want to angle the nails. This holds especially true at the ends to ensure the new wood stays secure. The final steps will serve to fill in the gaps and small nail holes.
Finishing the Wood
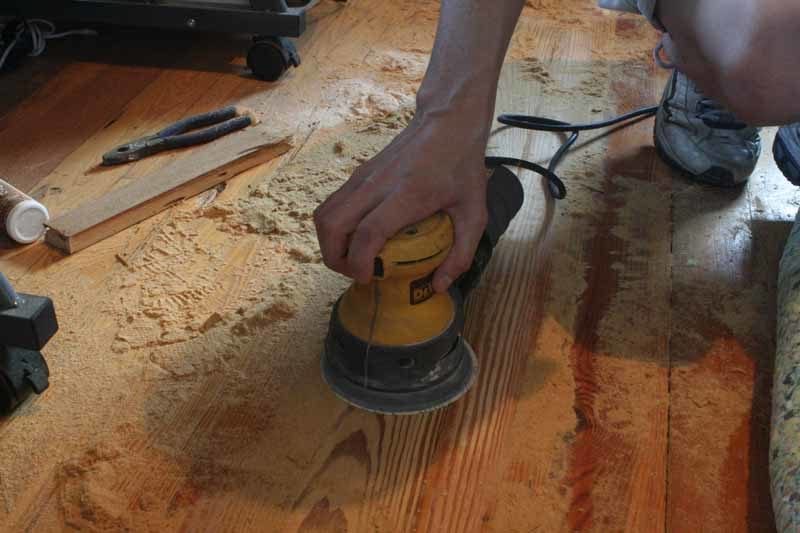
Finishing the wood involves a few steps. First, you need to use a belt sander to get the wood flush with the adjoining pieces. Remember to use a tool you can connect to a shop vac to again pick up the majority of dust during this step:

After you’ve sanded the wood flush, use an orbital sander to provide the secondary level of sanding. This lets you achieve a smooth surface suitable for your clear coat finish.
The last step involves adding wood filler (or wood putty to fill in the gaps and give you a smooth, filled surface, suitable to stain or clear coat. You want to use a strong wood filler that allows for a natural blend with the finished wood. Plan on sanding the wood once again after applying the putty to get everything nice and smooth and eliminate any extra filler from the surface.

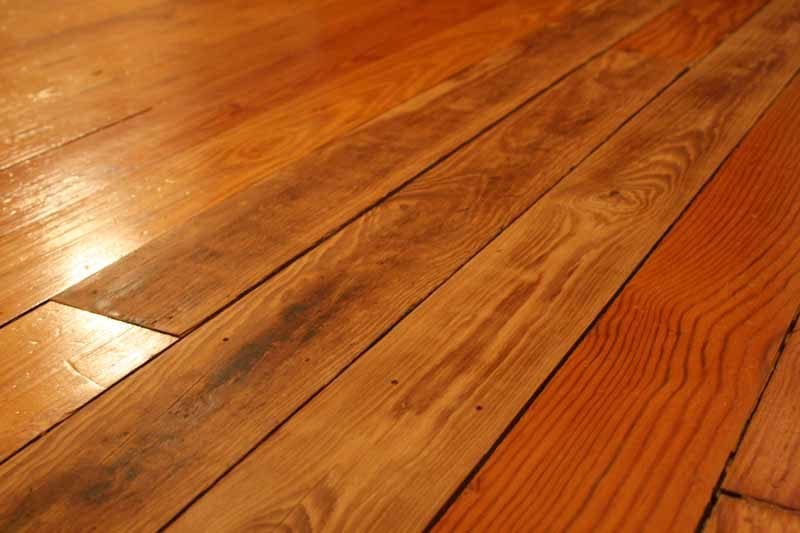
After you apply the final coat of finish you should barely notice where you repaired and replaced the wood.
The Final Word
It’s a lot of work learning how to repair and replace wood flooring. We feel the end result always makes up for the work. When you determine that a floor is salvageable and only in need of spot repair, it’s a whole lot more efficient and practical to replace small areas than to re-lay an entire floor. We hope this helped you know a little more about how to repair wood floors. At the very least, we hope it inspires you to take on your own wood flooring project.

I inherited a home built before 1902. In one bedroom, a lot of the floor needs to be replaced. The heart pine wood floor sits directly on joists spaced 24″ apart. Where can I get affordable wood flooring strong enough (without a subfloor) to replace what’s been damaged?
That sounds like a challenging project. Affordable is going to be relative since you’ll need to go with thicker flooring than traditional installs. You’ll need at least 3/4″ but possibly 1″ since the joists are 24″ apart. Depending on environmental conditions, you may need a vapor barrier at the very least, and perhaps engineered lumber to better deal with big swings in temperature and humidity.
For those reasons, it’s always good to get a professional flooring expert to look at the project and make sure you’re getting what you need, even if you do the work yourself.
That said, Twin Creeks Log Home Supply, Hurst Hardwoods, and Stonewood Products seem to balance price and product quality well. I haven’t used any of them personally, so I can’t vouch for any of them, but it would be worth a few phone calls to talk through your project with them.
I hope this helps!